
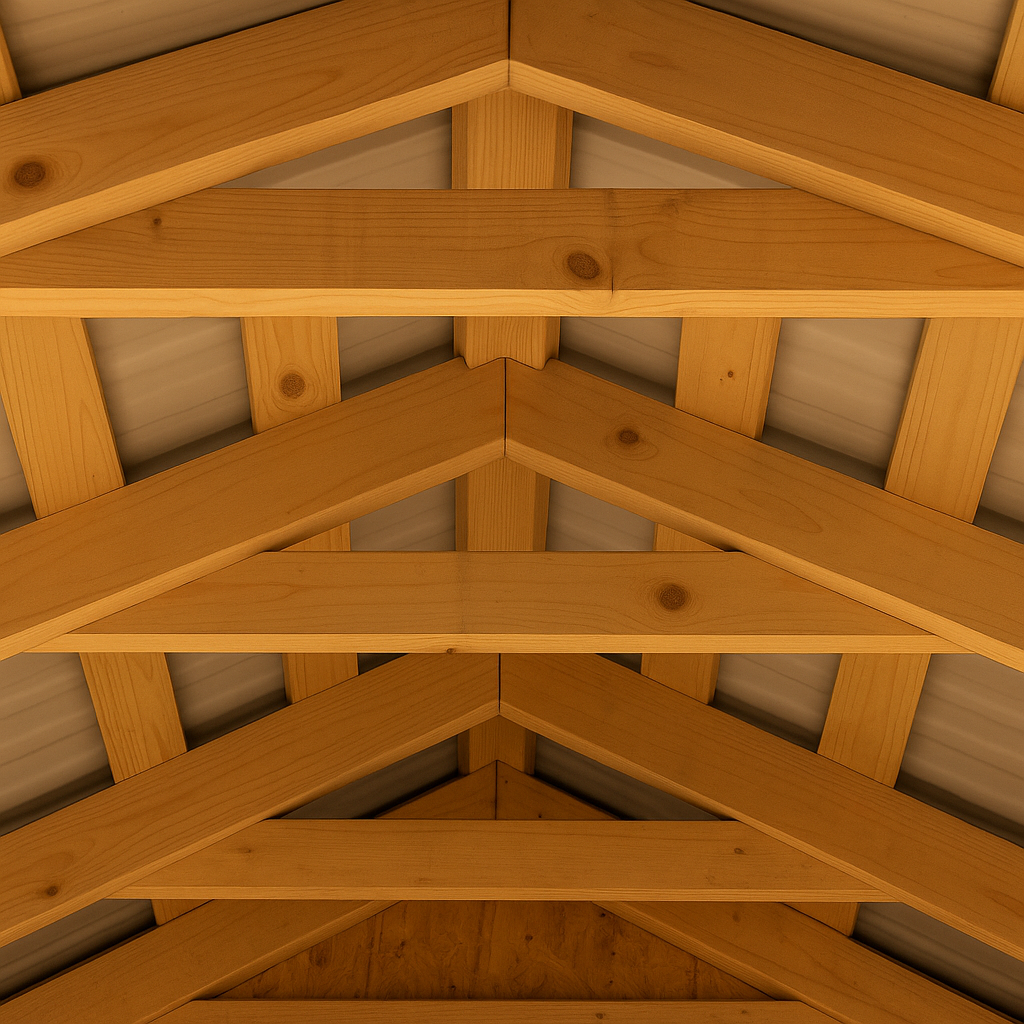
What Are Collar Beams? Understanding Their Role in Roof Framing
Collar beams are a critical structural element that helps prevent ridge separation and adds overall stability to steep-pitched roofs. Understanding how and when to use collar beams can save you time, money, and structural headaches.
This isn’t just theory—we’ve seen firsthand what happens when collar beams are placed incorrectly, skipped entirely, or misunderstood. This guide cuts through the fluff and gives you practical, real-world insights so you can build safer, longer-lasting roofs. Let’s break it down.
Comprehensive Guide to Collar Beams in Roof Construction

What is a Collar Beam?

IMAGE: Architectural diagram showing collar beam roof framing, with labeled rafters, ridge board, collar beam, and joists.
A collar beam is a horizontal beam connecting two opposing roof rafters. Unlike tie beams (which sit at the bottom of rafters), collar beams are placed higher in the roof structure, closer to the ridge.
Key Functions:
Prevents rafters from spreading apart under roof load
Improves roof strength and wind resistance
Allows for higher ceilings compared to rafter ties
Can be used to support attic storage or additional loads
Where are Collar Beams Used?

IMAGE: Technical roof framing diagram showing the layout and stabilizing role of collar beams in a gable roof.
🔹 Pitched Roofs – Common in residential and traditional timber-framed roofs
🔹 Attic Spaces – Helps create a usable attic space without lowering ceiling height
🔹 Historic & Timber Frame Construction – Seen in classic wooden-framed homes
🔹 Severe Weather Zones – Prevents wind uplift in high-wind areas
Not Typically Used In:
Flat roofs
Concrete slab roofs
Steel-framed buildings
How Collar Beams Improve Roof Stability and Strength
Collar Beams in Roofing: When and Why You Need Them
Collar Beam vs. Rafter Tie vs. Ridge Beam: What’s the Difference?
| Feature | Collar Beam | Rafter Tie | Ridge Beam |
|---|---|---|---|
| Placement | Higher up near the ridge | Lower near the base of rafters | Runs along the roof peak |
| Purpose | Prevents rafter spread & wind uplift | Prevents rafter spread | Supports vertical roof loads |
| Allows for Attic Space? | Yes | No | Yes |
| Load-Bearing? | No | No | Yes |
| Best Used In | Traditional wood-framed roofs | Low-slope & truss roofs | High-load structures |
🔹 Collar beams offer better ceiling height compared to rafter ties but do not bear load like a ridge beam.
Types of Collar Beams & Materials

A. Based on Material
Wood Collar Beam – Most common in residential & timber-frame homes
Steel Collar Beam – Used in industrial buildings with heavy loads
Engineered Wood (LVL, Glulam) Collar Beams – For longer spans & high load resistance
B. Based on Design
Fixed Collar Beam – Traditional nailed or bolted connection
Adjustable Collar Beam – Can be modified after installation
Decorative Collar Beam – Used in cathedral ceilings for aesthetics
Choosing the Right Material:
🔹 For residential homes → Solid wood beams
🔹 For commercial/industrial → Steel or engineered beams
Collar Beams: Installation Guidelines and Best Practices
The Role of Collar Beams in Preventing Roof Spread
Best Practices for Installing Collar Beams
Based on real experience from timber framers and structural carpenters
A. Sizing & Placement: Where and How to Install Collar Beams Correctly
Getting the placement right isn’t just about structure—it’s about preventing long-term sag, managing tension, and maintaining roof shape.
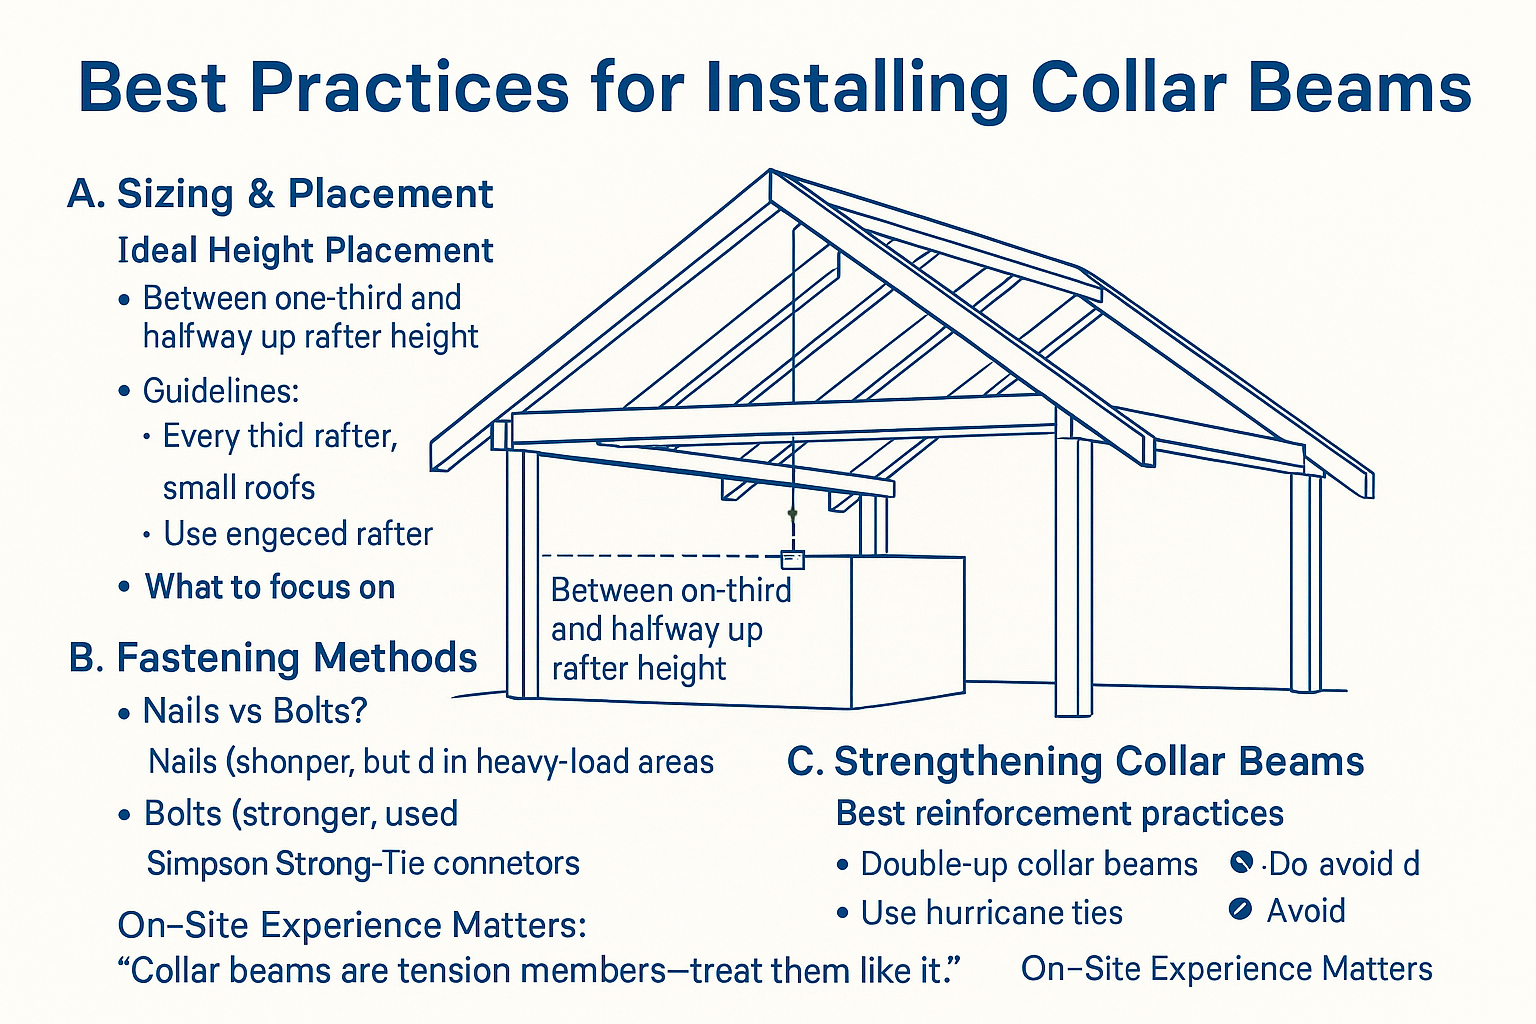
Ideal Height Placement
-
Collar beams should be installed between one-third and halfway up the height of the rafters.
-
Higher than halfway? It may look clean in cathedral ceilings, but loses most of its structural tension value.
Practical Guidelines:
-
For smaller gable roofs (like sheds or single-room additions), placing a collar beam on every third rafter is usually sufficient.
-
On larger spans or heavy roofs, every second rafter is recommended.
-
For long spans or continuous roofs, use engineered materials or double-up the beam.
Real-World Tip:
If you’re building in a region with heavy snow loads, err on the side of placing collar beams lower and closer together—that extra lateral resistance is crucial.
B. Fastening Methods: Holding Power That Lasts
Whether you’re using rough-cut pine or engineered LVLs, how you attach collar beams makes or breaks long-term performance.
Nails vs. Bolts
-
Nails are fine for small builds—but only if you're using ring shank or toe-nailed at opposing angles.
-
Bolts or lag screws should be used for:
-
Large spans
-
Engineered beams
-
Industrial or high-wind zone builds
-
Retrofits that need long-term holding power
-
What Pros Use:
-
Simpson Strong-Tie BCS connectors (beam-to-rafter): The go-to in code-heavy zones.
-
Some framers also add construction adhesive between collars and rafters for added grip and squeak prevention.
What to Focus On:
-
Make sure your bolt/nail pattern is symmetrical across the roof.
-
Avoid overdriving fasteners—especially near wood edges. It weakens the rafter over time.
C. Strengthening Collar Beams: Don’t Underbuild the Backbone
Even a well-placed collar beam can underperform if it’s not sized or reinforced correctly.
Best Reinforcement Practices:
-
Double-up collar beams when spanning more than 16 feet or using decorative open ceilings.
-
In coastal or tornado-prone areas, pair collar beams with hurricane ties or rafter straps.
-
Consider steel reinforcement or switch to engineered lumber if deflection is a concern.
Common Mistakes to Avoid:
-
Placing too high for visual effect—leaves the roof structure weak.
-
Relying on nails alone for structural collar beams.
-
Not accounting for thermal expansion in beams that span longer than 20 feet.
On-Site Experience Matters:
"I’ve seen roofs fail in post-frame barns simply because collar beams were placed too high and only nailed in. The whole upper triangle spread under snow load. Since then, I always tell my crew: collar beams are tension members—treat them like it. Bolts. Metal connectors. Get it right the first time."
— Mike T., structural framer, Ontario
Best Seller Recommendation: Top-Rated Collar Beam Hardware
🔹 Simpson Strong-Tie BCS2-3/8 Joist Hanger
(Perfect for securing collar beams to rafters.)
Heavy-Duty Steel – Withstands tension forces
Pre-Drilled for Quick Installation – Makes it easier for DIY & professionals
Code-Compliant – Meets building standards
🔗Visit the Simpson Strong-Tie Store on Amazon
Mistakes to Avoid When Using Collar Beams (And How to Get It Right)
Collar beams might seem simple, but getting them wrong can lead to serious structural issues. We've seen firsthand how bad placement, weak connections, or skipping them entirely can cause roof sagging, structural instability, and costly repairs down the road.
Here’s what not to do—and how to fix it before it's too late.
1. Placing Collar Beams Too High
Why It’s a Mistake:
Collar beams are meant to prevent ridge separation, but if placed too high (near the ridge), they lose their effectiveness. Instead of stabilizing the roof, they end up doing almost nothing structurally.
Real Consequence:
A builder once installed collar beams at the peak of a 12:12 pitched roof thinking it would help with wind resistance. The result? The rafters still started to pull apart over time, leading to gaps and leaks along the ridge.
The Fix:
✔ Place collar beams in the upper third of the rafter span—but not directly at the ridge.
✔ Follow engineering guidelines to determine the best height for your roof design.
2. Not Using Enough Fasteners
Why It’s a Mistake:
A collar beam is only as strong as its connections. Weak nails, too few fasteners, or improper attachments can result in beams that pull loose over time—especially in high-wind areas.
Real Consequence:
We inspected a roof after a storm where collar beams were barely nailed in place. Half of them had completely detached, and the ridge had shifted by almost two inches.
The Fix:
✔ Use at least (3) 16d nails per joint, or structural screws for extra hold.
✔ For long spans, use metal brackets (like Simpson Strong-Tie A35 or BCS connectors) to reinforce connections.
✔ In hurricane or tornado-prone areas, bolt collar beams into place for extra security.
3. Skipping Building Codes & Minimum Size Requirements
Why It’s a Mistake:
Every region has minimum size requirements for collar beams based on roof pitch, span, and wind load factors. Ignoring these codes can fail inspections, weaken the structure, and increase liability risks.
Real Consequence:
A DIY builder used 1x4 boards as collar beams in an attic renovation. Not only did it fail to meet code, but within a few years, the thin boards cracked under load, causing roof separation. The fix? Replacing them with 2x6 beams—costing twice the time and money.
The Fix:
✔ Always check your local building code for collar beam sizing and placement.
✔ General rule: Use at least 2x6 lumber for spans under 20 feet, and 2x8 or larger for longer spans.
✔ If unsure, consult an engineer or building inspector before installation.
4. Using Undersized Collar Beams
Why It’s a Mistake:
Too-small collar beams won’t properly resist uplift forces from wind or snow loads. Over time, they can crack, warp, or fail completely—leading to costly roof repairs.
Real Consequence:
A cabin in a snowy area had undersized 2x4 collar beams supporting its pitched roof. After a heavy winter, the beams buckled under the load, causing the ridge to shift and the rafters to spread—leading to a $15,000 roof repair.
The Fix:
✔ For standard homes, use 2x6 or larger collar beams.
✔ For long spans or heavy loads, upgrade to engineered wood (LVL beams) for extra strength.
✔ Check span tables for proper sizing based on rafter spacing and pitch.
5. Thinking Collar Beams Can Replace Rafter Ties
Why It’s a Mistake:
Collar beams DO NOT prevent rafter spread—they only help reduce ridge separation. If you skip rafter ties in a low-pitched roof, walls will slowly spread outward over time, causing foundation and drywall cracks.
Real Consequence:
A homeowner removed rafter ties to create a vaulted ceiling but kept the collar beams. Within five years, the exterior walls had spread by nearly two inches, leading to major structural issues.
The Fix:
✔ If your roof pitch is below 6:12, you NEED rafter ties.
✔ For vaulted ceilings, use structural ridge beams or steel tension rods to replace rafter ties.
✔ Consult an engineer before removing any structural ties.
6. Ignoring Wind Uplift & Weather Conditions
Why It’s a Mistake:
If you live in a high-wind zone, collar beams must be properly reinforced. Weak or missing collar beams can’t stop uplift forces, which can tear the roof apart in storms.
Real Consequence:
A coastal home had inadequate collar beams and weak nail connections. When a hurricane hit, the entire roof lifted off the house. The insurance company denied coverage, citing "improper structural reinforcement."
The Fix:
✔ Use hurricane ties & steel straps in wind-prone areas.
✔ Upgrade collar beam fasteners to bolts or hurricane-rated brackets.
✔ Space collar beams closer together for added uplift resistance.
7. Removing Collar Beams Without Proper Reinforcement
Why It’s a Mistake:
Removing collar beams without replacing them with a proper alternative (like a ridge beam) will weaken the roof structure.
Real Consequence:
A homeowner wanted a more "open look" and removed collar beams without adding any reinforcement. A heavy storm ripped the ridge apart, causing rafter failure and roof collapse. The fix? A $40,000 rebuild.
The Fix:
✔ If removing collar beams, replace them with a structural ridge beam.
✔ Use steel tension rods as an alternative in some vaulted designs.
✔ Always check load-bearing requirements before removing any framing elements.
Avoid These Mistakes & Build It Right
Collar beams aren’t optional—they serve a critical role in keeping your roof structure intact. But getting them wrong can lead to major structural failures, expensive repairs, and serious safety risks.
Key Takeaways:
✔ Don’t place them too high—stick to the upper third of the rafter span.
✔ Secure them properly with structural nails, screws, or brackets.
✔ Use the right size—2x6 minimum, larger for long spans or heavy loads.
✔ Collar beams don’t replace rafter ties—don’t mix up their function.
✔ Reinforce for wind uplift—especially in hurricane or tornado-prone areas.
✔ If removing collar beams, replace them with a ridge beam or steel reinforcements.
Bottom Line: Getting collar beams right the first time will save you time, money, and structural headaches down the road. When in doubt, consult your building code or an engineer—because fixing a roof failure is a lot more expensive than preventing one.
Alternative Roof Bracing Methods
| Alternative | When to Use | Pros | Cons |
|---|---|---|---|
| Rafter Ties | If ceiling height isn't a concern | Easy to install | Reduces attic space |
| Ridge Beam | If additional load support is needed | Structural support for long spans | Expensive & requires vertical posts |
| Steel Collar Beams | In high-load or industrial settings | Strong & durable | Heavy & costly |
| Cross Bracing | For extra wind resistance | Improves roof stability | Harder to install |
Ridge Straps vs. Collar Ties: What's the Difference and When to Use Each?

If you're framing a roof and wondering whether to use ridge straps or collar ties, you're not alone. They're often confused, but they do very different jobs—and using the wrong one in the wrong way can lead to major roof failure.
🔹 Ridge Straps: What They Are & When to Use
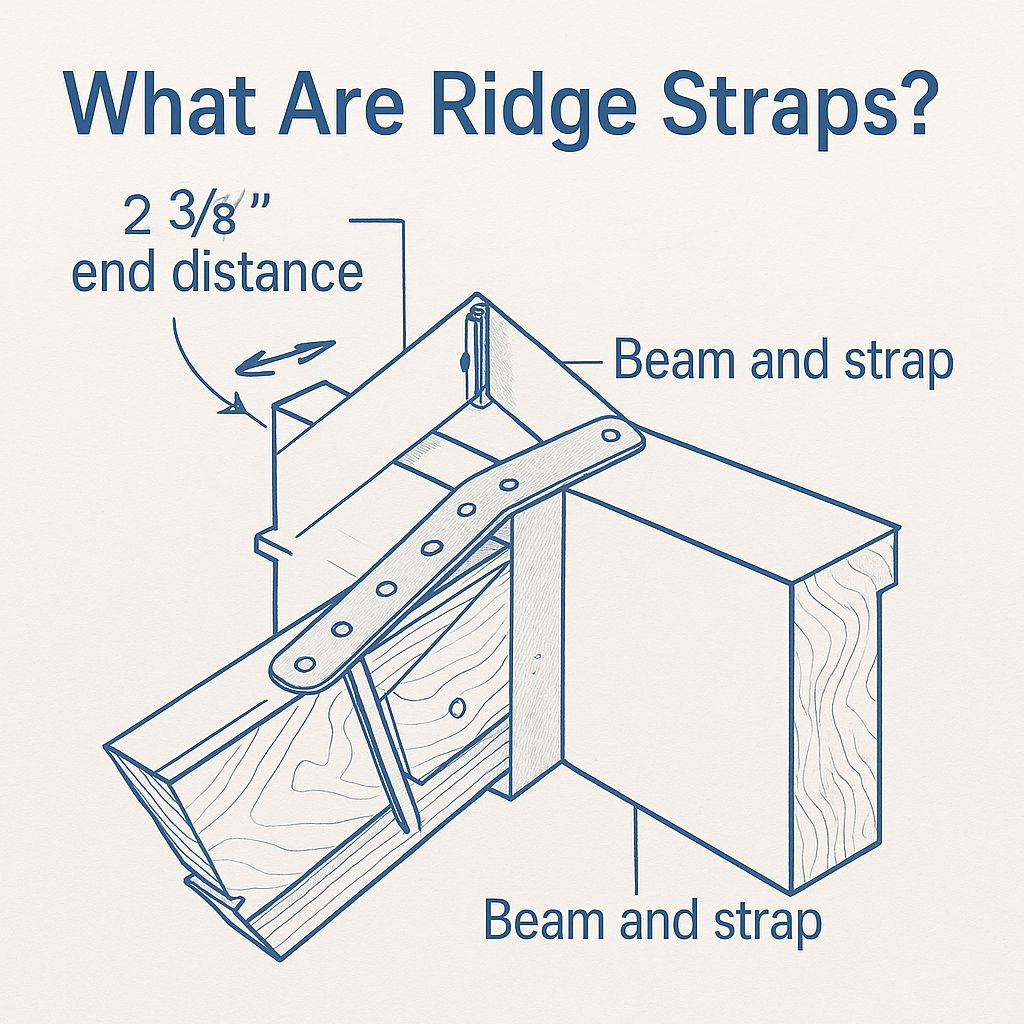
Ridge straps (also called ridge board straps) are metal ties or tension straps that secure rafters to the ridge board at the roof peak.
Purpose:
→ Keep rafters from separating during uplift (especially in high-wind or seismic zones)
→ Reinforce the connection between rafters and the ridge board
Where They're Used:
• Engineered roofs without collar ties
• Roofs subject to strong uplift forces
• Homes with exposed ceiling spaces (where collar ties aren’t ideal)
Best Practice:
Use galvanized steel or stainless steel ridge straps rated for structural loads. Pair with Simpson Strong-Tie or equivalent certified connectors.
🔹 Collar Ties: What They Are & When to Use
Collar ties are horizontal framing members installed between two opposing rafters, typically in the upper third of the roof span.
Purpose:
→ Prevent rafters from spreading outward under load
→ Resist wind uplift forces
→ Tie the roof together laterally
Where They're Used:
• Sloped or gable roofs
• Traditional stick-framed roofs
• Residential roofs with moderate spans
Best Practice:
Install every second or third pair of rafters, using solid lumber or engineered beams. Avoid placing too high—it reduces tension performance.
Quick Comparison Table
| Feature | Ridge Straps | Collar Ties |
|---|---|---|
| Function | Prevent uplift at the ridge | Prevent rafter spread + uplift |
| Location | Along ridge board (metal) | Upper third of roof (wood) |
| Material | Steel straps | Wood planks or LVL |
| Best For | High-wind, open-ceiling roofs | Gable roofs, standard residential |
| Visible? | Usually hidden | Often visible or finished |
| Installation | Requires straps, connectors | Nailed or bolted between rafters |
Pro Insight: What to Focus On
▪ Span and slope — Collar ties work best on moderate spans; ridge straps are better for steep roofs with open ceilings.
▪ Code compliance — Always check local code (IRC/IBC) before choosing. Some regions require both.
▪ Wind zones — In hurricane zones, you may need both for redundancy.
▪ Aesthetics — If you're going for a vaulted or cathedral ceiling, ridge straps help preserve that look.
“We’ve retrofitted dozens of homes after hurricane damage—and in every case where collar ties were too high or missing, the roof failed. Ridge straps won’t save you alone either. You need to get both tension and uplift right.”
— Jim Carlton, Structural Engineer, Coastal Retrofit Group
FAQ
1. Can collar beams be removed?
Yes, but only if an alternative support system is installed to prevent rafter spread.
2. Are collar beams required by building code?
Not always—some codes allow rafter ties instead, depending on span length.
3. What is the minimum size for a collar beam?
Typically 2x4 inches minimum, but larger spans need 2x6 or 2x8 beams.
4. Can I add collar beams to an existing roof?
Yes! Retrofit collar beams are added using bolted connections or joist hangers.
5. Do all roofs need collar beams?
No—low-slope roofs and engineered truss systems do not require collar beams.
Related
Framing & Bracing
- List of Construction Courses: Learn Building, Safety, and Management
- Types of Truss Bracing: What You Need to Know for Your Project
- Drag Struts in Framing: Purpose, Function, and Installation
- Drag Struts: Functions, Applications, and Best Practices
- T-Brace Framing: Installation Tips and Best Practices
- Truss Lateral Bracing: Types, Functions, and Installation
- Understanding Diagonal Truss Bracing: Function and Best Practices
- Roof Tie Beams: How They Support and Reinforce Building Structures
- Collar Beams in Roof Construction: Purpose and Function
- Hammer Beam Roofs: Types, Designs, and Real-World Applications
Rafter & Gable Bracing 🛠️
- Metal Rafter Braces: Types, Uses, and Installation Tips
- Rafter Ties in Construction: Purpose, Function, and Installation
- Rafter Ties vs. Collar Ties: Which One Does Your Roof Need?
- How to Install Metal Rafter Braces Like a Pro
- Gable Braces: Materials, Installation, and Benefits
Final Thoughts: Do You Really Need Collar Beams?
Collar beams can add strength and stability to a pitched roof, but they aren’t always a must-have. Whether or not you need them depends on several factors, including roof span, wind loads, local building codes, and attic space requirements.
✔ If your roof has a steep pitch and is in a high-wind area, collar beams help prevent ridge separation.
✔ If you're planning an open vaulted ceiling, collar beams may not be necessary—but you’ll need alternative reinforcement.
✔ If you're working on an older home and see signs of sagging or movement, adding collar beams might be a smart retrofit solution.
Bottom line? Don’t just add or remove collar beams blindly. Assess the structural needs first, and when in doubt, consult a qualified engineer or builder to make sure your roof stays safe and strong for years to come.
Resources
American Wood Council (AWC) – Roof Framing Standards
International Residential Code (IRC) – Collar Tie Requirements
National Frame Builders Association (NFBA) – Best Practices