A drag strut carries diaphragm force to the part of the building that resists it.
When that link is weak, the lateral system can look complete on paper and still perform badly in the field.
What a Drag Strut Carries

Image by ArchitectureCourses.org. The collector line has one job: pick up diaphragm force and deliver it into the resisting line without slip or detours.
- It collects in-plane force from roof or floor sheathing, deck, or slab.
- It moves that force along a defined line to a shear wall, braced frame, or core.
- It holds the load path together at long corridors, offsets, corners, and large openings.
- It keeps the diaphragm from dumping force into the wrong place just because that is where the framing happened to be convenient.
A row of nails is not a drag strut. A strap that “kind of helps” is not a drag strut either. The member, the connection, and the diaphragm edge all have to work as one system.
Where Collector Lines Show Up
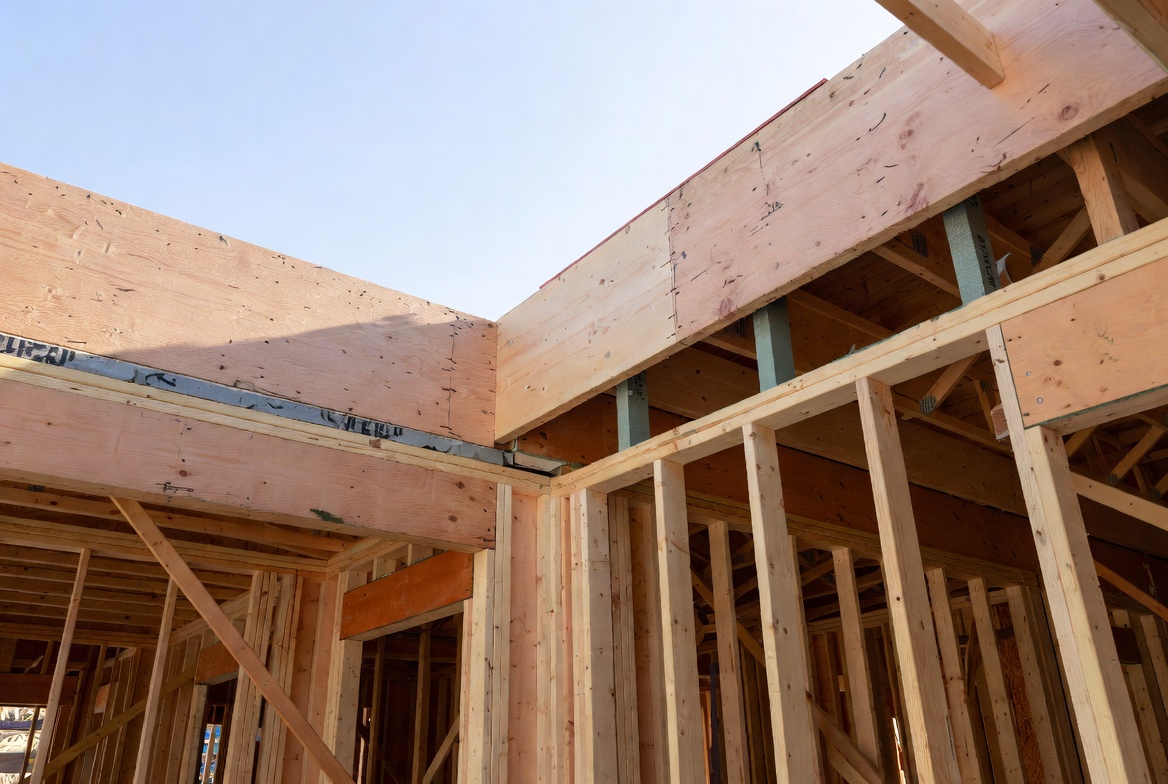
Wood-framed low-rise. Usually an LVL, glulam, or built-up wood member running along a shear wall line and tied into joists or rafters with straps, blocking, screws, or hold-down hardware. This is where people often underestimate the connection line because the member itself looks modest. Also useful. If the wall line itself is still fuzzy, see this load-bearing wall breakdown.
Steel buildings. Usually a channel, angle, plate, or wide-flange collector running along the edge of metal deck and back into a braced frame or moment frame. Here the usual problems are eccentricity, poor deck-edge welding, and collectors that look straight in plan but are not straight in how the force really arrives.
Concrete and masonry buildings. Usually a reinforced edge beam, collector strip, spandrel zone, or slab collector tied into a wall or core. In these systems the failure point is often not the concrete member itself. It is the anchorage, development length, or the assumption that slab reinforcement alone will sort it out.
How the Load Gets There

Image by ArchitectureCourses.org. The force path should move from diaphragm to collector to wall or frame without a weak handoff in the middle.
- Wind or seismic action puts in-plane shear into the roof or floor diaphragm.
- That force moves across the diaphragm toward the lateral resisting line.
- At long runs, offsets, re-entrant corners, corridors, or opening bands, the collector intercepts the force and gathers it.
- The collector transfers it into the wall, frame, or core through straps, bolts, welds, clips, screws, or reinforcing that can take the full line load.
- The resisting element takes it down to the foundation. For the roof end of that handoff, see roof-to-wall connections.
That third and fourth step are where jobs get sloppy. The drawings may show the right line. Then the opening shifts, a splice lands in the wrong place, blocking is skipped, or a deck weld gets shortened because the crew is moving fast. The load still travels. It just travels badly.
Do This Instead of This
| Condition | Do this | Instead of this |
|---|---|---|
| Long diaphragm line to one shear wall | Run a continuous collector with full-capacity connectors | Rely on edge nailing alone |
| Large opening along the collector line | Bridge it above the opening and drop force into posts or framing sized for tension | Break the line and add a few extra straps nearby |
| Collector splice is unavoidable | Move it to a lower-demand zone and design the splice for full force | Hide it under a strap and hope the fasteners share load |
| Steel deck into steel frame | Keep the handoff close to the real line of force and check eccentricity | Assume any edge angle will work the same way |
| Wood collector in a house or townhouse | Use solid blocking, full fastener patterns, and a member stiff enough for the line load | Treat it like ordinary edge framing |
Collector Types and Where They Fit
| Collector type | Best fit | What usually decides it |
|---|---|---|
| LVL or glulam | Houses, schools, timber low-rise | Good stiffness, clean fastening, predictable field work |
| Dimensional lumber | Short runs and lighter loads | Only works when demand is modest and blocking is tight |
| Steel channel or W-beam | Warehouses, mezzanines, long roof lines | Connection geometry and eccentricity often matter more than raw member strength |
| Reinforced concrete collector strip or edge beam | Concrete slabs, cores, podium work | Anchorage and development length govern a lot of the time |
| Cold-formed steel collector | Light commercial, modular, CFS wall systems | Screw pull-through, clip angles, and strap detailing |
If you are new to the lateral side of framing, truss bracing basics is worth a quick read before you start thinking every stiff member is a collector.
What Makes a Collector Hold Up
Continuity
The line has to stay continuous where the force stays continuous. That sounds obvious until the framing hits a corridor, stair opening, storefront run, or mechanical chase.
Real connectors
The weak spot is usually not the member. It is the handoff into the diaphragm, the splice, the end anchorage, or the transfer into the wall or frame. That is where collector lines lose capacity quietly.
Blocking and backing where wood is doing the work
Wood collectors want solid backing. Straps over voids, screws into bad grain, and soft edge conditions are where a nice detail starts unraveling.
Attachment that matches the schedule
Half the required nails is not “close.” Missing screws at one clip line is not “good enough.” Collectors do not average out well when the detail is under-built in a few spots.
Openings, Corners, and Other Problem Areas
Most clean collector diagrams stop right before the plan gets awkward. Real jobs do not.
Long window and door runs. The collector usually has to bridge above the opening and drop force into jamb posts or framing that can take the tension. This is where coordination gets messy fast if the opening layout changed late. Before you move on, window header framing and window rough openings help keep those posts and straps from fighting each other.
Re-entrant corners and offsets. The force wants to cut across the weak side of the diaphragm. The collector has to bring it back deliberately. That usually means a straighter line, more direct handoff, and less wishful thinking about what the sheathing will do on its own.
Roof geometry. Collectors often end up sharing space with ridge details, rafter ties, collar ties, vents, and blocking. That coordination needs to happen early. A collector that solves one problem while wrecking roof ventilation or cutting through the wrong tie line is still a bad detail. For that roof-side distinction, see rafter ties vs collar ties.
Sizing Logic That Holds Up in Practice
- Start with the line load. Diaphragm shear has to be turned into a force moving along the collector. If that number is fuzzy, the rest gets fuzzy too.
- Pick a member that can carry the force without becoming a serviceability problem. In wood, extra depth often helps more than trying to cheat it with a wider but softer section. In steel, straight load entry matters as much as the section size.
- Design the connection line for the full demand. This is where straps, welds, bolts, screws, clips, and hold-downs start governing instead of the collector itself.
- Keep the path straight when you can. Every jog and offset adds another way for the force to peel, twist, or overstress the handoff.
Worth knowing: if someone on the team needs a quick reset on member behavior before collector stiffness starts getting argued, how to analyze beams is the right background page.
Field Sequence

Image by ArchitectureCourses.org. The collector line should inspect as one continuous system, not as a handful of unrelated parts.
Wood framing
- Snap the resisting line clearly on the deck or top plate.
- Set the collector member straight and keep obvious splice zones out of the worst demand areas.
- Add solid blocking where the straps, screws, or clips need it.
- Install the hardware exactly to schedule, including all required fasteners.
- Stitch the diaphragm edge to the blocking with the right pattern.
- Photograph the line before it disappears.
Steel framing
- Lay out the collector beam, channel, or plate on the actual force line, not just the cleanest shop line.
- Align to the gusset, clip, or frame connection before final tightening or welding.
- Check that the deck edge detail is actually delivering force into the collector where the model assumed it would.
Concrete
- Form the collector zone with room for real bars, hooks, and development length.
- Place reinforcement so it ties back into the wall or core the way the detail intended.
- Keep congestion under control so the transfer zone can actually consolidate during the pour.
What Fails First
- Missing fasteners in straps or clips
- Collector splices landing in the wrong place
- No blocking where the wood connection needed bearing
- A big opening breaking the line without a real bridge detail
- Deck welds, clips, or plates lighter than the demand they are supposed to carry
- A straight-looking collector that is still eccentric in how the force arrives
That is usually how collector problems show up. Quietly. Not as a snapped member in the middle. As slip, drift, cracked corners, ugly drywall lines, and a building that feels looser than the engineer intended.
Connectors That Do the Work
Collector lines usually fail at the connections, not in the middle of the member.
FIELD PICK
Simpson Strong-Tie DSC5R Drag Strut Connector
Useful where wood-to-steel or steel-to-steel tie-ins need a direct, tight transfer detail.
RECOMMENDED TOOL
Simpson Strong-Tie HD3B Hold-Down
Useful when the collector is anchoring into a wall post and tension is real, not assumed.
FAQ
Do all buildings need drag struts?
No. Simple buildings with short spans and clean resisting lines may not need a dedicated collector. Once the plan gets longer, more irregular, or full of large openings, collectors start becoming hard to avoid.
Is every strap a drag strut?
No. A strap becomes part of a collector only when the full line load, backing, fastener pattern, and end transfer have all been worked out.
Can dimensional lumber replace an LVL collector?
Sometimes, when the load is modest and stiffness is still acceptable. A lot of real projects move to LVL because it stays stiffer and gives cleaner connections.
Where should a collector splice go?
Away from the highest-demand zone, and only where the splice itself can carry the full design force.
Do drag struts affect roof details?
They can. Collectors often need to be coordinated with roof framing, vent paths, and opening layout so one fix does not create a different problem.
Short Code Notes
- IBC: requires a complete and positive lateral load path.
- ASCE 7: governs the wind and seismic combinations that often control collector and connector demand.
- AISC and APA details: matter because collector design is never only about the member. The connection values count too.