Most crawl space liner advice gets reduced to one lazy sentence: “Just use 6-mil plastic.”
That is how people end up doing the same job twice.
Yes, 6-mil still shows up in a lot of code and program guidance as the minimum-style baseline for exposed earth in closed or unvented crawl spaces. That does not mean 6-mil is the right choice for every crawl space, every service condition, or every homeowner who does not want the liner shredded the first time somebody crawls under the house with tools.
Thickness is not just about vapor control. It is also about durability, puncture resistance, service traffic, repairs, and whether the crawl space is just getting a basic ground cover or a full encapsulation system.
That is where people get burned. They compare price per roll, not job type. Then the seams tear, the piers get skipped, the wall detail peels loose, and the “cheap” liner turns into the expensive one because now you are doing it again.
This page is the practical decision guide.
- What 6-mil is good for
- When 10-mil is the smarter minimum
- Why 12-mil is often the real residential sweet spot
- When 20-mil is worth the money
- What thickness does not fix
- How to match the liner to the crawl instead of buying by habit
Worth knowing: if you still are not clear whether the crawl needs a basic ground-cover approach or a full sealed system, start with Crawl Space Encapsulation vs Vapor Barrier Only before you choose thickness around the wrong strategy.
The Quick Answer
6-mil is the minimum-style baseline. It can be enough for a lighter-duty crawl space ground cover when the crawl is dry enough, traffic is low, and you are not pretending it is a heavy-duty encapsulation liner.
10-mil is where a lot of residential jobs start making more sense. It is still manageable to install, but it gives you more puncture resistance and a little more forgiveness than 6-mil.
12-mil is often the best middle ground for homeowners who want a more durable residential encapsulation liner without jumping all the way to very heavy membrane territory.
20-mil is the heavy-duty choice. It is for rougher crawls, more service traffic, more abuse, and homeowners who care more about long-term durability than easier handling or lower cost.
The mistake is thinking thicker automatically means better for every job. The real goal is not to buy the thickest thing in the warehouse. The goal is to buy the right liner for the actual crawl space.
| Thickness | Best Use | Main Strength | Main Limitation |
|---|---|---|---|
| 6-mil | Basic ground-cover jobs, lighter-duty crawls | Cheap, easy to handle, widely accepted as a minimum-style baseline | Tears and punctures much more easily under real service traffic |
| 10-mil | Better residential ground cover and lighter encapsulation work | More durable without becoming miserable to install | Still not ideal for very rough or high-traffic crawls |
| 12-mil | Strong residential encapsulation middle ground | Good durability-to-handleability balance | More expensive and heavier than the baseline options |
| 20-mil | Heavy-duty encapsulation, repeated service traffic, rough conditions | Exceptional durability and puncture resistance | Heavier, harder to maneuver, more expensive, easier to overbuy |
What Thickness Actually Changes
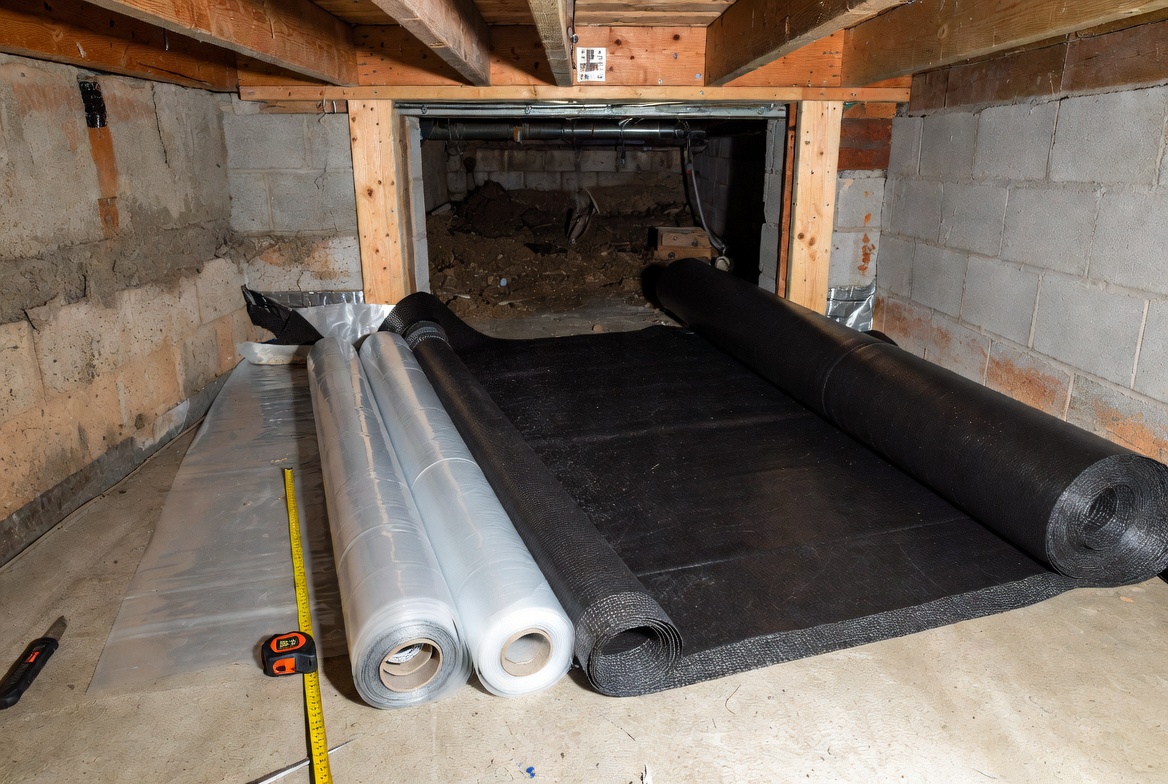
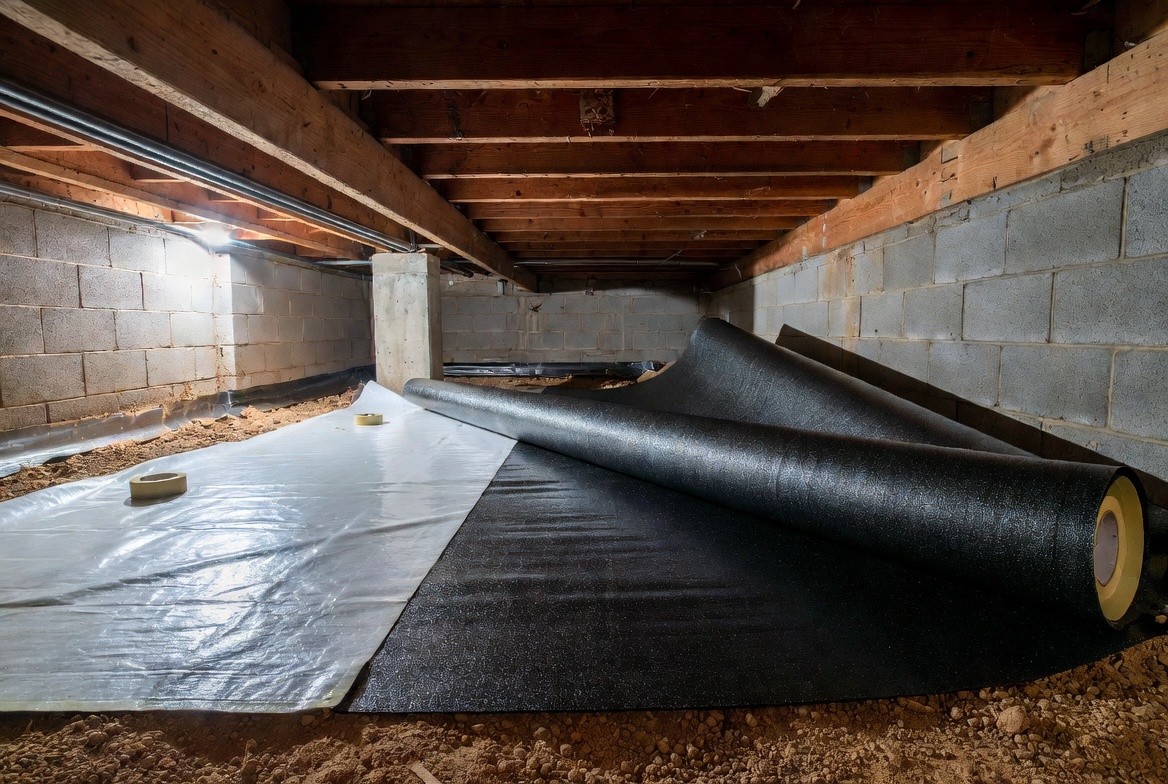
Different crawl space vapor barrier rolls laid out for comparing thickness, weight, and install use. Image by ArchitectureCourses.org.
Thickness changes more than one thing at once.
People tend to act like thickness is only about stopping vapor. That is only part of the picture. A properly installed 6-mil ground cover can already do real vapor-control work. The reason thicker liners exist is that crawl spaces are not clean lab floors. People crawl across them. Plumbers drag tools through them. HVAC techs crush corners. Brick chips, nails, gravel, and rough soil all keep trying to turn the liner into confetti.
So thickness changes four practical things:
- durability under traffic and service work
- puncture resistance on rough soil and debris
- how well the system survives time, not just install day
- how much hassle you buy later in patches, tears, and rework
That is why this page matters. A liner is not just a sheet. It is a maintenance decision.
Start With the Wrong Assumption and You Buy the Wrong Thickness
The wrong assumption is usually one of these:
- “Code says 6-mil, so 6-mil is always enough.”
- “Thicker is always better, so just buy 20-mil.”
- “If the liner is thick enough, it will make the crawl dry.”
- “I can save money on the liner and just tape more.”
All four miss the real decision.
The first question is not “what mil thickness should I buy?” It is:
What kind of crawl space am I actually lining?
Dry enough and mostly stable? Rough and muddy after storms? Fully sealed or still vented? Light service traffic or constant crawling under equipment? Just covering exposed earth, or doing full encapsulation with wall run-up, sealed seams, pier wraps, and tighter perimeter continuity?
That is what decides whether 6-mil is reasonable, 10-mil is smarter, 12-mil is the sweet spot, or 20-mil is worth the trouble.
6-Mil: Minimum Does Not Mean Best
6-mil polyethylene is still the minimum-style baseline you see in a lot of crawl-space guidance for exposed earth. That is real. It is not made up. If the crawl is fairly well-behaved and the goal is simple ground vapor control, 6-mil can still be a legitimate option.
But people hear “minimum” and mentally turn it into “best practice.” That is where the trouble starts.
Use 6-mil when most of these are true:
- the crawl is fairly dry and does not see repeated standing water
- the soil is not sharp, rocky, or full of debris
- service traffic is low
- the budget is tight and the job is more basic ground cover than full premium encapsulation
- you understand that you are buying a lighter-duty system
A decent 6-mil installation can still do real moisture-control work. That part matters. This page is not here to pretend 6-mil is useless.
What 6-mil does badly is abuse. If people will be in and out of that crawl regularly, if the crawl has rough conditions, or if you want fewer repairs later, 6-mil starts feeling cheap in the bad way, not the efficient way.
Read this next: if you are staying with a lighter-duty ground-cover strategy, pair this with Crawl Space Vapor Barrier Installation: How to Do It Right the First Time.
10-Mil: The Smarter Baseline for a Lot of Houses
If 6-mil is the minimum-style floor, 10-mil is where a lot of residential jobs start becoming more realistic.
This is especially true when the crawl is no longer just “throw down some poly and forget it.” A 10-mil liner gives you noticeably more durability without becoming miserable to drag, position, wrap around piers, or run up the walls.
That is why 10-mil is such a common upgrade path. It is not usually because the vapor math suddenly changes in a magical way. It is because the liner now has a better chance of surviving a real crawl space.
Use 10-mil when:
- you want to go beyond minimum-style ground cover
- the crawl is getting a more serious residential moisture-control job
- there will be some service traffic
- the soil is not perfect and you want a little more forgiveness
- you want better durability without jumping straight into very heavy material
A lot of people stop here, and for many crawls that is reasonable. Especially if the crawl is not rough enough to demand something heavier and the owner still wants a liner that is manageable to install.
The main caution: not all 10-mil products are equal. A good 10-mil crawl-space liner is not the same as generic cheap plastic that happens to measure thicker on paper. Reinforcement, puncture resistance, and actual field durability matter more than the headline mil number alone.
12-Mil: Often the Residential Sweet Spot
This is the thickness a lot of people end up wishing they had bought after trying to save money with something lighter.
There is no universal code line that says 12-mil is the official residential answer. That is not the claim. The reason 12-mil matters is practical: it often lands in the zone where the liner feels substantially tougher than the lighter options without becoming as cumbersome and expensive as a very heavy membrane.
That makes it a strong residential encapsulation choice when:
- the crawl is getting a real long-term encapsulation job
- there will be future service traffic under the house
- the owner wants better puncture resistance but does not need the heaviest product on the market
- the crawl has enough roughness or complexity that 6-mil feels too fragile and 10-mil still feels a little light
In other words, 12-mil is often the answer for people who are done pretending this is a “cheap plastic” project, but who also do not need an industrial-grade liner.
That is why I would call it the residential sweet spot more often than not. Not because it is universally right. Because it is very often the right compromise between cost, handling, and durability.
Also useful: if you are still deciding whether the crawl needs a full sealed system or just a ground-cover job, go back to Crawl Space Encapsulation vs Vapor Barrier Only.
20-Mil: Heavy-Duty, Not Automatic
20-mil is where you stop talking about “better than minimum” and start talking about heavy-duty membrane territory.
This is the choice for rougher conditions, more abuse, more future service traffic, and homeowners who care more about long-term toughness than lighter roll weight or easier handling.
Use 20-mil when:
- the crawl gets frequent service access
- the soil or gravel conditions are rougher
- you want the strongest puncture resistance in the group
- the crawl is large or important enough that redoing the liner later would be especially annoying
- you are willing to pay more and work harder now to get more durability later
Where people get this wrong is assuming 20-mil is always the “professional” answer. Sometimes it is. Sometimes it is just overbuying.
It costs more. It weighs more. It is harder to maneuver around low-clearance corners, piers, ducts, and awkward crawl access. If the crawl is lightly trafficked and the conditions are fairly mild, 20-mil can absolutely be more liner than the job really needed.
So yes, 20-mil is impressive. That is not the same as necessary.
Do This Instead of This
| Do This | Instead of This | Why |
|---|---|---|
| Use 6-mil for lighter-duty ground cover where the crawl is fairly stable | Assume 6-mil is the universal best answer | Minimum-style guidance is not the same as best fit for every crawl |
| Use 10-mil when you want a smarter baseline with better durability | Keep replacing torn cheap poly | One better install is usually cheaper than repeating a flimsy one |
| Use 12-mil when you want a real residential encapsulation middle ground | Jump from 6-mil straight to the heaviest membrane without a reason | 12-mil often gives the durability bump most homes actually need |
| Use 20-mil where traffic and rough conditions justify it | Buy 20-mil just because “thicker must be better” | Heavy-duty material only pays off when the crawl actually demands it |
| Match thickness to service conditions and system type | Compare by mil number alone | A better product is more than a thicker sheet |
Thickness Does Not Fix These Problems
This is the section people need before they spend money.
A thicker liner does not fix:
- standing water after storms
- muddy soil and outside drainage failures
- wet wall bases and perimeter seepage
- open vents in a crawl that is trying to function as sealed
- a bad access door
- unmanaged humidity in a fully closed crawl
- musty odor caused by multiple failures happening at once
That is the part people miss. A 20-mil liner over a wet crawl is still a wet crawl with a stronger sheet.
If the crawl still takes on water, stop shopping for liner thickness and fix the water path first. If the crawl still smells because the whole moisture system is wrong, fix that first too. Start with Crawl Space Drainage System: When You Need One, What It Includes, and What It Does Not Fix, Why Does My Crawl Space Smell in the House?, and Exterior Foundation Waterproofing.
What Matters More Than Mil Thickness Alone
If you compare crawl-space liners for long enough, the mil numbers start feeling like the whole story. They are not.
These matter too:
- Reinforcement: some sheets simply survive field use better than others.
- Puncture resistance: this matters more than homeowners expect.
- Seam behavior: some materials take tape and seam detailing better than others.
- Roll size and handling: a giant heavy roll in a miserable low crawl is not always a favor.
- Wall detailing: if the perimeter detail fails, the field thickness does not save the job.
This is also where ASTM language starts becoming useful. ASTM E1745 is primarily an under-slab vapor-retarder standard, not a crawl-space code requirement by itself. But its puncture, tensile, and permeance classes are still helpful when you want a more serious way to compare tough membranes beyond just “this one is thicker.”
So yes, thickness matters. But thickness without actual product performance is lazy shopping.
Read this next: when the seam system is the weak point, go to Best Crawl Space Vapor Barrier Tape.
The Detail People Miss
The middle of the crawl is not where most liners prove themselves. The edges are.
People obsess over 6-mil vs 10-mil vs 20-mil, then leave the liner low at the wall base, rush the pier wraps, or use tape like a magic spell on dusty masonry.
That is backwards.
A decent 10- or 12-mil install with good perimeter continuity usually outperforms a sloppy 20-mil install that stops at the easy part. The field is the obvious part. The perimeter is where the job becomes real.
That is also why a heavier liner is not automatically the smarter buy if the installer or DIY plan is still weak on the actual details.
What People Commonly Do Wrong
- Buying by mil number without deciding whether the crawl is staying vented or becoming sealed.
- Using 6-mil where the crawl clearly sees regular service traffic and rough handling.
- Buying 20-mil for a mild crawl that did not need it.
- Ignoring seam tape, pier wraps, and perimeter run-up.
- Thinking a thicker liner fixes bulk water.
- Forgetting that humidity, smell, and liner durability are related but not identical problems.
If you are already seeing sustained high humidity, pair this thickness decision with Crawl Space Humidity: What’s Normal, High, and Dangerous? and Best Crawl Space Hygrometers and Humidity Monitors.
Use This When / Avoid This When
| Use This | When | Avoid This | When |
|---|---|---|---|
| 6-mil | The crawl is lighter-duty and you mainly need code-minimum-style ground vapor control | 6-mil | The crawl will see regular service traffic or rough conditions |
| 10-mil | You want a smarter baseline without overbuilding the job | 10-mil | The crawl is especially rough, high-traffic, or you want maximum toughness |
| 12-mil | You want a durable residential encapsulation middle ground | 12-mil | You are still ignoring active water intrusion or bad perimeter details |
| 20-mil | The crawl is rough, heavily trafficked, or you want a heavy-duty long-life liner | 20-mil | You are buying it just because “thicker sounds professional” |
How to Decide in One Walkthrough
- Check the water history. If the crawl still takes on water, thickness is not the first decision.
- Decide the crawl-space strategy. Vented ground cover or full encapsulation? Do not buy thickness before you know the system.
- Check the service reality. Will people be under here often? If yes, lighter liners start looking less attractive.
- Look at the ground. Smooth and mild is different from rough gravel, debris, and puncture risk.
- Decide your tolerance for rework. Lower upfront cost is not always cheaper if the liner shreds later.
If the crawl is lighter-duty and mostly stable, 6-mil or 10-mil may be enough.
If the crawl is getting real encapsulation and you want fewer regrets later, 10-mil or 12-mil is often the more practical residential range.
If the crawl is rough, heavily trafficked, or long-term durability matters more than handling ease, 20-mil earns its keep.
Quick Checklist
- Do not choose thickness before deciding whether the crawl is staying vented or becoming sealed.
- Use 6-mil when the crawl is light-duty and the job is basic ground vapor control.
- Use 10-mil when you want a better real-world baseline.
- Use 12-mil when you want a stronger residential encapsulation middle ground.
- Use 20-mil when the crawl is rough enough to justify heavy-duty material.
- Do not expect thicker liner to fix drainage, seepage, or bad humidity strategy.
- Take seams, pier wraps, and perimeter run-up as seriously as the field thickness.
What To Do Next
This part matters: if you still are not sure whether the crawl should get a basic liner job or a full closed system, go to Crawl Space Encapsulation vs Vapor Barrier Only.
Also useful: if the weak point is the installation itself, go to Crawl Space Vapor Barrier Installation: How to Do It Right the First Time and Best Crawl Space Vapor Barrier Tape.
Before you move on: if the crawl is already sealed and the next problem is humidity control, use What Size Crawl Space Dehumidifier Do You Need?, Best Crawl Space Dehumidifiers, and Can You Use a Dehumidifier in a Crawl Space Without Encapsulation?.
If you still need the bigger picture: use Conditioned Crawl Space vs Encapsulated Crawl Space and House Foundations: What You Need to Know Before Construction.
FAQ
Is 6-mil enough for a crawl space?
Sometimes, yes. It is still the minimum-style baseline in a lot of crawl-space guidance for exposed earth. It is enough when the crawl is lighter-duty and you are mainly solving ground vapor, not building a more durable long-term encapsulation system.
Is 10-mil better than 6-mil?
Usually, yes, in real-world durability. It does not change the laws of vapor movement, but it usually holds up better under traffic, rougher conditions, and service work.
Is 12-mil overkill?
No, not usually. In a lot of residential encapsulation jobs, 12-mil is a sensible middle ground between lighter baseline material and very heavy-duty membranes.
Is 20-mil worth it?
It can be. It is worth it when the crawl is rough, gets service traffic, or you care enough about long-term durability to accept the heavier material and higher cost. It is not automatically worth it for every mild crawl space.
Does thicker liner stop more moisture?
Not in the simple way people imagine. Once you are already in proper vapor-retarder territory, the bigger real-world difference is usually durability, puncture resistance, and how long the installation keeps behaving like a continuous system.
What thickness should I use for full encapsulation?
For many residential encapsulation jobs, 10-mil to 12-mil is a very practical range. Go heavier when the crawl is rougher or sees more abuse. Go lighter only if the crawl and service conditions truly justify it.
What is the biggest mistake with crawl-space liner thickness?
Buying by mil number alone while ignoring water intrusion, crawl-space strategy, service traffic, and perimeter detailing.