



A small Cape kitchen usually gets planned like a much bigger kitchen that happened to shrink, and that's where most of the trouble starts.
The sink window fixes one wall. The range has to vent to the outside somewhere.
The fridge wants more depth than the room can spare, and the doorway to the dining room eats the cabinet space you were counting on — put a back door in that wall too and the kitchen turns into a hallway to the yard.
You can open a wall for light and still end up with nowhere to keep the dishes.
So the realistic target for a small Cape kitchen is narrow: stop wasting steps, hang onto the daylight it already has, and make it work inside the footprint it's got. Moving walls usually isn't on the table.
The broader Cape kitchen conversation covers larger layouts and full wall removals; small ones run by their own rules, because here the footprint decides almost everything.
Why Small Cape Kitchens Are Different
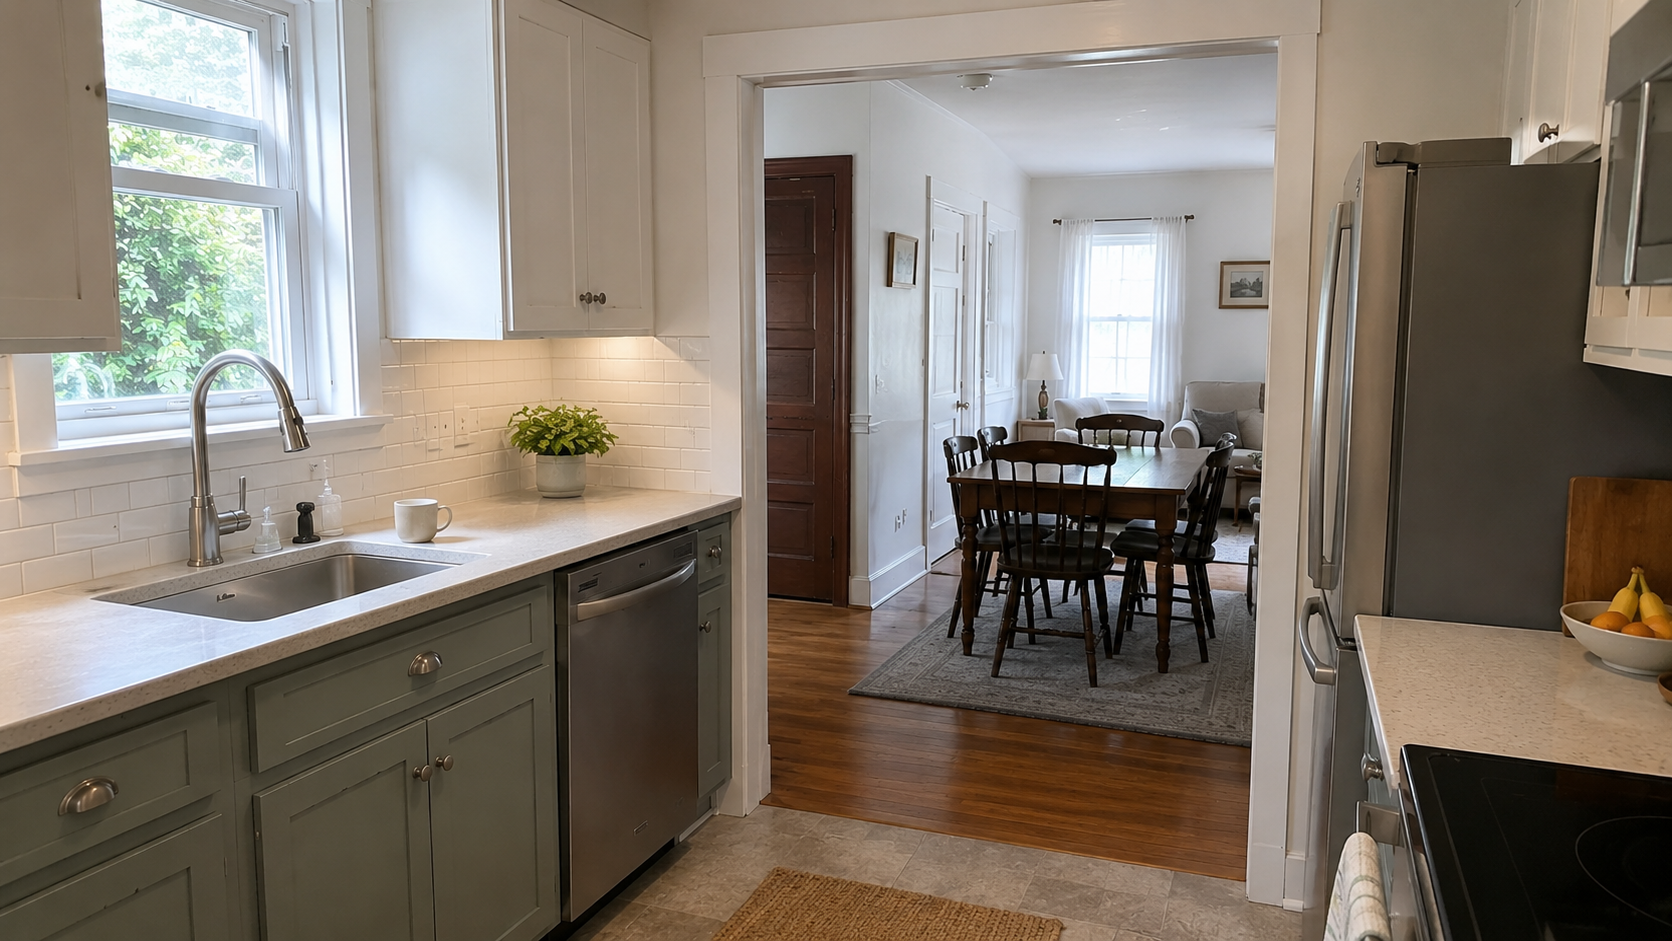
A small Cape kitchen has less room to recover from a single bad decision than a bigger kitchen does. In a large kitchen, a deep refrigerator, a wide island, an oversized range, or an awkward door swing might just be annoying.
In a small Cape, the same mistake can block the work aisle, kill the prep counter, or make the dishwasher impossible to unload without turning sideways.
The age of the house matters, too. Most small Cape kitchens were built around a very compact cooking routine: sink under the window, short cabinet runs, a range near one wall, a back door or a basement door nearby, and a dining room just outside the kitchen.
The room was never designed to hold a big island, a French-door refrigerator, a coffee station, a pantry wall, a microwave drawer, and five people moving through it at once. None of that means the kitchen can't be fixed. It just means the remodel has to be more disciplined than a suburban one.
Where Small Cape Kitchens Get Trapped
The trap usually starts with the same set of pieces fighting for the same room: window, stair, doorway, refrigerator, range, sink, and traffic path.
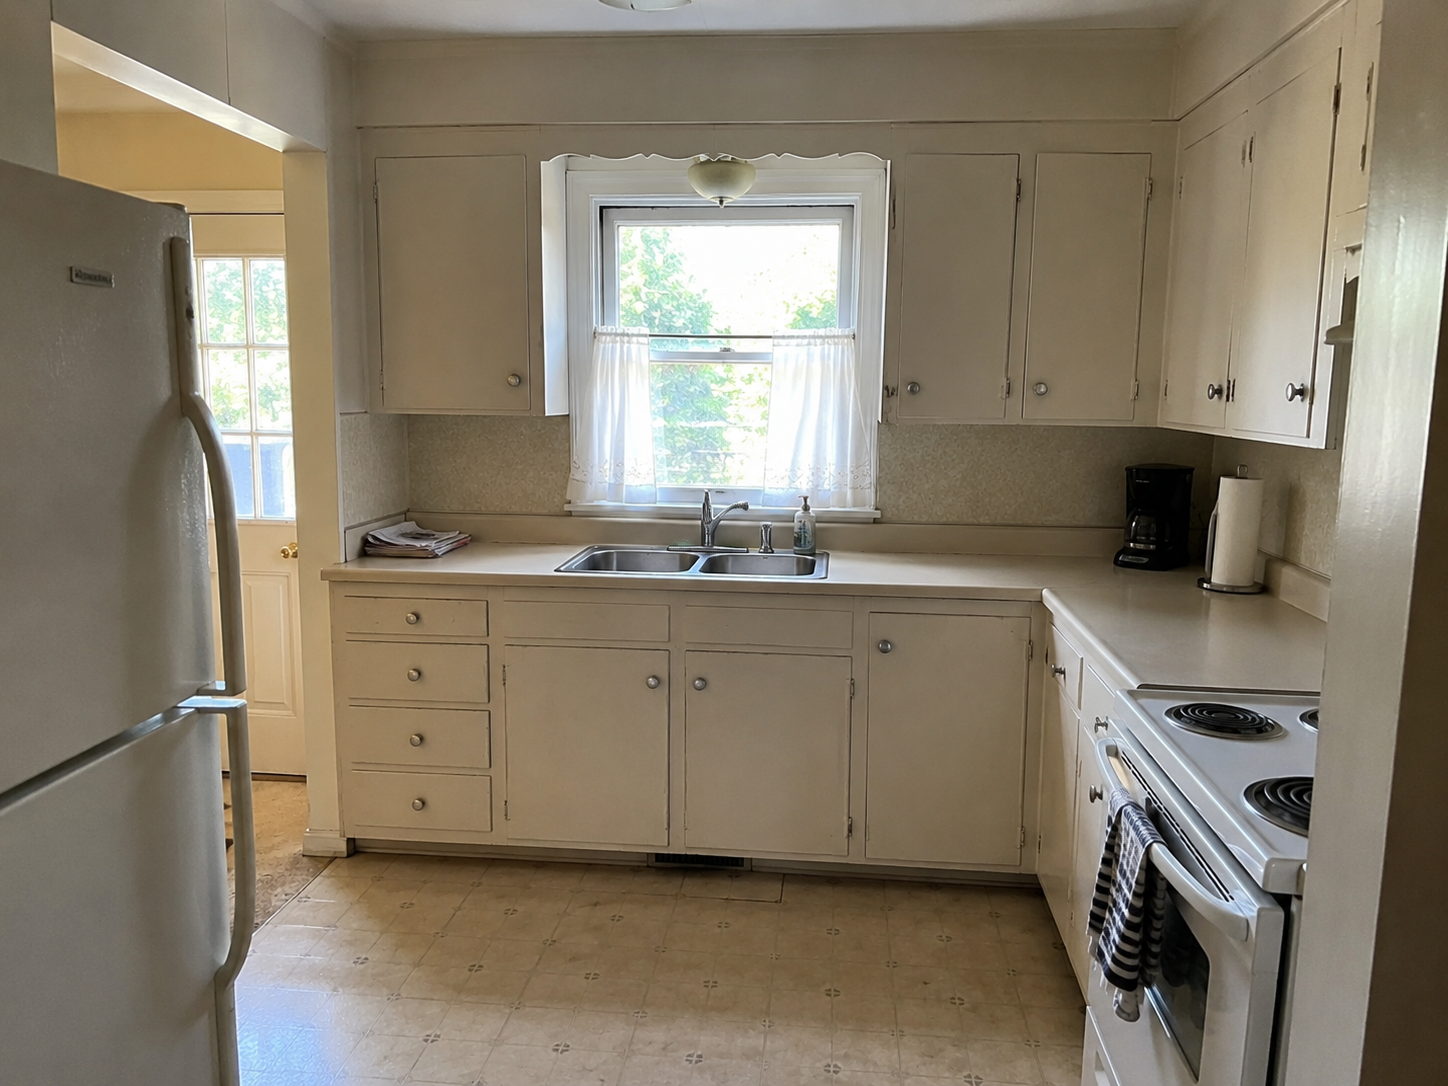
The sink window feels like the natural center of the room, but it pins both the sink and often the dishwasher against one wall. Range placement is constrained by where the exhaust duct can actually run to the outside. Refrigerators need door swing and cabinet depth an older Cape often can't spare.
And the doorway to the dining room may be sitting exactly where a cabinet run wants to go, while the back door turns the kitchen into a hallway on its way to the yard.
Solving those pieces one at a time is the classic mistake. A cabinet plan that ignores the refrigerator's actual depth won't work. A wall opening that gives up too many upper cabinets creates a brighter room that suddenly holds less.
The most useful first step is marking on the actual floor of the room what blocks movement, and that's usually where the money should go first.
Start With the Layout, Not the Cabinet Style
Before choosing cabinet doors, measure the room the way a designer would. Mark the sink wall, window width, sill height, range location, refrigerator depth, dishwasher swing, door swings, any stair or basement access, and the path from the back door to the dining room. Then walk what a real person would walk during breakfast prep.
If that walking path cuts through the cooking zone, the kitchen will still feel wrong after the remodel, regardless of which door style ends up on the cabinets.
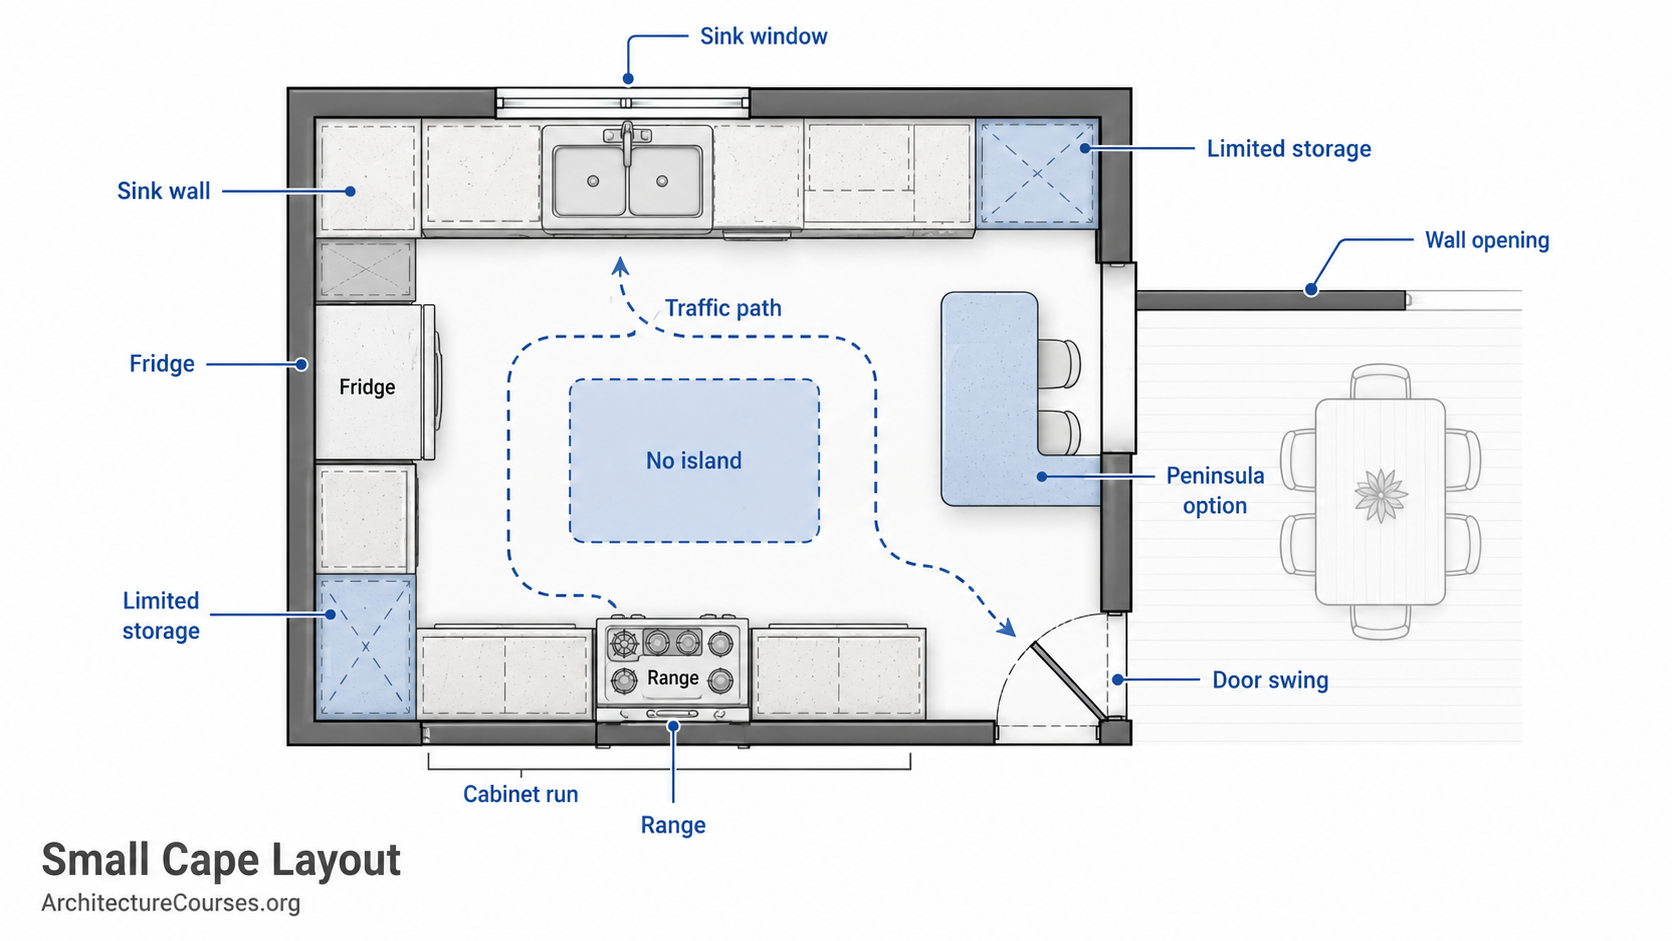
Most small Cape kitchens work best as a galley, an L-shape, a compact U-shape, or a short peninsula. Islands come later in the conversation — for small footprints, they arrive only after everything else has been solved, and often they don't fit at all.
A 24-inch-deep base cabinet plus a countertop overhang already takes serious floor space. Add appliance handles, an open refrigerator door, an open dishwasher door, and a person standing at the sink, and the room shrinks fast. A layout that looks fine on a showroom floor plan can still fail in a real Cape.
The Island Is Often the Wrong Answer
A small Cape kitchen can have an island only when the room genuinely has clearance around it, and clearance here means more than squeezing a rectangle onto a floor plan. The dishwasher still has to open without hitting anything. Somebody still has to be able to pass behind the person at the range.
A base cabinet drawer can't slam into the island's toe kick every time it opens. Seating on the island shouldn't sit between the back door and the rest of the house.
If the island has to be small enough that it turns into a decorative block in the middle of the room, skip it.
A peninsula, a rolling work table, a deeper counter at one end of the room, or better drawer storage will give the household more real daily value than a symbolic island that everyone walks around.
Can a Small Cape Kitchen Have a Peninsula?
A peninsula can work in a small Cape kitchen when it earns the space it takes up. A compact peninsula adds prep counter, some storage, and a visual edge between the kitchen and the dining room. It can also become a barricade if it cuts across the main traffic path.
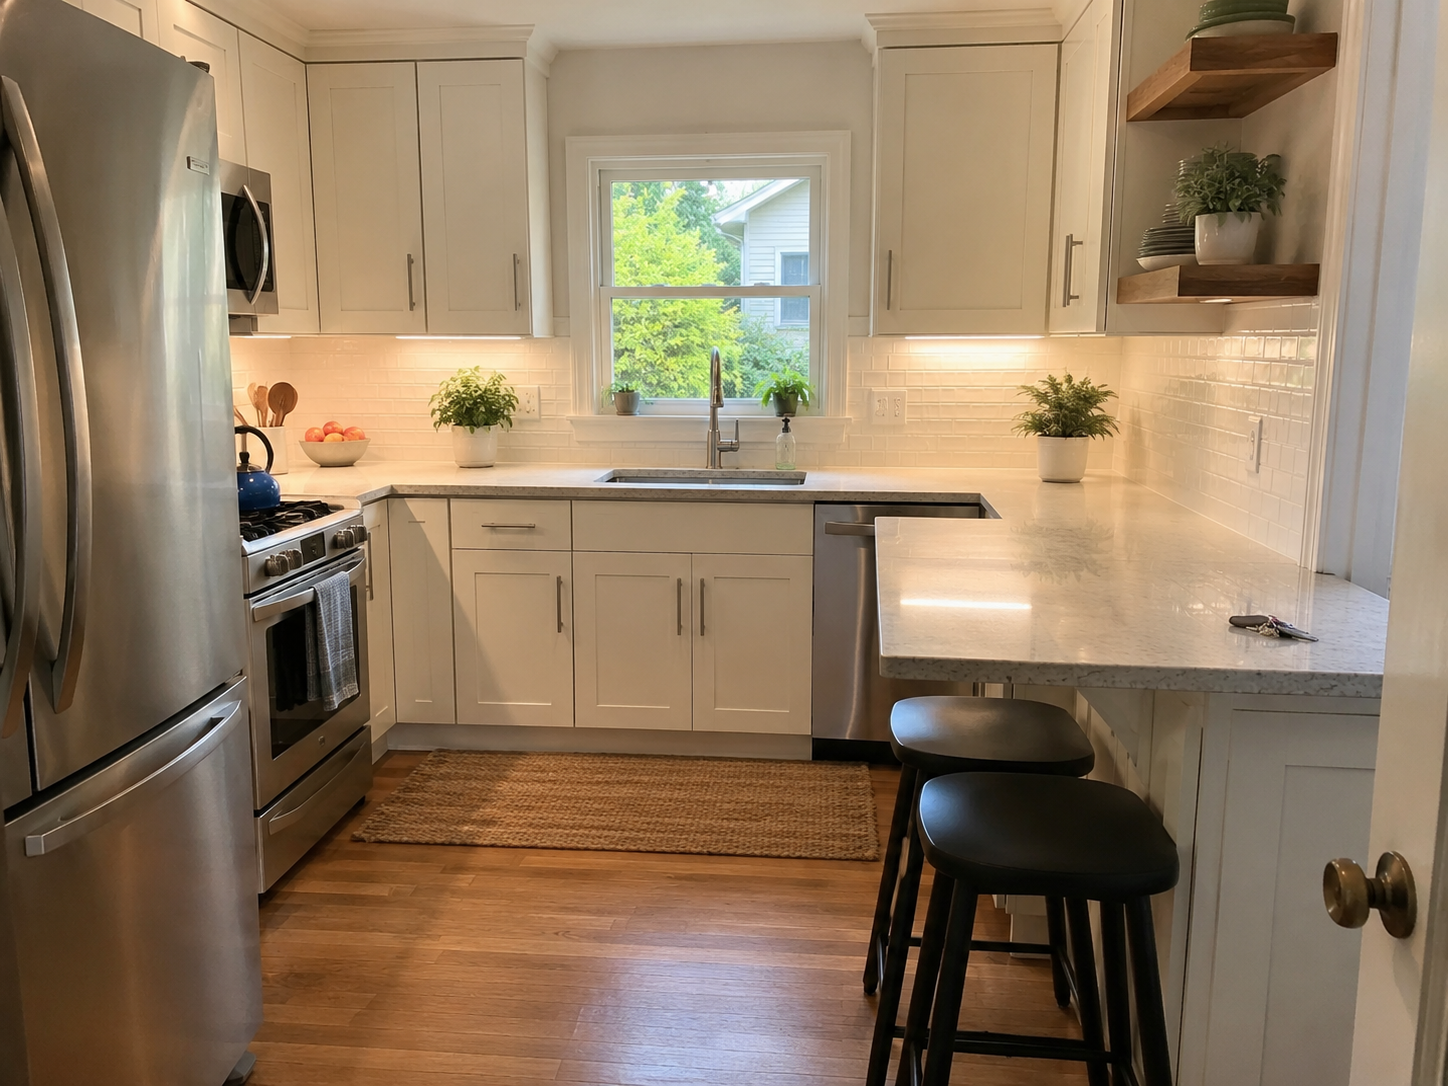
The best peninsula in a small Cape kitchen is usually short, plain, and useful — enough landing space and a drawer or two, without pretending to be an island. If the room is already narrow, the peninsula should stop before it blocks the path between the sink, the refrigerator, and the dining room.
Before ordering cabinets, tape the peninsula's actual footprint on the floor and try the room with an open refrigerator, an open dishwasher, and someone standing at the range. Ten minutes of tape can save several thousand dollars of cabinet order.
The Sink Window Controls More Than the Sink
The sink window is often the strongest feature in a small Cape kitchen. It brings daylight into a room that would otherwise feel boxed in, and it usually controls the sink, the dishwasher, the backsplash height, the counter run, and a piece of the exterior wall.
Changing the window can pull in siding, trim, sill work, flashing, and the way the rear or side elevation looks from outside.
If the window is rotted, drafty, undersized, or was changed badly at some point, the fix has to be coordinated with the Cape Cod window replacement before the cabinet order gets locked. A small kitchen can't afford to lose daylight to a bulky replacement frame that ate half the glass area.
Keeping the room bright is part of the remodel itself, not something the finishes are supposed to fix later.
What Usually Stays in Place
In a small Cape kitchen, leaving a fixture where it is often turns out to be the smarter move. The sink usually stays near the window, because moving it means new plumbing, drain slope math, venting, cabinet changes, floor patching, and sometimes ceiling repair in the room below.
The range often stays on whichever wall can vent to the outside without a long, complicated duct run. Refrigerators can move, but only when the new spot doesn't block a doorway or eat the only tall-storage wall in the room.
A good remodel doesn't relocate every fixture just to prove the room changed. It moves the pieces that are hurting the layout and leaves the expensive parts alone when they still work — because most of the money that disappears in a kitchen remodel gets spent behind the walls, not on top of the counters.
What Gets Exposed When the Wall Opens
Opening a wall is where a lot of small Cape kitchen budgets get honest.
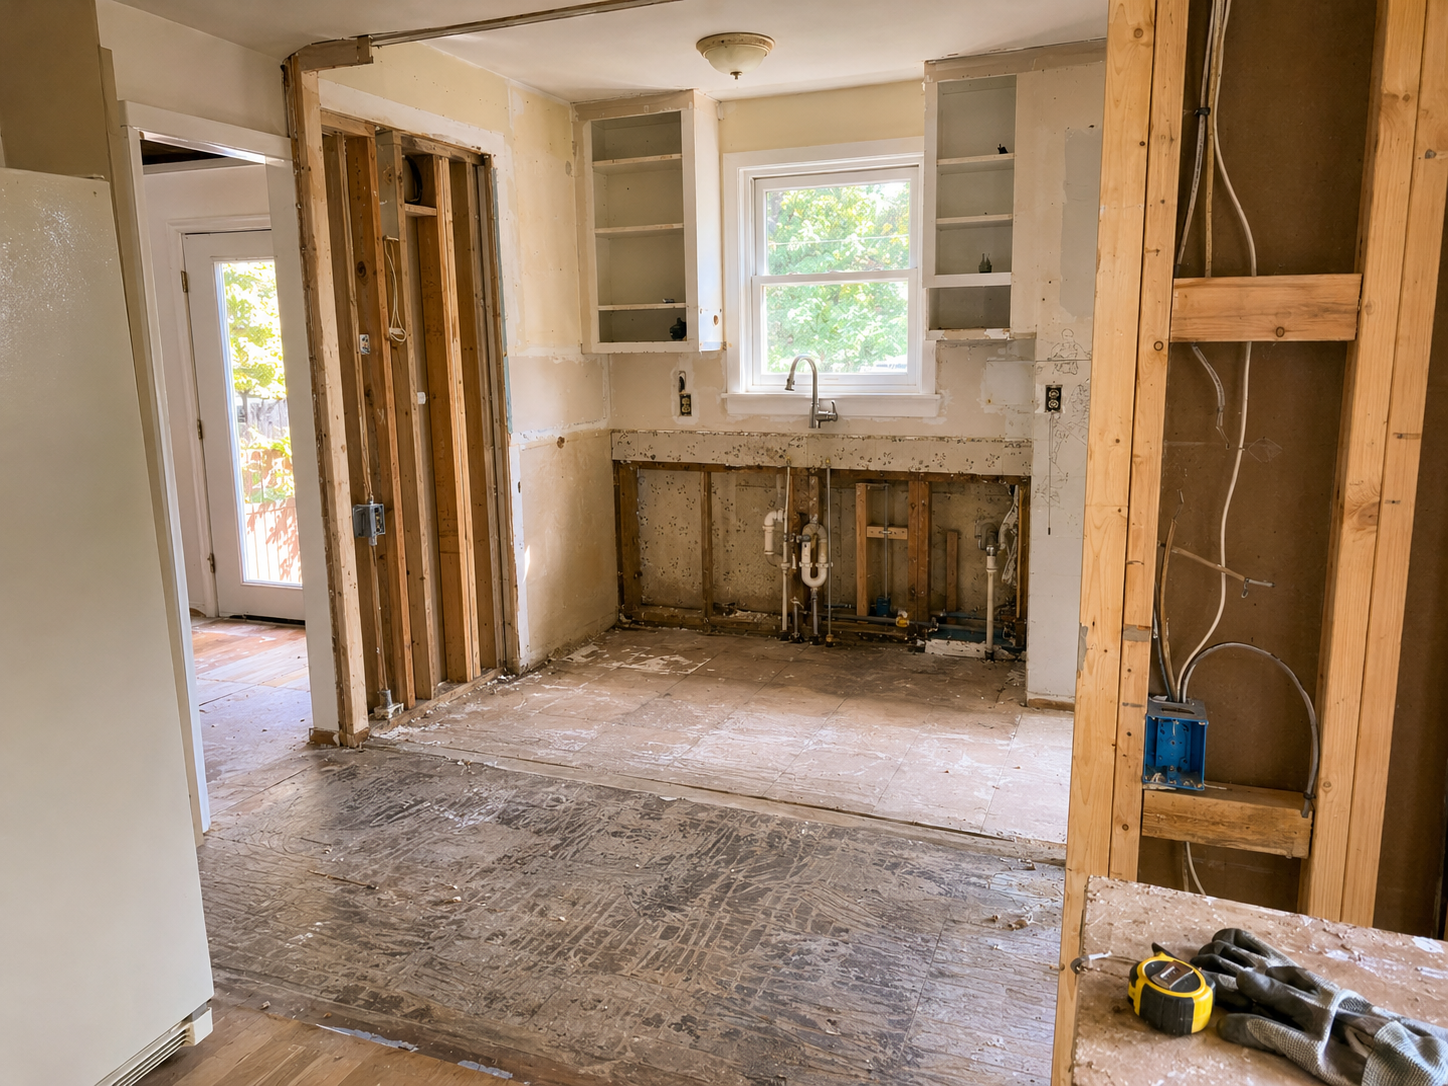
The wall between the kitchen and the dining room may be carrying load from the floor above, from the ceiling, from the roof, or from upstairs framing. It can also be hiding electrical runs, old plaster, heat ducts, plumbing, or an old chimney condition.
Even when the opening is structurally simple, the finish work around it can be much larger than expected — plaster, trim, floor patching, ceiling patching, and rerouted switches all add up.
A wider cased opening will often do the job a full wall removal is supposed to do. It brings in more light, it improves the connection between rooms, and it still leaves enough wall for cabinets, switches, outlets, trim, and structure.
Most of the hidden cost in this work comes from what the new beam pulls with it: ceiling patching, floor patching, trim repair, electrical relocation, lighting changes, and the storage that gets given up when the wall disappears.
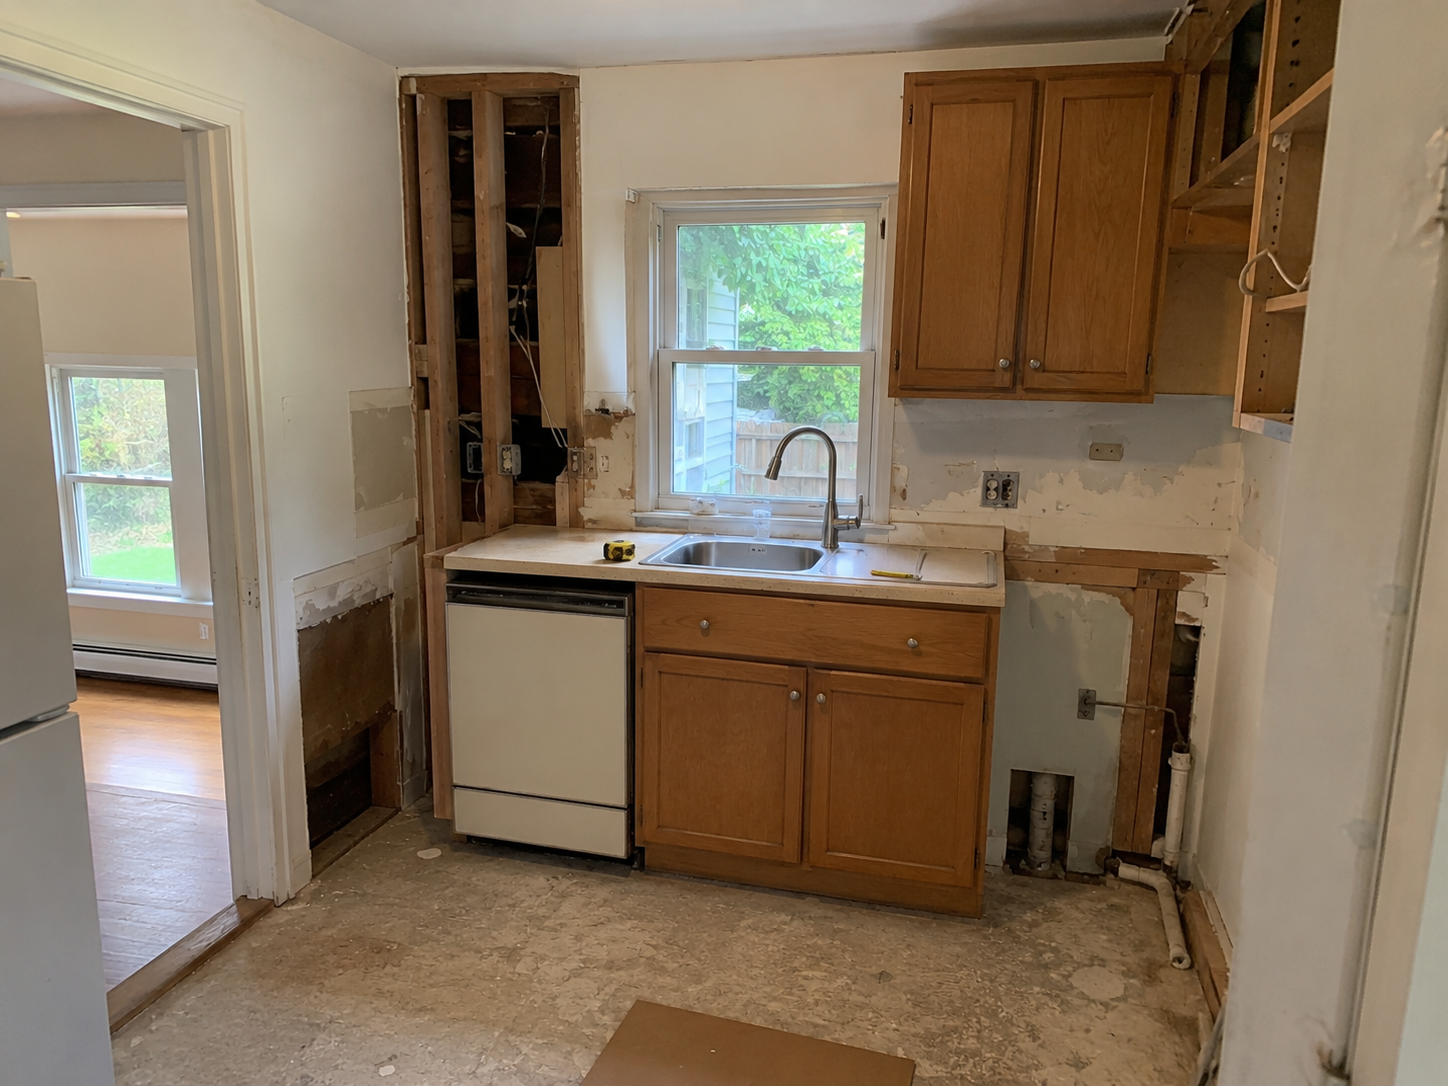
Before You Remove a Wall, Count the Storage You Are Losing
Removing a kitchen wall almost always feels like the right idea until the storage math shows up. A small Cape kitchen typically stores dishes, glasses, spices, pantry items, cleaning supplies, baking pans, trash, recycling, and small appliances in the same few cabinet runs.
Take one of those runs out, and the kitchen looks more open while holding much less of what the household actually uses every day.
Count the lost storage before pricing the opening. Not in general terms — count actual cabinet boxes, drawers, and upper cabinets, and figure out on paper where plates, pans, trash, dog food, cereal, and the coffee maker are going to go.
If the new layout can't answer those questions, the open kitchen becomes a cleaner-looking storage problem.
Appliance Size Can Break the Whole Plan
Oversized appliances punish small Cape kitchens more than almost any other single decision. A standard 30-inch range fits most old Cape openings. A 36- or 48-inch commercial-style range can steal prep counter and create venting problems that weren't there before.
A full-depth refrigerator can stand proud of the cabinets by two or three inches and narrow the aisle by the same amount. The dishwasher needs floor space beside the sink, but that's also the wall where the room may want drawers or a trash pullout.
Counter-depth refrigerators help with circulation, but they cost more and hold less. A smaller range often makes more sense than a larger one when it leaves a usable landing zone next to it. Wall ovens and microwave drawers can sound like a solution until the cabinet math catches up with the plan.
In a small kitchen, the right appliance is usually the one that still lets the rest of the room work after it's installed.
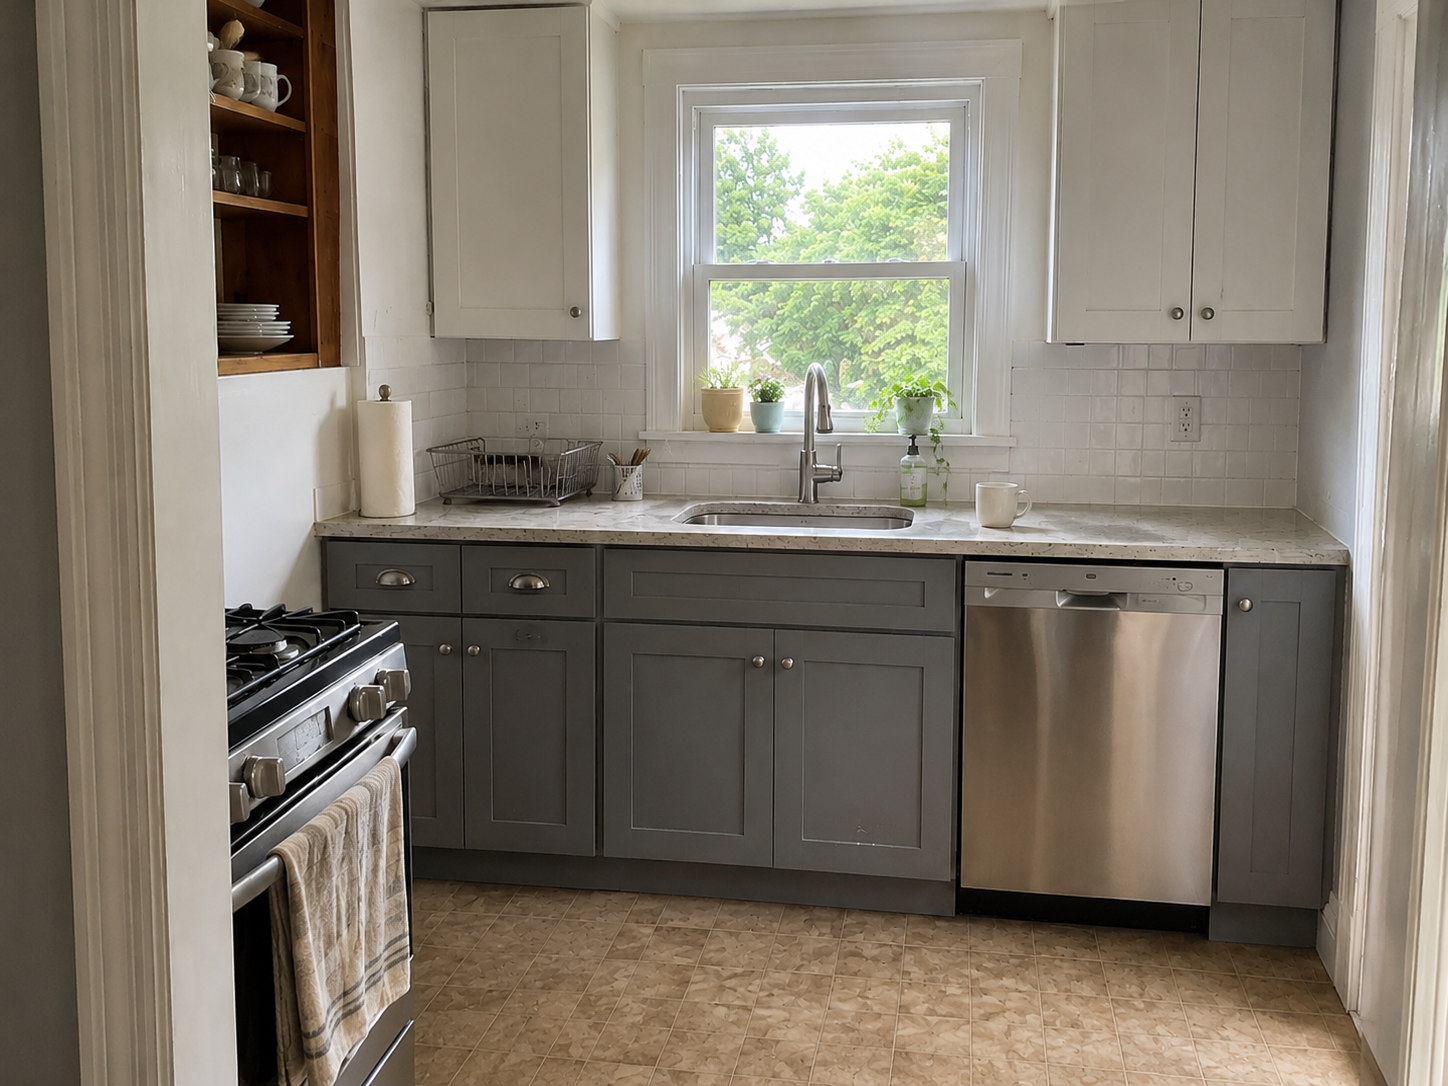
The Actual Numbers: NKBA Clearances and How Real Appliances Fit
Most planning arguments in a small Cape kitchen get settled by two sets of numbers: the National Kitchen and Bath Association (NKBA) planning guidelines, which set the minimum clearances a functional kitchen needs, and the real dimensions of standard appliances, which decide what actually fits into those clearances.
Small kitchens fail more often because the appliance math wasn't done than because the design was ugly.
Work aisle width (NKBA Guideline 6). The clear width of a work aisle — measured between the fronts of counters, tall cabinets, and appliances — should be at least 42 inches for one cook and at least 48 inches for two cooks.
In a small Cape kitchen with one cook, 42 inches is the floor, not the target. Anything less makes it hard to open the dishwasher, stand at the sink, and let someone else walk through at the same time.
Walkway width (NKBA Guideline 7). A walkway that passes through the kitchen without being a work zone should be at least 36 inches wide. If two walkways are perpendicular, one of them should be at least 42 inches wide.
This is what matters when the kitchen sits between the front door, the dining room, and the back door — the walking path can't drop below 36 inches at any pinch point.
Refrigerator landing (NKBA Guideline 16). There should be at least 15 inches of landing counter on the handle side of the refrigerator, or 15 inches of counter directly across the aisle within 48 inches of the door.
This is the first rule that gets broken in a small Cape kitchen, because the refrigerator often ends up against a doorway or a corner cabinet. Groceries with nowhere to go get set on the floor.
Sink landing (NKBA Guideline 11) and prep area (Guideline 12). The sink needs at least 24 inches of counter on one side and 18 inches on the other, plus a continuous 36-by-24-inch prep area right next to it.
Under a small Cape's sink window, meeting both rules usually forces the dishwasher onto one specific side, which then locks in most of the rest of the plan.
Dishwasher clearance (NKBA Guideline 13). The nearest edge of the dishwasher should sit within 36 inches of the nearest edge of the sink, and there should be at least 21 inches of standing clearance in front of the dishwasher when the door is open.
This one interacts directly with the 42-inch work aisle: a standard dishwasher door opens about 24 inches into the room, so 24 plus 21 equals 45 inches of aisle needed with the door open.
That's part of why the 48-inch two-cook aisle rule exists — one cook plus one open dishwasher door already uses most of a 42-inch aisle.
Cooktop landing (NKBA Guideline 17). The range or cooktop needs at least 12 inches of counter on one side and at least 15 inches on the other. In an island or peninsula install, the counter behind the cooktop should extend at least 9 inches past the burners.
Clearance above the cooking surface is 24 inches to a protected noncombustible surface (a range hood) or 30 inches to an unprotected combustible surface (a wood wall cabinet).
U-shape clearance. If the plan is a U-shape, the opposing counter runs should sit at least 60 inches apart. A lot of small Cape U-shapes fail this one — which is exactly why they end up feeling too tight even when the finishes are fresh.
Then the real appliance dimensions those clearances have to accommodate. A standard base cabinet is 24 inches deep, and a countertop with a normal overhang is closer to 25-1/2 inches.
A standard full-depth refrigerator is 32 to 36 inches deep with the door closed and even more with the handle — meaning it stands 6 to 10 inches proud of the cabinets around it and eats into aisle width.
A counter-depth refrigerator runs about 24 to 25 inches deep (roughly flush with the cabinets) but usually holds 20 to 30 percent less. A standard range is 30 inches wide; commercial-style ranges start at 36 inches and go up.
A standard dishwasher is 24 inches wide, with the door opening about 24 inches into the aisle. The math is unforgiving on a small footprint. A full-depth refrigerator plus a 42-inch aisle gives roughly 32 inches of clear passage after the refrigerator is in place, and that's before anyone opens a door.
The NKBA guidelines are recommendations, not code, and older Cape kitchens will fail several of them at once. The goal isn't to force every rule to apply. It's to know which one is being broken, and by how much, before the cabinet order goes in.
The Three Things to Mock Up Before Ordering Cabinets
Before signing a cabinet contract or paying a deposit, three quick mockups on the actual floor of the actual room will catch most of the layout mistakes that show up later.
- Mock up the refrigerator depth. Tape the real depth on the floor, handle included, and check that the door swings without hitting a wall, an appliance, or a person standing at the sink.
- Mock up the dishwasher door. Open it in the plan and ask where the trash pullout, dish storage, and the person's feet are supposed to go while it's open.
- Mock up the wall opening or peninsula. Tape the edge on the floor and walk the normal path from the back door to the dining room. If it feels tight in the tape, it will feel tighter with cabinets.
None of that takes any real time or money, and a taped layout that already feels bad in an empty room will feel worse once the cabinets and appliances are in — and by then the change costs thousands.
Small Cape Kitchen Layouts That Actually Work
The right layout depends on the doorway, the window, the stair, and the appliance walls. Most small Cape kitchens still fall into a few practical patterns.
| Layout | Best when | Watch for |
|---|---|---|
| Galley | The kitchen is narrow and the sink, range, and refrigerator can stay in a clear line. | Traffic cutting through the work zone. |
| L-shape | The sink window controls one wall and the second wall can hold range or storage. | Dead corners and poor landing space. |
| Compact U-shape | The room has enough width for the 60-inch opposing-run clearance. | Appliance doors colliding and corners wasting storage. |
| Short peninsula | You want separation, prep space, or storage without a full island. | Blocking the path to the dining room or back door. |
| Rear bump-out | The old footprint can't hold the kitchen without damaging the rest of the layout. | Foundation, roof tie-in, siding, drainage, and cost. |
The best small Cape kitchen layout usually reduces conflicts rather than adding features.
When a Small Rear Bump-Out Beats a Better Cabinet Plan
Sometimes the footprint itself is the real problem, and no cabinet redesign will fix it. If the stair, the window, the plumbing wall, and the doorways all fight the kitchen from inside its existing walls, rearranging cabinets just relocates the frustration.
A small rear bump-out — three to six feet of new floor — can add enough depth for a real sink wall, an eating area, a mudroom edge, a pantry, or a family traffic path that finally stops crossing the cooking zone.
Bump-outs aren't cheap. They pull in foundation work, roof framing, siding, new or moved windows, HVAC changes, electrical work, plumbing, and drainage.
The roof tie-in has to be detailed properly, water has to move away from the house, and the addition can't turn the original Cape into a small front pasted onto a bigger box — the massing of the whole house has to hold together.
If the honest answer is that the old footprint can't hold the kitchen the household needs, a small addition can still be a more useful spend than another cabinet plan the room keeps rejecting.
What Actually Changes in a Small Cape Kitchen Remodel
The strongest small Cape kitchen remodels usually keep more of the original room than people expect. The sink can stay under the window. The room can stay compact. The doorway can stay in more or less the same place.
The improvement comes from cleaner cabinet runs, better drawer storage, brighter surfaces, better task lighting, a smarter refrigerator location, and a work path that no longer crosses itself in the middle of every meal.
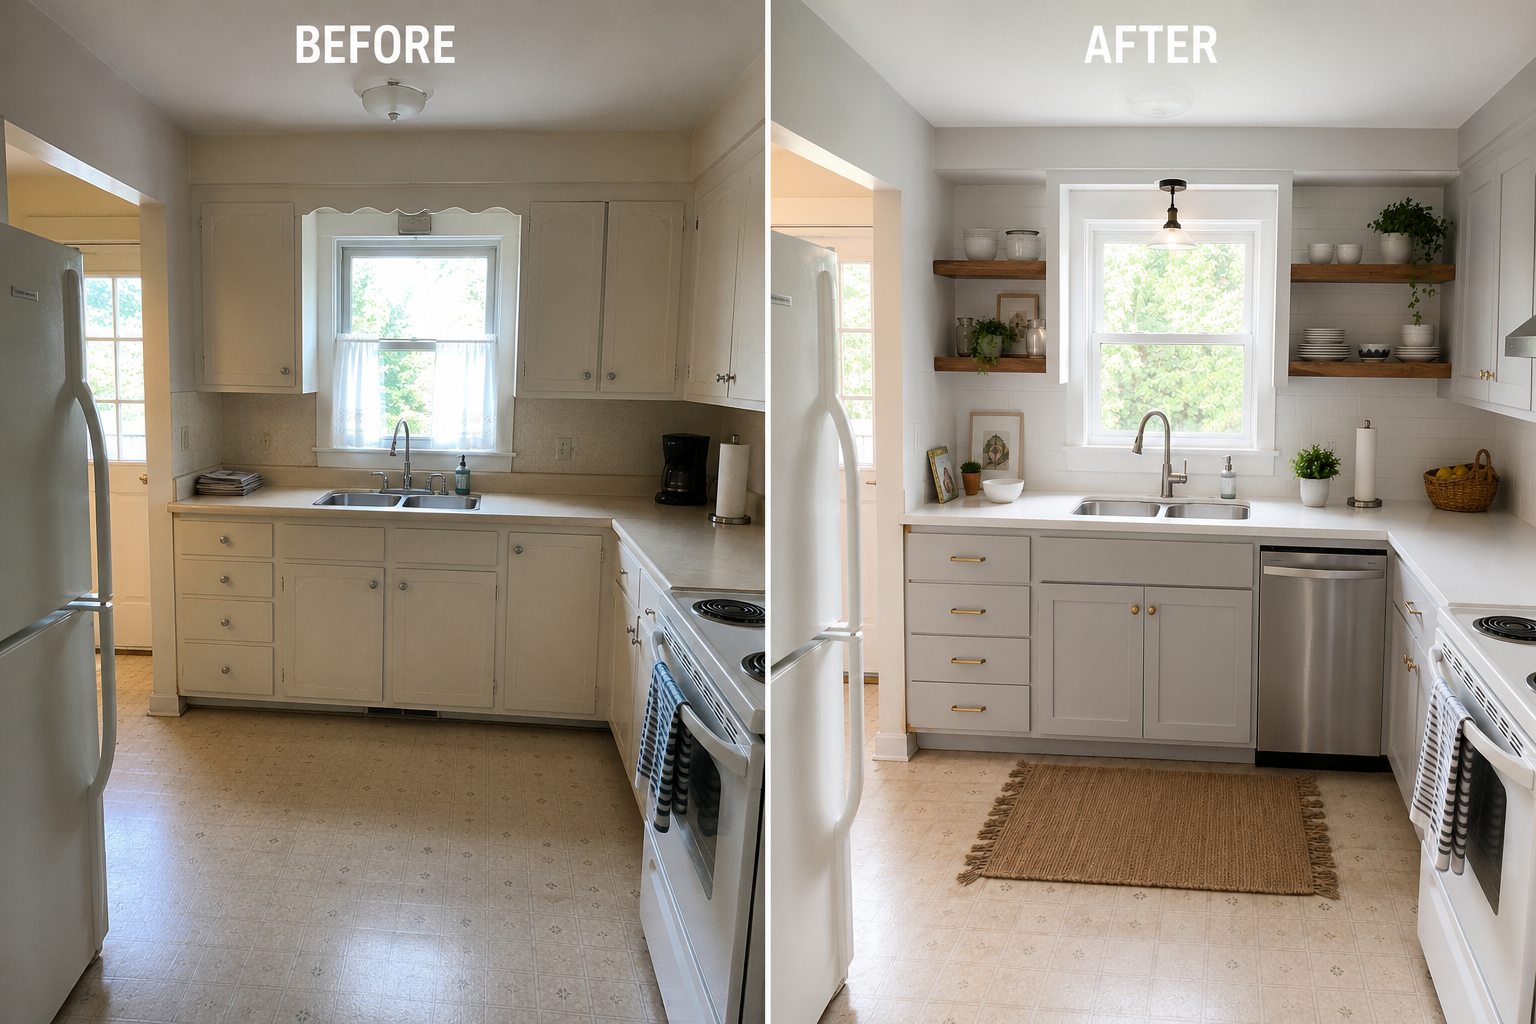
Before-and-after photos can be misleading here, because a photo only shows the finish change.
It doesn't show whether the room now stores pans better, whether the dishwasher opens without trapping someone against the counter, whether the refrigerator has stopped choking the aisle, or whether the wall opening ended up costing more storage than it gave back.
Lighting a Small Cape Kitchen
A small Cape kitchen needs layered lighting, because a single ceiling fixture can't do the whole job on its own. Daylight from the sink window comes first — protect it, and then add task lighting at the counters, the sink, and the range.
Under-cabinet lighting matters more than most decorative pendants, because it's the light that actually lands on the work surface. Pendants over a peninsula can help, but only when they don't hang in the sightline or make a small room feel busier than it already is.
More lumens in a small kitchen isn't automatically better light. What matters is whether each work zone has usable light on the surface where the work happens. Lighting can't rescue a bad layout — it just makes a good one easier to use.
Old Finishes Can Hide Bigger Problems
Older Cape kitchens often carry several previous remodels stacked in the same room. Demolition can uncover flooring layered over more flooring, wallpaper behind cabinets, patched plaster, dead electrical outlets, undersized circuits, strange venting paths, old plumbing routes, or a soft section of subfloor near the sink or the dishwasher.
In houses built before 1978, painted surfaces disturbed during the work may also trigger the EPA's lead-safe rules.
Plan for surprises. A small kitchen leaves less physical room to work around whatever gets uncovered, and fewer places to hide the fixes.
If the wall behind the sink is soft, or the subfloor under the dishwasher is stained, the cause has to be found and fixed before new cabinets go in on top of it.
What a Small Cape Kitchen Remodel Can Cost
These are 2026 U.S. planning ranges, not real quotes. Local labor rates, cabinet quality, appliance choices, permit requirements, hidden damage, old wiring, plumbing moves, lead-safe work, and any wall openings will all move the final number in either direction.
| Scope | Planning range | What is usually included |
|---|---|---|
| Small refresh | $8,000 to $20,000 | Paint, hardware, lighting, faucet, limited flooring, appliance swaps, and minor cabinet work. |
| Compact remodel, same layout | $20,000 to $55,000 | Cabinets, counters, sink, backsplash, flooring, lighting, appliances, and modest repairs without major wall moves. |
| Layout remodel with wall opening | $45,000 to $110,000 | Cabinets, finishes, electrical work, plumbing adjustments, beam or framing work, patching, and lighting changes. |
| Small kitchen plus rear bump-out | $120,000 to $250,000+ | Foundation, framing, roof tie-in, siding, windows, systems, kitchen finishes, and exterior repair. |
The cheaper end of each range assumes the room stays where it is, the plumbing stays close to its current spot, the wiring is manageable, the floor is sound, and no wall opening turns complicated.
The expensive end shows up when the small room is being asked to become a different room — either by taking down walls or by growing out the back.
What to Keep, What to Change, and What to Skip
| Keep | Change carefully | Skip |
|---|---|---|
| Good sink-window daylight | Window size, frame thickness, sill height, trim, and backsplash | Bulky replacement windows that make the room darker |
| A working compact footprint | Door openings, wall removal, and peninsula depth | A full island that blocks movement |
| Useful wall storage | Open shelving, wall openings, taller cabinets | Removing upper cabinets without replacing the storage somewhere else |
| Appliance locations that still work | Refrigerator depth, range venting, dishwasher placement | Oversized appliances that shrink the room |
What a Good Small Cape Kitchen Remodel Should Look Like
A good small Cape kitchen remodel doesn't have to look large. It has to feel clear.
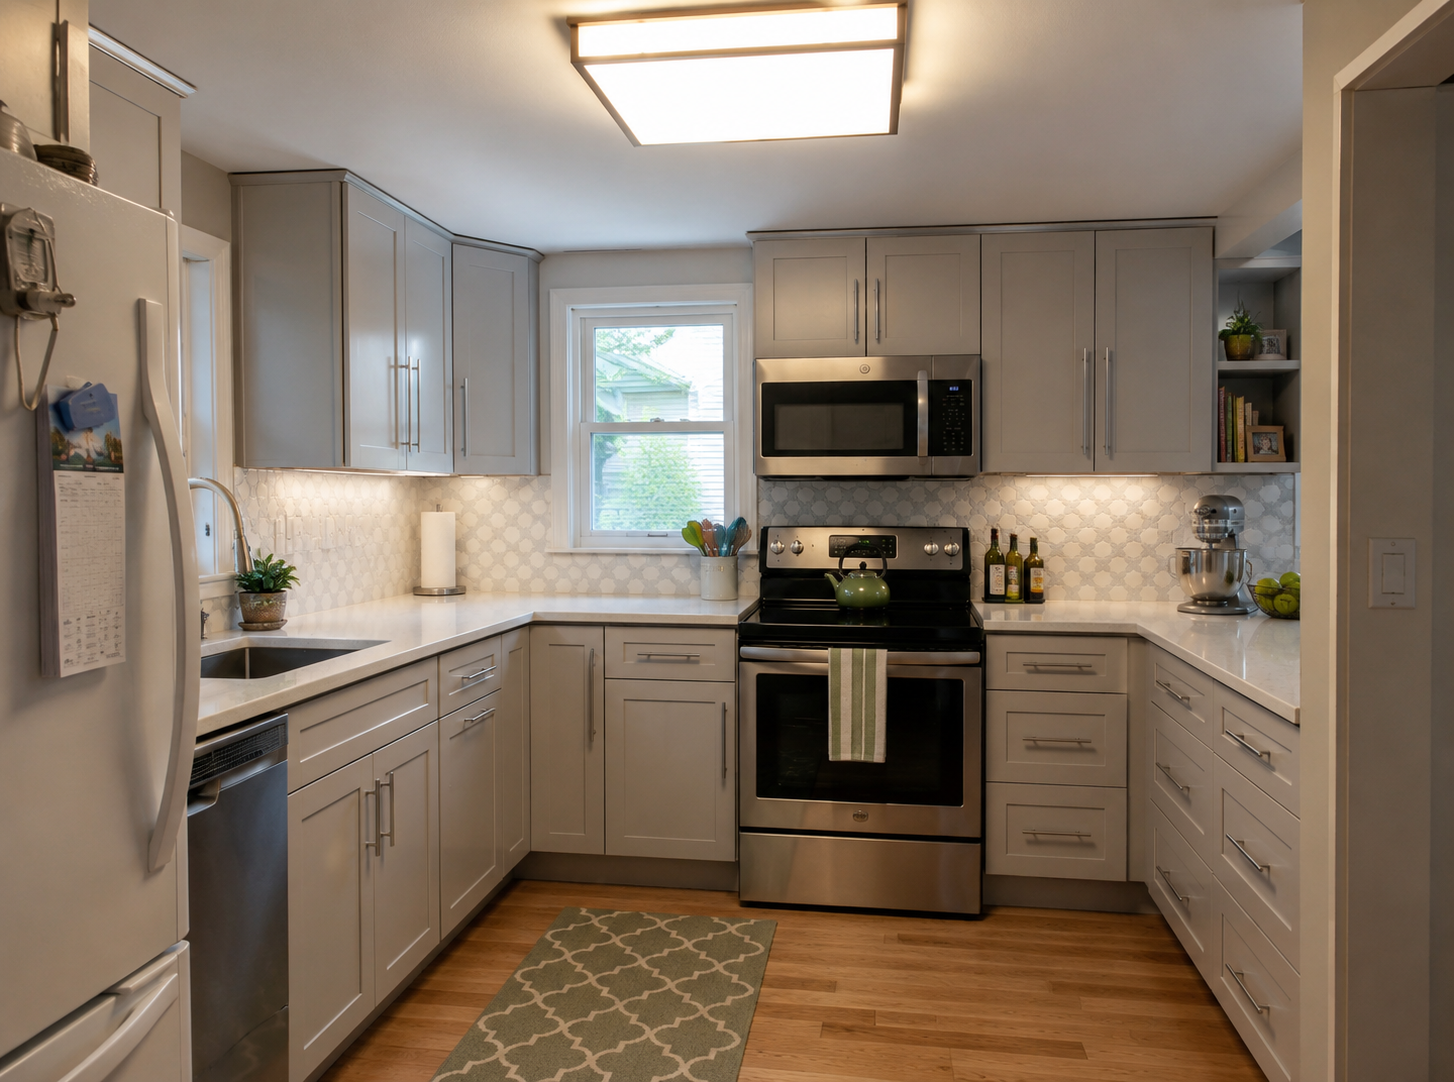
That means the sink has real light on it. The refrigerator doesn't stand proud of the cabinets and choke the aisle. Opening the dishwasher doesn't trap anyone against the opposite counter. The main walking path stays out of the cooking zone.
And the cabinets hold what the household actually uses, without the finishes trying so hard that the room feels smaller than it already is. A kitchen that photographs well matters less than a room that works quietly every day.
The Real Upgrade in a Small Cape Kitchen
Small Cape kitchens aren't the ones people photograph and pin. Most homeowners I meet want to expand out of them, usually at the cost of a bedroom, a mudroom, or a piece of the back yard. My view has shifted after enough of these projects, though.
The strongest small Cape kitchens I've worked in stayed roughly the same size and just got smarter about the space they already had. The room kept its shape, the daylight stayed protected, and the old sink wall stayed where the house had always wanted it to stay.
What changed was how the room used its own corners, its heights, and its own walls — repurposing storage the original layout had never taken full advantage of.
Paint and plumbing help along the way, and new hardware is a nice finish, but what actually turns a small Cape kitchen into an upgrade is usually a preservation move: putting the room back to being itself, only sharper.
What to Check Before Hiring Anyone
A contractor or kitchen designer working on a small Cape kitchen needs to understand old-house layout constraints, not just cabinets and finishes. A few questions worth asking before signing anything:
- Does the new layout keep the sink, the dishwasher, the refrigerator, and the range usable at the same time?
- What storage gets lost if a wall is opened, and where does that storage go instead?
- How will the range vent to the outside, and where does the duct run?
- What happens if old wiring, lead paint, plumbing surprises, or soft flooring get uncovered mid-job?
- Does the window need repair or replacement before cabinets and backsplash go in around it?
- What is excluded from the bid — patching, painting, permits, appliance installation, floor repair, electrical upgrades, and lead-safe setup?
A strong bid on a small Cape kitchen walks through the sequence of the work: demo first, then plumbing and electrical rough-in, then any framing or beam work, then waterproofing details, then cabinets, then counters, then finishes. A weak bid reads like a shopping list of cabinets, countertops, and tile, with everything in between assumed.
Read This Next
- Cape Cod kitchen remodel
- Cape Cod house remodel
- Cape Cod architecture
- Cape Cod window replacement
- Cape Cod bathroom remodel
FAQ
What is the best layout for a small Cape kitchen?
Usually a galley, an L-shape, a compact U-shape, or a short peninsula. The right answer depends on the sink window, doorways, refrigerator depth, range location, and traffic path.
Can a small Cape kitchen have an island?
Sometimes, but many small Cape kitchens don't have enough clear walking space around one. A peninsula, a rolling work table, or better drawer storage often works better than a forced island.
Should I open the wall in a small Cape kitchen?
Only after checking structure, wiring, plumbing, ceiling patching, floor patching, and the storage the wall was carrying. A wider cased opening often works better than a full wall removal.
What should I fix first in a small Cape kitchen remodel?
The layout, the appliance sizes, the sink window, the traffic path, the ventilation, the electrical capacity, and the storage plan — all before choosing cabinet door style, counters, tile, or paint.
Is a peninsula better than an island in a small Cape kitchen?
Often yes. A short peninsula can add prep space and storage without needing clear space on all four sides.
How much does a small Cape kitchen remodel cost?
A light refresh may run about $8,000 to $20,000. A compact same-layout remodel usually lands around $20,000 to $55,000. Wall openings, old-house repairs, plumbing moves, and additions can push the cost significantly higher.
Should I replace the kitchen window during the remodel?
Replace or repair it if it's leaking, rotted, drafty, too small, or badly changed. The window affects daylight, sink placement, exterior trim, backsplash, and cabinet layout.
What makes small Cape kitchens expensive to remodel?
Cost rises when walls move, plumbing shifts, old wiring needs upgrades, layered flooring has to come out, windows need repair, or the old footprint can't support the new layout without an addition.