
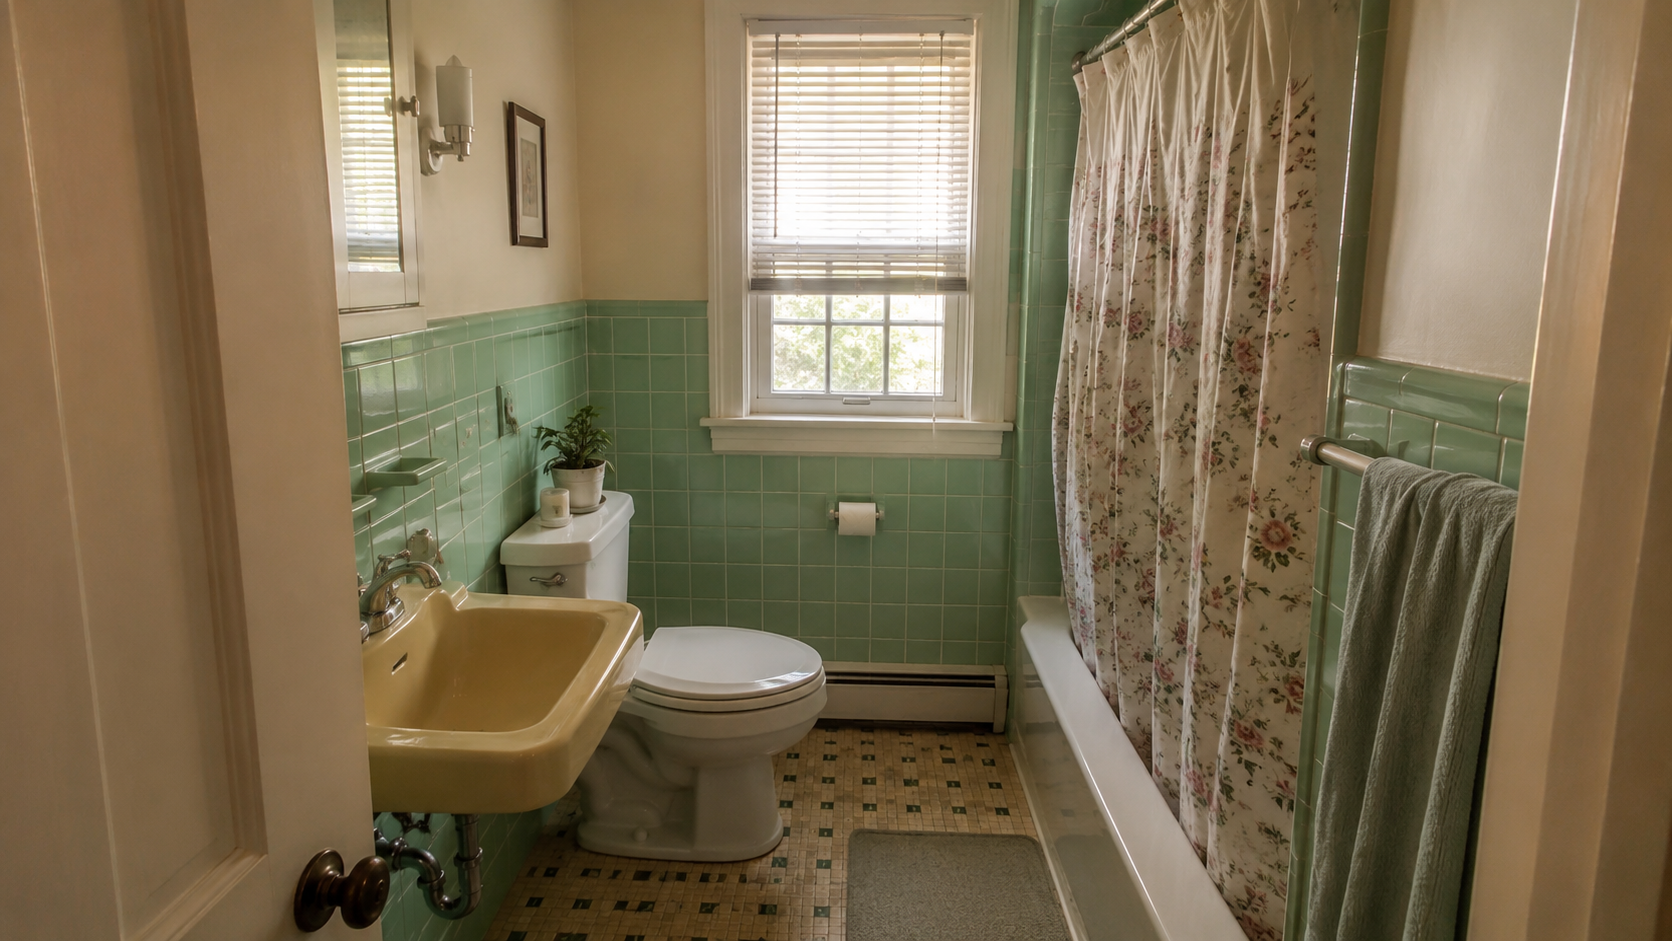
Most Cape Cod bathrooms are small, and most of the important decisions in the room were made decades ago. The window sits where it sits. The plumbing stack was routed to the shortest path, which is usually against one wall and nowhere else. Upstairs, the roof cuts into the ceiling wherever it lands. New tile can make the room look better, but it can't fix a layout that was never checked against headroom, drainage, ventilation, and fixture clearances.
The way to start a Cape Cod bathroom remodel is with what can't move easily, and only then to figure out what should. If the bathroom is part of a larger project, plan it with the Cape Cod house remodel rather than treating it as a separate finish job to bolt on at the end.
Why Cape Cod Bathrooms Are Hard to Remodel
Cape Cod bathrooms are hard because the house is small, the roof cuts into the upstairs, and the plumbing was usually squeezed into whatever spot was cheapest at the time. A first-floor bath often sits beside the stair or kitchen — that was the shortest route for the drain. An upstairs bath may be tucked under a dormer or a slope because no other wall in the house was tall enough. Either way, the room typically has just enough space for the fixtures already in it, and not much more.
The first professional move on any of these rooms is to stop asking what the bathroom should look like and start asking what the room will actually let you do without creating a worse problem in the process.
Start With the Layout, Not the Tile
The layout is what really decides whether the remodel works. Before choosing tile, measure the tub or shower wall, the toilet location, vanity depth, window height, door swing, ceiling height, and the route for the drain and vent. Then walk through what happens when a real person stands at the sink, steps out of the tub, opens the door, or sits on the toilet.
In a small Cape bathroom, an inch matters. A vanity two inches too deep makes the toilet feel trapped. Shower doors sometimes swing straight into the toilet. Tubs get placed under the only decent window in the room. A pocket door can help in some layouts, but only if the wall it slides into is free of pipes, wiring, and framing you can't move. In a bathroom this small, a layout that works quietly in the morning matters more than one full of expensive fixtures.
What Usually Has to Stay Where It Is
In an older Cape, the toilet is usually the cheapest fixture to leave alone. Moving it means changing a larger drain, working around floor framing, and often opening the ceiling in whatever room sits below. The tub or shower is often tied to the only wall that's deep enough to hide the plumbing. The vanity is normally the easiest fixture to swap, though even that depends on the window, the door swing, and how much clear wall the room actually has.
A bathroom remodel doesn't automatically get better by moving every fixture in it. The smarter job often keeps the toilet and tub roughly where they already are, then puts real money into the vanity, storage, lighting, tile, ventilation, and clearances around them. Money spent where it changes how the room actually works matters more than money spent making the plan look newer on paper.
First-Floor Bathrooms Have Their Own Limits
A first-floor Cape Cod bathroom usually has one thing going for it: full-height walls. That helps with mirror placement, shower height, storage, and lighting. But the limits are just different from the ones upstairs. The room is often narrow, the door swings badly, the tub runs under the only window, and the bathroom sits next to the kitchen or the stair where every inch is already doing another job.
If the first-floor bathroom is the only bathroom in the house, a long shutdown becomes a real issue. A full gut can leave the household without a working toilet or shower for weeks unless the contractor stages the work or the family has somewhere else to stay. That drives cost, too — temporary plumbing, weekend labor, faster sequencing, or renting somewhere else for a month can turn a normal bathroom remodel into a much more expensive project.
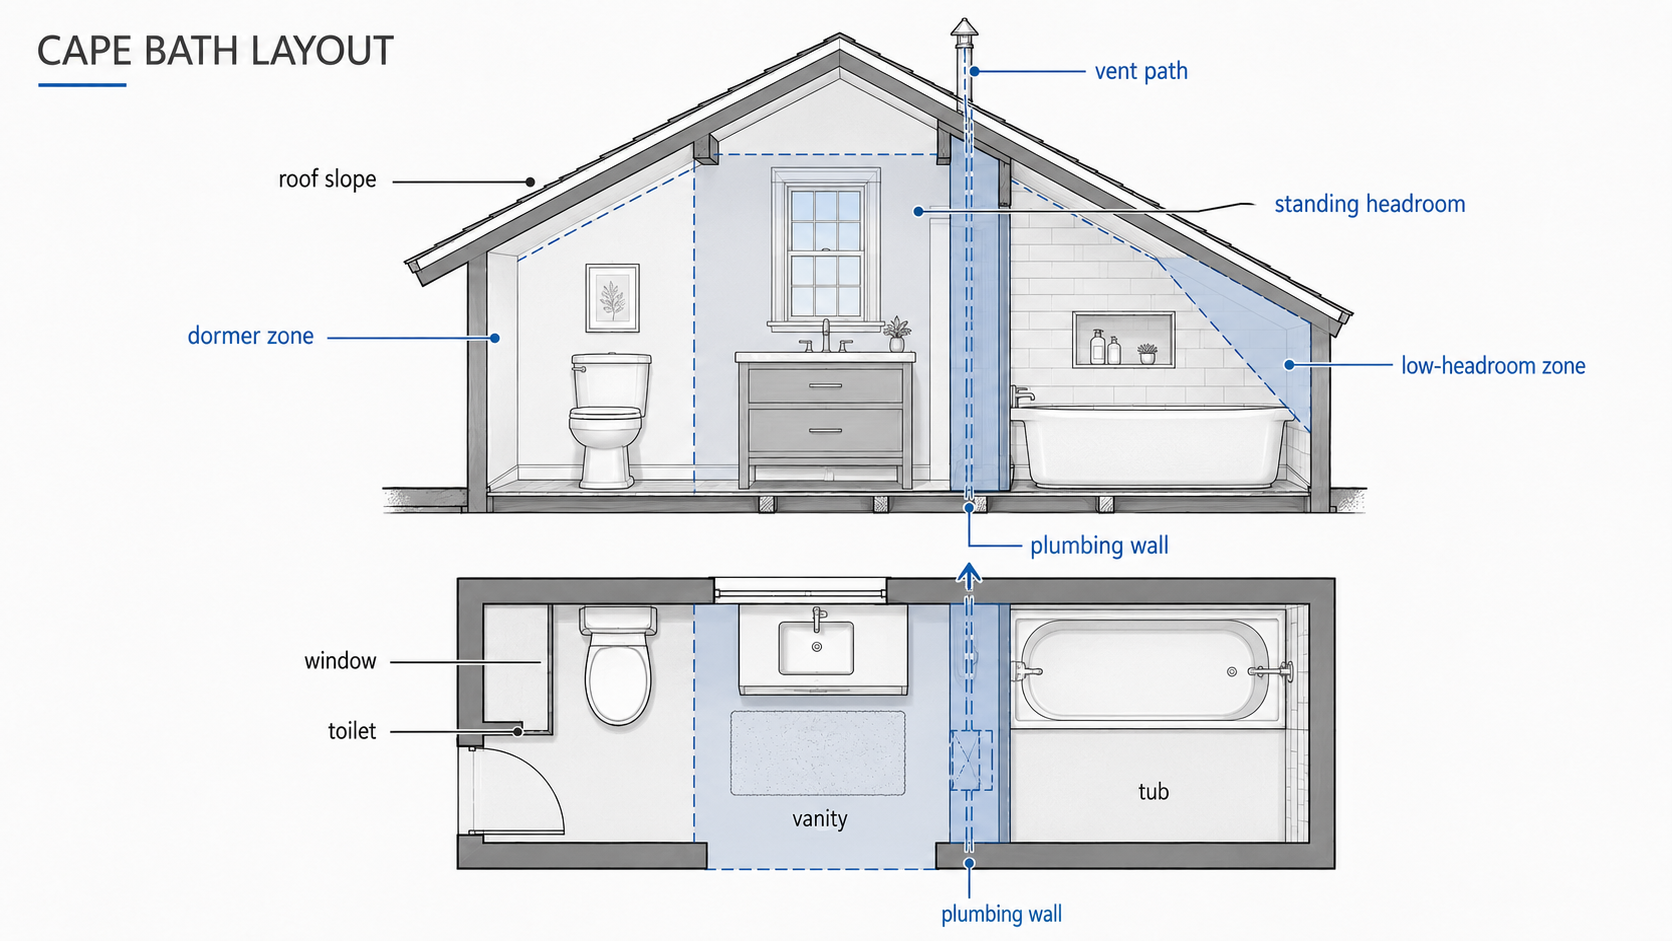
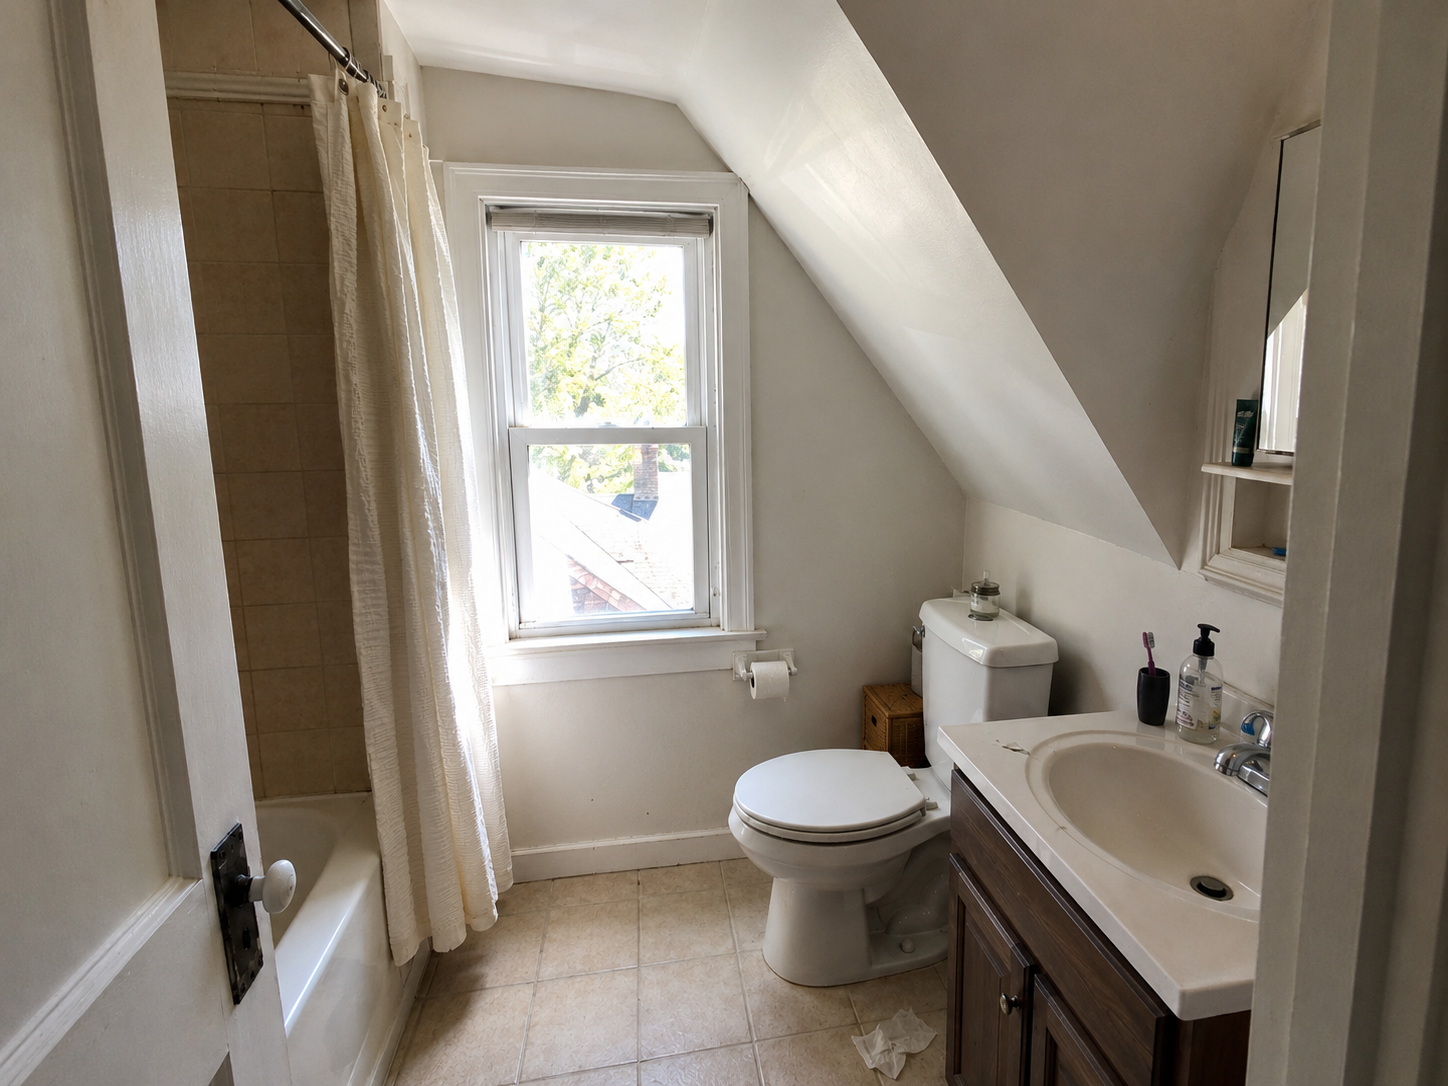
Upstairs Bathrooms Fight the Roof Slope
Upstairs is where Cape Cod bathrooms get harder. The roof slope decides where anyone can actually stand. A toilet can sometimes live under a lower slope, since a person sitting on it doesn't need much headroom. A tub tucked against a short knee wall can work the same way. The vanity is pickier, since somebody has to stand at the sink with room to lean forward, and the shower is pickier still — it needs full-height space for the person, the showerhead, the waterproofing detail behind the wall, and either the door or the curtain.
Drawings can be misleading here, because the floor might look big enough on paper while the usable standing area is much smaller. Before an upstairs bathroom layout gets committed to paper, mark the low-headroom zone directly on the subfloor — anywhere the ceiling drops below 6'-8" or so. Then decide where each fixture is actually going to get used by a real person.
If the upstairs bathroom needs a dormer to work, that decision has to come early in the project. Dormers aren't a bathroom accessory — they change the roofline, the exterior, the flashing, the insulation detailing, the cost, and sometimes the whole look of the house from the street.
Where the Toilet, Tub, Shower, and Vanity Actually Fit
The best Cape Cod bathroom layouts are usually the modest ones. A tub-shower combination can be the right answer if the room is narrow and one long wall already has plumbing on it. A walk-in shower can work well if the room has enough full-height space and the glass door doesn't crowd the toilet. Compact vanities often work better than furniture-style pieces in a tight room, even if they look less exciting in photos.
Each fixture has its own basic need. The toilet needs clear space to the sides and in front. A vanity needs room for someone to stand and lean forward at the mirror without hitting the sink. A tub or shower needs safe entry and exit, and the door has to open without hitting the fixture you just paid to install. When all four fixtures are fighting for the same square footage, the fix is usually to shrink the ambition rather than raise the budget — a smaller vanity, a tub instead of a large shower, a recessed medicine cabinet, or a different door swing usually solve more than another few hundred dollars of tile.
What the Code Actually Requires in a Small Bathroom
Most fixture placement arguments in a Cape Cod bathroom get resolved by two sections of the IRC: R305 (ceiling height) and P2705 (fixture clearances). These are the numbers a plumbing inspector will actually check at final inspection, and they explain why some tight Cape layouts you see in old photos wouldn't be legal today.
Ceiling height. The 2021 IRC (R305.1) requires 7 feet of finished ceiling in habitable rooms, but Exception 2 lets bathrooms and toilet rooms drop to 6 feet 8 inches, measured at the center of the front clearance area for the water closet, bidet, or lavatory. Showers and tubs with a showerhead still need 6'-8" of clear headroom over at least a 30-inch by 30-inch area at the showerhead. That's exactly why some upstairs Cape bathrooms can legally work under a slope — the code allows the ceiling to drop over the toilet and sink as long as the fixtures can still be used for their intended purpose, but the shower needs a full-height zone. When someone says a Cape bathroom "won't fit upstairs," what they usually mean is that the showerhead can't get 6'-8" over a 30x30 area without a dormer.
Toilet clearance. IRC P2705.1 requires 15 inches minimum from the centerline of the water closet to any side wall, partition, vanity, tub, shower, cabinet, or other obstruction, and 21 inches minimum of clear space in front of the bowl. Measurements are taken to finished surfaces, not framing — a wall that's 15-1/2" clear at the stud can drop to 14-3/4" once backer board and tile go in, and fail. Older Cape bathrooms often fail the 15" side clearance because a bulky vanity got pushed in tight against the toilet during a 1980s remodel, and a new permitted job legally has to correct that.
Shower and tub. IRC P2708.1 sets the shower floor minimum at 900 square inches, with a 30-inch minimum interior dimension in each direction. Practically, that means a 30x30 shower is the code floor but very hard to actually use — 32x32 or 36x36 is closer to comfortable. The shower door or opening needs 24 inches of clear space in front of it. There's no specific IRC front-clearance number for a bathtub, but a standard alcove tub is 60 inches long and 30 to 32 inches wide, and still needs about 24 inches of clear floor in front for anyone to step in and out safely.
Lavatory. The centerline of a lavatory has to be 15 inches minimum from any side wall or fixture under P2705.1 as well, with 21 inches minimum clear in front. This is why swapping a small older sink for a wider modern vanity can sometimes trigger a clearance problem on the toilet next to it — the two fixtures share the same 15-inch measurement.
The code sets a floor, not a target. A layout that just clears every one of these numbers can still feel awful in daily use, and most good designers add 2 to 4 inches to every clearance where the room allows it. The IRC minimums are what keep the bathroom legal. Whether it works is a different question, and it's the one worth spending real design time on.
Local amendments do change some of these numbers. Some New England jurisdictions and the UPC (used in parts of the West Coast) require 24 inches of front clearance for a toilet instead of 21. Always confirm with the local building department before finalizing a layout, especially in an older Cape where the existing bathroom probably wasn't built to any of these numbers in the first place.
When a Dormer Makes Sense
A dormer is worth the cost when it solves a real bathroom problem. It can create standing height for a shower, make a vanity wall usable, add daylight where the room needs it, or turn an awkward upstairs half bath into a full bathroom. But dormers aren't cheap — the roof gets cut and reframed, new flashing goes in at every intersection, the exterior gets patched, insulation details get harder, and every one of those joints becomes a potential leak point ten years from now. So the dormer has to actually earn its place in the project.
The question to ask before pricing one is whether it creates usable headroom exactly where the fixture needs it. If the showerhead can only clear 6'-8" after the dormer goes in, the dormer is doing structural work for the layout. If it only adds a little more light or a bit of exterior symmetry, there are usually cheaper ways to improve the bathroom.
Ventilation Is Not Just a Fan
A bathroom fan on its own isn't a moisture plan for a Cape Cod house. The fan has to be sized to the room's cubic feet, connected to a smooth duct (not accordion flex), and vented all the way to the outside — not into an attic, a knee-wall cavity, a soffit vent, or a piece of roof space that just gets a hole in it. In a Cape, that dumping-into-attic mistake causes real damage, because the bathroom usually sits close to sloped ceilings, dormer knee walls, and small attic pockets where moisture is already hard to control.
The mirror is the easiest diagnostic. If it stays wet for a long time after a shower, the fan is probably weak, noisy, badly ducted, clogged with lint, or just not being run long enough. Peeling paint near the ceiling, musty smells, stained trim, swollen baseboards, and recurring mildew are all moisture symptoms — the finish is the messenger, not the problem.
Fan location matters just as much as fan rating. A fan set on the opposite side of the room from the shower can't pull moisture from where the moisture actually is. A duct that starts smooth and then gets crushed into a joist bay somewhere upstream can sound like it's working fine while moving almost no air. There's also a Cape-specific problem worth mentioning here: a fan duct that runs through a cold, unconditioned attic can grow condensation on its inside walls in winter, which then drips back down to the fan housing and sometimes into the ceiling. Insulating the duct and sloping it slightly toward the exterior cap helps, but this is one of those Cape Cod details where even a properly installed fan setup can still misbehave in January if the attic runs cold enough.
Windows, Privacy, and Light in Small Cape Bathrooms
The bathroom window in a Cape Cod house often does two things at once. It brings daylight and air into a small dim room, and it usually sits either inside the wet zone of the shower or right next to the tub. It can be genuinely useful, or it can be the thing that decides where every fixture in the room has to go, or leaks quietly for years behind new tile.
If the window is old, rotted, drafty, or was replaced badly by a previous owner, that repair has to be scheduled with the Cape Cod window replacement work — before tile goes up. Window size, sill height, trim depth, exterior casing, glass type, and the flashing detail underneath all matter more once the bathroom is opened. A rotted opening covered with backer board and tile isn't fixed. It's a slower failure.
The Bathroom and Kitchen Often Compete for the Same Budget
In a small Cape, the bathroom and kitchen are tied together by plumbing, walls, and timing more often than people realize. Bathroom stacks tend to run near the kitchen, because that's where the drain wanted to go. Upstairs bathroom plumbing usually has to be opened from the kitchen ceiling. First-floor bathrooms share a wall with the kitchen or the stair. If both rooms are due for work, planning them together saves money and headaches — a Cape Cod kitchen remodel and a bathroom remodel done in the same phase can share electrical runs, wall openings, drywall work, and sometimes even the tile order. Doing one room beautifully and then cutting a hole in the ceiling six months later is the expensive way.
Old Tile, Lead Paint, and Suspect Materials Change the Job
A lot of Cape Cod bathrooms were built or remodeled before modern rules on lead paint and asbestos. Painted trim, doors, walls, and windows from before 1978 all fall under the EPA's Renovation, Repair, and Painting rule for lead-safe work if they get disturbed. Old flooring, mastics, ceiling materials, pipe insulation, or wallboard that pre-dates the mid-1980s may also need testing before demolition if there's any reason to suspect asbestos. Testing and containment cost a lot less before the demo hammer starts swinging than they do afterward, once the dust has already spread into a hallway, a bedroom, or an HVAC return.
What Gets Exposed After Demolition Starts
Once the bathroom is opened up, the real project often shows itself. Common finds include rotten subfloor around the toilet flange, stained framing behind the tub apron, layers of old plumbing patches, hidden shutoff problems, ungrounded wiring, fan ducting that never actually reached the outside, patched plaster, stacked layers of old flooring, and framing that just doesn't line up with the new plan. Water damage around a tub or toilet can't be covered up with new backer board and tile — if the floor is soft, the wall smells musty, or the tub apron shows staining, the source of the water has to be found before anything gets closed up. Otherwise, all the new tile is buying is a slower and more expensive version of the same leak.
What a Cape Cod Bathroom Remodel Can Cost
These are 2026 U.S. planning ranges, not real quotes for a specific project. Regional labor rates, access, fixture quality, hidden damage, lead-safe work requirements, plumbing moves, electrical upgrades, and whether the roof or a dormer is involved will all move the final number quickly.
| Scope | Planning range | What is usually included |
|---|---|---|
| Light bathroom refresh | $5,000 to $15,000 | Paint, hardware, lighting, mirror, faucet, minor vanity work, limited repair, no major plumbing move. |
| Small full bathroom remodel | $18,000 to $45,000 | New vanity, toilet, tub or shower work, tile, fan, lighting, plumbing fixture updates, and finish repair. |
| Layout remodel | $40,000 to $85,000 | Fixture relocation, plumbing changes, electrical upgrades, floor repair, wall repair, waterproofing, and new finishes. |
| Upstairs bath with roof or dormer work | $75,000 to $180,000+ | Dormer or roof work, framing, plumbing runs, ventilation, insulation, windows, waterproofing, and full finish work. |
The line item that actually hurts is rarely the toilet or the faucet — it's the plumbing route, the rotten subfloor, the shower waterproofing membrane, the fan duct running through the attic, the window repair, the roof slope, or the dormer that was needed to make the layout legal and usable in the first place. Ten percent contingency is thin on any old bathroom. Fifteen to twenty percent is more realistic once the project opens up floors, walls, ceilings, old tile, or roof-slope areas that haven't been touched since the house was built.
What to Keep, What to Change, and What to Skip
The general rule for a Cape Cod bathroom: keep what already makes the room work, change what causes moisture, clearance, safety, or access problems, and skip the upgrades that look good in a magazine photo but make a tight bathroom harder to use every day.
| Keep | Change carefully | Skip |
|---|---|---|
| Useful window light | Window trim, privacy glass, sill waterproofing | Covering a bad window with tile and hoping it stops leaking |
| Fixture locations that still work | Toilet, tub, shower, vanity moves | Moving drains just to make the plan look newer |
| Full-height standing zones | Showers under slopes, dormer plans | Forcing a shower where the roof makes it uncomfortable |
| Simple waterproof assemblies | Tile showers, tub surrounds, old wall repair | Decorative finishes over wet or soft framing |
What a Good Cape Cod Bathroom Remodel Looks Like
A good Cape bathroom remodel doesn't have to look expensive. It should feel dry, bright, easy to clean, and properly fitted to the room it's in. The toilet shouldn't feel jammed against the vanity. The vanity shouldn't block the door. The shower should have usable headroom for whoever actually lives there. The window should bring light in without creating either a leak point or a privacy problem for the neighbors. And the fan should actually pull moisture out of the room, not just make noise.
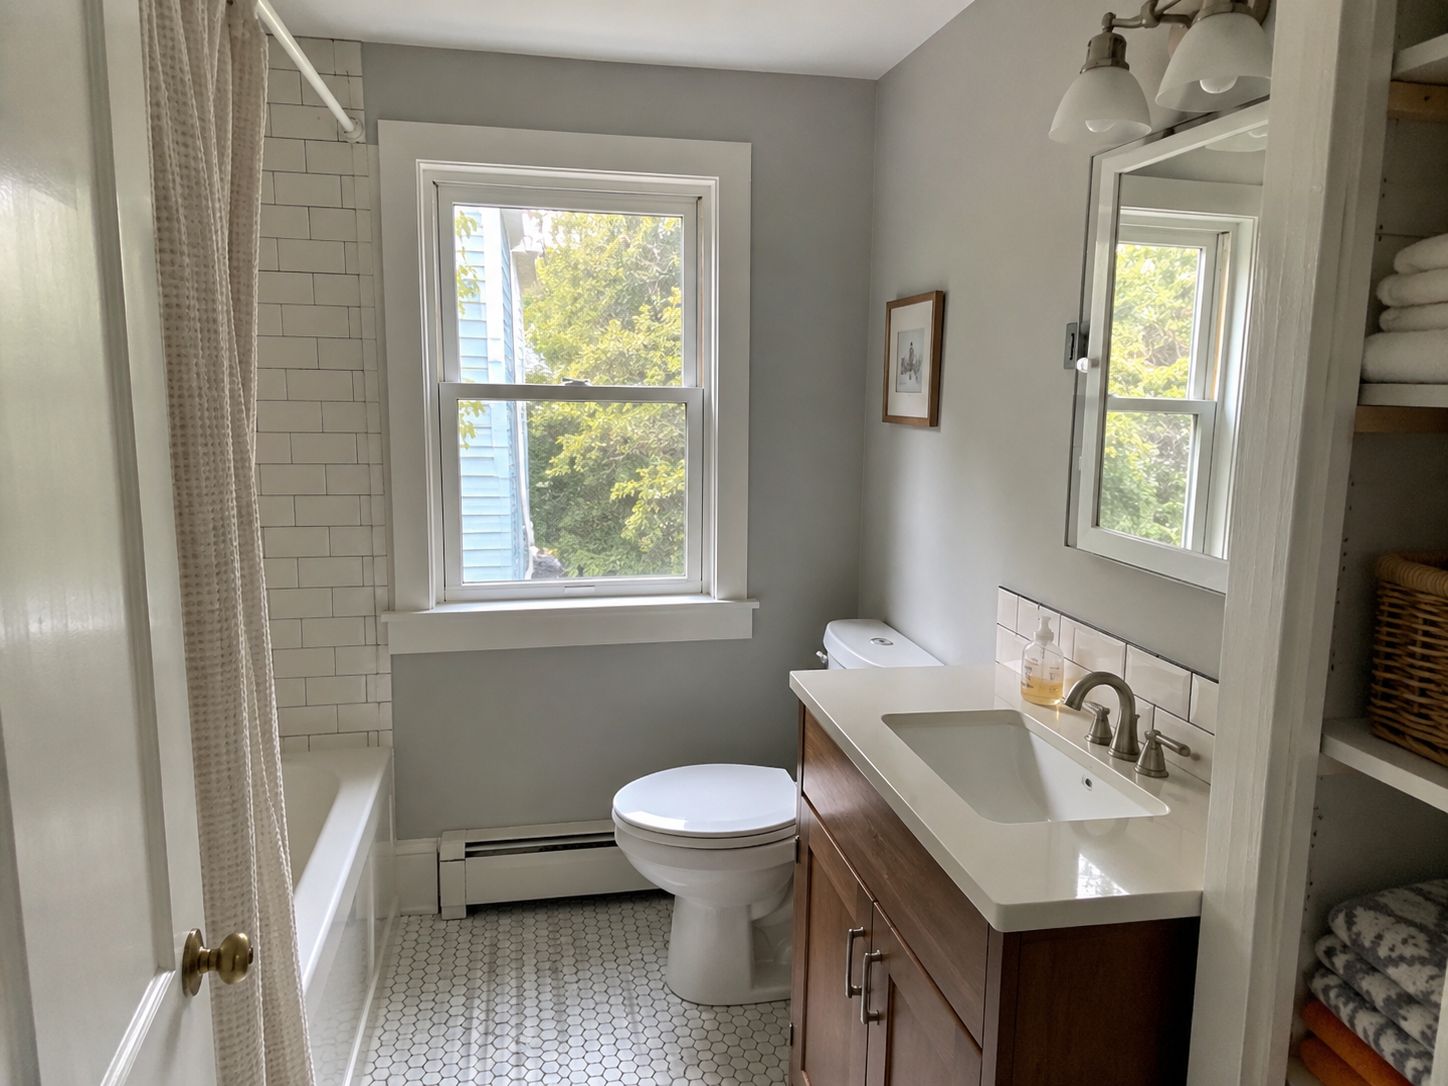
The best remodels of Cape bathrooms are usually the ones that don't call attention to themselves. The room still reads like it belongs in a modest older house, but it works better every day than it did the day before.
Before and After Photos Can Hide the Expensive Part
Bathroom before-and-after photos can be misleading, because a good photo only shows surfaces. It doesn't show the rotten subfloor repair, the corrected toilet flange, the new shutoff valves, the fan duct that finally reaches the outside, the lead-safe containment setup, the waterproofing membrane behind the tile, the plaster repair, the ceiling patch downstairs, or the framing work that had to happen before the shower could fit. Use finished-room photos to judge the feel of a bathroom, not to estimate what a similar-looking project would cost, unless you know exactly what changed behind the walls.
What to Check Before Hiring Anyone
The right bathroom contractor for a Cape Cod house is more than a tile installer. They should understand old-house plumbing, ventilation duct routing, window repair, subfloor work, sloped-ceiling framing, waterproofing membranes, and how to fit a working layout into a small room. A few questions worth asking before anyone signs anything:
- Which fixtures can stay where they are, and which ones are actually worth moving?
- How will the fan vent to the outside, and where does the duct run?
- What happens if rotten subfloor, old wiring, lead paint, or suspect materials get uncovered mid-job?
- Does the window need repair or replacement before tile and waterproofing go in?
- What's excluded from the bid — permits, patching, painting, electrical upgrades, waterproofing upgrades, asbestos testing, and temporary bathroom arrangements?
A strong bid will explain the sequence of the work — demo first, then plumbing rough-in, then framing corrections, then wiring, then waterproofing, then finishes. A weak bid usually just lists the fixtures and tile that will get installed, and hopes for the best on everything in between.
Read This Next
FAQ
What makes a Cape Cod bathroom hard to remodel?
The room is usually small, and the layout is controlled by old plumbing, a window, a narrow doorway, the stair, or (upstairs) the roof slope. The finish choices are the easy part.
Should I move the toilet in a Cape Cod bathroom remodel?
Only if the layout really needs it. Moving the toilet often means changing a larger drain, opening the floor, working around framing, and repairing the ceiling in the room below.
Can you put a bathroom upstairs in a Cape Cod house?
Sometimes, but the roof slope, headroom, plumbing route, venting, and window placement all have to work. A dormer may be needed if the shower or vanity can't fit in full-height space.
Is a tub or shower better in a small Cape Cod bathroom?
It depends on the room. A tub-shower combo can fit well along a long wall. A walk-in shower can work better if there's enough standing height and the door or glass doesn't crowd the toilet or vanity.
Why does ventilation matter so much in a Cape Cod bathroom?
Many Cape bathrooms sit near roof slopes, dormers, knee-wall spaces, or small attic pockets. Bad ventilation traps moisture where it causes peeling paint, musty smells, mold risk, and hidden framing damage.
How much does a Cape Cod bathroom remodel cost?
A light refresh may run around $5,000 to $15,000. A small full remodel often lands around $18,000 to $45,000. Layout changes, upstairs work, dormers, plumbing moves, and hidden damage can push the number much higher.
Should I replace the bathroom window during the remodel?
Replace or repair it if it's leaking, rotted, drafty, badly placed, or sitting in the shower zone. The window opening should be fixed before tile, trim, and waterproofing go in around it.
What should I check before starting demolition?
Check fixture locations, shutoffs, venting, window condition, subfloor softness, old paint, suspect flooring or mastic, and whether the bathroom is the only working one in the house.
Sources used for this article
- 2021 IRC Section R305.1: Minimum Ceiling Height
- 2021 IRC Section P2705.1: Installation of Fixtures
- U.S. EPA: Lead Renovation, Repair and Painting Program
- U.S. EPA: Protect Your Family from Exposures to Asbestos
- U.S. Department of Energy: Air Sealing Your Home
- U.S. Department of Energy: Insulation
- JLC: 2025 Cost vs. Value Report