


A Cape Cod basement isn’t empty space. It’s already doing a job.
Most Cape Cod basements aren't blank rooms waiting for drywall. They're small, awkward service spaces already doing a job: running the furnace, the water heater, the laundry, and half the house's mechanical lines through a footprint that was never built to be a living room. Renovate one without checking what it's holding together first, and you end up paying twice — once for the finish, and again to undo whatever the first pass covered up.
If this basement is part of a bigger Cape Cod house remodel, plan it alongside the rest of the house. It often controls plumbing runs, heating, electrical routes, and future kitchen or bathroom work more than it looks like from upstairs.
Why Cape Cod Basements Are a Different Job
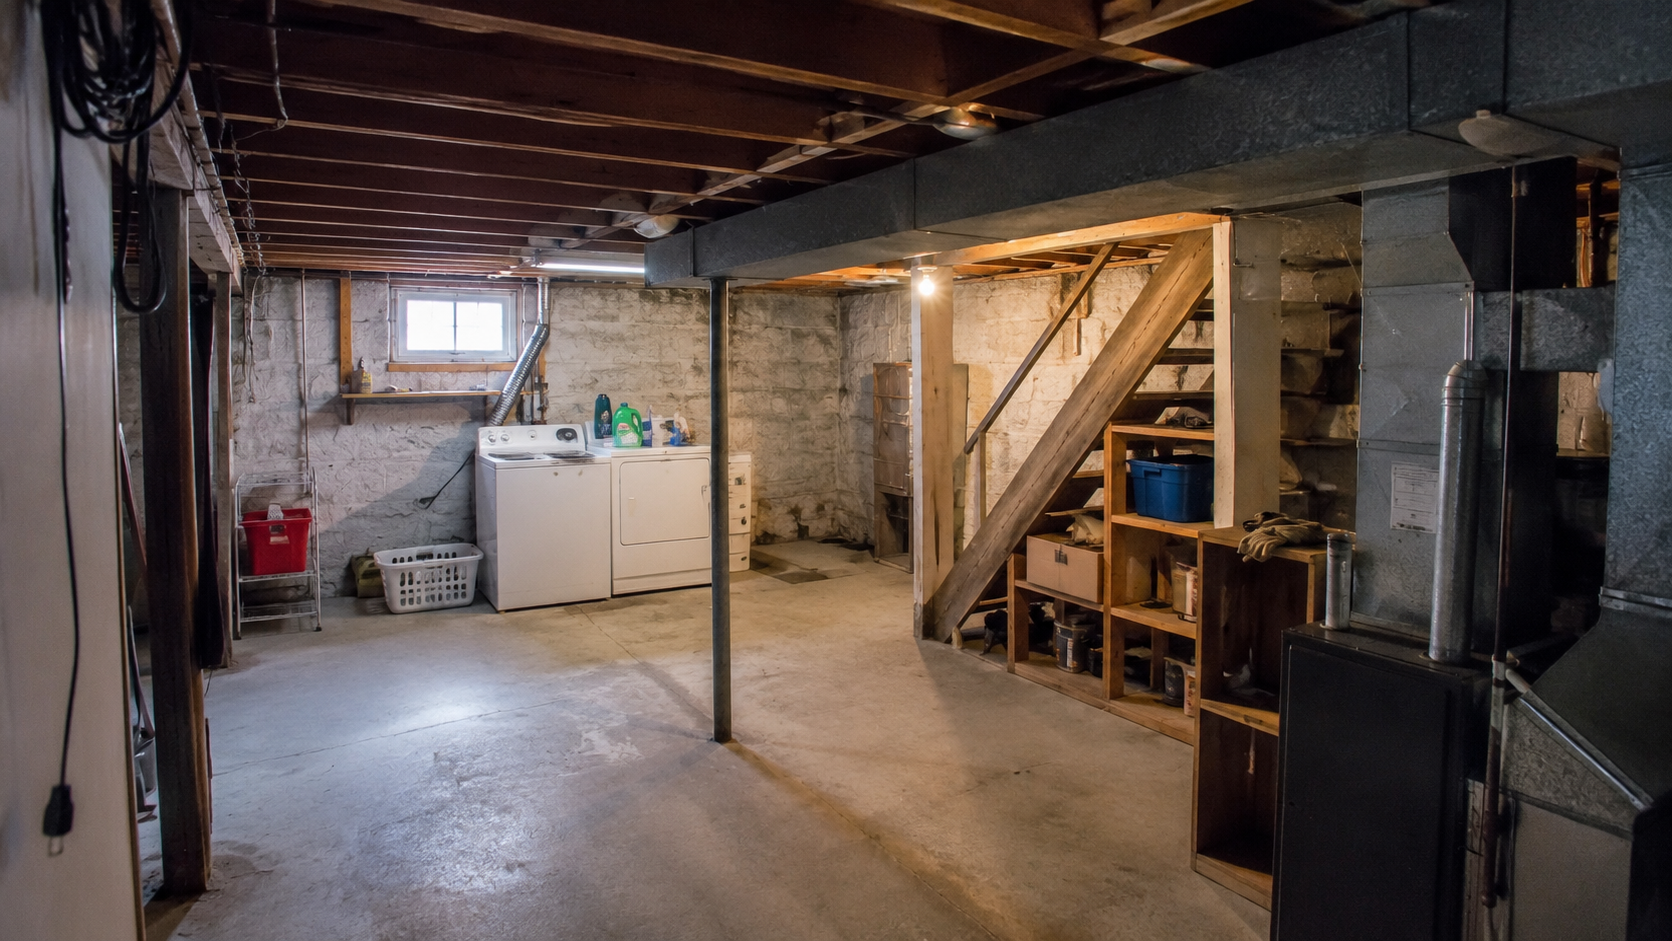
A Cape Cod usually looks compact from the street, and the basement underneath follows the same logic. The footprint is small. The stair is narrow. The furnace and water heater sit near the middle of the room because the house above was built simple and tight, and a chimney base, bearing post, or beam can carve the space into pieces before you've drawn a single wall.
A newer suburban basement usually has wide open spans, real ceiling height, and mechanicals tucked into a planned utility corner. A Cape basement rarely gets that luxury. The real question is what can become finished space without breaking the part of the house that's still doing service work.
Sometimes the honest answer is less exciting than a finished-basement photo. A dry, organized basement with one improved room, real storage, safe stairs, and mechanical access that still works can add more to the house than forcing a low-ceiling room into a pretend apartment.
Finishing and Remodeling Are Not the Same Project
Finishing a basement means making the existing space cleaner, warmer, and brighter — new paint, better lighting, organized storage. Remodeling means changing how the space works: moving walls, adding a bathroom, cutting in an egress window, rerouting ducts, changing how the mechanical equipment gets serviced.
In a Cape Cod basement, that difference decides your budget before you've picked a single finish. A finishing project can clean up lighting and storage without much drama. A remodel runs into low beams, chimney mass, duct trunks, an old stair, and mechanical equipment that can't just disappear because you'd rather it wasn't there.
A Finished-But-Not-Fully-Remodeled Basement
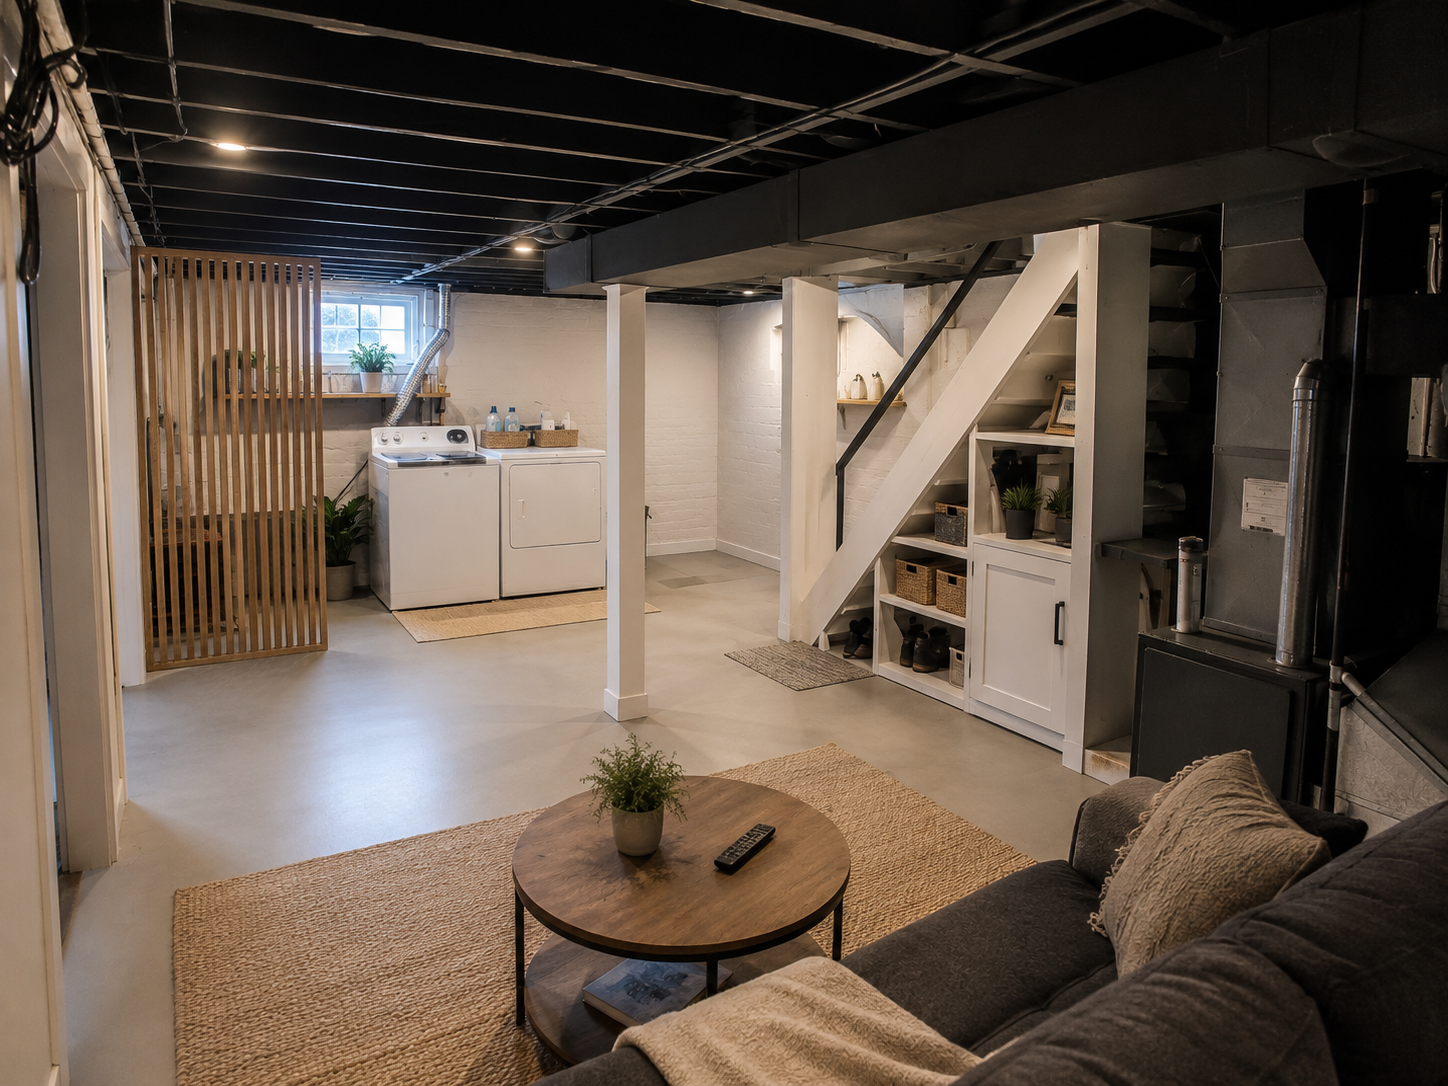
Decide up front whether you're improving a utility basement or building legal living space. Those are two different projects, with different permits, different inspections, and very different price tags.
What to Check Before You Spend a Dollar on Finishes
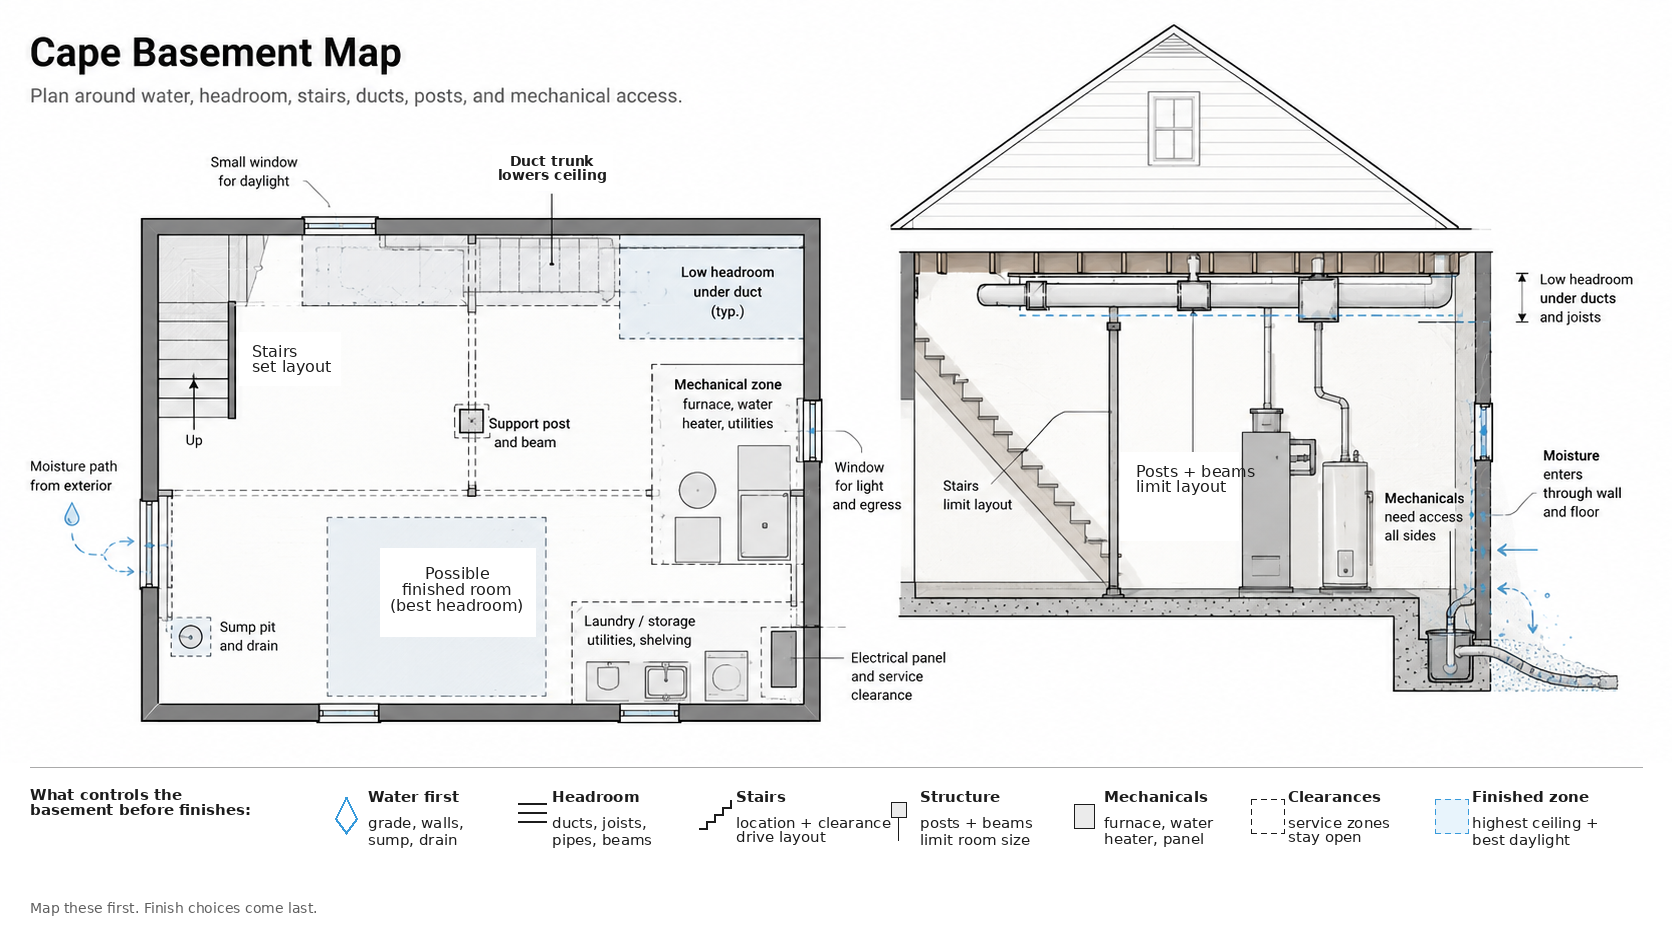
Start with water. Look for stains on the foundation walls, damp patches on the slab, white chalky efflorescence, a musty smell, rusted metal, swollen baseboards, patched cracks, or a sump pump that's clearly been busy. A basement that smells damp before you touch it won't stop smelling damp because you covered the walls in drywall — we've seen that exact bet lost more than once, usually a year or two after the paint dried.
Then measure ceiling height — under the beams, under the ducts, under the lowest pipe, not just between the joists. A Cape basement can look tall enough in the middle of the room and still feel like a crawl path once framing, insulation, lighting, and a finished ceiling eat into that clearance.
Check the stairs. Older Cape stairs run steep, narrow, low-headed, or badly placed, and a stair that's fine for hauling laundry can be a genuine hazard for daily traffic. Don't design a basement bedroom, office, or family room without asking how people and furniture are actually going to get down there.
Check mechanical access. The furnace, water heater, electrical panel, shutoffs, cleanouts, sump pump, and laundry connections all need working room around them. Boxing them into a tight closet might make the basement look tidier in a rendering, and it will make the next repair miserable.
If the basement needs new outlets, recessed lights, a subpanel, or finished-room circuits, check the permit rules before the ceiling closes up. Electrical work is far cheaper to inspect and fix while the framing's still open than after the drywall's hung.
Check windows and code before you call any basement room a bedroom. Whether a basement sleeping room triggers an emergency escape requirement depends on your local adopted code, the room's use, and the scope of work — and a small old basement window that lets in a little daylight can still fail as an escape opening. More on the exact numbers below.
Check old materials, too. In older houses, painted surfaces may involve lead-safe work when disturbed, and old floor tile, mastic, or pipe insulation may need testing if it looks suspect. This isn't a reason to panic — it's a reason to know before demolition sends dust through the rest of the house.
The Basement Still Has to Work as Service Space
This is where a lot of finished-basement plans go sideways. The basement isn't only potential living area — it's the access layer for the house. In a Cape Cod, the kitchen, the bathroom, the heating, the plumbing, and the electrical work often depend on routes that run straight through it.
A pretty wall that blocks a plumbing cleanout is a bad wall no matter how it looks. A finished ceiling that buries every valve and duct damper causes the next repair to start with demolition. A closet framed tight around a furnace can fail clearance the day a technician needs to actually work on it.
A better plan protects the parts of the house that still need to be reached — a storage wall with removable panels, a utility zone that stays honest about what it is, or a finished room that simply stops short of the mechanical cluster.
How This Project Gets Bigger Than You Planned
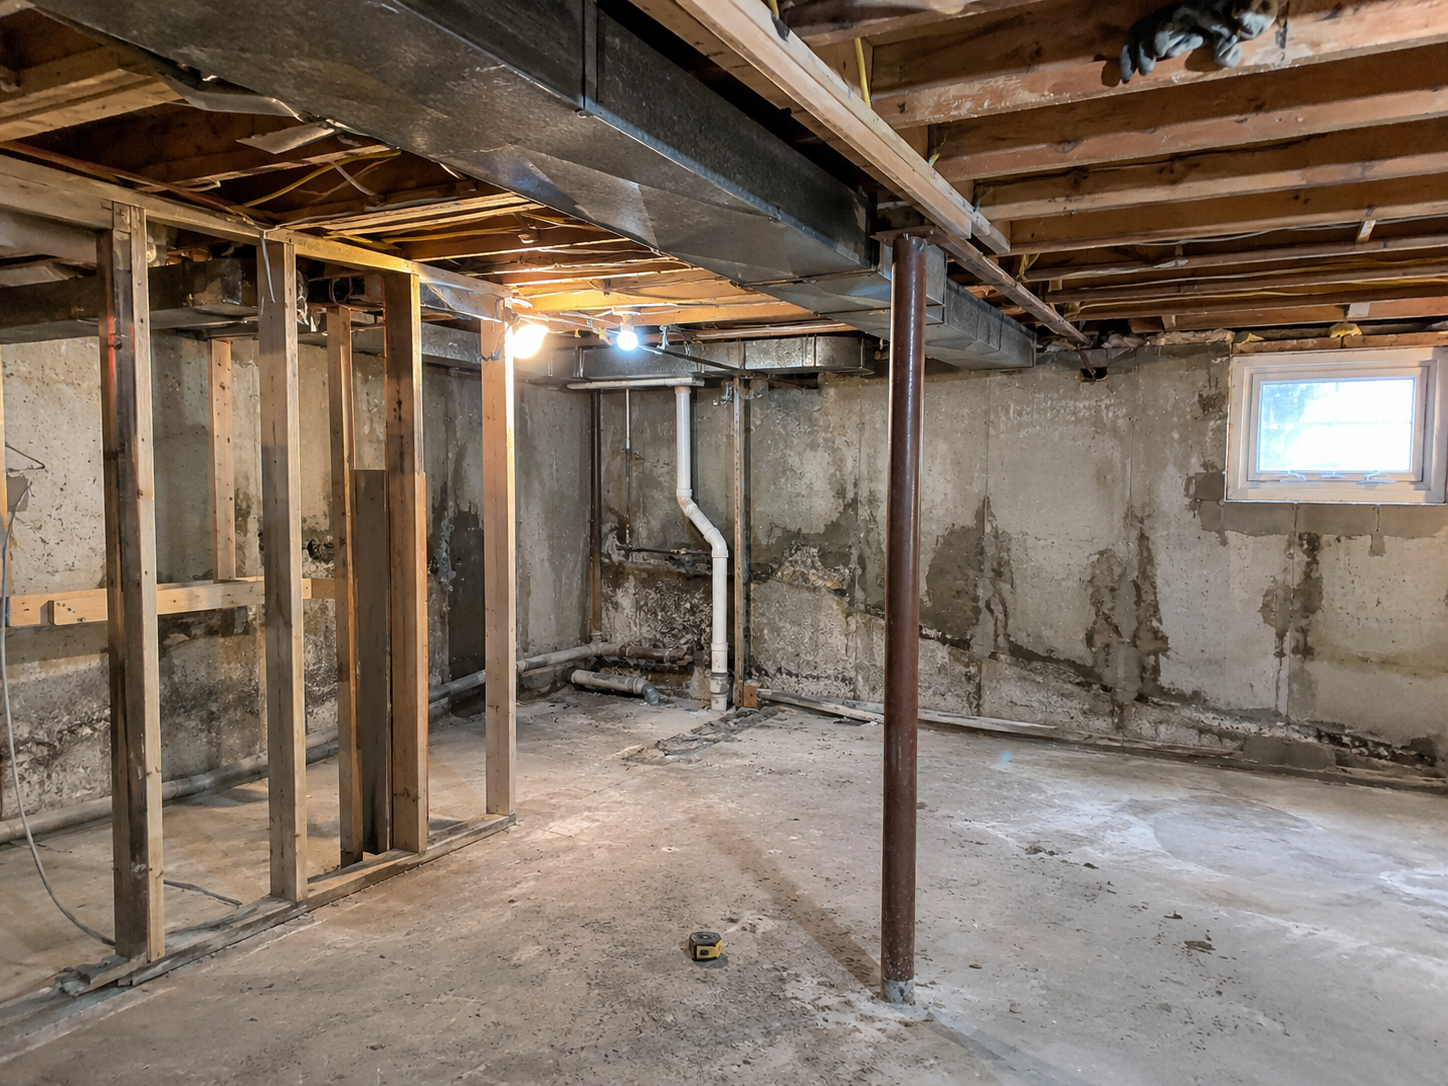
You start by painting the walls. Then you find moisture behind the storage shelves. You frame one wall, and the outlet layout turns out wrong. You lower the ceiling to hide the ducts, and now the beam and the stair headroom are a problem. You plan a bedroom, and the window isn't egress-sized. You add a bathroom, and the drain, the vent, the pump, and the ceiling work above all move the budget again.
Basement projects grow because the basement is where the hidden systems live, and a small Cape doesn't leave much room to route around them. Set a stopping point before you start: a cleaner storage-and-laundry level, one finished flex room, a full rec room, or a code-compliant bedroom suite. Don't price the smallest version and quietly expect the biggest one.
What Not to Touch Yet
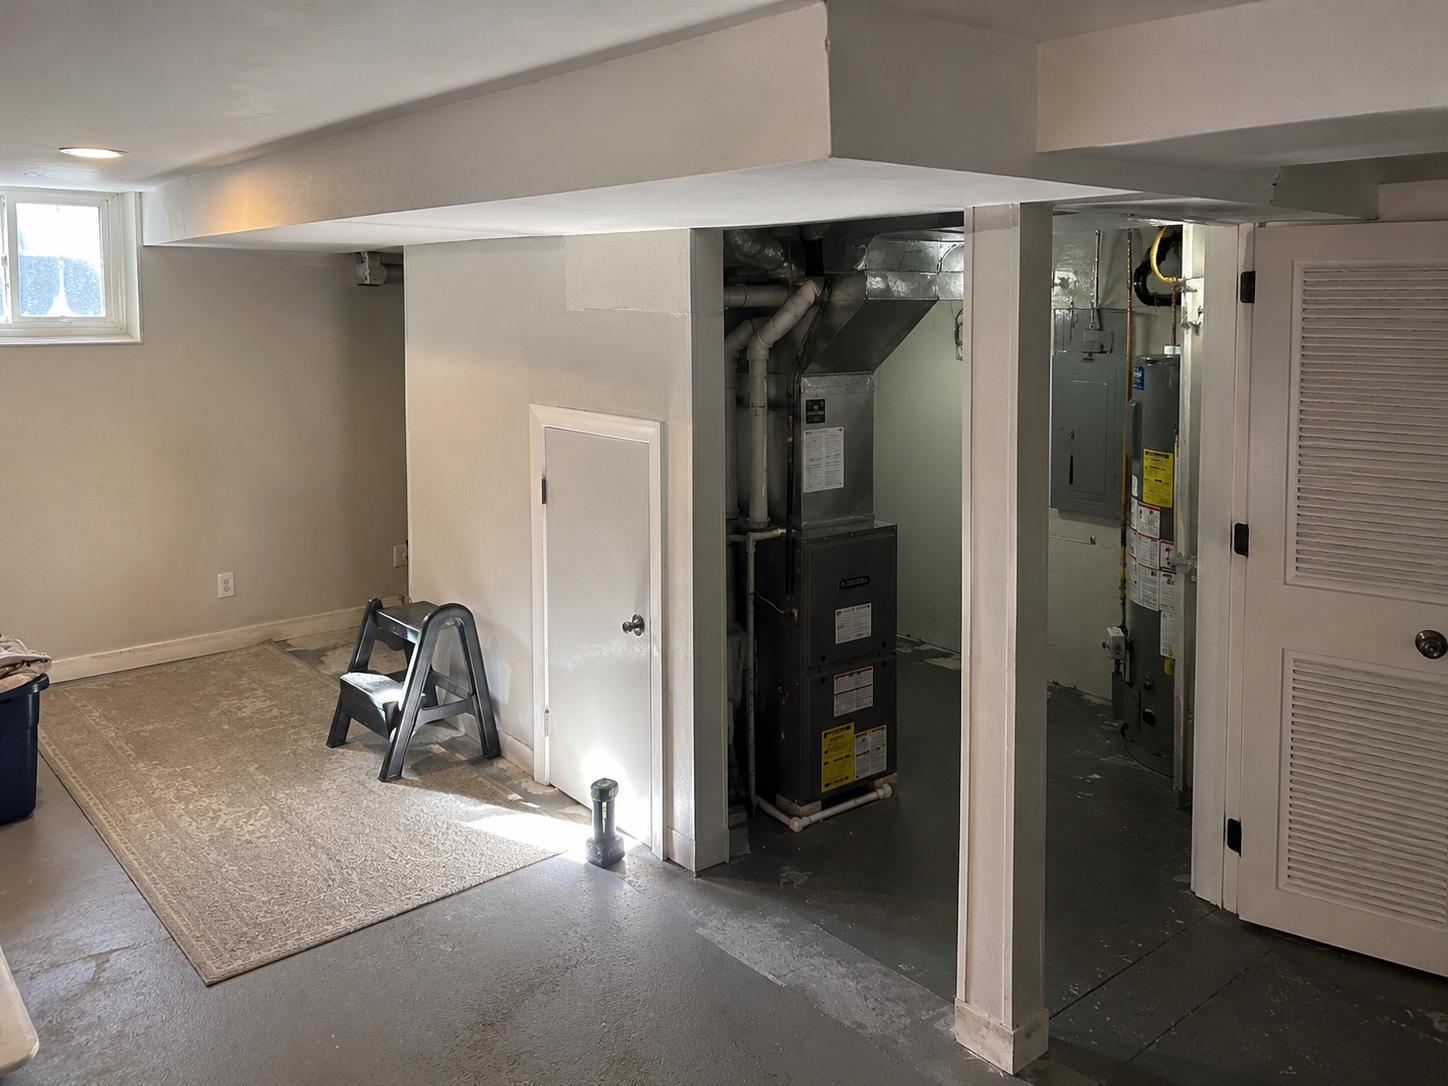
Don't start by moving the stairs. Stair work can reach into the first floor's framing, headroom, layout, and finish repair, and in a Cape Cod the stair is often tight because the floor plan above it is tight. Move it and you can turn a basement project into a main-floor remodel by accident.
Don't bury mechanicals behind permanent finishes. Keep access to the panel, the shutoffs, the cleanouts, the sump pump, the furnace, and the filters. If a contractor tells you they'll "just box that in," ask how anyone is supposed to service it later.
Don't remove posts, beams, or chimney bases just because they're ugly. They may be carrying load, hiding ducts, or protecting a vent route — the ugly thing is often the thing keeping the house standing the way it currently stands.
Don't cover the foundation walls before you understand the moisture. Paint and paneling hide the evidence. Finished walls over damp masonry are how you get mold, rot, and a finish that fails within a couple of years.
Minimum Improvement, Middle Renovation, or Full Renovation
A Cape Cod basement needs a scope level before it needs finishes.
| Project level | What it can achieve | What it cannot solve | Hidden work that may appear |
|---|---|---|---|
| Minimum improvement | Dry storage, better lighting, a cleaner laundry area, safer stairs, painted masonry, an organized mechanical zone. | Won't create true living space if moisture, headroom, windows, or stairs are still poor. | Drainage repairs, dehumidification, electrical cleanup, stair handrail work, minor crack repair. |
| Middle renovation | One finished flex room, a better floor surface, partial ceiling, improved storage and laundry layout. | May not support a legal bedroom, bathroom, rental unit, or full rec room. | Framing, insulation, electrical, duct adjustments, moisture control, access panels, window upgrades. |
| Full renovation | Finished living area, bathroom, bedroom possibility, office, family room, or major basement rework. | Can't ignore low ceilings, poor stairs, egress, water, or mechanical clearances. | Permits, egress window and well, slab cutting, plumbing, sump or drainage, HVAC, structural review, code upgrades. |
For most Cape basements, the middle renovation is the better fit. It improves the useful part of the room without pretending every square foot deserves to be finished.
Moisture Decides Your Floor and Wall System
Basement moisture isn't one problem — it can come from exterior drainage, foundation cracks, humidity, plumbing leaks, condensation on cold surfaces, or vapor moving through the concrete itself. A dehumidifier helps with comfort. It does nothing for a gutter dumping water against the foundation or a crack that leaks every time it storms.
In a Cape Cod basement, moisture tends to show up in exactly the spots homeowners want to improve first: the laundry corner, the storage shelves, the foundation wall behind them, and the cold slab under old carpet. If those spots smell musty now, don't cover them in drywall and flooring before you've fixed the source.
Start outside — gutters, downspouts, grading, window wells, driveway slope. Then check inside — cracks, sump function, slab dampness, plumbing leaks, humidity. Let the finish system respond to what you actually find down there.
Low Ceilings Change the Whole Room
Ceiling height isn't just a comfort issue. It controls whether the basement can become legal habitable space, where the lights can go, how the ducts get handled, and whether the finished room feels right or squeezed.
Cape basements often have low zones under beams, duct trunks, and stair landings. A drywall ceiling can look clean in a rendering and still drop the room too far in real life. A drop ceiling protects access but can feel just as low. Leaving part of it exposed — cleaned up, painted, organized — is sometimes the more honest call, and it preserves both height and future access.
Posts, Beams, and Chimneys Are Structure First, Design Second
A post in the middle of a Cape basement is probably supporting the main beam. A chimney base may still be serving heating equipment, or it may have served equipment that's long gone but left the mass behind. A framed chase may hold ducts, pipes, or wiring you haven't traced yet. Treat these as clues before you treat them as ugliness.
If a post breaks up the layout, plan the room around it, or bring in a structural professional to find out what's actually possible. Don't let the design start with "remove it" unless the budget already has room for the beam, the footing, the permit, and the finish repair that removal usually drags along with it.
The Stair May Be the Real Limit on the Whole Project
A stair that's fine for laundry and storage isn't automatically fine for daily family-room traffic. It might be hard to get furniture down. It might land directly in the mechanical area, splitting the basement so badly that neither half feels like a room.
Improving the stair can be worth the money if the basement gets used every day — but it's rarely a small, isolated change. It touches the first-floor plan, the framing, the doors, the railings, and code review all at once. If the stair isn't being rebuilt, design the basement around the stair you actually have, not the one you wish the house had.
Basement Bedrooms: What the Code Actually Requires
Most articles on this topic tell you a basement bedroom "may require an egress window" and stop there. The actual numbers matter more than that sentence suggests, especially in a Cape Cod, where short foundation walls make sill height the thing that usually kills the plan.
Under the International Residential Code's egress section (R310), any basement sleeping room needs an emergency escape and rescue opening with a minimum net clear opening of 5.7 square feet — reduced to 5.0 square feet if the opening sits at grade — with a minimum clear height of 24 inches, a minimum clear width of 20 inches, and a sill no higher than 44 inches above the finished floor. All four numbers have to be met at the same time, and "net clear opening" means the actual usable space when the window is fully open, not the frame size or the rough opening.
That last distinction is where a lot of Cape Cod basements fail without anyone realizing it. A single-hung or sliding window with a large-looking frame often provides less than half its rough opening as usable clear space, because only one sash moves. A casement window that cranks fully open can deliver nearly the entire rough opening as net clear area, which is why it's usually the better choice for a below-grade wall where you're trying to hit 5.7 square feet without cutting a bigger hole than you have to.
If the sill sits below grade, the code also requires a window well with a minimum horizontal area of 9 square feet and a minimum projection of 36 inches out from the wall, plus a permanently fixed ladder or steps if the well is deeper than 44 inches. Plan the well's drainage into the foundation's drain system, or you've built a bathtub that fills during every storm and works against the escape it's supposed to provide.
One more detail worth checking before you order anything: sill height gets measured from the finished floor, not the slab. Adding two inches of flooring after a window passes inspection at 44 inches can push the sill effectively higher and out of compliance. Measure with the actual finished floor buildup in mind, not the bare concrete you're standing on during demo.
Cutting a new opening into a foundation wall for an egress window is not a homeowner project. It means saw-cutting concrete or block, installing a lintel or temporary shoring, and coordinating waterproofing at the new opening — work that needs a licensed contractor, usually a permit, and often a structural engineer's sign-off if the wall is load-bearing.
Can a Cape Cod Basement Work as a Short-Term Rental?
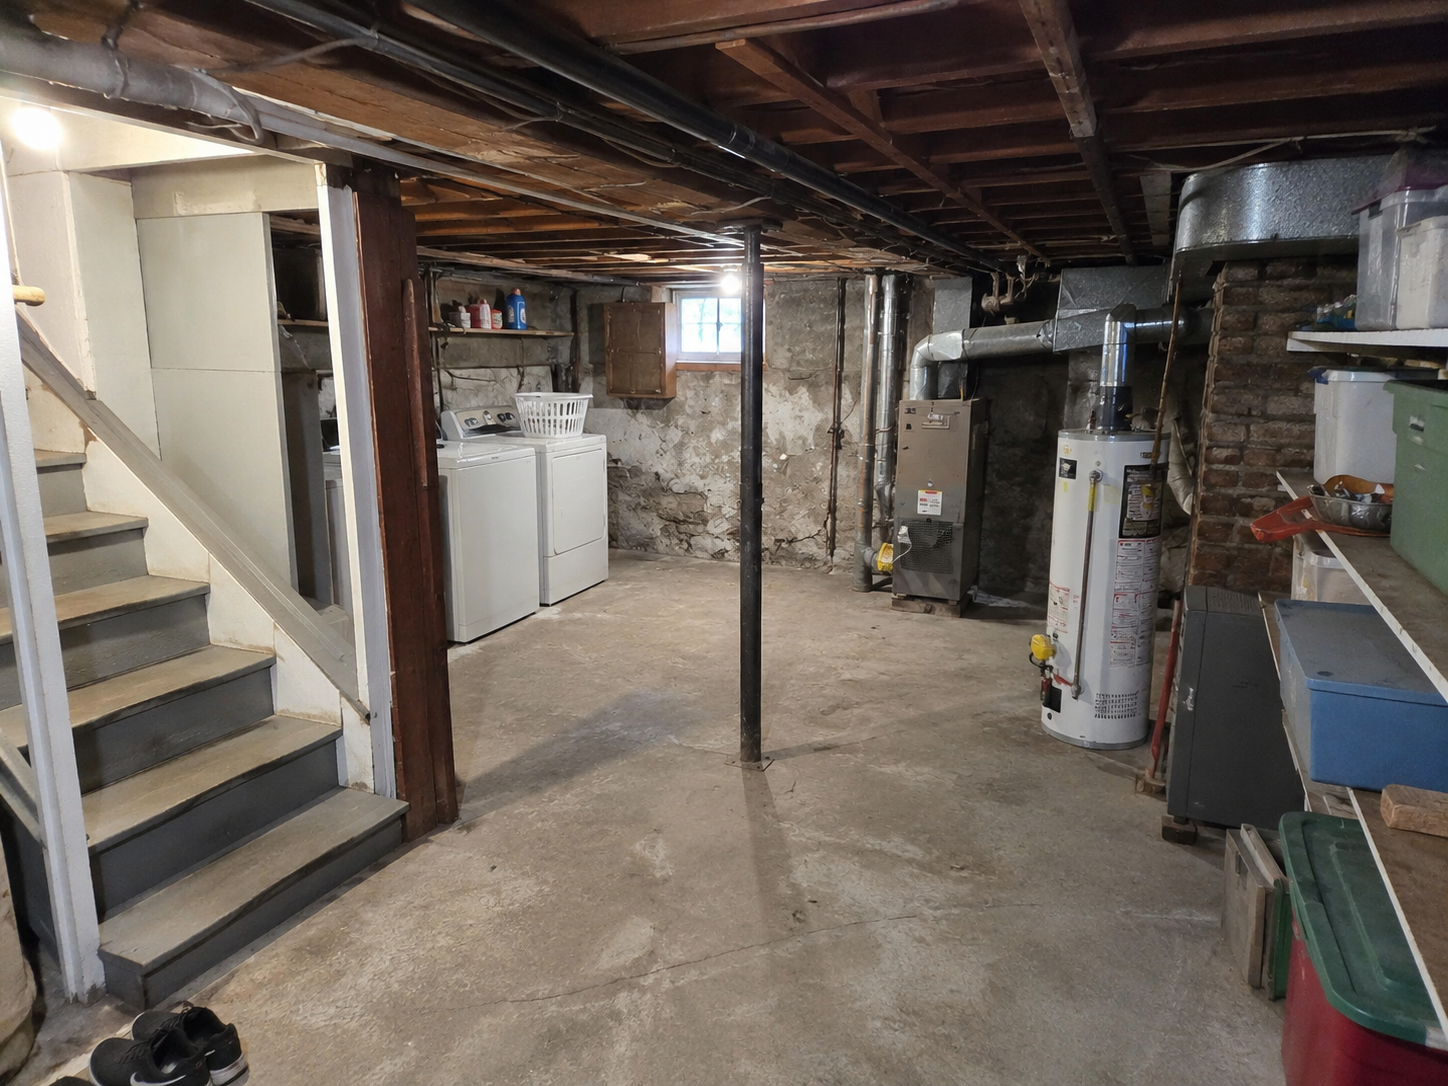
Sometimes, but don't plan it like a quick Airbnb makeover. The first question isn't paint or furniture — it's whether the basement can legally be used that way at all. Local short-term rental rules can require registration, a business license, primary-residence status, parking limits, owner occupancy, or inspection, and the rules vary a lot by city and county. Check before you spend a dollar on the layout.
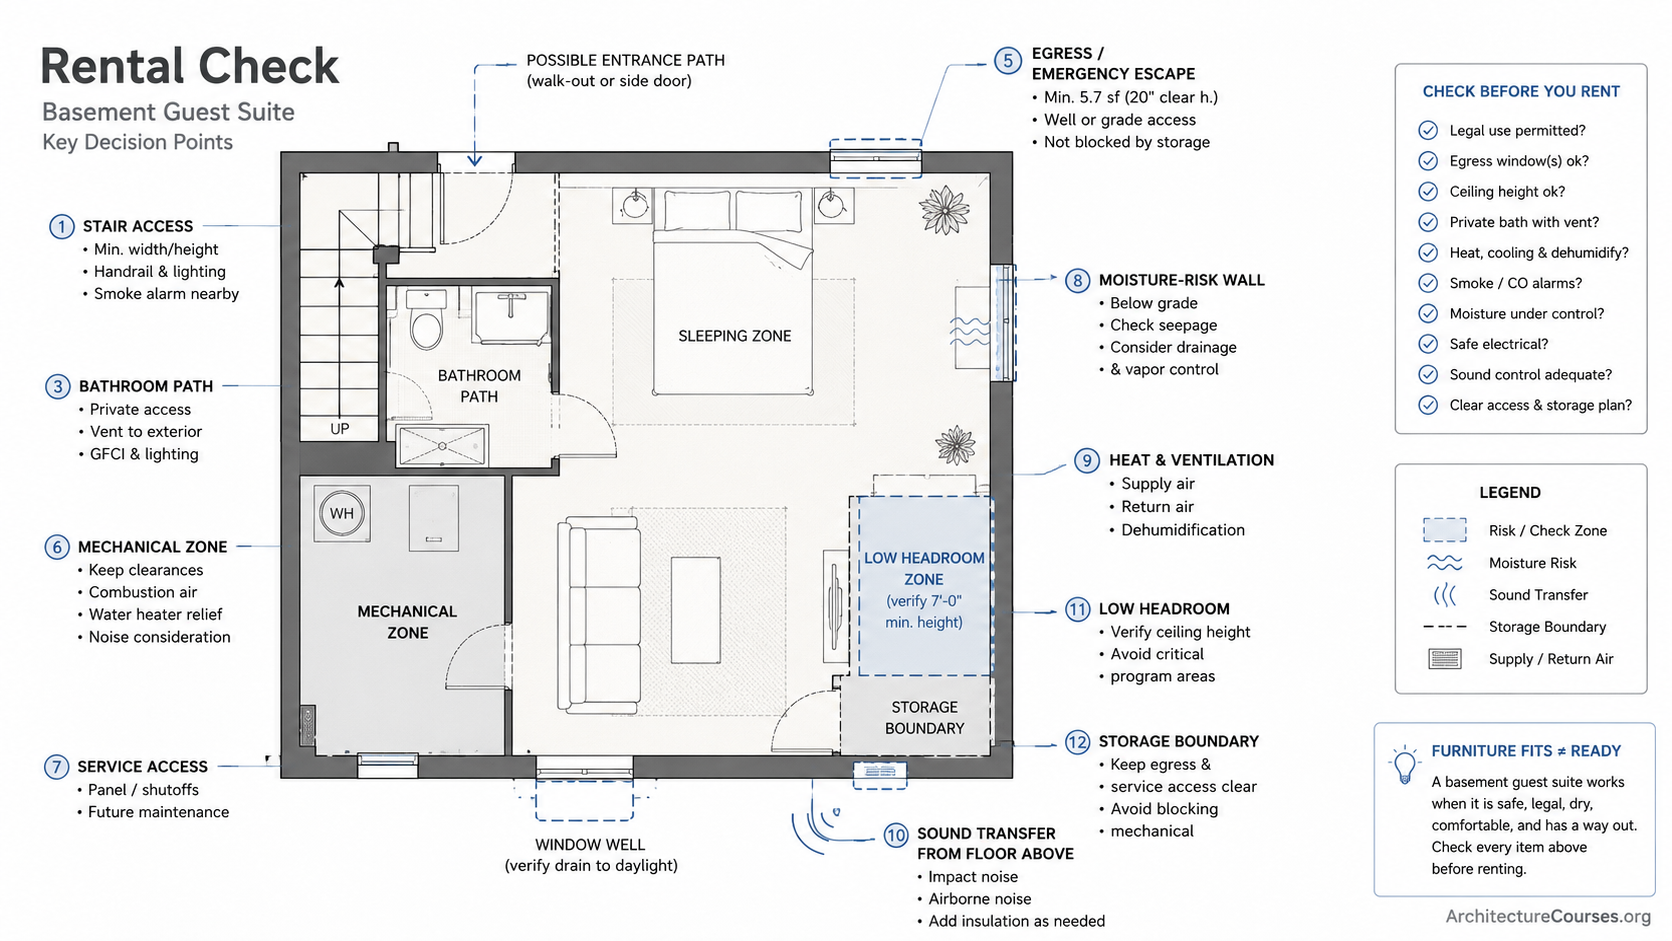
This is a planning checklist, not a code approval — confirm zoning, rental rules, ceiling height, egress, smoke and CO alarms, ventilation, and bathroom requirements locally before treating a basement as guest space.
The second question is comfort. A low Cape basement can feel disappointing fast if the ceiling's chopped up by ducts, the stair feels awkward, the air feels damp, or the mechanical room hums all night. A rental-ready basement needs dry walls, safe stairs, real ventilation, sound control from the floor above, reliable heat, enough outlets, and a clean path to a bathroom. If any of those are weak, fix them before you buy furniture.
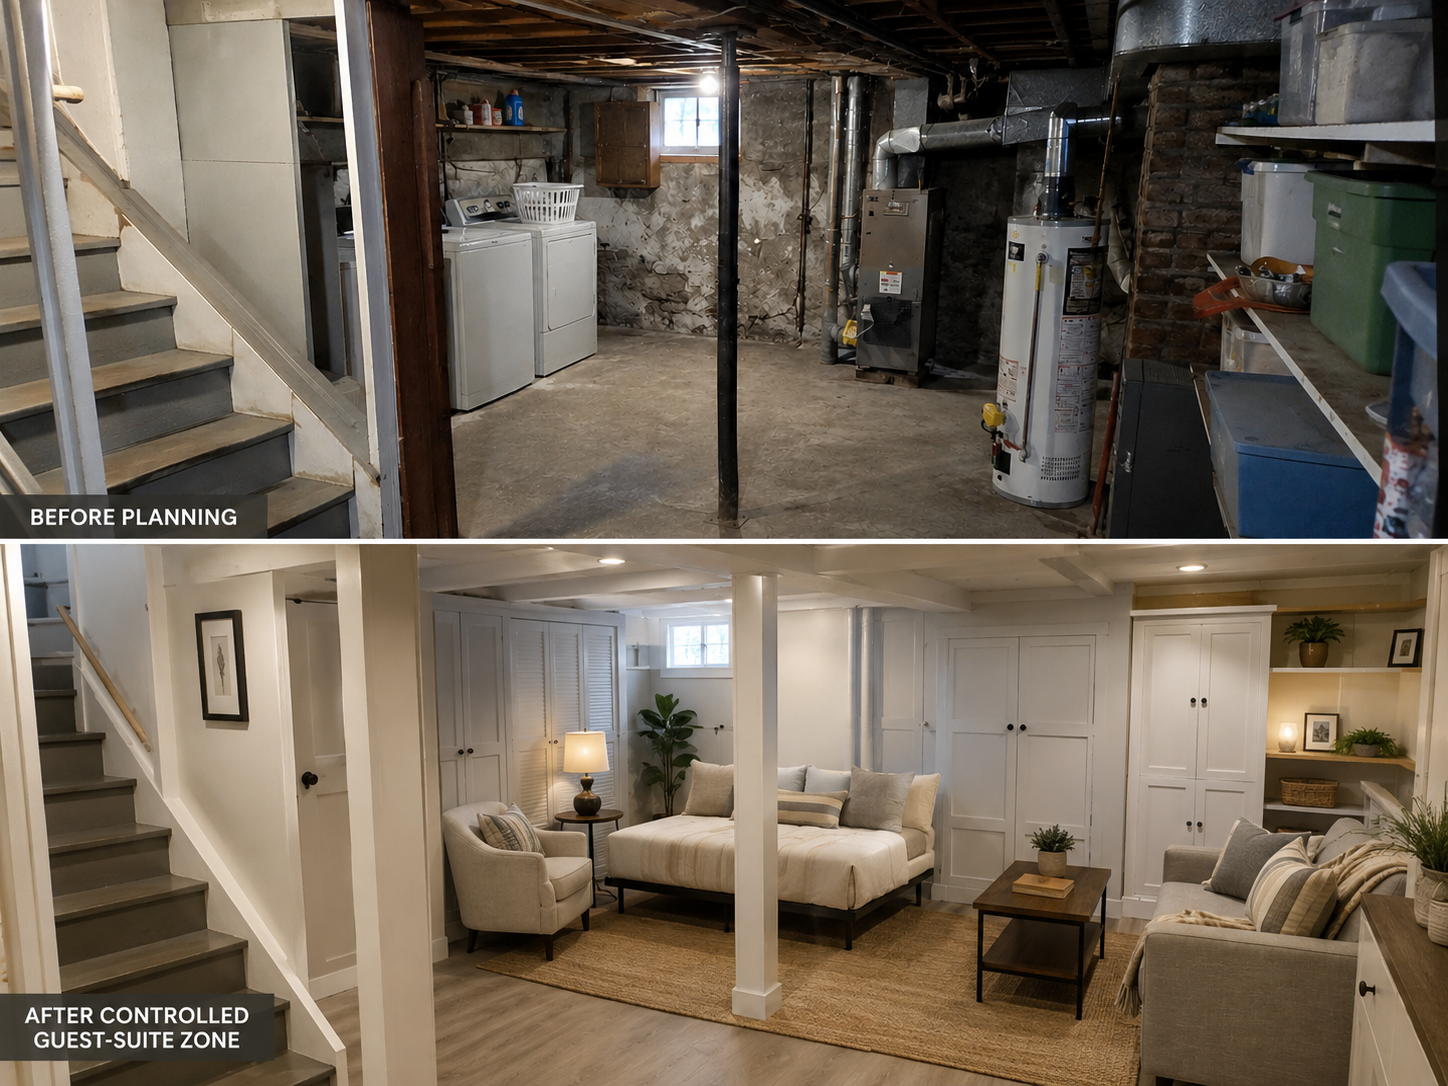
Never bury the mechanical area behind permanent drywall just to make the room look finished. A wall of louvered doors, bifold doors, or removable panels hides the visual clutter while keeping the furnace, water heater, laundry, and panel reachable. The guest sees a clean room. You still have access to everything that eventually needs a wrench.
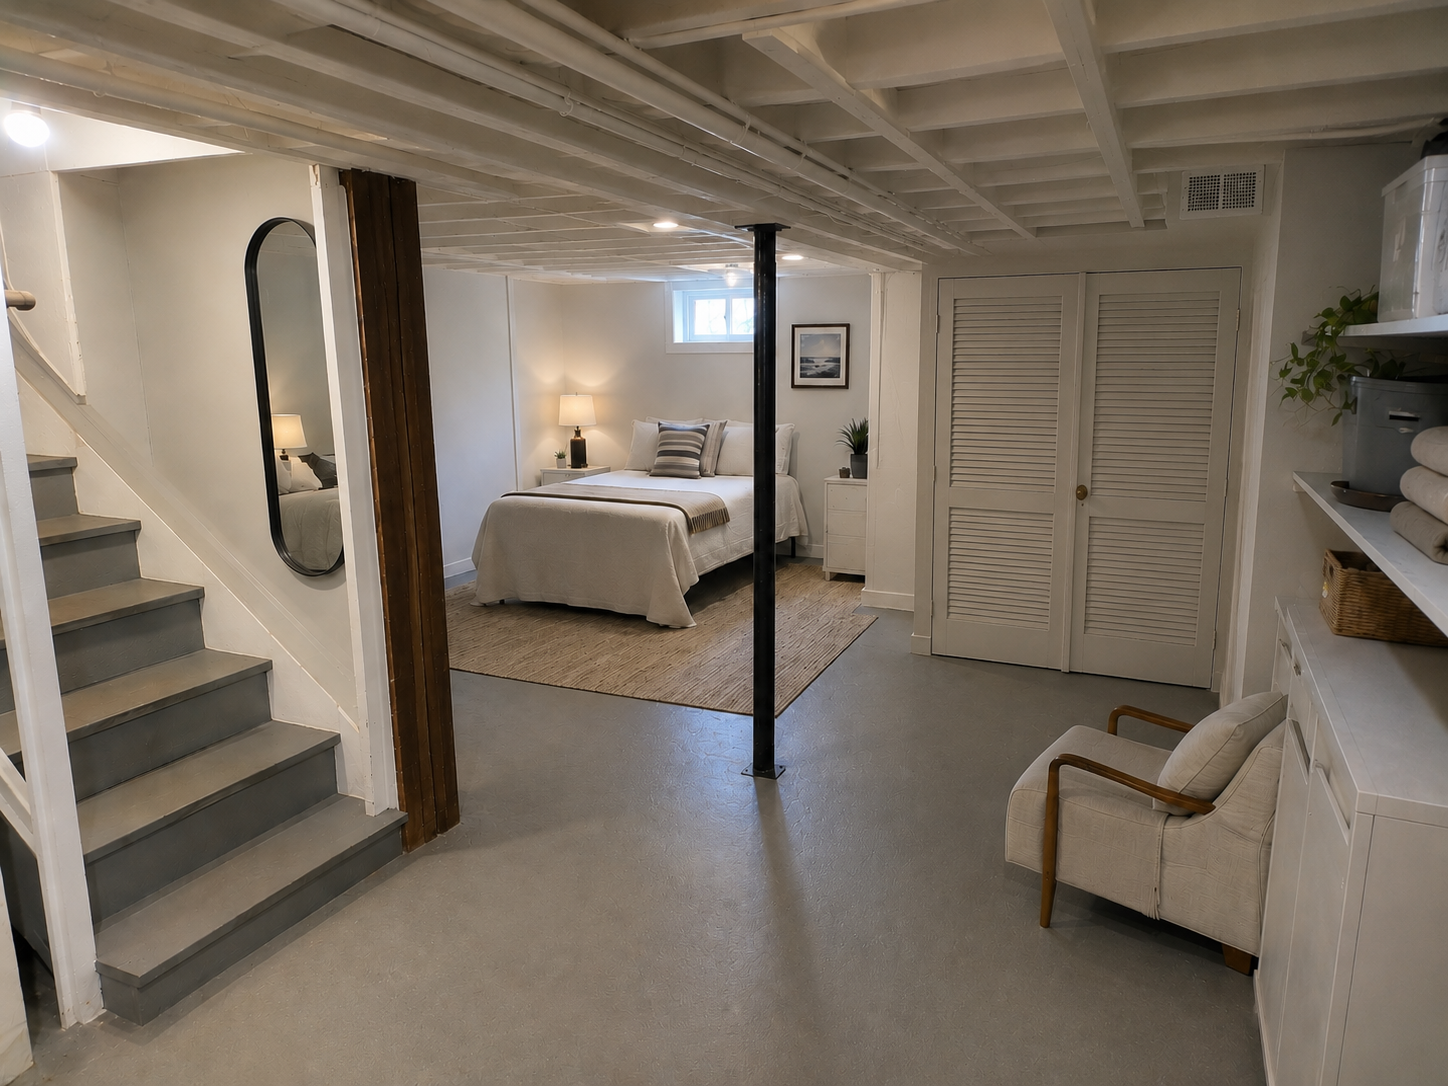
Keep it simple: one clean sleeping or sitting zone, one honest storage zone, one clear mechanical zone, and a well-lit path from the entry to the bathroom. If the plan needs a bedroom, bathroom, separate entrance, or egress window, bring in the right professionals early — it protects the budget from a failed inspection more than it costs you up front.
Mechanical Access Is Part of the Design, Not an Afterthought
Finished basements fail when the mechanical room gets treated like leftover space. A furnace, water heater, electrical panel, and sump pump all need clearance, and some equipment needs combustion air or drain routes on top of that — none of it is a decoration problem you can style your way around.
In many Cape Cod basements the mechanicals sit near the center of the room or along the most useful wall, simply because the house above is compact. Moving them is expensive. Hiding them badly is worse. Draw the mechanical zone first, then fit the finished room around it.
Why Some Renovations Feel Generic Even When They Cost the Same
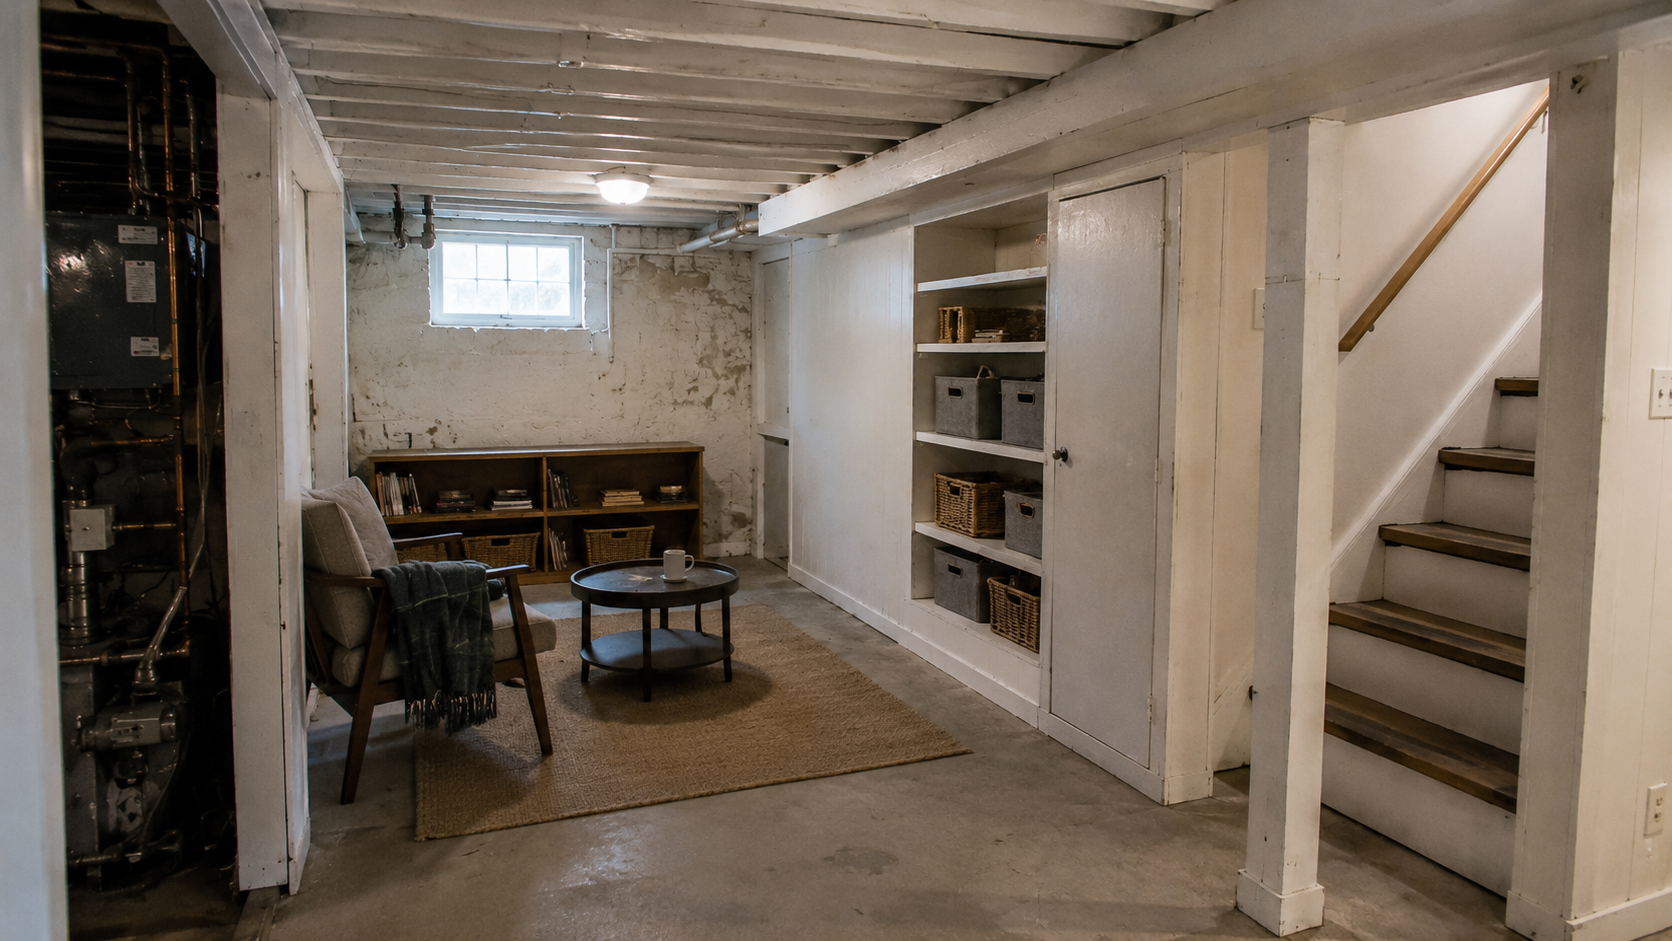
Two Cape Cod basements can cost close to the same amount and come out completely different. One feels like a real lower-level room — dry, calm, and honest about what it is. The other has flat lighting, a boxed-in duct running down the middle, a floor transition that looks slapped together, and storage that clearly got shoved back in after the drywall went up. That second basement wasn't cheap. It just spent the money in the wrong order, on the wrong things.
A lot of that comes down to proportion, and a Cape basement is an unforgiving room for it. The ceiling is already low. The footprint is already narrow. Try to force one big open rec room out of that shape and every flaw — the duct, the beam, the low spot by the stair — reads as a mistake instead of a feature. Break the same room into two or three honest zones sized to what the ceiling and the posts actually allow, and those same obstacles start doing work: a storage nook here, a low reading corner there, a taller stretch left open for the TV wall. Nothing about that costs more. It just asks you to measure before you frame instead of after.
Lighting is the next place the split shows up. A generic basement gets one center fixture per room and calls it done, which is exactly why so many finished basements still feel dim no matter how bright the bulb is. A basement that reads as intentional layers the light instead: recessed cans along the walking path, a fixture over the folding table, a wall wash near the stair where people actually need to see their feet. None of that is expensive lighting. It's more fixtures at a lower price point, placed where the room is actually used.
Ceiling lines and duct decisions matter more here than almost anywhere else in the house. We've walked basements where the contractor boxed in a duct trunk straight down the middle of the main room, which is the single fastest way to make a 7-foot ceiling feel like 6. The better call is almost always to work around the duct instead of through it — drop a soffit only where the duct actually runs, keep the rest of the ceiling as high as the framing allows, and paint any exposed joists a flat dark color if full drywall isn't in the budget. It reads as a design choice instead of a compromise, because it is one.
Access panels are the detail that separates a basement that still functions from one that looks nice for a year and then gets cut open. A generic remodel drywalls straight over the cleanout and the shutoff because it's faster. A better one builds a flush access panel into the wall or ceiling at that exact spot, painted to match, so the room still looks finished and a plumber can still get in without demolition. It's a fifteen-dollar difference in hardware and it's the whole reason the room still looks good five years later.
Floor choice follows the same logic. A basement floor that tries to imitate an upstairs formal room — high-gloss finish, pale color, delicate-looking trim — almost always looks cheaper than a simple, matte, durable floor that admits what room it's in. Fewer materials and cleaner transitions beat an accent wall and three kinds of trim fighting for attention in a room this size. The same goes for moisture control: a basement finished before the moisture problem is solved will eventually announce that shortcut through a stain, a smell, or a warped baseboard, no matter how good the paint job looked on move-in day.
Storage tells the same story from a different angle. A basement that plans one real storage wall, sized for what the household actually owns, stays useful for years. A basement that skips that step finishes the room first and lets boxes drift back into every open corner within a season, which is what makes an otherwise nice space start to look cluttered and unplanned.
None of this is about spending more. It's about deciding, before the first stud goes up, which parts of a Cape Cod basement are worth the extra thought — proportion, light placement, duct handling, access, floor and material restraint — and which parts don't need to compete for attention. The premium feel in a room like this rarely comes from expensive materials. It comes from judgment: solving the awkward parts first, keeping the mechanical and structural realities in view instead of hidden, and building a room that admits it's a basement instead of pretending to be something upstairs.
Smart Small Wins Before a Full Finish
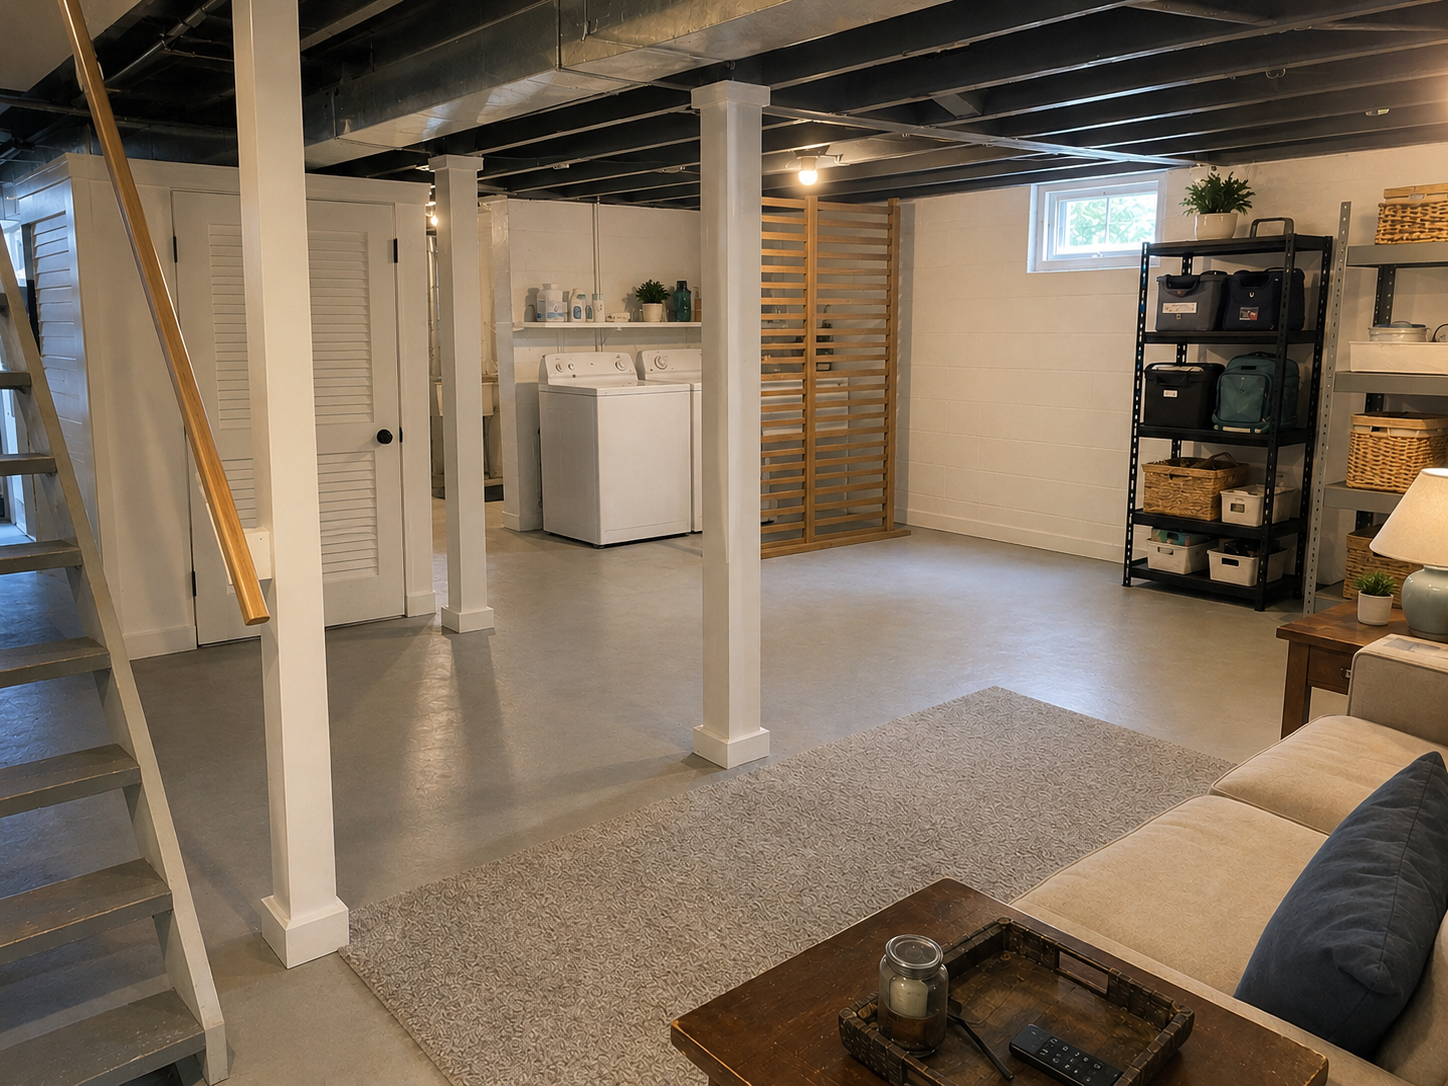
Not every Cape basement needs a full build-out. Clear out storage that no longer serves a purpose. Paint the masonry, but only after you understand the moisture. Add brighter lighting. Label the shutoffs. Improve the laundry surfaces. Add shelving that keeps boxes off the floor. Repair unsafe stair lighting or a loose railing.
These small moves make the basement more useful without hiding anything, and they show you how the space behaves through a full rainy season and a humid summer before you commit to finished walls.
DIY Work That Actually Makes Sense
DIY is reasonable here when the work is low-risk and reversible: cleaning, storage systems, painting dry masonry, freestanding shelving, plug-in task lighting, organizing mechanical access, clearing out clutter that isn't hazardous.
It's also a good use of your own time for planning. Measure the ceiling yourself. Tape out furniture on the floor. Mark the wet spots after a hard rain. Photograph the mechanicals. Track humidity for a month. Label the valves and cleanouts. None of it costs much, and it makes every decision after it better.
Managing the project is not the same as doing every trade yourself. You can run the show and still hire out the risky parts.
Where Professional Help Protects the Budget
Hire help wherever a mistake means water damage, a safety risk, or a failed inspection: structural changes, post or beam work, stair rebuilding, electrical, plumbing, gas lines, HVAC changes, waterproofing, sump or drainage systems, egress window installation, foundation cutting, bathroom additions, and anything involving suspect lead or asbestos.
A professional isn't there to take the project away from you. On a Cape basement, the right one is what stops the project from turning into a half-finished room with hidden moisture, buried mechanicals, and an inspector who won't sign off.
What a Cape Cod Basement Remodel Can Cost
Treat these as 2026 U.S. planning ranges, not quotes. Region, access, moisture, ceiling height, permits, and hidden repairs can all move the number quickly.
| Scope | Planning range | What it usually includes |
|---|---|---|
| Minimum improvement | $3,000 to $15,000 | Cleanout, storage, lighting, painting dry surfaces, stair safety improvements, minor moisture corrections. |
| Partial basement renovation | $20,000 to $70,000 | One finished area, electrical upgrades, flooring, partial ceiling, storage, laundry cleanup, access panels. |
| Full finished basement | $60,000 to $150,000+ | Framing, insulation, electrical, HVAC adjustments, ceiling work, finished rooms, moisture control, permits. |
| Basement with bedroom, bath, or major waterproofing | $100,000 to $250,000+ | Egress, plumbing, slab cutting, bathroom, drainage, sump, foundation work, major mechanical changes, full finishes. |
The number usually climbs the moment the basement needs to become habitable space instead of improved utility space. Bedroom, bathroom, egress, and waterproofing are what actually move the budget.
What to Keep, What to Change, and What to Leave Alone
| Keep | Change carefully | Leave alone for now |
|---|---|---|
| Clear mechanical access | Utility walls, storage rooms, equipment closets | Permanent finishes that block service panels or cleanouts |
| Useful structural posts and beams | Post wraps, layout around supports, engineered changes | Removing supports without structural review |
| Dry storage zones | Flooring, shelving, wall finishes | Carpet or wood finishes over questionable moisture |
| Working stair location if it is safe | Lighting, handrails, tread repair, headroom improvements | Moving stairs before the whole-house layout is understood |
Before-and-After Photos Can Hide the Real Problem
Basement before-and-after photos are almost always misleading. The after photo shows flooring, drywall, and furniture. It doesn't show whether the foundation wall stayed dry for a full year, whether the duct trunk forced the ceiling lower than planned, whether the egress window ever got added, or whether the room still smells damp in August.
Use photos for ideas, not proof. Your basement has to pass its own moisture, height, access, and code test before you assume it can take the same scope as the one in the photo.
Decision Point
Before you spend a dollar on finishes, decide which basement you actually have.
If it's damp, low, crowded with mechanicals, and hard to access, start with water, light, storage, and service clearance. That's not a failure — that's the honest minimum improvement.
If part of the basement is dry and tall enough, finish that part and leave the mechanical side accessible. That's usually the best middle renovation for a house like this.
If you want a bedroom, bathroom, or short-term rental, treat it as a full renovation from day one, and price egress, plumbing, ceiling height, permits, waterproofing, and mechanical access before you price a single finish.
Related Reading
- Cape Cod house remodel
- Cape Cod architecture
- Cape Cod kitchen remodel
- Cape Cod bathroom remodel
- Cape Cod window replacement
FAQ
Is a Cape Cod basement worth finishing?
It can be worth improving, but not every Cape basement should become fully finished living space. Moisture, ceiling height, stairs, windows, ducts, posts, and mechanical access decide the real potential.
What should I check first before remodeling a Cape Cod basement?
Check water, foundation walls, slab dampness, ceiling height, stairs, ducts, mechanical equipment, electrical panel access, plumbing cleanouts, windows, and whether any room use triggers code requirements.
Why are Cape Cod basements often hard to finish?
Many are compact service spaces with low beams, ducts, posts, chimney mass, laundry, mechanical equipment, and awkward stairs. The basement may be useful, but not wide open.
Can I put a bedroom in a Cape Cod basement?
Sometimes, but a bed fitting in the room isn't enough. Under IRC R310, a basement bedroom needs an emergency escape opening with at least 5.7 square feet of net clear opening, a 20-inch minimum width, a 24-inch minimum height, and a sill no higher than 44 inches above the finished floor.
Can a Cape Cod basement work as an Airbnb or short-term rental?
Sometimes, but do not plan it as a quick furniture project. Check local short-term rental rules, legal use, safety, egress, moisture, bathroom access, heat, ventilation, sound control, and mechanical access before spending money.
What is the biggest mistake in a basement remodel?
Finishing over moisture. The second biggest mistake is hiding mechanicals, shutoffs, cleanouts, ducts, and panels behind permanent finished walls or ceilings.
Can I remodel a Cape Cod basement myself?
Some parts are good DIY work: cleaning, storage, painting dry masonry, basic organization, and planning. Hire qualified help for structural work, electrical, plumbing, gas, HVAC, waterproofing, egress, and suspect lead or asbestos materials.
How much does a Cape Cod basement remodel cost?
A minimum improvement may stay under $15,000. A partial renovation often runs $20,000 to $70,000. A full basement with egress, bathroom work, waterproofing, or major mechanical changes can move well over $100,000.
Should I drywall the ceiling in a Cape basement?
Only if the height and access still work. In low Cape basements, an exposed or removable ceiling strategy can preserve headroom and future access better than a fully drywalled ceiling.
Sources and reference links
- U.S. EPA: Mold Resources
- U.S. EPA: Lead Renovation, Repair and Painting Program
- U.S. EPA: Protect Your Family from Exposures to Asbestos
- U.S. Department of Energy: Insulation
- International Residential Code: Building Planning
- NYC Office of Special Enforcement: Short-Term Rental Registration Law
- Better Homes & Gardens: Cost to Finish a Basement
- Real Simple: Basement Renovation Cost Ranges