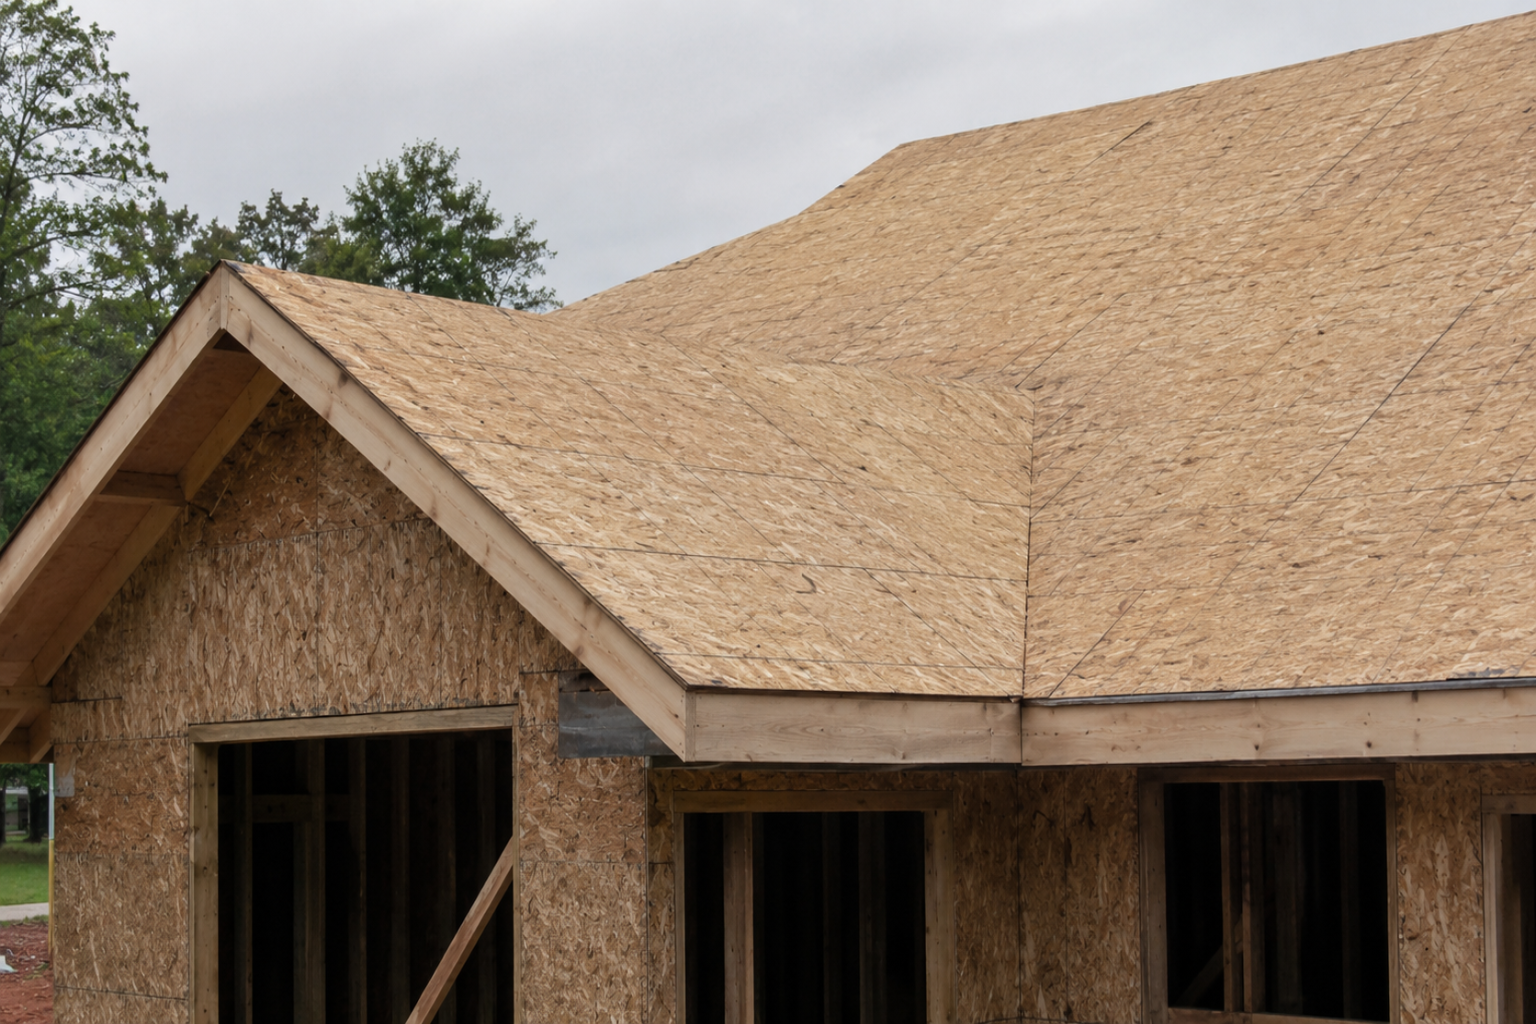
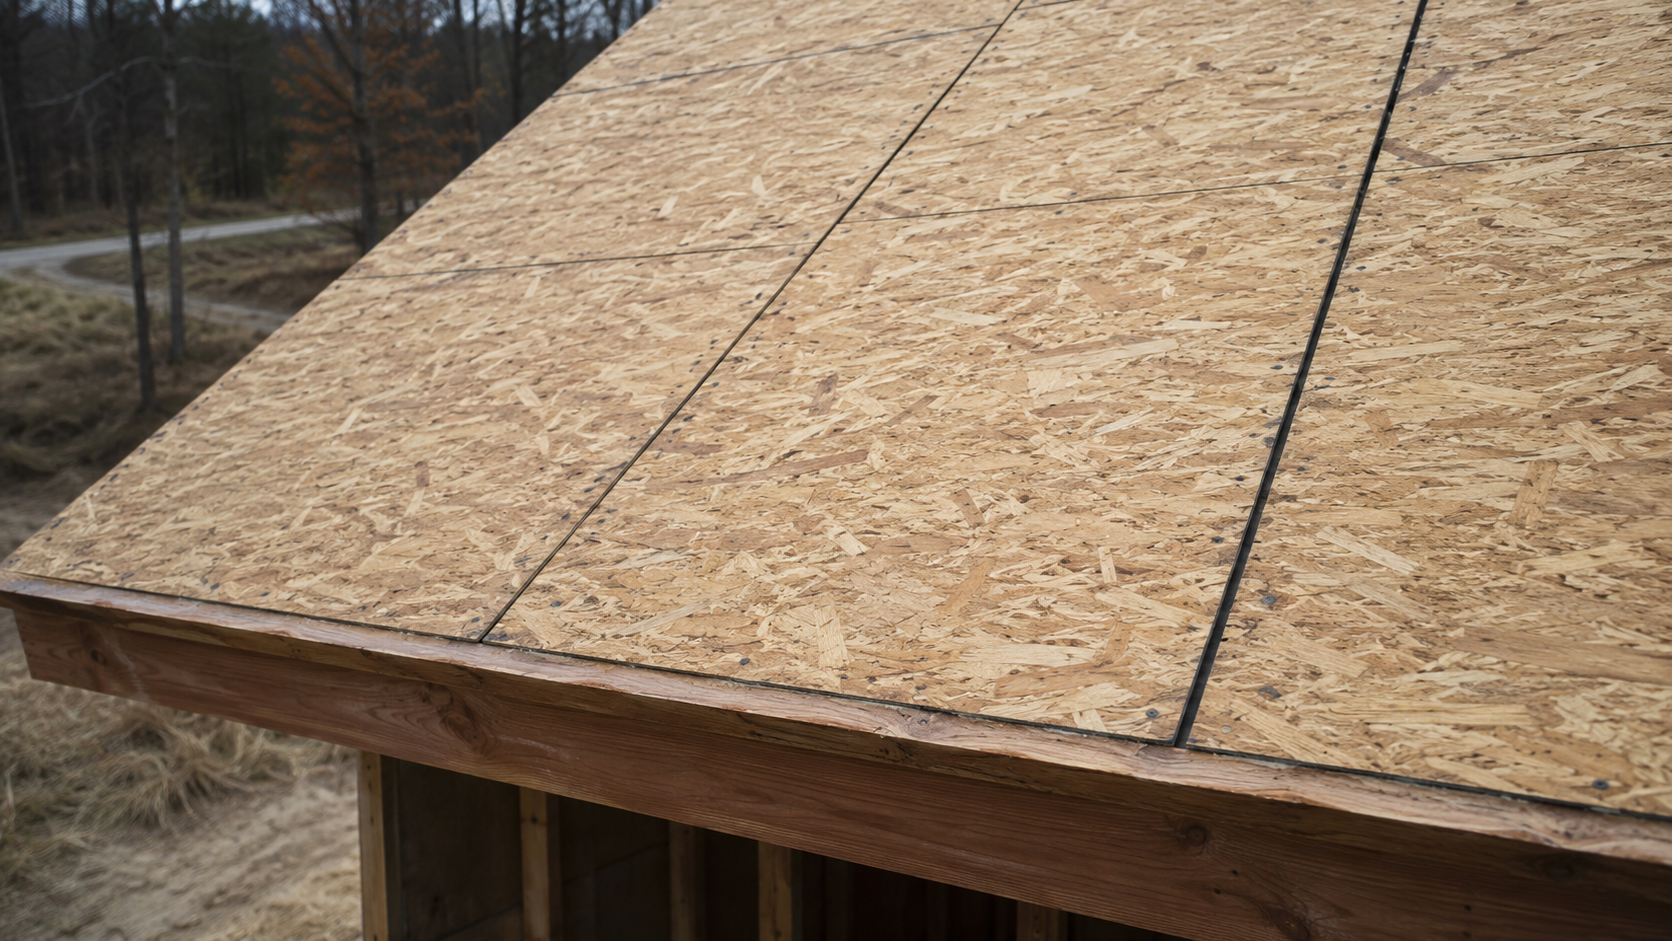
Roof sheathing is the roof deck under shingles, underlayment, metal roofing, or another roof covering.
When it is too thin, badly spaced, wet, buckled, or poorly fastened, the roof can look finished from the street while the deck underneath is already setting up nail pops, soft spots, leaks, mold, sagging, or a failed re-roof inspection.
This page is about the roof deck itself: OSB, plywood, thickness, panel layout, gaps, nailing, underlayment, ventilation, and early warning signs. For the broader frame of the house, start with house sheathing. For wall panels, use exterior wall sheathing.
What roof sheathing does
Roof sheathing gives the roof covering a solid base. It also ties the rafters or trusses together so the roof works as one connected plane rather than a set of loose framing members.
The deck cannot fix bad framing, though. A sagging rafter, a bad truss, an undersized beam, or a weak roof-wall connection is still a framing problem, and sheathing only does its job when it is supported, gapped, fastened, and kept dry.
A good roof deck has to do several jobs at once:
- Carry roofing loads into rafters or trusses.
- Hold nails or screws without crushing or pulling loose.
- Stay flat enough that shingles, metal panels, or underlayment are not telegraphing every mistake.
- Dry when small amounts of moisture get into the assembly.
Roof sheathing vs roof decking
In residential work, roof sheathing and roof decking often mean the same thing. Contractors may say “decking” when they are talking about the plywood, OSB, or plank layer under the roofing. Designers and inspectors may say “roof sheathing.”
The word matters less than whether the deck is rated for the span, supported at the edges where it needs to be, fastened correctly, and acceptable for the roofing going over it.
| Term | What it usually means on site | What to check |
|---|---|---|
| Roof sheathing | The structural panel or board layer attached to rafters or trusses. | Panel rating, thickness, span, gaps, nailing, and moisture condition. |
| Roof decking | The same roof base layer, often used by roofers during tear-off or re-roofing. | Soft spots, rot, delamination, loose nails, and whether new roofing can be fastened safely. |
| Old roof planking | Board roof deck found on older houses before plywood or OSB became common. | Large gaps, split boards, loose planks, cupping, poor fastener hold, and whether panels need to be added over the boards. See roof planking. |
| Underlayment | The water-shedding layer above the sheathing and below shingles or roofing. | Laps, flashing integration, dry-in timing, and manufacturer instructions. |
OSB roof sheathing vs plywood roof sheathing
OSB and plywood are both common roof sheathing, and both can work. Failures usually trace back to the things around the panel rather than the panel itself: wetting, poor fastening, bad gaps, unsupported edges, or roofing laid over a deck that should have been repaired first.
OSB is common because it is consistent, widely available, and often cheaper. It works well when it stays dry, is installed with the right spacing, and is covered before weather damages the edges.
Plywood costs more in many markets, but it handles repeated wetting and drying better in rough conditions. That matters around valleys, low-slope areas, ice-dam zones, bad flashing, roof leaks, and re-roofing jobs where the deck may be exposed longer than planned.
| Material | Where it works well | Where to be careful |
|---|---|---|
| OSB roof sheathing | Large roof fields, normal dry-in schedules, budget-sensitive projects, and standard shingle roofs. | Panel edges can swell if they stay wet. Chronic leaks, poor attic ventilation, and delayed dry-in can turn a cheap choice into a callback. |
| Plywood roof sheathing | Wet-risk areas, valleys, roof edges, older homes, complicated roof shapes, and upgrades where drying matters. | Costs more and still fails if flashing, ventilation, or underlayment details are wrong. |
| Integrated sheathing systems | Projects using rated sheathing with an integrated water-resistive layer and taped seams. | They depend on correct tape, temperature, rolling pressure, and manufacturer sequence. Do not treat the tape as magic. |
Roof sheathing thickness: 7/16, 1/2, and 5/8 panels
Roof sheathing thickness is not chosen by habit alone. It depends on framing spacing, panel span rating, roof loads, local code, roofing type, and the manufacturer instructions for the roof covering.
For many houses, you will see 7/16 inch OSB, 1/2 inch panels, or 5/8 inch panels. The thicker option can feel better underfoot, hold fasteners better, and reduce bounce or waviness on some roofs. None of that makes 5/8 inch the automatic choice, though. The deck only has to match the span and the job.
| Panel thickness | Common use | Watch point |
|---|---|---|
| 7/16 inch | Common OSB roof sheathing on many residential roofs when rated for the span and approved locally. | Do not assume it is enough for every span, load, roof covering, or inspection requirement. |
| 1/2 inch | Common upgrade or plywood option where the roof needs a stiffer deck or better fastener feel. | Still needs correct gaps, edge support, and fastening. |
| 5/8 inch | Often used where stiffness, spans, loads, roof covering requirements, or local practice call for a stronger deck. | Costs more, weighs more, and does not solve leaks or poor ventilation by itself. |
Look for the panel stamp. The span rating and exposure rating matter more than a casual guess from the driveway. If the roof is being inspected, the local inspector and adopted code cycle decide what passes.
Panel gaps, layout, and nailing
Roof sheathing panels need room to move. Wood structural panels expand and contract with moisture, so panels jammed tight and then rained on can swell, ridge, buckle, or telegraph through the roofing. That gap at the panel edges is not sloppy work. APA recommends roughly a 1/8-inch space at every panel edge and end unless the panel maker says otherwise, and the old framer's trick for setting it is to slip the shank of a 10d box nail between the sheets as a spacer. Tight joints leave no room for that expansion, and the callback that follows is expensive.
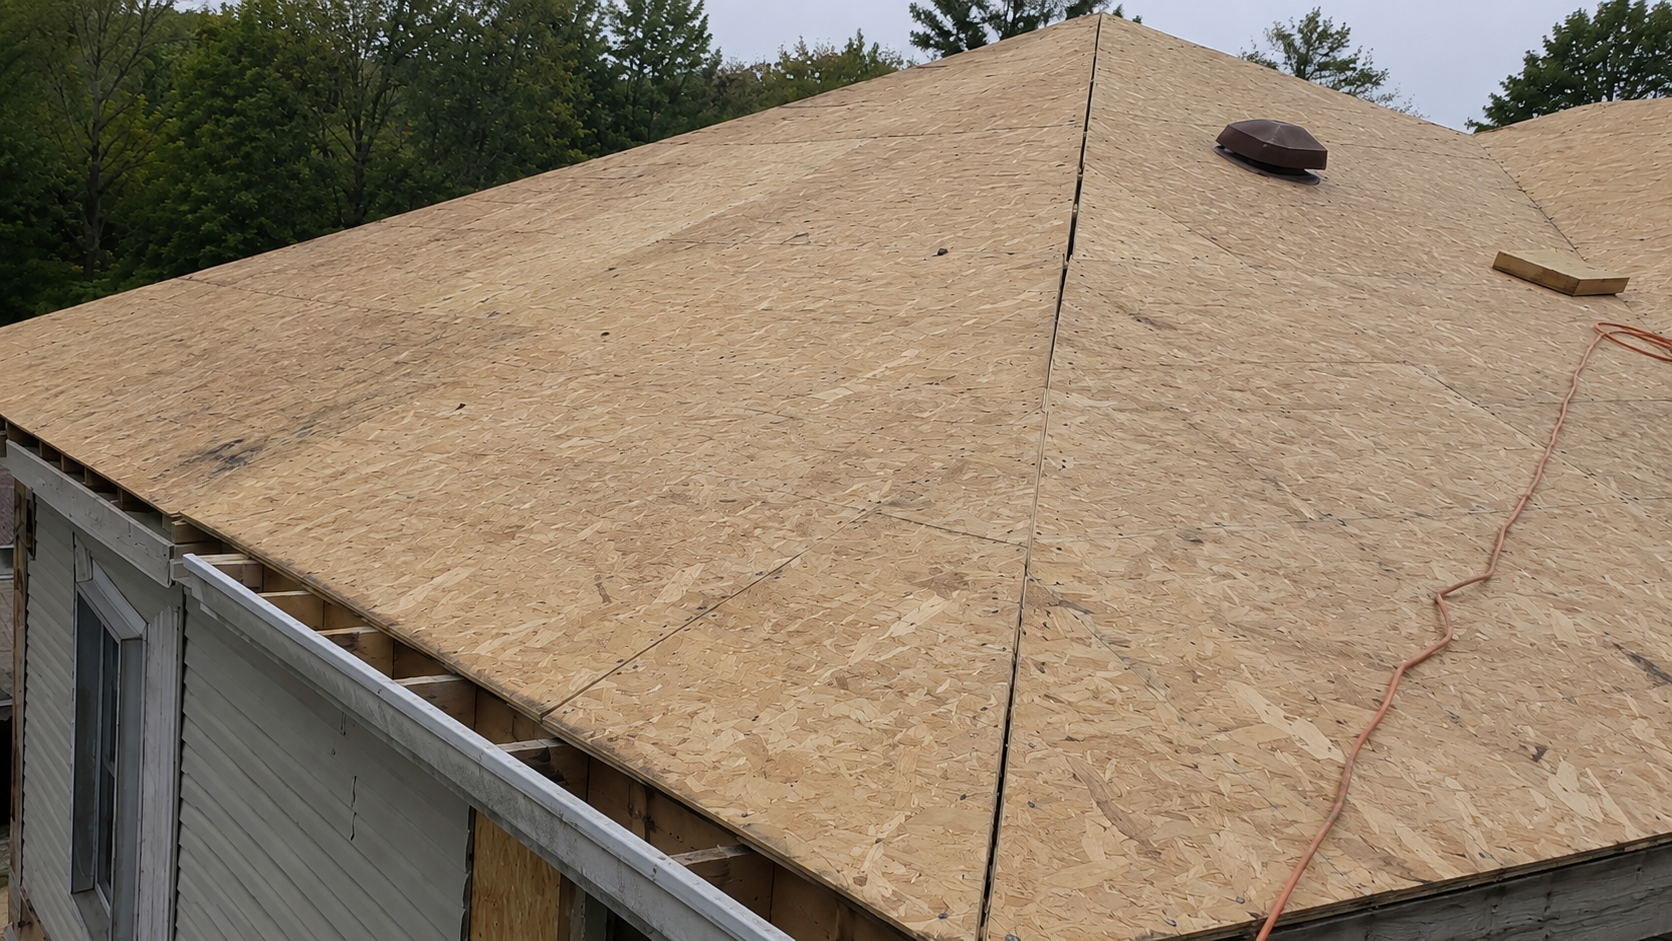
Orientation matters more than it looks. The panels have a strength axis, which is the long dimension, and the span rating stamped on them assumes that long side runs across three or more rafters or trusses. Turn a panel the other way to save a cut and you have quietly downgraded the deck below what the stamp promises. Panels go long-side across the framing, seams staggered so the joints do not all land in one line, and each sheet should land cleanly on framing with its fasteners biting wood rather than floating near an edge.
The long edge of a panel that runs between rafters is unsupported, and on 24-inch framing that edge usually needs help. That is what H-clips, the small metal panel edge clips, are for: one clip set midway between the rafters, or two where the span reaches 48 inches. Solid blocking or tongue-and-groove edges do the same job. Whether the code and the panel's span rating actually require them comes down to how the rating compares with the real framing spacing, so it is worth checking rather than guessing.
One quiet mistake shows up later as a dip you can see from the ground: nailing a panel while it is bowed. Standing in the bay between two rafters pushes the sheet down, and fastening it there locks the dip in. It does no structural harm, but it telegraphs a shallow valley through the shingles for the life of the roof. If the framing itself is warped or bowed, shim or block it to a flat nailing surface first.
Bad fastening causes the most trouble because it hides. Nails driven too hard crush the panel and lose their grip, nails that fall short or miss do not hold at all, and nails set too close to an edge split it. Once the underlayment and shingles cover the deck, those misses are hard to see and expensive to reach.
Why roofers snap a line before they nail
Here is the part most guides skip, and it is the one that decides whether the deck stays put in a storm. Once the panels are down, you cannot see the rafters anymore. A nail gun moves fast, and a nail that misses the rafter or truss underneath, which roofers call a shiner, pins the sheathing to nothing but felt and the air in the gap. It holds almost nothing, and the sheathing-to-framing nails are the exact connection that keeps a roof from peeling off when the wind gets under it.
The fix is boring and it works. Before nailing off a sheet, snap a chalk line down the center of each rafter or truss on top of the deck, then shoot to the line. APA's own installation sheet says to use a chalk line or straightedge to keep the fasteners on the framing, and re-roof inspectors in hurricane country list the same move as a pro tip: mark every rafter on the decking with chalk so the nails hit wood. On a big roof it costs a little time. It saves a deck full of shiners.
You can check your own roof from the attic. Look up. A scatter of bright nail tips is normal, because the fasteners are supposed to come through the sheathing. What you do not want is a line of tips coming through a bay between two rafters, catching nothing but underlayment. That row is shiners, and it means that stretch of deck is barely tied to the frame. I have stood in enough attics to read a deck in about ten seconds this way: on a solid roof the nail tips march along the framing lines, not between them.
The schedule that actually holds is 8d nails, 6 inches on center along the supported edges and ends and 12 inches through the field, kept about 3/8 inch off the edges and driven flush rather than sunk below the surface. High-wind and coastal zones tighten the field spacing too. Ring-shank nails earn their place here, since the rings resist withdrawal far better than a smooth shank, which is why many coastal codes now require them and why staples or old smooth nails often fail a re-roof inspection. The nail also has to reach, at least about 3/4 inch into the framing, or it is only holding the sheathing to itself.
None of this replaces a qualified roofer, or an engineer where the structure is in question. Span, load, roof covering, wind zone, and the local code cycle all change the right answer from one roof to the next, so treat what is here as a way to see the work clearly, not as a spec for your own house.
Estimate roof sheathing sheets before you buy
Use the Roof Sheathing Calculator to estimate roof deck sheets, roof pitch adjustment, waste, panel size, and partial replacement areas before ordering OSB or plywood.
Do the estimate before the delivery truck shows up. A simple gable roof and a cut-up roof with valleys, dormers, hips, and additions can need very different waste allowances even when the footprint looks close.
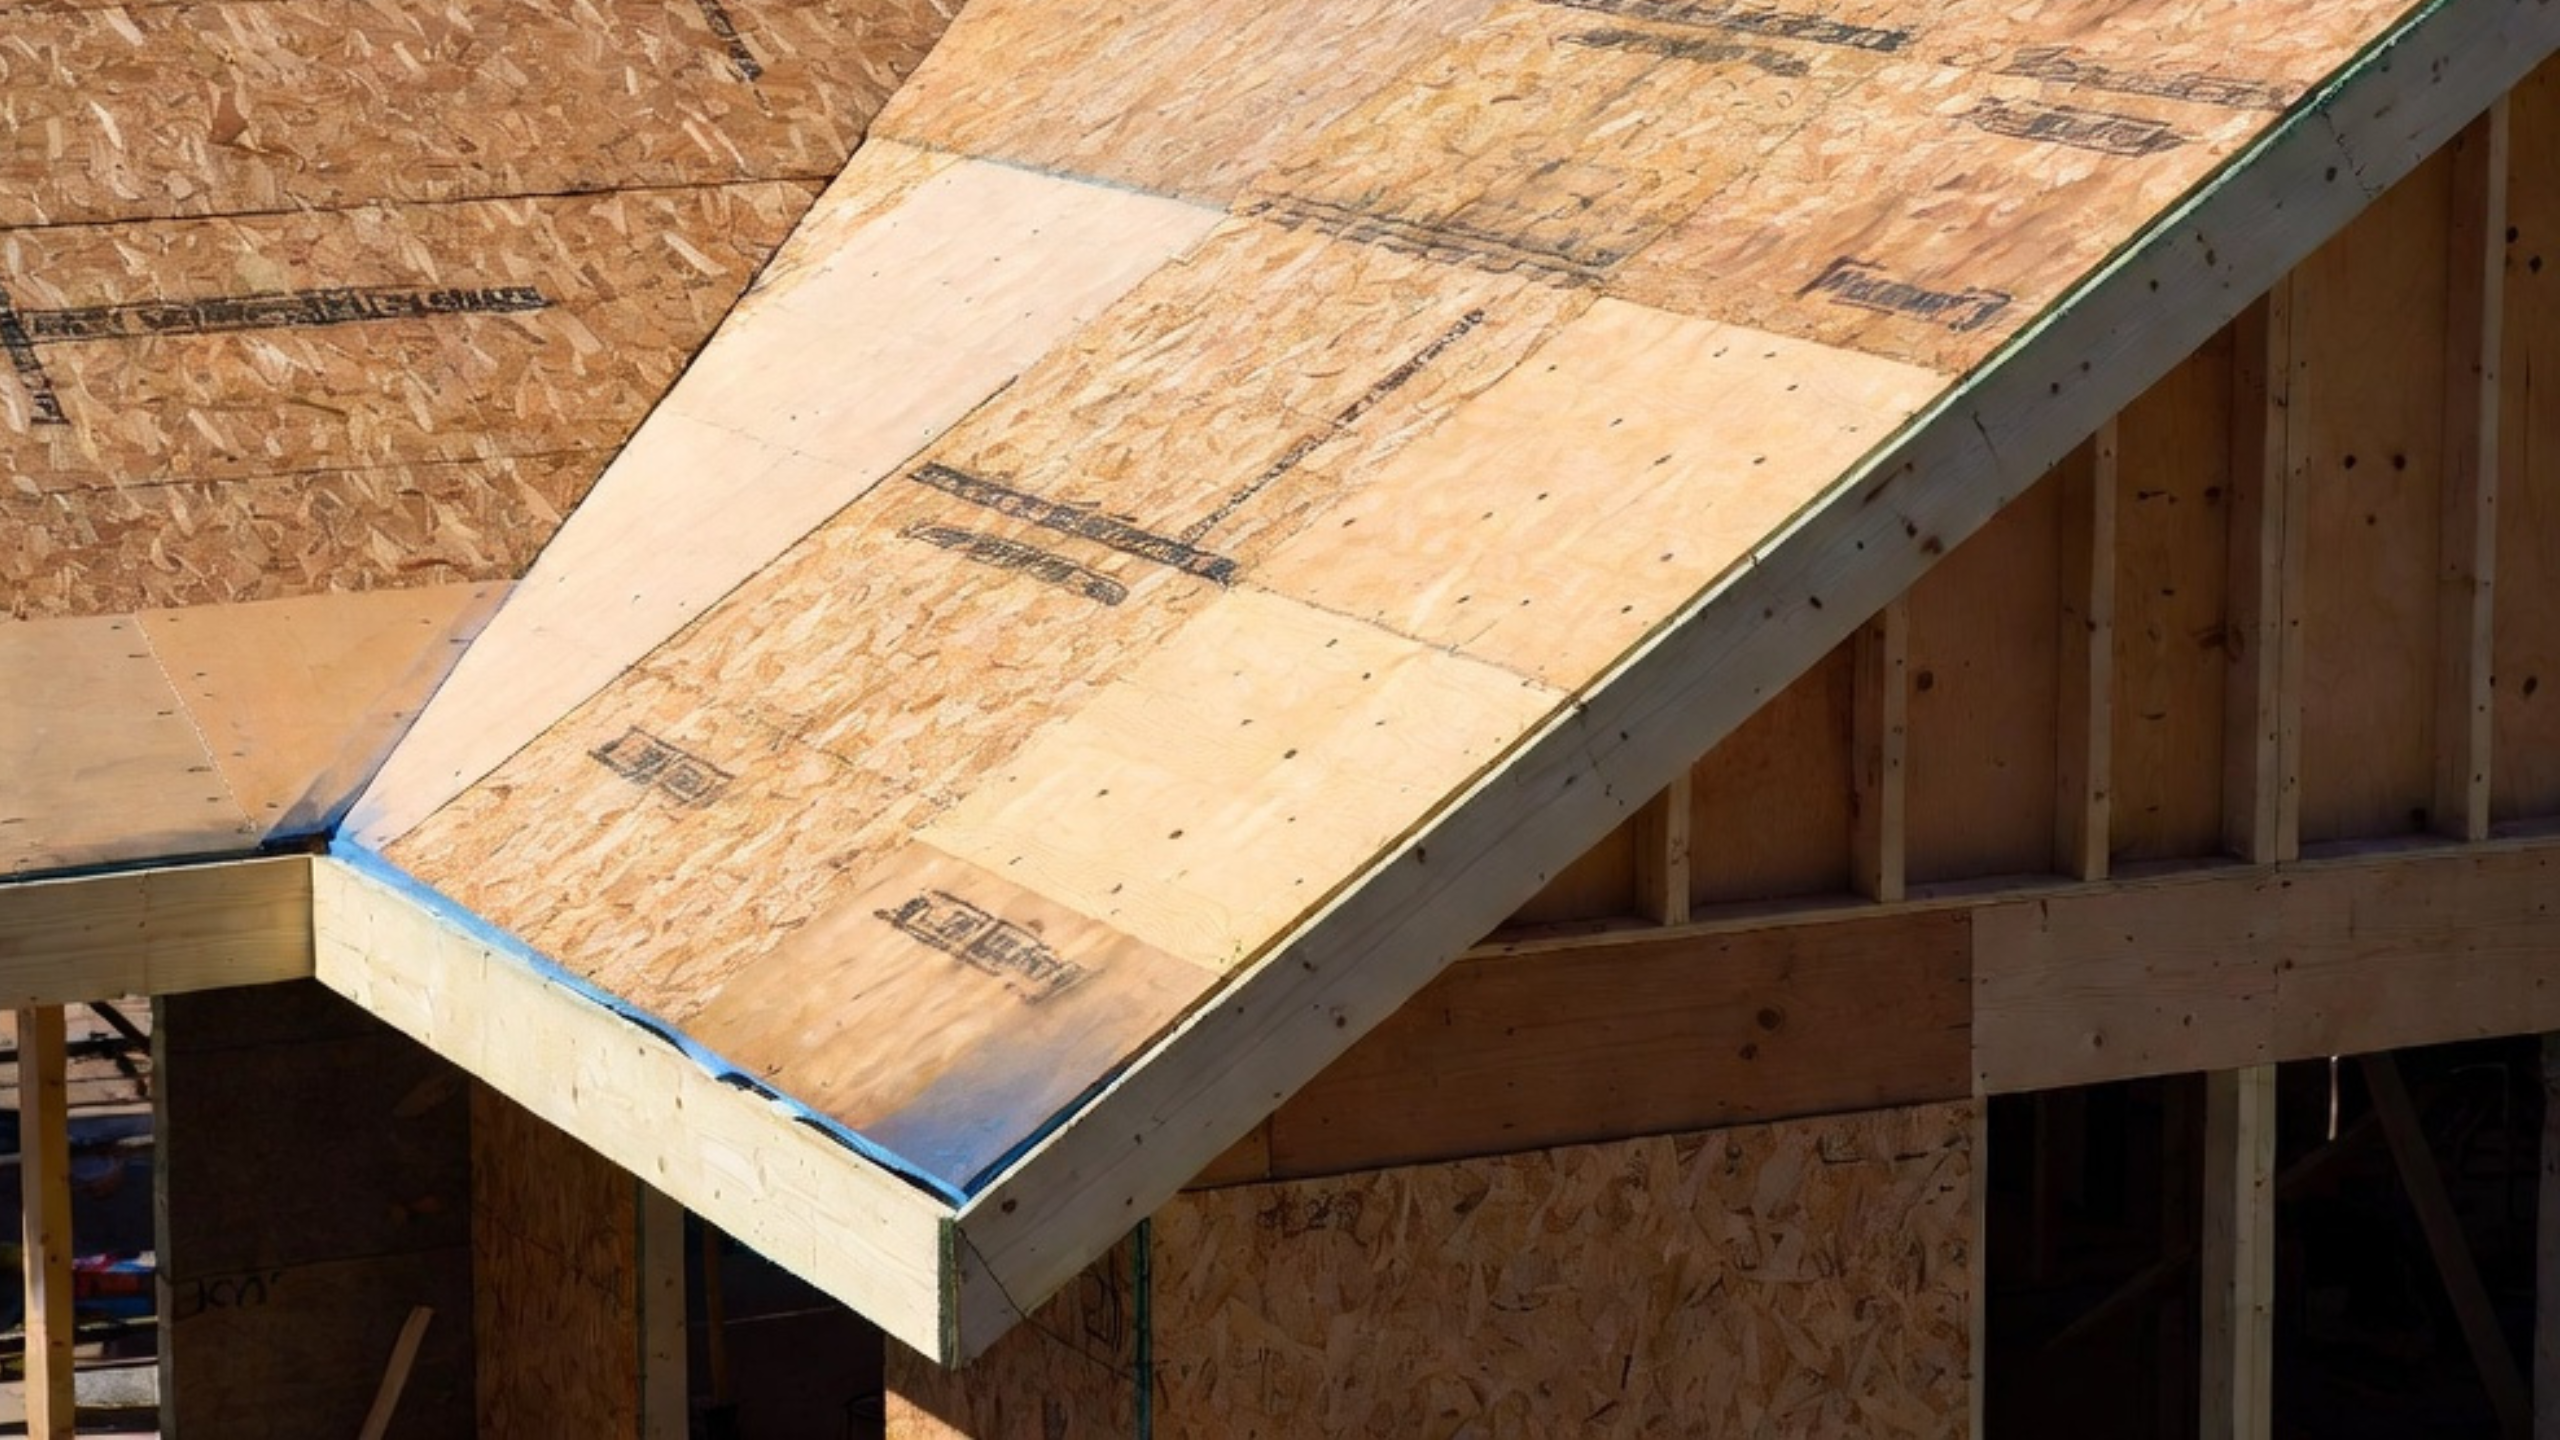
Roof edges, valleys, and tricky roof planes
The flat open field of a roof is the easy part. The trouble usually starts at valleys, eaves, rakes, chimneys, skylights, low-slope transitions, roof-wall intersections, and old additions.
These areas collect cuts, seams, flashing, fasteners, and water paths, so a small mistake there does far more damage than the same mistake in the middle of a clean roof plane.
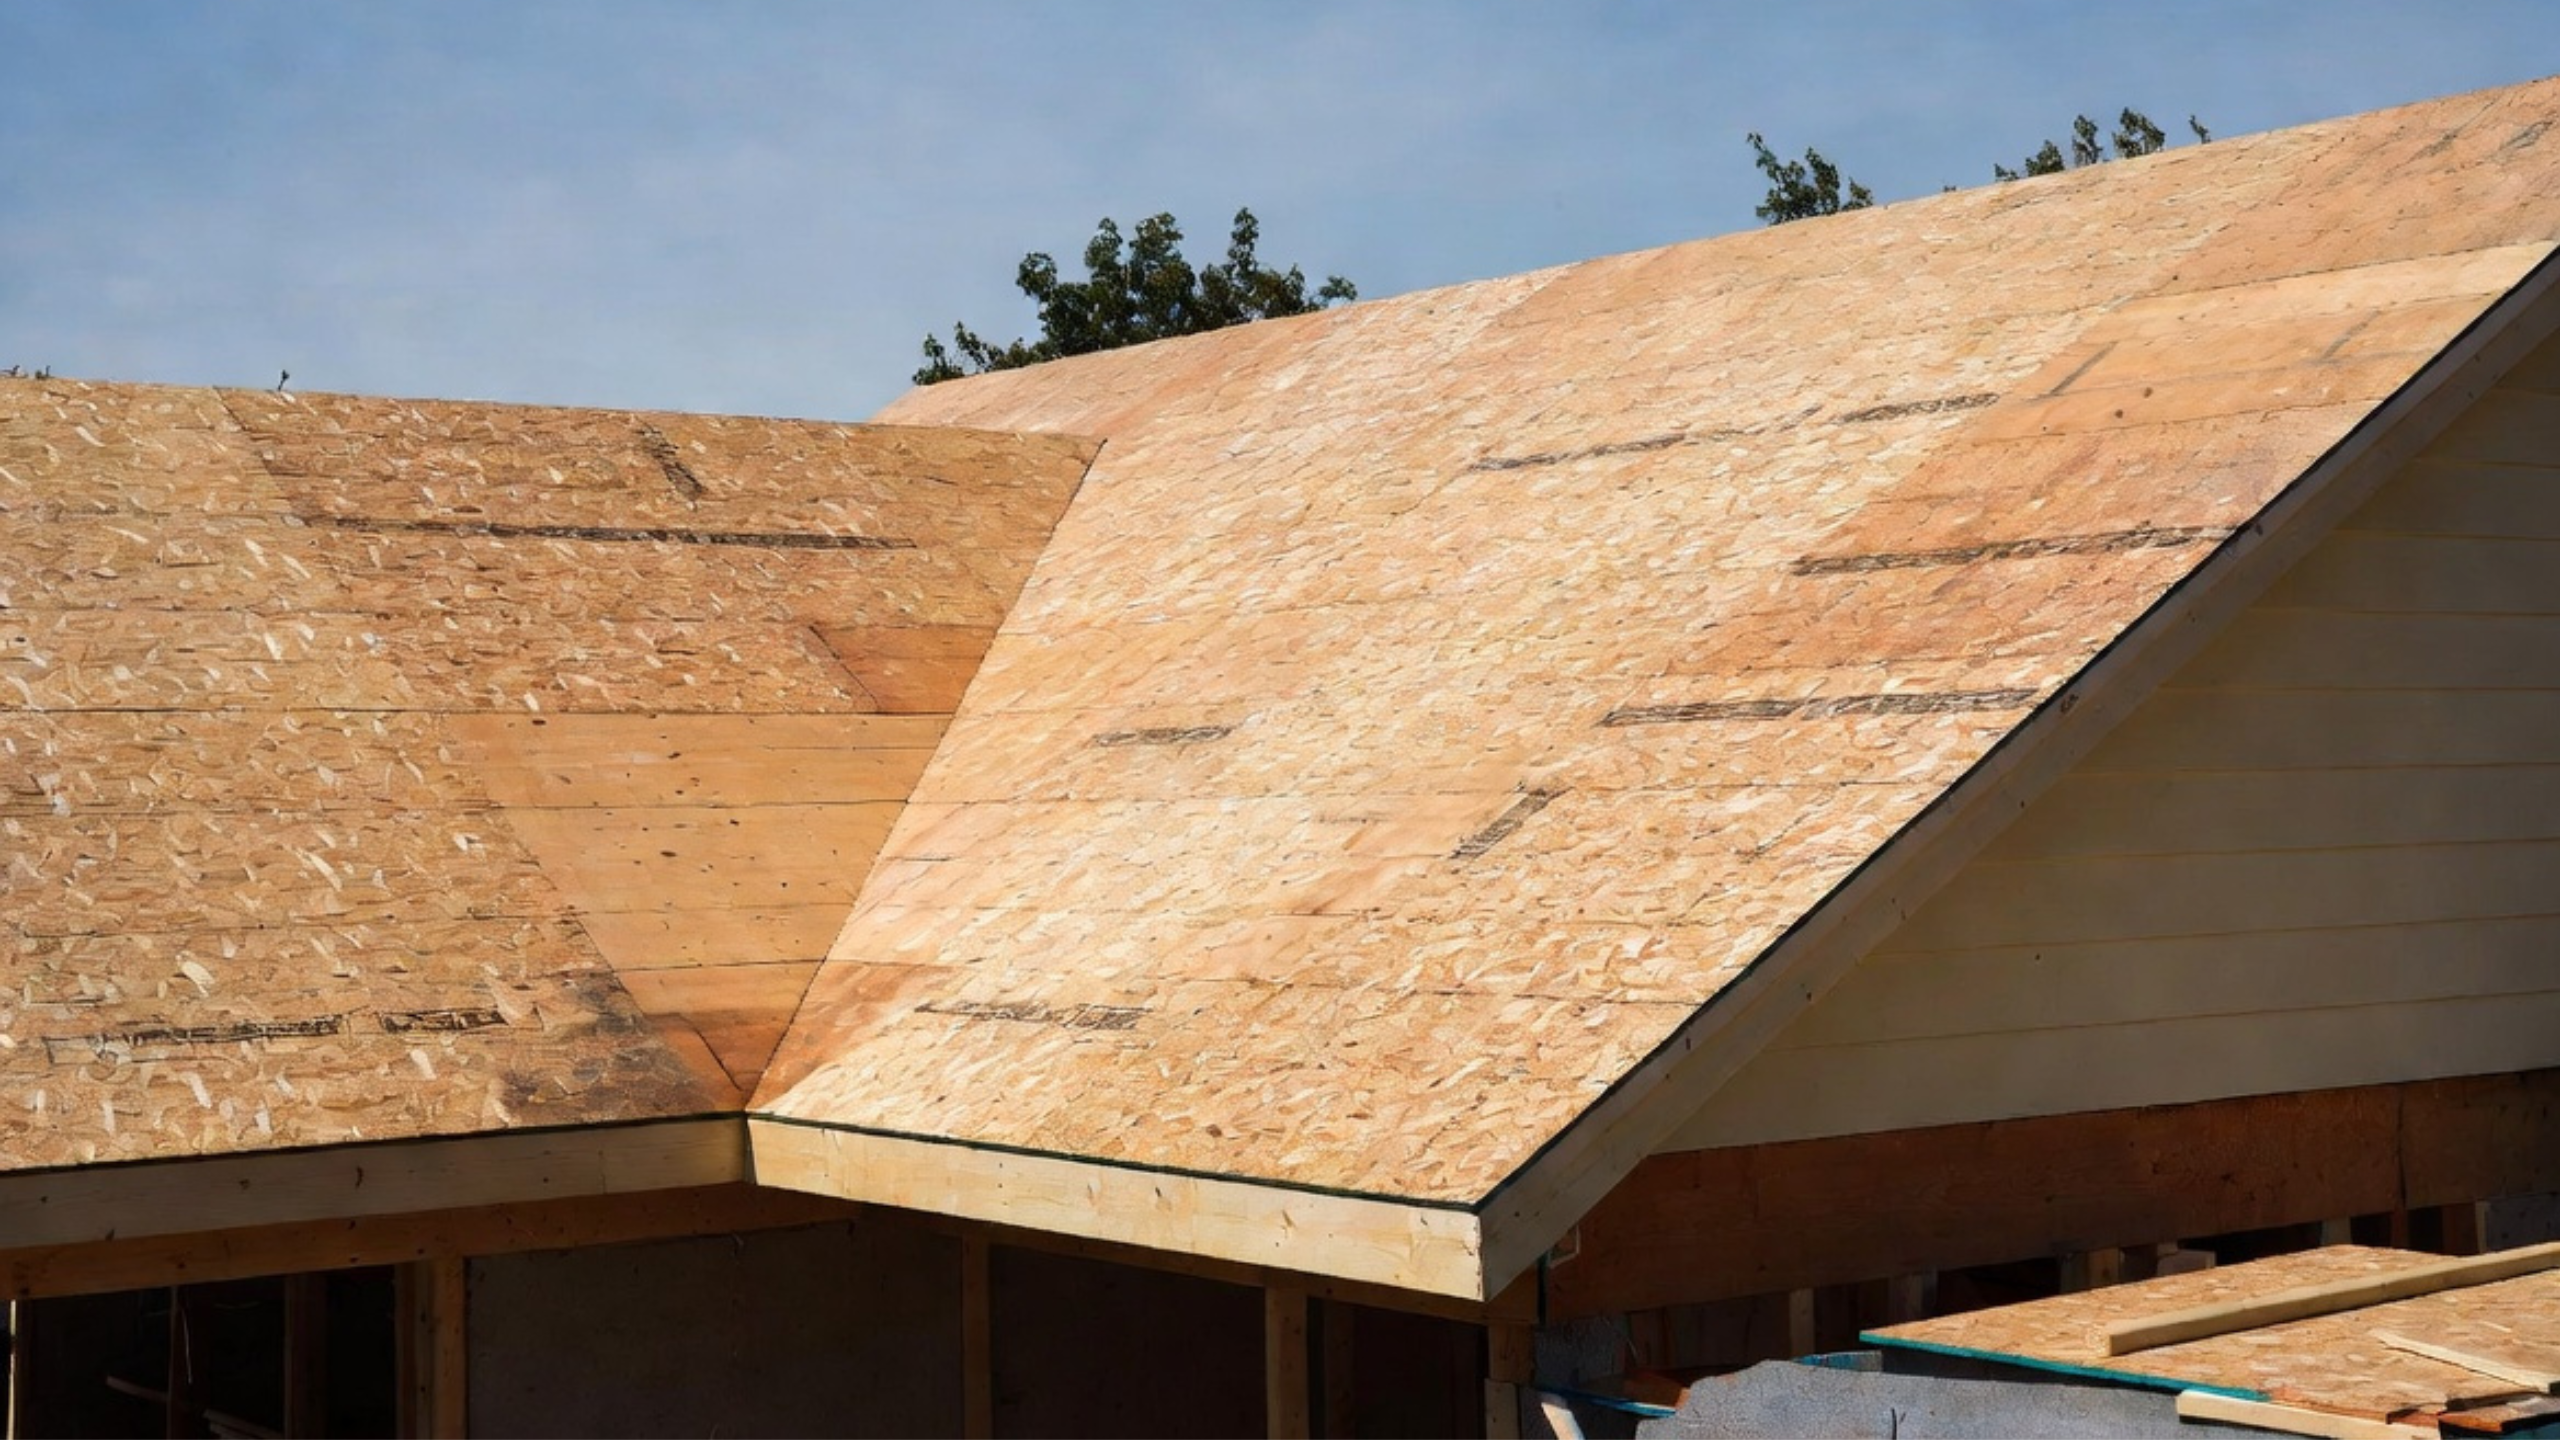
At these edges, check for solid backing, clean cuts, correct underlayment sequence, and enough support for the roofing system. If the panel edge is unsupported or already swollen before roofing goes on, the finished roof is starting with a weak spot.
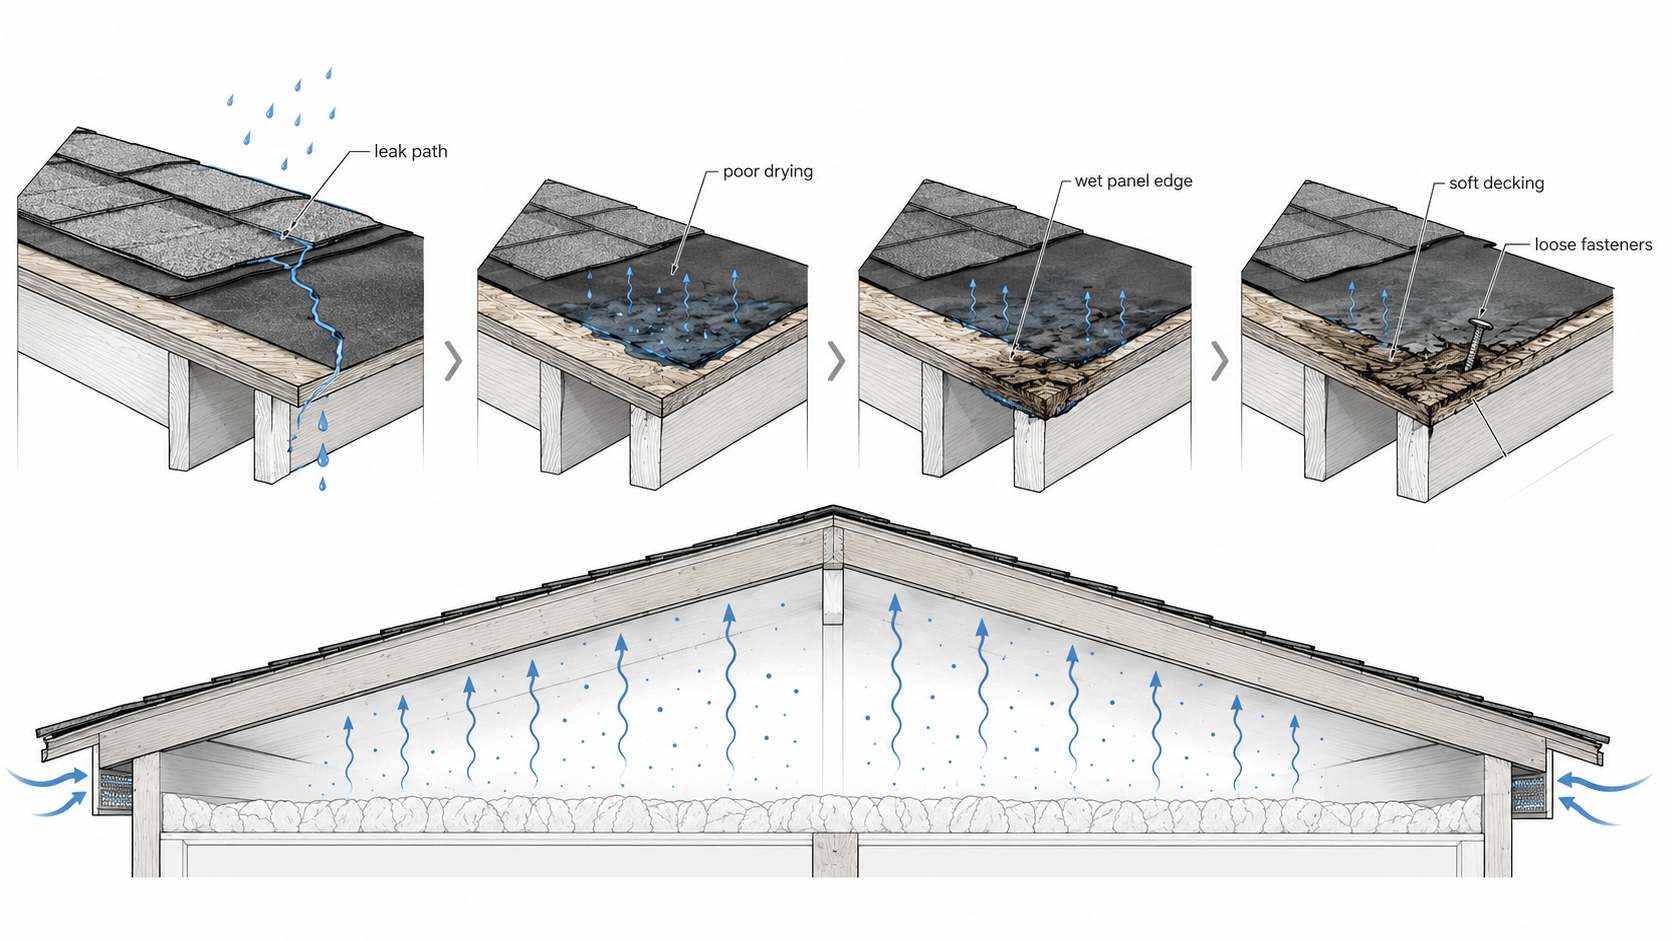
Where roof sheathing fails first
Roof sheathing fails first where water enters, where drying is poor, or where the deck was installed too tight or too weak for the span.
Common failure points include:
- Valleys where water volume is high and flashing mistakes are expensive.
- Eaves where ice dams, clogged gutters, or poor edge details wet the deck.
- Bathrooms, kitchens, and laundry areas where warm moist air reaches a cold roof deck.
- Old leak areas around chimneys, vents, skylights, pipe boots, and roof-wall intersections.
OSB edge swelling, dark staining, soft spots underfoot, nail pops, ridges visible through shingles, and moldy attic-side sheathing are all warning signs. One stain does not always mean the whole roof deck is bad, but it does mean the water path needs to be found before the roof is covered again.
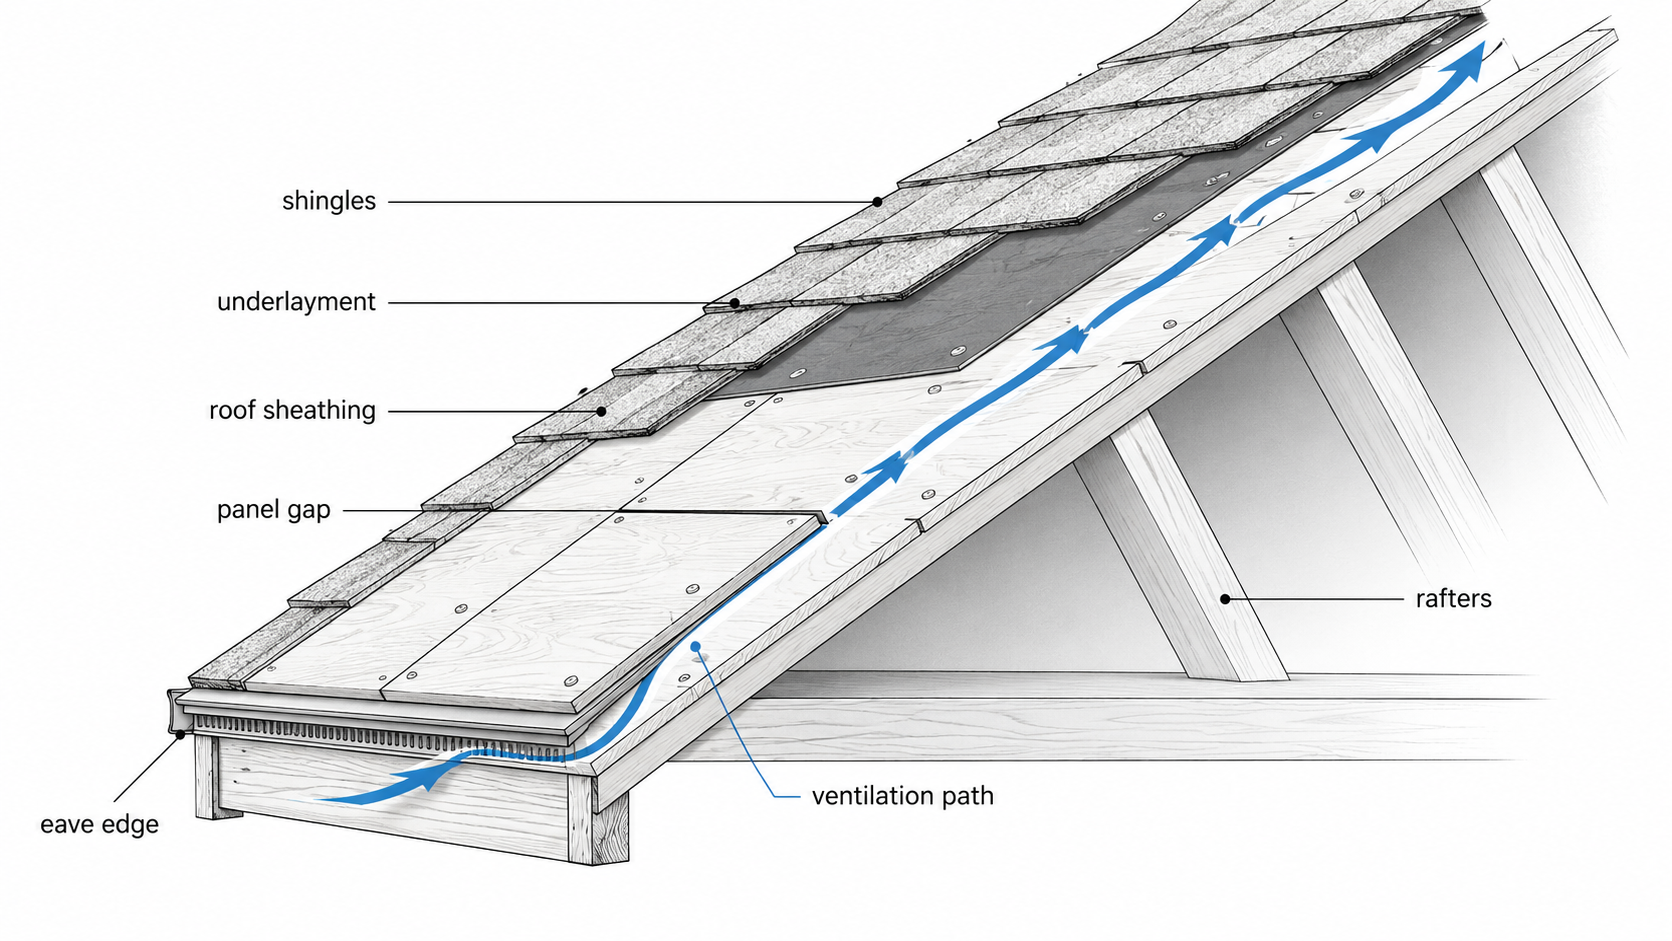
Ventilation and drying matter
Roof sheathing is not threatened only from the outside. Moisture can come from inside the house too. Warm indoor air that leaks into a cold attic can condense on the underside of the roof deck, especially near poorly vented slopes, blocked soffit vents, or cathedral ceilings without a clear ventilation path.
Good attic ventilation is not a cure for roof leaks, and it will not fix a bad vapor or air leak from the house below. But drying potential still matters. A roof deck that gets damp and can dry out is a very different problem from one that gets damp every winter and stays wet.
Before adding insulation tight against the underside of roof sheathing, check the assembly. Some roof designs need vent baffles, air sealing, or a different insulation strategy. This is where climate, code, roof pitch, roofing type, and attic layout change the answer.
When soft roof decking becomes a replacement problem
Once the deck is soft, the OSB-or-plywood question stops mattering. If the roof deck is soft, swollen, delaminated, mold-stained, or rotted, the real questions are whether it can still hold roofing fasteners and whether the leak that caused the damage has been fixed.
If the roof deck is already damaged, move to replacing roof sheathing before pricing the job as a simple material swap. For rough repair planning after the leak source is understood, use the Water-Damaged Sheathing Repair Cost Calculator.
New underlayment should never be used to hide a bad deck, because once shingles or metal roofing go on, what could have been a simple inspection turns into a full tear-off.
What to check before underlayment goes down
The best time to catch roof sheathing mistakes is before underlayment covers the deck.
- Panel stamp and span rating match the roof framing and local requirements.
- Edges are gapped, supported where needed, and not swollen from weather exposure.
- Fasteners are seated correctly, not missed, overdriven, or floating off framing.
- Valleys, eaves, openings, and roof-wall intersections are ready for proper underlayment and flashing.
That inspection does not need to be dramatic. Walk the roof only if it is safe and appropriate. From the attic, look for daylight, staining, mold, loose fasteners, broken panels, and dark wet areas. From the roof, look for soft deck areas, ridges, buckling, bad seams, and water-damaged edges.
FAQ
Is roof sheathing the same as roof decking?
In most residential conversations, yes. Roofers often say roof decking. Designers, code language, and builders may say roof sheathing. Both usually mean the structural panel or board layer under the roofing.
Is OSB good for roof sheathing?
Yes, when it is rated for the span, installed correctly, kept dry, and covered with the right roof system. OSB problems usually come from wet edges, poor drying, tight joints, or chronic leaks.
Is plywood better than OSB for roof sheathing?
Plywood is often more forgiving when wetting and drying are likely. OSB is common and works well when detailed correctly. In wet-risk areas, valleys, old roofs, or delayed dry-in work, plywood can be worth the upgrade.
What thickness should roof sheathing be?
It depends on the panel rating, rafter or truss spacing, roof loads, roofing material, local code, and manufacturer instructions. Common residential panels include 7/16 inch, 1/2 inch, and 5/8 inch, but the panel stamp and inspection requirements decide the job.
Is 7/16 OSB enough for roof sheathing?
It can be enough on many residential roofs when the panel is rated for the span and accepted by the local inspector. Do not assume it is enough for every roof, every climate, every load, or every roofing material.
Should roof sheathing have gaps?
Yes. Wood structural panels need small expansion gaps unless the panel system has a manufacturer-specific edge profile or instruction. Tight panels can swell, buckle, or ridge after moisture exposure.
What are shiners on a roof?
Shiners are fasteners that missed the rafter or truss and came through the sheathing into open space instead of biting framing. They hold little or nothing, so a row of them means that part of the deck is poorly attached. Snapping chalk lines over the framing before nailing is how installers avoid them.
Can I roof over soft sheathing?
No. Soft sheathing means the deck may not hold fasteners or carry loads properly. Find the leak source, replace damaged panels, and fix the roof deck before covering it.
Does underlayment fix bad roof sheathing?
No. Underlayment sheds water above the deck. It does not make a rotten, swollen, unsupported, or badly nailed deck strong again.
Why does roof sheathing rot from the attic side?
Warm indoor air can leak into the attic and condense on cold roof sheathing. Blocked vents, missing baffles, bathroom fans venting into the attic, and poor air sealing can all keep the underside of the roof deck wet.
Should old plank roof sheathing be replaced with plywood?
Not always. Some plank decks can stay if they are sound, flat, and acceptable for the roof covering. Large gaps, split boards, loose boards, rot, or poor nailing support may require new panels or repairs before roofing goes on.
Read This Next
- Replacing Roof Sheathing
- Roof Planking
- House Sheathing
- Exterior Wall Sheathing
- Roof Sheathing Calculator
- Water-Damaged Sheathing Repair Cost Calculator
References
Sources used for this article
- International Residential Code: roof-ceiling construction and roof sheathing provisions
- APA: Engineered Wood Construction Guide and roof sheathing guidance
- APA Builder Tips: proper installation of APA rated sheathing for roof applications (Form N335)
- APA: panel spacing and preventing buckling in wood structural panel sheathing
- IBHS FORTIFIED: roof sheathing attachment and re-nailing standards for wind and hurricane resistance
- Asphalt Roofing Manufacturers Association: Residential Asphalt Roofing Manual
- Huber Engineered Woods: ZIP System sheathing and tape installation manual