
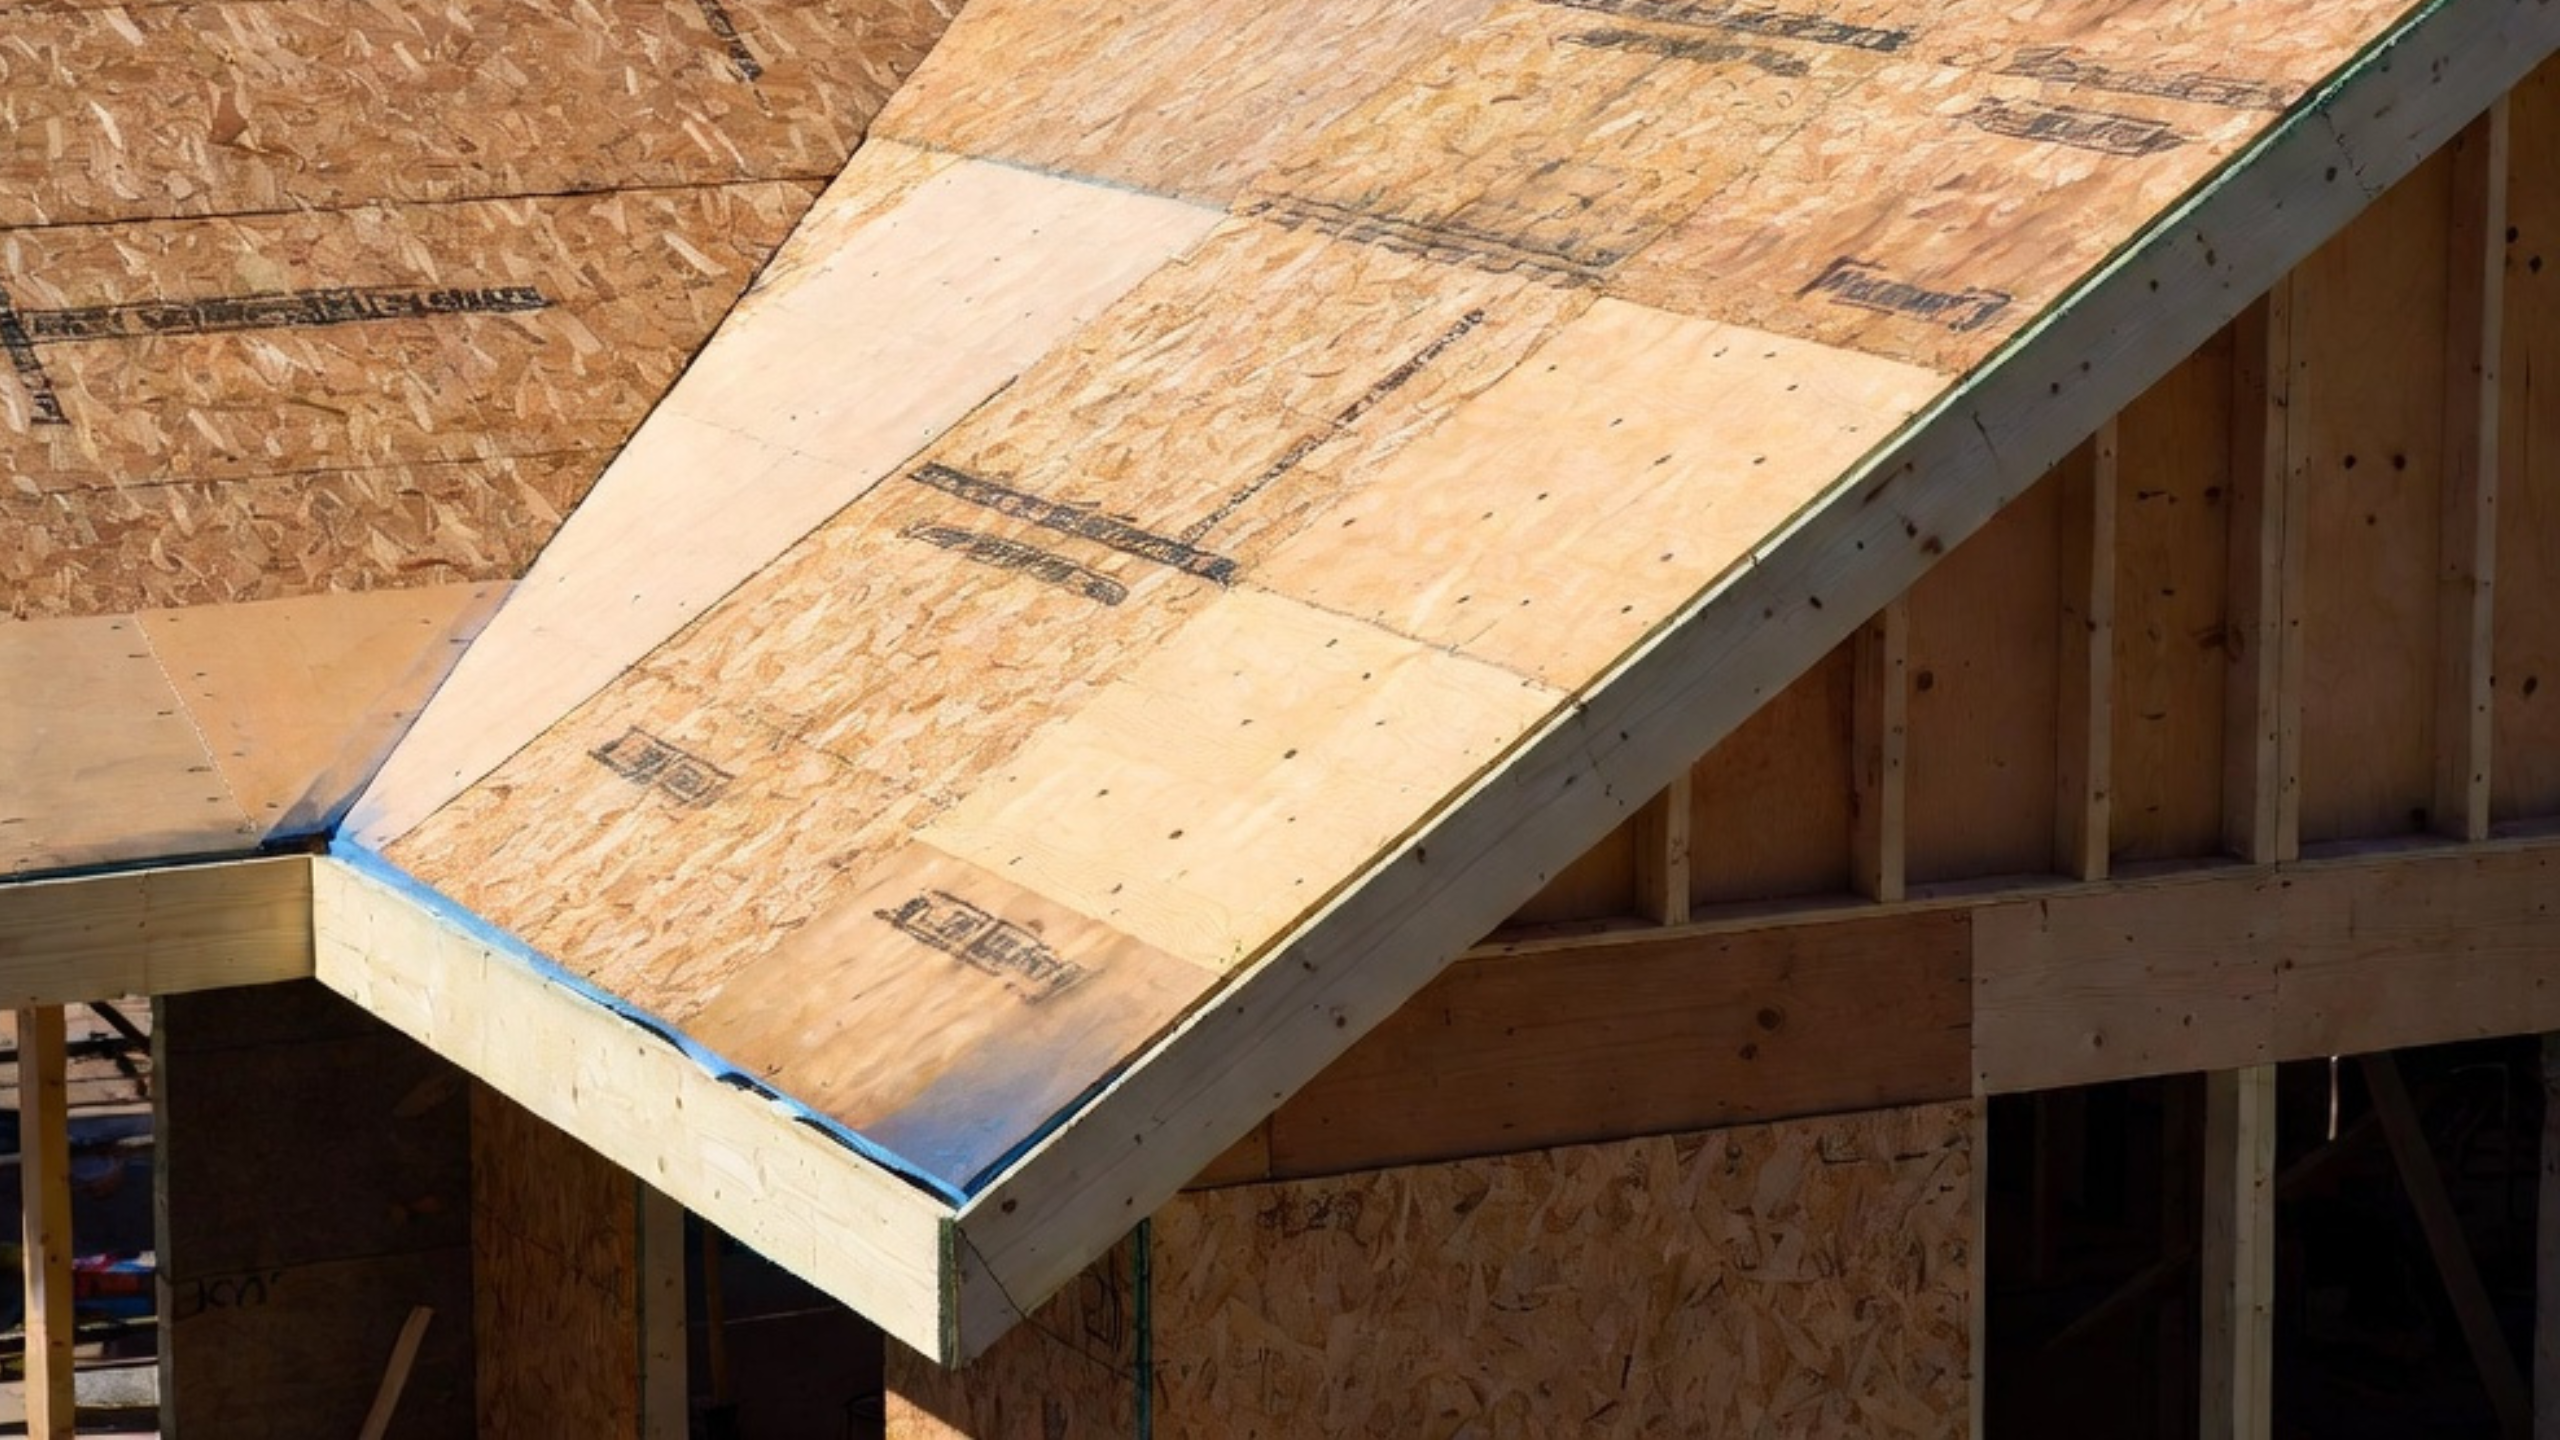
Replacing roof sheathing is not just swapping a few sheets of plywood during a reroof.
The roof deck has to hold fasteners, stay flat, dry correctly, and give the new roofing a solid base. If the deck is soft, swollen, rotted, badly nailed, or too thin for the span, new shingles or metal roofing will only hide the problem for a while.
This page is about replacement scope, cost, rot, roof plywood replacement, roof decking repair, and what roofers should check after tear-off. For the basic roof deck assembly, OSB vs plywood, thickness, and panel layout, start with roof sheathing. For the larger sheathing system across the house, see house sheathing.
When roof sheathing needs replacement
Roof sheathing needs replacement when it can no longer hold fasteners, carry roof loads, stay flat, or dry after getting wet.
The warning signs are usually clear once the roof is opened:
- Soft or spongy decking underfoot.
- Swollen OSB edges or plywood delamination.
- Dark staining, rot, mold, or crumbly wood visible from the attic.
- Shingles that ripple, dip, or telegraph panel edges.
- Loose fasteners, nail pops, or old nails that no longer bite.
One stained area does not always mean the whole roof deck is bad, but soft sheathing is a different story. If a screwdriver sinks into the wood, if the panel flakes apart, or if the fasteners no longer hold, that section has to come out.
Where roof sheathing usually rots first
Roof sheathing usually fails where water enters and drying is poor. The bad sheet is often the last part of a longer water problem.
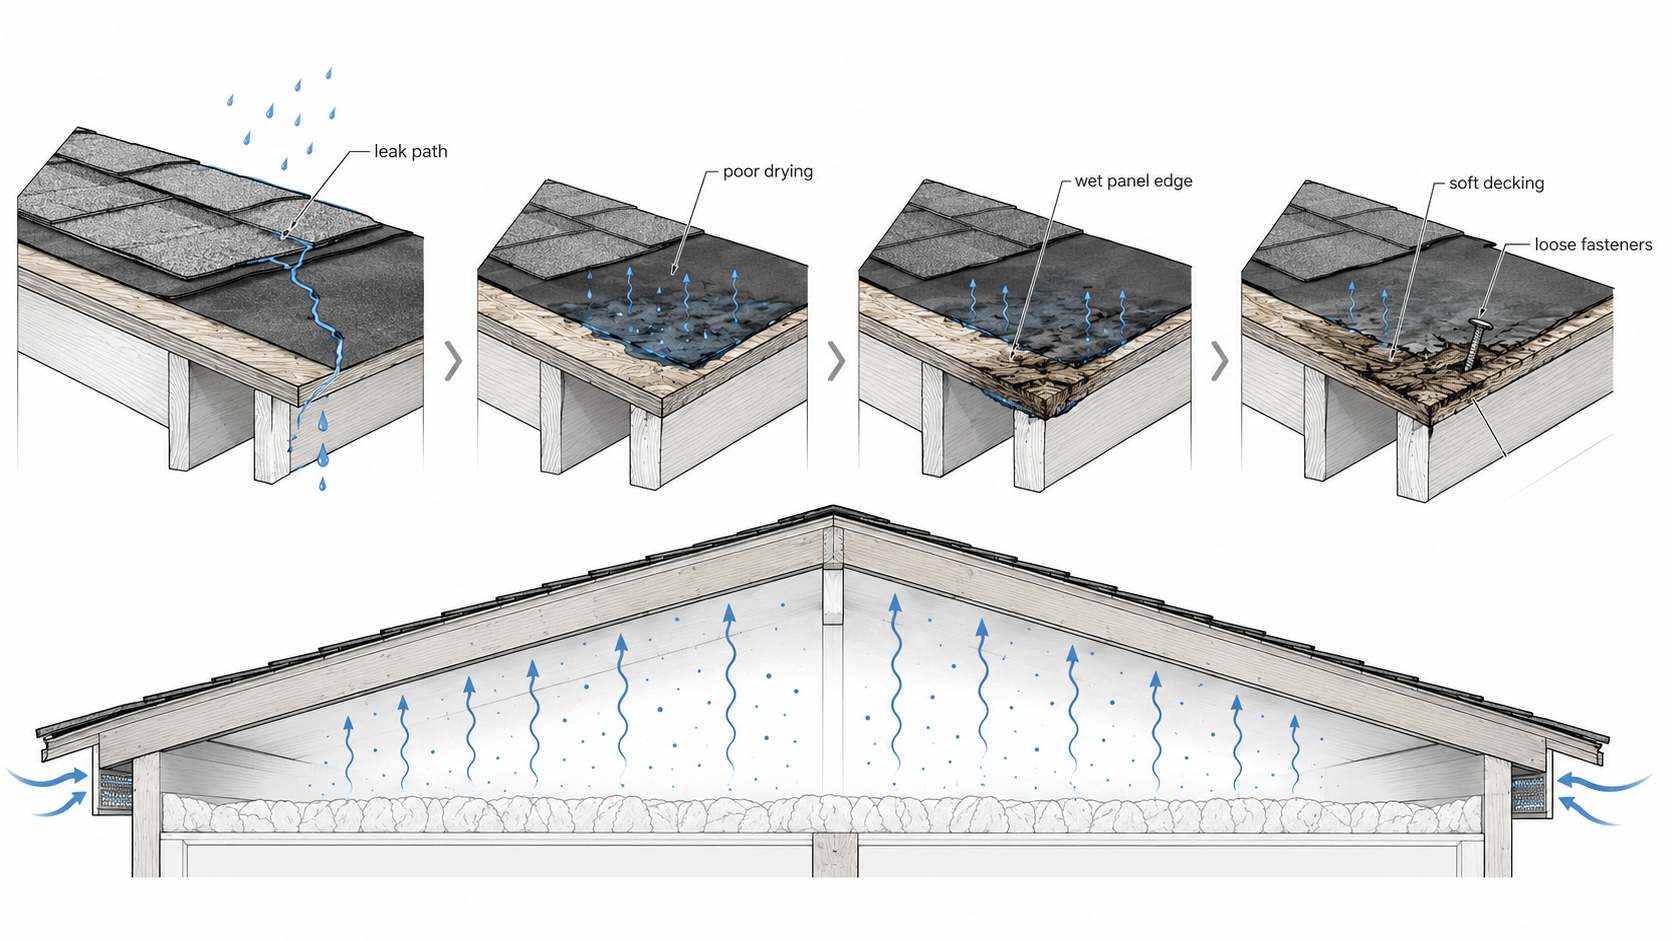
Check these areas first:
- Eaves where ice dams, clogged gutters, or poor drip-edge details wet the deck.
- Valleys where water volume is high and flashing mistakes cost more.
- Chimneys, skylights, pipe boots, vents, and roof-wall intersections.
- Bathroom and kitchen exhaust areas where warm moist air reaches the underside of the deck.
If the leak path is not fixed, replacing roof sheathing only resets the clock. The new panel will fail the same way.
If the roof damage started at siding, a wall, or a window opening, do not treat it as only a roof problem. Water can travel before it shows up in the deck.
Roof sheathing replacement cost
Roof sheathing replacement cost depends on how much decking is bad, how steep the roof is, how many roof planes and valleys are involved, what material is used, and whether the work happens during a full reroof or as a separate repair.
As a 2026 planning range, many roof decking replacement jobs fall around $2 to $6 per square foot when larger areas are being replaced. Small spot repairs are often priced by the sheet during a reroof. In many markets, damaged roof plywood replacement can run roughly $75 to $150 per sheet once labor, access, tear-off, disposal, and material are included. Local contracts can be lower or higher.
| Scope | Planning range | What is usually included |
|---|---|---|
| Small spot replacement | $75–$150 per sheet | Bad sheets found during tear-off, panel replacement, fastening, and normal disposal. |
| Partial roof deck repair | $500–$2,500+ | Several sheets near valleys, eaves, vents, skylights, or chimney areas. |
| Large-area replacement | $2–$6 per square foot | Panels, labor, disposal, layout, fastening, and deck preparation before underlayment. |
| Full redeck during reroof | $1,900–$17,000+ | Wide range because roof size, pitch, height, access, plywood thickness, and region change the price fast. |
These are planning ranges, not bids. A low-slope garage roof and a steep two-story roof with valleys, dormers, skylights, and old plank decking are not the same job.
What changes the price
The cheapest version of this job is a few bad sheets found while the roof is already stripped. It gets expensive when the damage is hidden and spread across eaves, valleys, chimneys, and old ventilation problems.
The price changes most when one of these shows up:
- Pitch and access. Steep roofs, high roofs, and tight driveways slow the job.
- Damage pattern. One bad panel is simple; rot across a whole slope is a different job.
- Material choice. OSB, plywood, 5/8 panels, radiant-barrier panels, and specialty systems do not price the same.
- Flashing scope. Chimneys, skylights, valleys, and roof-wall intersections can cost more than the panel itself.
Do not approve a bid that says “replace rotten wood as needed” without a unit price. Get the per-sheet price, the plywood or OSB thickness, and the fastening method in writing before tear-off.
Use calculators before you sign
Use the Roof Sheathing Replacement Cost Calculator to rough out replacement cost by roof area, number of sheets, labor, material, pitch, and waste.
If the roof deck is already soft, stained, swollen, or moldy, use the Water-Damaged Sheathing Repair Cost Calculator after the leak source is understood.
If you only need to estimate sheet quantity before buying material, use the Roof Sheathing Calculator. For the full set of roof, wall, floor, OSB, plywood, and gable tools, use the main sheathing calculators page.
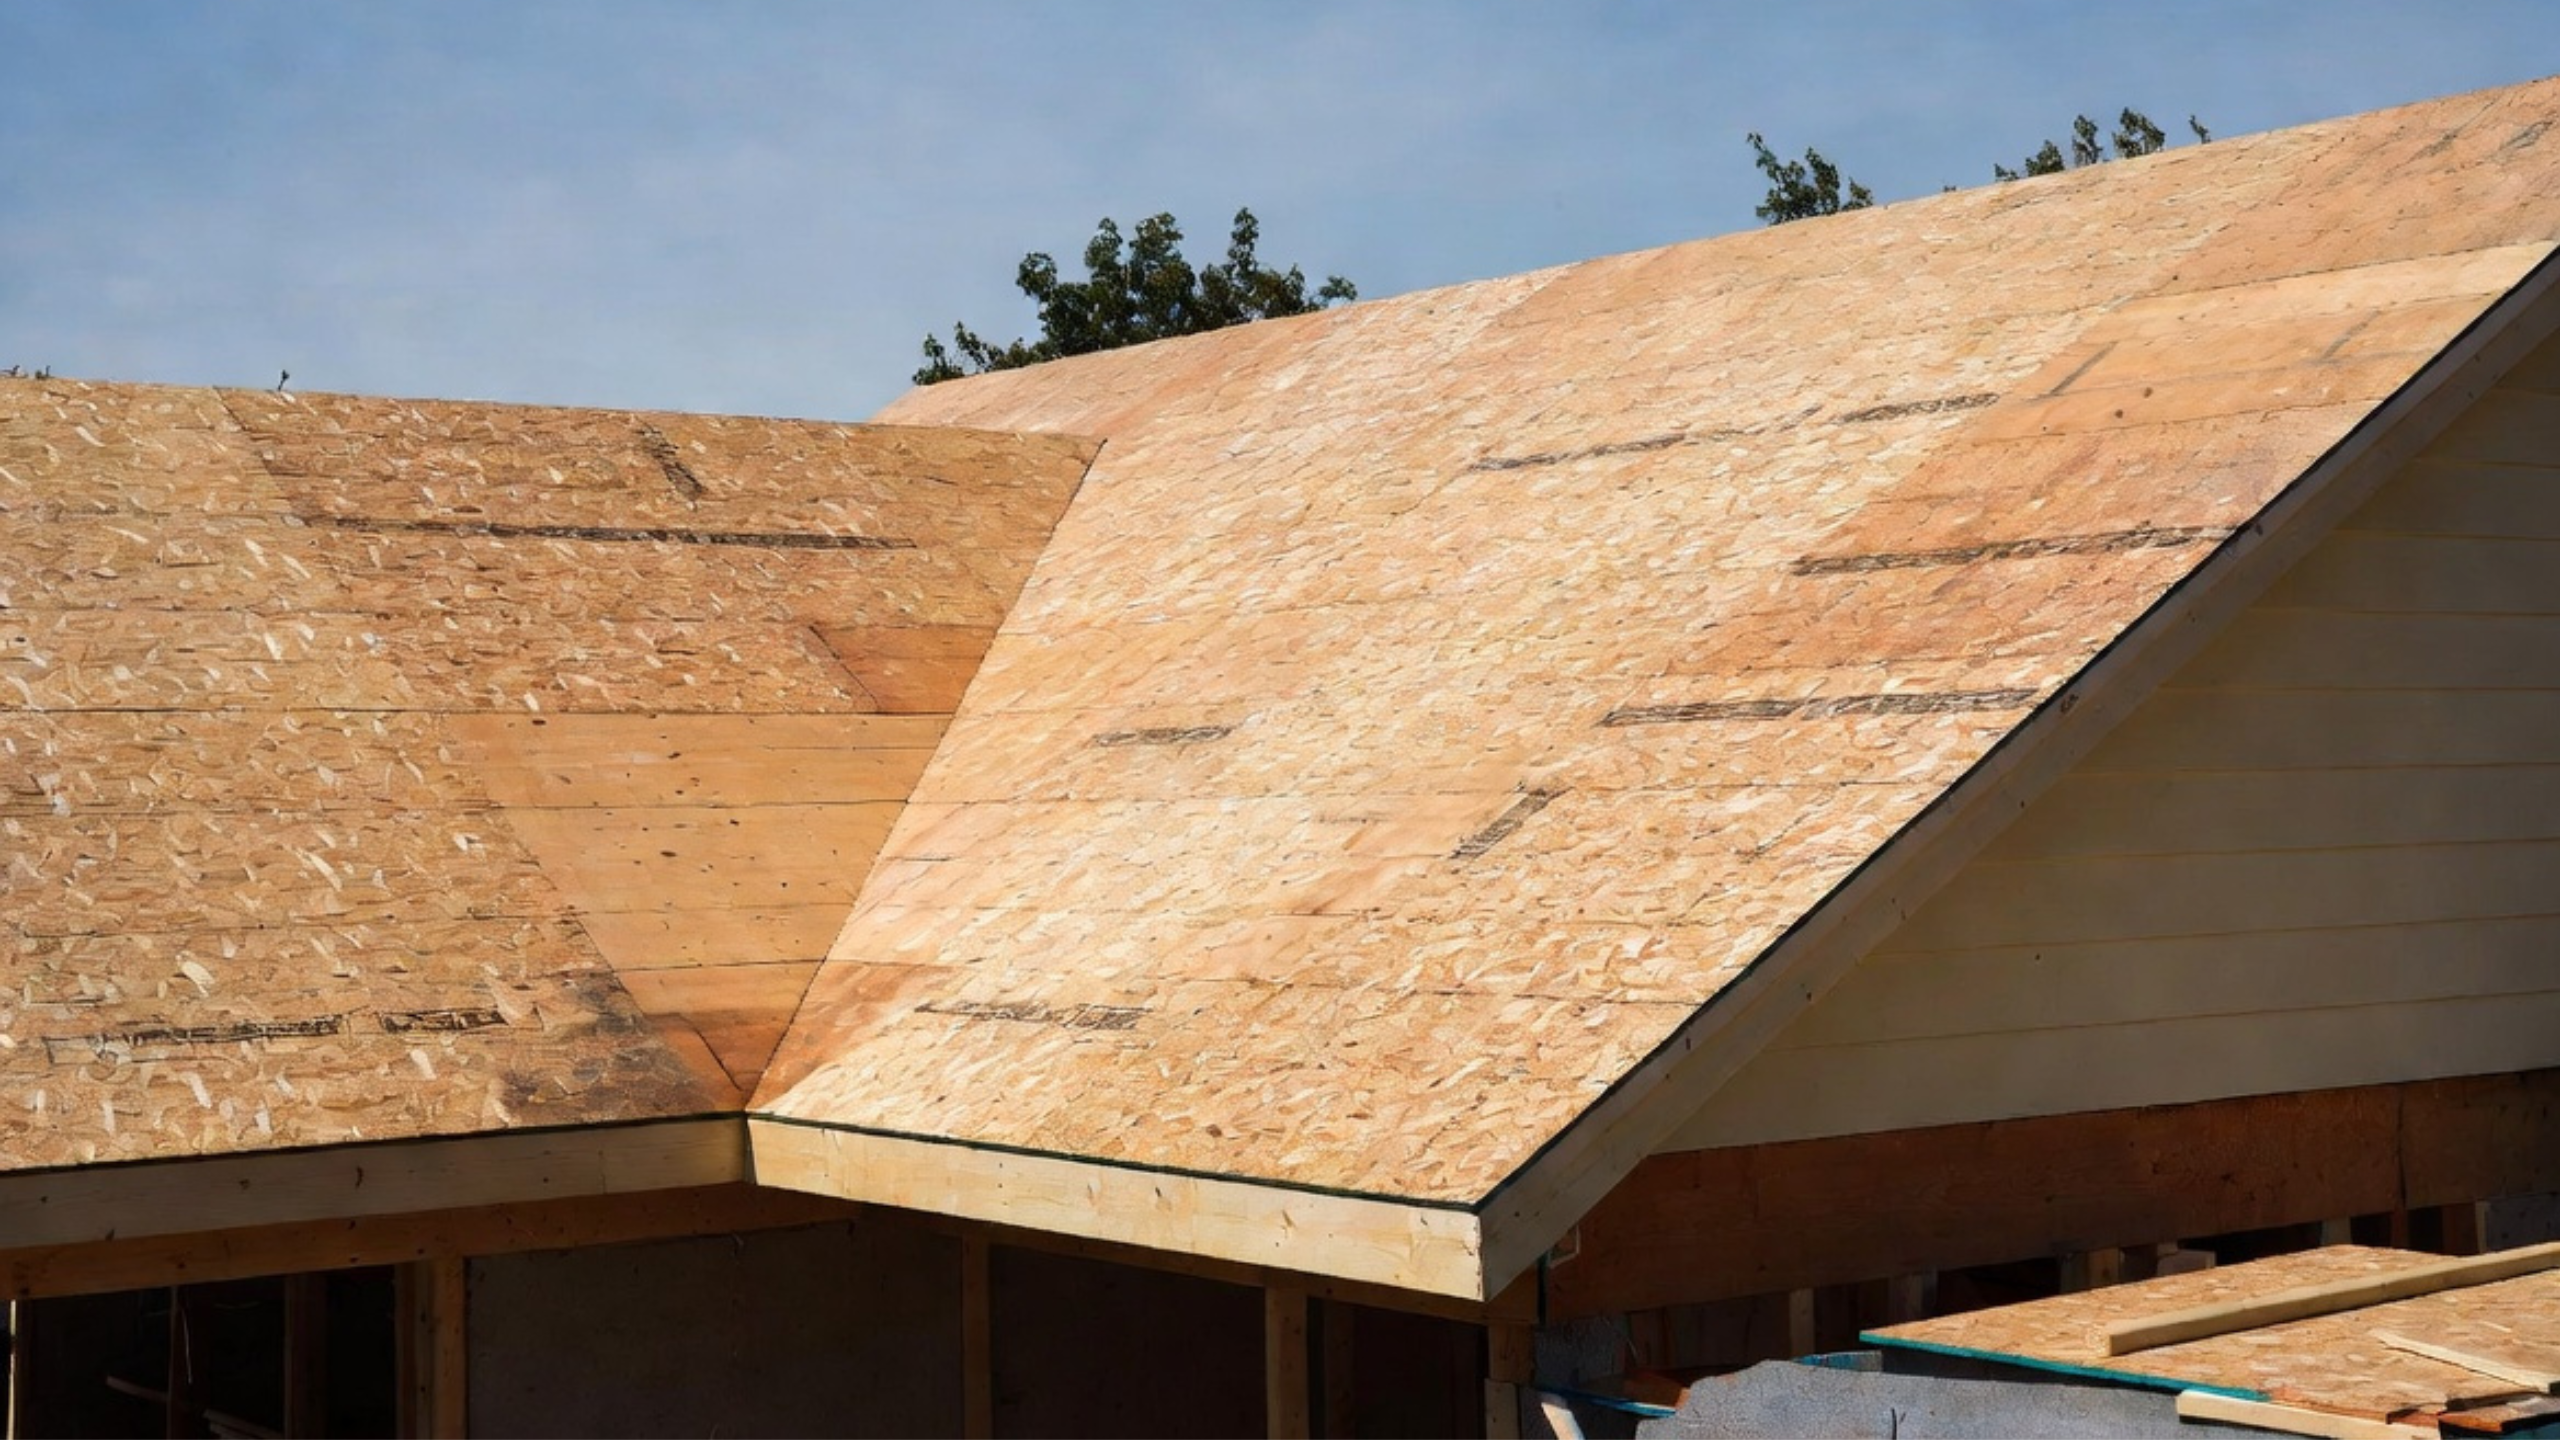
OSB vs plywood for replacement roof sheathing
OSB and plywood can both work for replacement roof sheathing when the panel is rated for the span and installed correctly.
OSB is common because it is available, consistent, and often cheaper. It performs well when it is kept dry, gapped correctly, supported at edges where required, and fastened to the right schedule.
Plywood costs more in many markets, but it is more forgiving when wetting and drying are likely. That matters at eaves, valleys, old leaks, complicated roof planes, and jobs where the deck may be exposed longer than planned.
| Material | Good use | Watch point |
|---|---|---|
| OSB roof sheathing | Large roof fields, budget-sensitive reroofs, and normal dry-in schedules. | Edges can swell if left wet or installed tight. |
| Plywood roof sheathing | Eaves, valleys, wet-risk areas, old houses, and roofs with more exposure risk. | Costs more and still fails if flashing or ventilation is wrong. |
| Thicker plywood or OSB | 24-inch framing, high wind areas, heavier roofing, or roofs needing a stiffer deck. | Must match the span rating, local code, and roof covering instructions. |
“OSB or plywood?” is the wrong question. The ones that matter are what failed, what has to dry, what span is being covered, and what the roofing system requires.
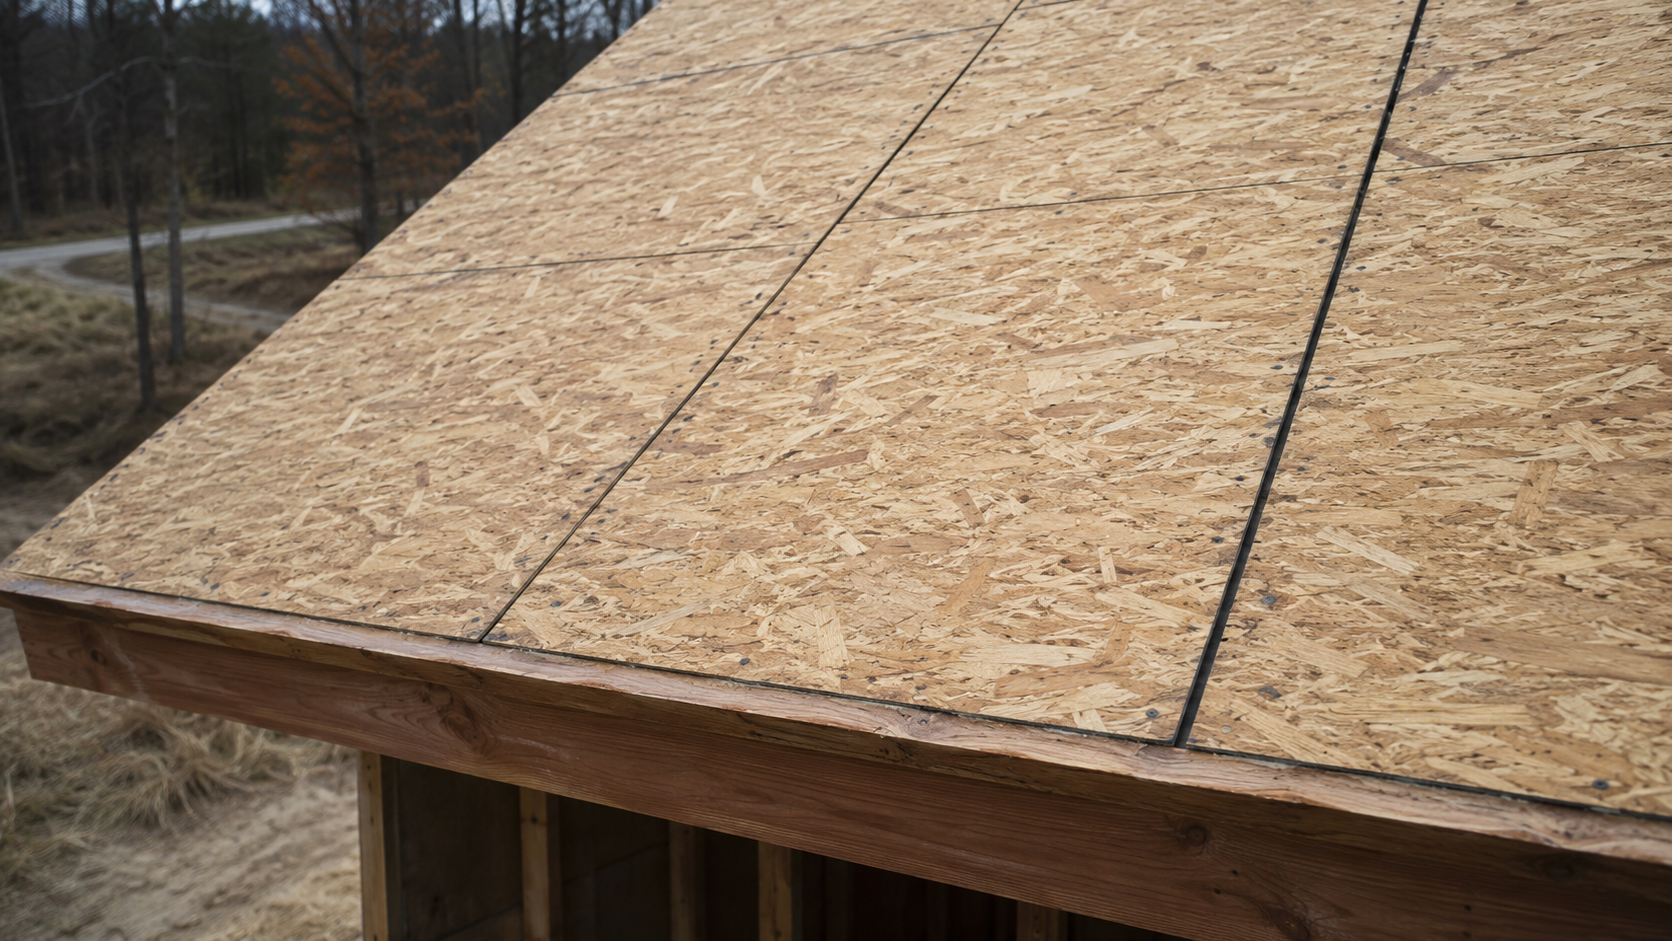
Thickness, gaps, clips, and fastening
Replacement roof sheathing has to match the roof frame and the roof covering. Do not patch a roof with random leftover plywood and hope the underlayment hides it.
Common residential roof decks use 7/16 inch OSB, 1/2 inch panels, or 5/8 inch panels depending on span, roof load, local code, roofing material, and manufacturer instructions. On 24-inch framing, edge support and stiffness matter more, so H-clips, tongue-and-groove edges, blocking, or thicker panels may be needed.
Good replacement work includes:
- Cutting damaged panels back to framing, not leaving weak slivers.
- Installing panels with the long direction across rafters or trusses unless the panel instructions say otherwise.
- Leaving 1/8 inch gaps at panel ends and edges unless the manufacturer gives different instructions.
- Using panel clips, blocking, or tongue-and-groove edges where the span and panel rating require edge support.
- Fastening with the required nails or screws at the required spacing, not whatever is left in the gun.
APA guidance commonly calls for 1/8 inch panel spacing and minimum 8d common nails with close edge spacing for roof sheathing. High-wind zones, engineered roofs, and local code can require stronger schedules.
How roofers replace bad sheets
The clean method is simple, but it has to be done in the right order.
- Strip roofing, underlayment, and damaged flashing to expose the deck.
- Mark soft, swollen, rotted, delaminated, or badly fastened panels.
- Cut damaged panels back to the center of rafters or trusses.
- Replace with rated panels of the right thickness and span rating.
- Gap, clip, block, and fasten the panels correctly.
- Replace underlayment, drip edge, valley flashing, step flashing, boots, and other water-control details as needed.
Do not let a roofer patch only the visible hole if the nearby deck is also soft. Roof decking often fails in a pattern, so eaves, valleys, and penetrations should be probed and checked before the roof is dried in again.
What roofers should check before underlayment
The last good inspection moment is before underlayment covers the deck.
Check the deck for:
- Flatness across rafters, trusses, and repaired areas.
- Correct panel thickness and span rating.
- Clean panel gaps and edge support.
- Nails seated flush, not overdriven or missed.
- Dry, sound panels at valleys, eaves, chimneys, skylights, and vents.
Underlayment is a water-shedding layer above the deck, not a fix for bad sheathing. If the deck is rotten or soft, the roofing is going on over a weak base.
A tear-off is the one cheap time to upgrade the deck
Most people spend a reroof budget on the shingle color. The smarter money is on the two things nobody ever sees, and a tear-off is the only affordable time to touch them: how well the deck is nailed to the frame, and whether the deck itself is sealed against water.
Start with the nailing. A lot of older decks were fastened with widely spaced smooth nails, or even staples, that do not come close to today's uplift standards. While the deck is bare, re-nailing the whole thing to a current schedule, 8d ring-shank nails at roughly 6 inches on center along the edges and 6 to 12 inches through the field depending on the wind zone, and long enough to bite the framing, is cheap labor that makes the roof much harder to peel off in a storm. In Florida and other high-wind states this re-nailing is required on a reroof, not optional.
The second upgrade is a sealed roof deck, sometimes called a secondary water barrier. Instead of plain felt, the panel seams get taped or the whole deck gets a fully adhered membrane, so that if wind strips the shingles off in a storm, water still cannot pour through the deck into the house. The insurance research lab at IBHS blasted test houses with hurricane-force wind and rain and found a sealed deck kept the interior dry even after the covering was torn away. It costs a modest upcharge while the deck is open and is expensive and disruptive to add later.
Here is the part that can help pay for the upgrade. In hurricane- and high-wind states, both moves, better deck attachment and a sealed deck, show up on the wind-mitigation inspection form insurers use, and they can take real money off the premium. The credits vary by carrier and state, the sealed layer usually has to cover the entire deck to count, and it all has to be documented with photos and product approvals, so this is a conversation to have with your roofer and your insurer before the tear-off rather than after. Even outside hurricane country, a sealed deck is worth considering anywhere you get ice dams or heavy wind-driven rain.
When spot replacement is enough
Spot replacement is usually enough when the damage is local, the surrounding panels are sound, and the water path is fixed.
That might mean one sheet near a pipe boot, a few feet around a chimney cricket, or a small eave area damaged by an old gutter problem.
Spot replacement stops making sense when the roof plane is wavy, several bays are soft, old plank decking has large gaps, or more than about 20% to 30% of a slope needs patching. At that point, replacing the whole plane is often cleaner, faster, and easier to warranty.
Old plank roof decks need a separate decision
Older houses may have roof planking instead of plywood or OSB. Some plank decks can stay. Others need repairs, overlay sheathing, or full replacement.
The decision depends on board condition, gaps, looseness, roof covering, fastener holding, and local requirements. Asphalt shingles usually need a solid, flat, well-supported deck, so large gaps, split boards, cupped boards, and loose planks can cause fastening and finish problems.
Do not write off plank decking just because it is old, and do not trust it just because it has lasted this long. Strip enough roof to see what is actually there.
Questions to ask before approving the work
Before signing a roof sheathing replacement contract, ask these questions:
- What is the per-sheet price for rotten roof sheathing found during tear-off?
- What panel thickness and material are included?
- Will damaged sheets be cut back to framing?
- Are H-clips, blocking, or thicker panels included where needed?
- What nail size and spacing will be used?
- Are drip edge, valley flashing, step flashing, pipe boots, and chimney flashing included or separate?
- Will photos be taken before underlayment covers the replacement work?
The best answer is not the cheapest one; it is the one with clear scope. You want to know in advance what happens when the crew finds five bad sheets instead of one.
Where contractors hide the real cost
The line item that decides your final bill is usually the vague one: “decking replacement as needed.”
That phrase can be fair, because nobody knows every sheet until the roof is open. But it can also hide the number that changes the job. A quote with no per-sheet rate, no thickness, and no flashing scope is not complete.
Ask for photos of every replaced sheet. Ask whether the price includes disposal. Ask whether new flashing is included when decking is replaced near chimneys, valleys, roof-wall intersections, and pipe penetrations. A cheap sheet price can still become expensive if every related detail is billed as an extra.
FAQ
How much does it cost to replace roof sheathing?
As a 2026 planning range, spot replacement during a reroof often runs about $75 to $150 per 4×8 sheet in many markets. Larger deck replacement often lands around $2 to $6 per square foot. Pitch, access, material, region, and damage pattern change the final cost.
Can you replace only part of the roof sheathing?
Yes. Localized rot near a vent, valley, chimney, or eave can often be repaired with partial sheet replacement. If damage spreads across many bays or a whole slope is wavy, replacing the full plane may be better.
Should rotten roof plywood always be replaced?
Yes. Rotten plywood or OSB cannot hold fasteners properly and should not be covered with new roofing. The leak source also has to be fixed.
Is OSB or plywood better for replacement roof sheathing?
Both can work. OSB is common and cost-effective. Plywood is more forgiving in wet-risk areas and often feels better for repairs near eaves, valleys, chimneys, and old leaks.
What thickness should replacement roof sheathing be?
It depends on rafter or truss spacing, panel span rating, roof load, roofing material, and local code. Common residential choices include 7/16 inch, 1/2 inch, and 5/8 inch panels.
Can new roof sheathing go over old sheathing?
Sometimes, if the old deck is sound, flat, dry, and acceptable for the roof system. But covering bad decking hides rot and adds weight, so strip-and-replace is cleaner when the old deck is soft or damaged.
Does insurance cover roof sheathing replacement?
It depends on the policy and cause. Sudden storm damage may be treated differently from long-term leaks, dry rot, poor ventilation, or maintenance failure. Read the policy and document the damage.
Should roof sheathing be replaced before solar panels?
Soft, thin, or damaged roof sheathing should be fixed before solar installation. Solar racking adds penetrations and concentrated loads, and a weak deck makes leaks and loose fasteners more likely.
Read This Next
- Roof Sheathing
- Roof Planking
- Roof Sheathing Replacement Cost Calculator
- Water-Damaged Sheathing Repair Cost Calculator
- Roof Sheathing Calculator
- House Sheathing
References
Sources used for this article
- International Residential Code: roof-ceiling construction and roof sheathing provisions
- APA: proper installation of APA rated sheathing for roof applications
- APA: engineered wood construction and roof sheathing guidance
- Florida Building Code: secondary water barrier and reroof hurricane-mitigation options
- IBHS FORTIFIED: sealed roof deck and roof-deck attachment standards
- Angi: 2026 roof decking replacement cost data
- HomeGuide: roof decking replacement cost ranges
- RenoQuotes: 2026 Canadian roof replacement and decking cost context