
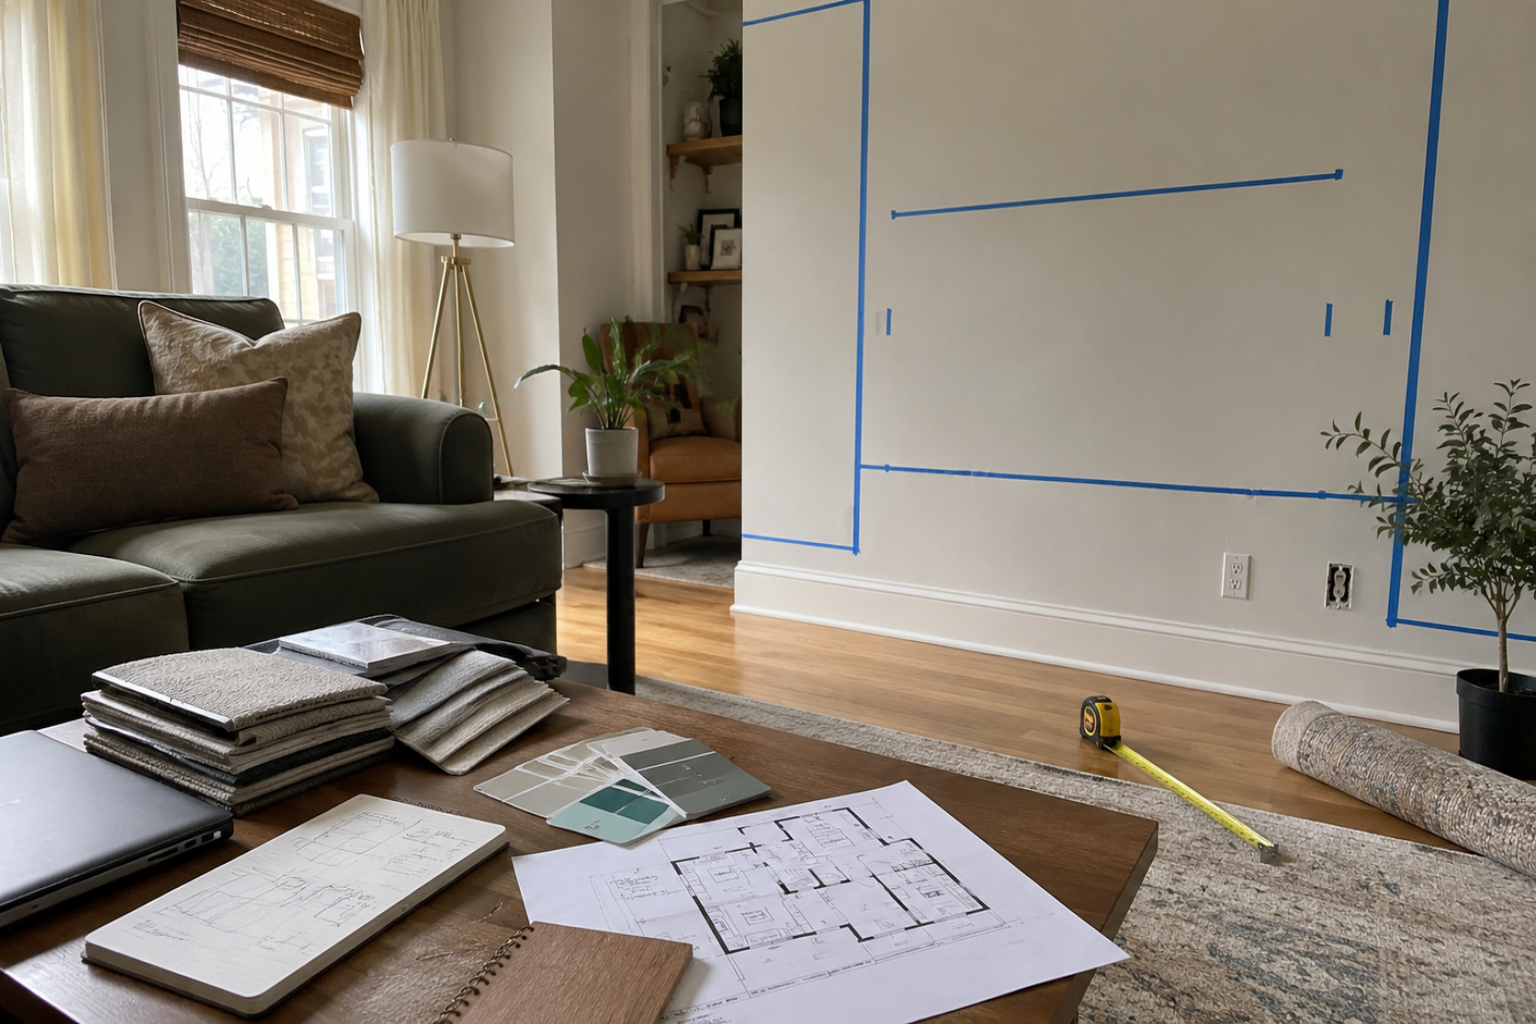
Interior design software is useful only if it gets the room closer to a decision.
A pretty render is not enough. The sofa still has to fit. The walkway still has to work. The outlet still has to be where the lamp needs power. The client still has to understand what changed.
The best setup is not a pile of apps. It is a short workflow: measure the room, draw it, model it, test the look, and show the version someone can actually approve.
Start with the room. The software comes after.
The Room-to-Approval Workflow
A useful interior software setup is one you can repeat on a normal job. Living room, bedroom, rental unit, kitchen corner, small office, studio apartment — the room changes, but the workflow stays close to the same.
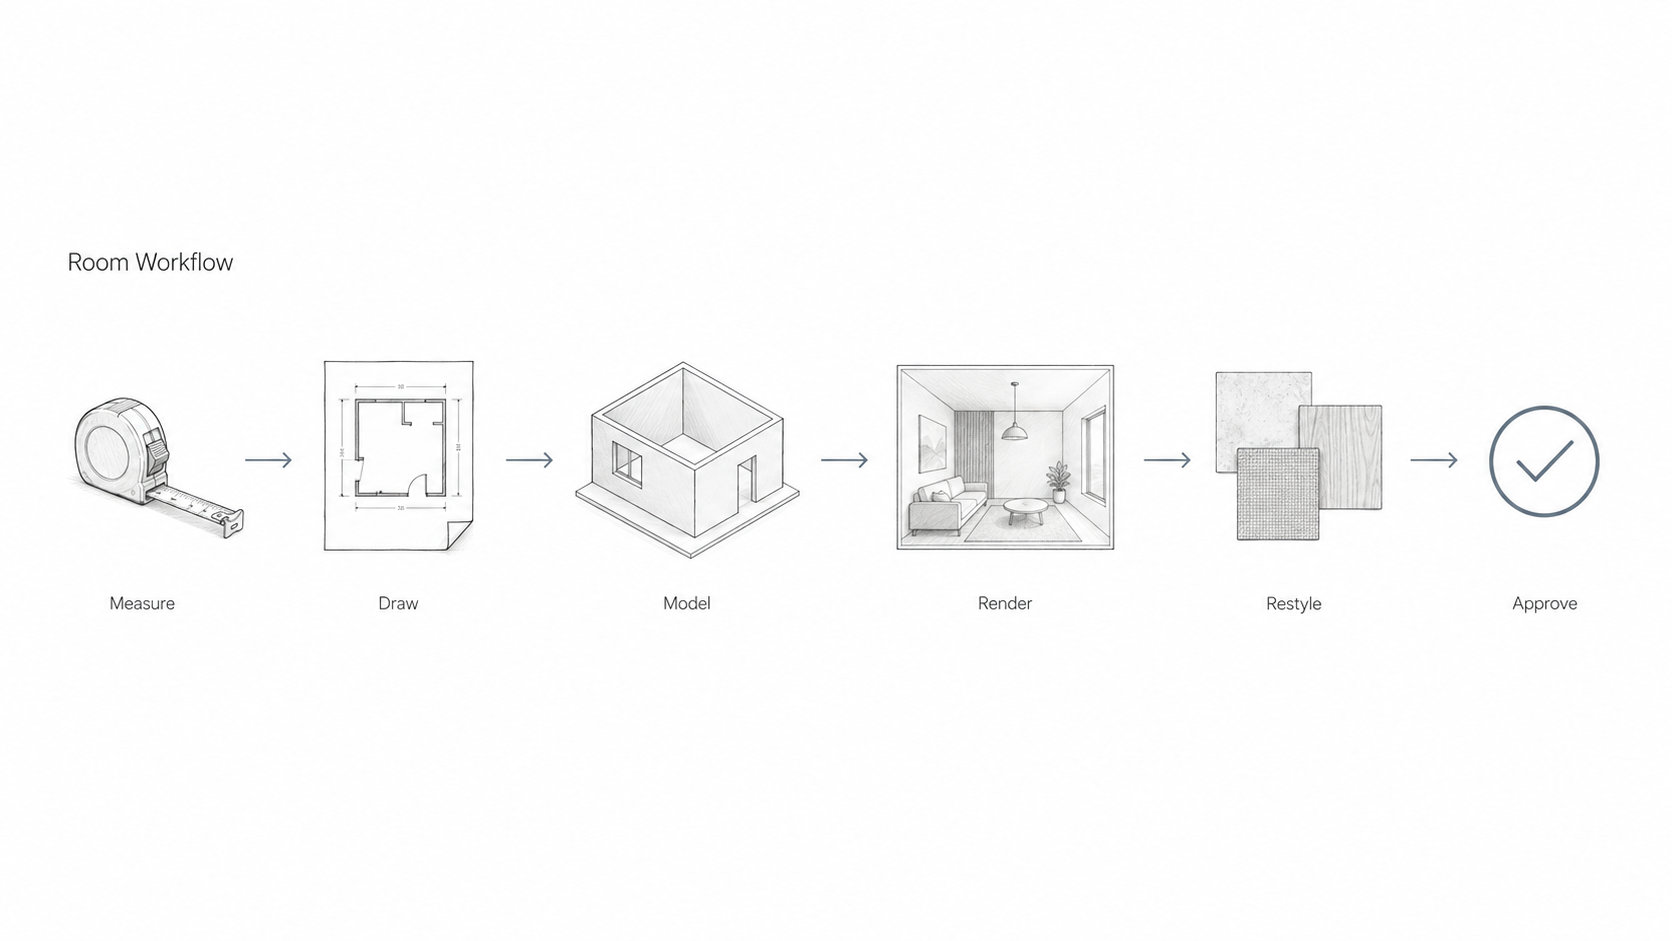
- Measure the space.
- Draw the room.
- Build a simple model.
- Make one clear view.
- Test two or three material options.
- Show the version the client can approve.
That workflow matters more than the brand name on the software. It also connects directly to good space planning, because no render can fix a bad room layout.
Start With the Room, Not the App
Before opening any program, get the room right.
Measure the wall lengths, ceiling height, windows, doors, outlets, radiators, vents, beams, soffits, and awkward corners. Take photos from the entry, each corner, and the main wall.
This is not exciting work. It is the part that keeps the project from becoming fake.
If the wall is wrong by six inches, the render will lie. If the ceiling height is wrong, the built-ins may look better on screen than they feel in the room. If the photo is crooked, AI may invent a cleaner room than the one you actually have.
Good interior software starts with honest measurements. If you are still building your drawing basics, review architectural drawings before relying on polished images.
What Each Tool Should Do
Every app in the stack needs a job. If it does not help you measure, draw, model, test, render, or approve the room, it is probably just adding noise.
This is where beginners get buried. They download one app for plans, one for mood boards, one for AI images, one for rendering, one for furniture, one for presentation, and then nobody knows which version is current.
| Job | What the tool must do | Common options |
|---|---|---|
| Measure and draw | Set walls, openings, and furniture size | AutoCAD, SketchUp, Floorplanner, RoomSketcher |
| Build the room | Create the room volume and main furniture | SketchUp, Revit, Archicad, Blender |
| Make it readable | Show light, materials, and scale | Enscape, D5, Lumion, Blender |
| Test options | Try color, mood, and material direction fast | AI interior tools and image editing tools |
| Present | Put the decision in front of the client | PDF, slides, tablet, printed boards |
If a tool does not help the next decision, keep it out of the stack.
Tools for Drawing the Room
The drawing tool has to protect the room from fantasy.
That means correct wall lengths, ceiling height, doors, windows, outlets, vents, furniture footprints, and circulation. If those are wrong, everything after them gets easier to sell and harder to build.
SketchUp is strong for quick interiors because it is fast to learn. It works well for living rooms, bedrooms, kitchens, retail corners, and small offices.
AutoCAD is useful when the project needs cleaner 2D drawings, measured plans, or details that a contractor can read.
Floorplanner and RoomSketcher are useful for fast room layouts, rental units, early ideas, and simple client calls.
The goal here is not beauty. The goal is a clean shell: walls, doors, windows, ceiling height, and furniture footprints.
Tools for Building the Room in 3D
Once the room shell is right, build only what the client needs to see.
You do not need every book, vase, pillow, and outlet at the first pass. You need the sofa, table, rug, lighting, storage, feature wall, and main clearances.
SketchUp is still one of the easiest tools for this stage. Revit or Archicad makes sense when the interior is tied to a larger building model. Blender is powerful and free, but it takes more patience.
For small jobs, keep the model light. A clean model that opens fast is better than a heavy file full of furniture you will delete next week.
For furniture planning, use the model to test fit first, then refine the look with furniture selection. A beautiful chair that blocks the walkway is still the wrong chair.
Tools for Making the Room Look Finished
Clients understand a room faster when they can see light, color, and material.
That is where a renderer helps.
Enscape, D5, and Lumion are useful because they let you move fast. You can stand in the model, set a view, change materials, and export images without turning the job into a film project.
Blender can make strong images too, especially if you want a free tool. The trade-off is time. You will spend more time learning lighting, cameras, and material settings.
For most interior jobs, one clear render beats six dramatic ones. Show the room from the angle the client knows: the entry, the sofa wall, the kitchen opening, or the bed wall.
Rendering should support the lighting decision, not hide it. For rooms where lamps, daylight, and mood matter, connect the render back to basic lighting design.
Where AI Helps, and Where It Lies
AI is useful for mood. It is weak at measurement.
Use it when the client asks, “Can I see it warmer?” or “What if the cabinets were darker?” That is a good job for AI.
It can test color, mood, built-ins, and material direction fast. But it will also stretch rooms, clean up clutter, invent better windows, ignore outlets, change furniture scale, and make cheap materials look better than they are.
Start from a measured model or a clean room photo. Keep the same camera. Use AI to test direction, then rebuild the chosen version properly before calling it a design.
AI is a sketch assistant. It is not a measured drawing.
For a deeper tool discussion, see AI interior design and furniture design.
The Approval Stack
The strongest presentation is small and clear.
For most rooms, show these five things:
- A before photo.
- A simple plan.
- One main room view.
- Two material directions.
- A short note on what changed.
That is enough for many clients to make a choice.
Too many options slow the job down. A client does not need eight sofa colors, six floor options, and four wall treatments on the first call. They need to understand the room and feel safe saying yes.
This is also project management. A clean approval flow keeps samples, drawings, renders, and client notes from spreading across too many folders. See interior design project management for the workflow side.
Where Interior Software Lies
A room can look solved on screen and still fail in the house.
The sofa blocks the walkway. The pendant hangs too low. The cabinet door hits the wall. The rug looks rich in the render and thin in the room. The warm wall color turns muddy in north light.
AI makes the problem worse because it can quietly improve the room without telling you. It widens the camera, cleans the light, straightens the clutter, and makes ordinary materials look expensive.
That is why the measured model matters. After the client likes a direction, check the wall, window, light, outlet, cabinet depth, walkway, and material before it becomes a proposal.
Good software keeps the room honest. Bad workflow makes the room easier to fake.
Free and Student-Friendly Stack
You can start without buying expensive software.
| Need | Low-cost setup |
|---|---|
| Room layout | SketchUp Free, Floorplanner, or RoomSketcher |
| Rendering | Blender or a light real-time viewer |
| Color tests | Adobe Color, paint-brand color tools, or AI mood tests |
| Presentation | PDF, Google Slides, Canva, or a simple printed board |
This setup is enough for school projects, small rooms, early freelance work, and portfolio pieces.
Do not worry about having the perfect software at the start. Learn the workflow first. If you need broader no-cost options, compare this with free home design software.
Small Studio Stack
A small interior studio needs speed and fewer loose ends.
A clean setup could look like this:
- SketchUp Pro or Revit for the room model.
- Enscape or D5 for same-day views.
- An AI tool for quick mood options.
- A simple task tracker for approvals, samples, and client notes.
- A shared folder for photos, plans, renders, and final PDFs.
The app count is not the point. The point is that everyone knows where the current model, current render, and current approval live.
When Revit or BIM Makes Sense
You do not need Revit for every interior project.
Use Revit or another BIM tool when the interior is part of a larger building model, when you need coordinated sheets, or when the architect, engineer, or contractor is already working in BIM.
For one room, SketchUp may be faster. For a full office fit-out, medical space, school interior, or larger renovation, BIM can save confusion because drawings, schedules, and views stay connected.
Use the tool that matches the job size. For the difference between design roles, see architecture vs interior design.
Material Choices Need More Than a Render
Interiors live or die on finishes.
A render can show the idea, but it cannot fully show feel, weight, sheen, or daylight color. A beige fabric, oak floor, matte tile, and warm white wall can all shift when the light changes.
Use software to narrow the choices. Then use samples to confirm them.
For paid work, keep a small material board ready. It can be simple: floor, wall color, cabinet finish, counter sample, fabric, and metal finish. The client needs to see the room and touch the choice.
For deeper finish planning, pair the render with materials and textiles and color theory for interior design.
What to Show First
Lead with the clearest view.
Do not start with a software screen. Do not start with a giant menu of tools. Start with the room problem.
Show the before photo. Then show the improved view from the same direction if possible. The client should understand the change in five seconds.
Then show the plan, material direction, and second option.
A good interior presentation feels calm. The client should not have to decode your software.
Portfolio Advice for Students and New Designers
For a portfolio, the cleanest room often beats the biggest render.
Show that you can measure, plan, light, and explain the space.
A strong interior project can be only three pages:
- Before photo or room problem.
- Plan or simple axon.
- Final view with material notes.
Add one process image if it helps. Do not fill the portfolio with ten similar renders. Three clear pages are stronger than a gallery of half-finished views.
If this work is going into a school or job application, connect it to interior designer portfolio development.
Common Problems You Will Hit
Every interior workflow runs into the same problems.
Bad room photos: Rebuild the shell instead of trusting a crooked photo.
Repeating textures: Change scale, rotate the material, or use a better texture.
Heavy files: Use lighter furniture models and save a clean master file.
Flat lighting: Add one clear light source and keep the view simple.
Too many options: Show two strong directions, not ten weak ones.
The point is not to impress people with software. The point is to make the room clear enough to approve.
FAQ
Do I need Revit for interior design?
No, not for every project. Revit helps when the interior is part of a larger building model or when you need coordinated drawings. For single rooms, SketchUp, Floorplanner, RoomSketcher, or similar tools can be enough.
Can I do interior design work with free software?
Yes. You can draw a room in a free or low-cost layout tool, build a simple model, render in Blender, and present the work as a PDF. Paid tools help with speed, but they do not replace good room planning.
Where does AI fit in interior design?
AI is best for fast visual options. Use it to test color, mood, built-ins, or material direction. Do not use it as the final measured design. After the client picks a direction, rebuild it properly.
What should I learn first?
Learn to measure and draw a room first. Then learn 3D modeling. After that, learn rendering and AI tools. If you start with AI, you may get nice images of rooms that do not fit real dimensions.
How many software tools do I need?
Most people need three or four: one for drawing, one for 3D, one for rendering, and one for presentation or AI options. More tools only help if they solve a clear problem.
What makes a client say yes faster?
A clear before photo, a simple plan, one strong view, and two controlled choices. Clients approve faster when they understand the room, not when they see every possible option.
What to Build Next
Pick one room and run the full workflow. Measure it. Draw it. Model it. Make one main view. Test two material directions. Then build a short presentation that a client could understand without you explaining every detail.
That one clean project will teach more than downloading five more apps.
Read This Next
- Space Planning and Layout for Interior Design
- Lighting Design
- Materials and Textiles for Interior Design
- Furniture Design and Selection
- Interior Design Project Management
- Interior Designer Portfolio Development
- AI Interior Design and Furniture Design
- Free Home Design Software