
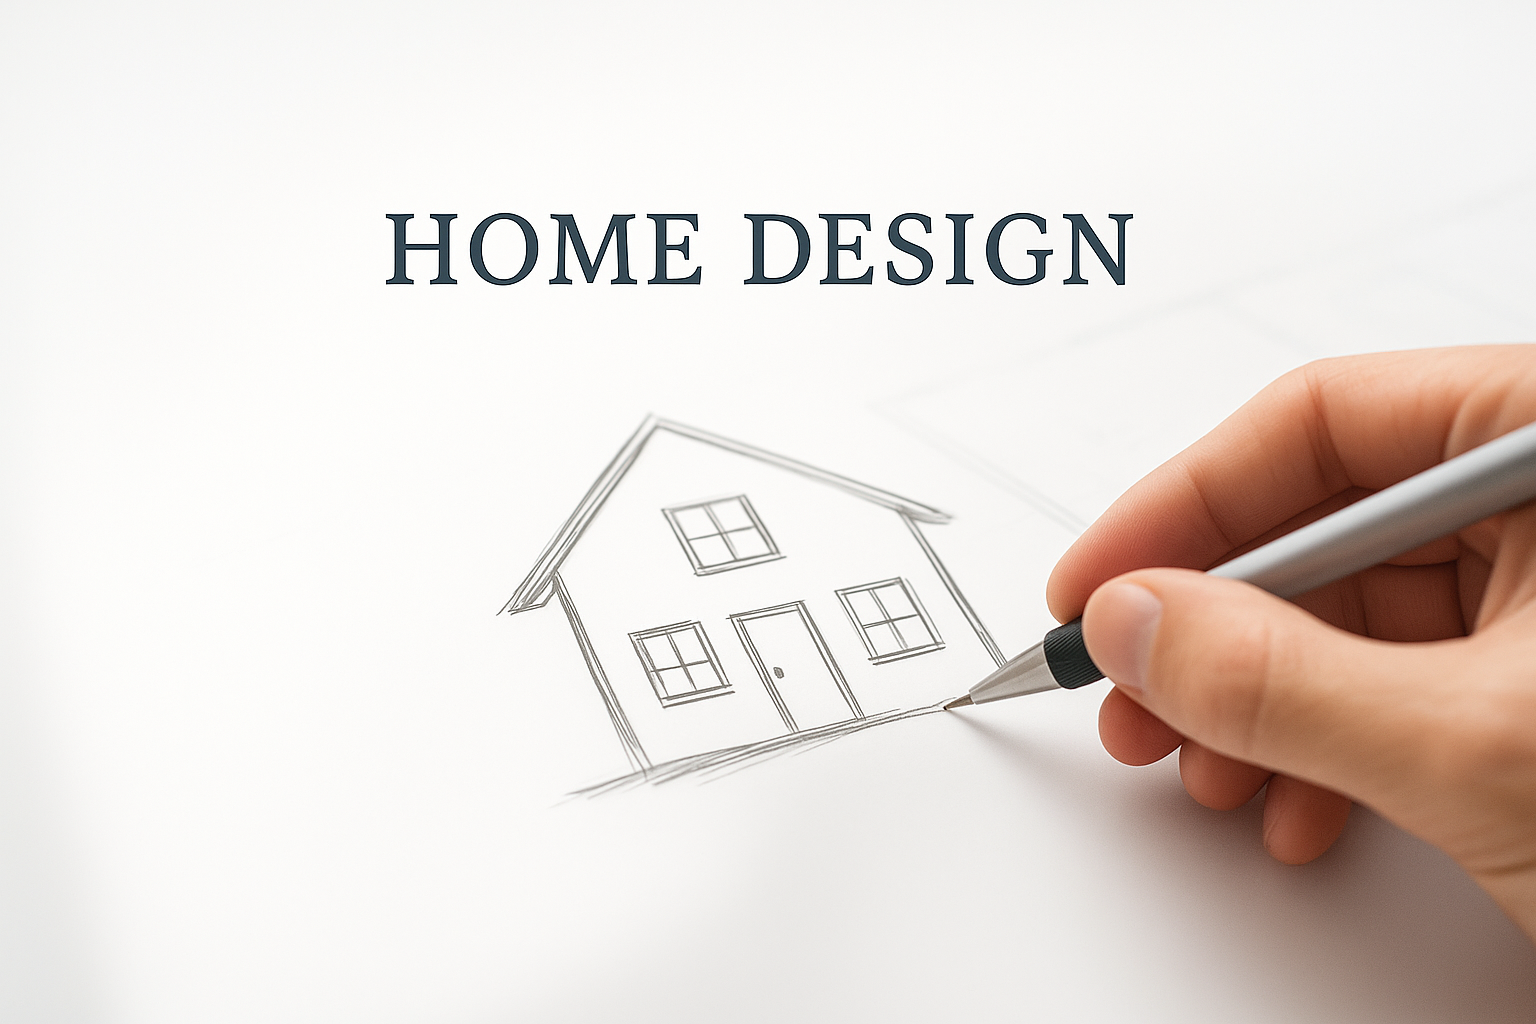
Make Your Own House Plans: Step-by-Step for Beginners
Design Your Own Dream Home: Architect-Level Tips That Save Money
I’ll admit it: I roll my eyes when someone says they’re going to “design their house for free online” before they’ve even measured their lot. But I’ve also seen motivated homeowners produce solid, buildable plans when they follow a real process instead of chasing Pinterest dreams.
Designing your own house is not about clicking through a miracle app. It’s about space, flow, and constraints. Get those right, and you’ll have a plan a builder can respect. Skip them, and you’ll burn months on drawings that collapse the minute someone checks code or scale.
Why I Wrote This
I’ve had dozens of clients tell me, “I want to design my own house.” Some showed up with napkin sketches. Others came with free software layouts that looked polished but failed the first code review. A few spent thousands revising mistakes that could’ve been avoided on day one.
Here’s the truth: yes, you can design your own house. But it takes more than mood boards and swatch picking. You need a process, the right tools, and a clear sense of where amateurs trip up. This guide is the one I wish my first-time clients had before hiring me.
You might like: Design Elements In Architecture: Basics Explained Simply
Where DIY House Design Goes Wrong
Every time I review a DIY plan, the same mistakes show up:
-
No site check. People forget about zoning setbacks, slope, and sun.
-
No bubble diagram. Jumping straight into floor plans leads to chopped-up layouts with no flow.
-
Random scale. Sketches look good until you realize the “living room” is 40 feet wide and furniture floats like Lego.
-
Over-reliance on free apps. Software can trick you into thinking you’ve nailed it. In reality, you’re building a dollhouse plan.
-
Ignoring code and structure. Stairs too steep, beams missing, bathrooms stacked over nowhere.
The good news: all of this is fixable.
Design Your Own House: Field Steps That Actually Work
Step 1: Start With the Site
Forget Pinterest layouts. Start by walking your land.
Setbacks. Every city has rules on how close you can build to the property line. I had one client sketch a wraparound porch, only to learn zoning chopped six feet off their plan.
Slope. Flat land is cheap to build on. Steep lots mean retaining walls, drainage fixes, and stair runs you’ll pay for twice. I once reviewed a “dream walkout basement” plan that became a water nightmare because no one read the topo map.
Sun. Orientation makes or breaks comfort. Face living spaces south in cold climates, avoid western walls of glass in hot ones. I’ve seen houses that bake every afternoon because someone drew “big windows” without checking the sun path.
Access. Where does the driveway go? Where does the garbage truck stop? Service lines? Forget these and your “grand entry” will be blocked by utility boxes.
Step 2: Bubble Diagrams — The Architect’s Secret Weapon
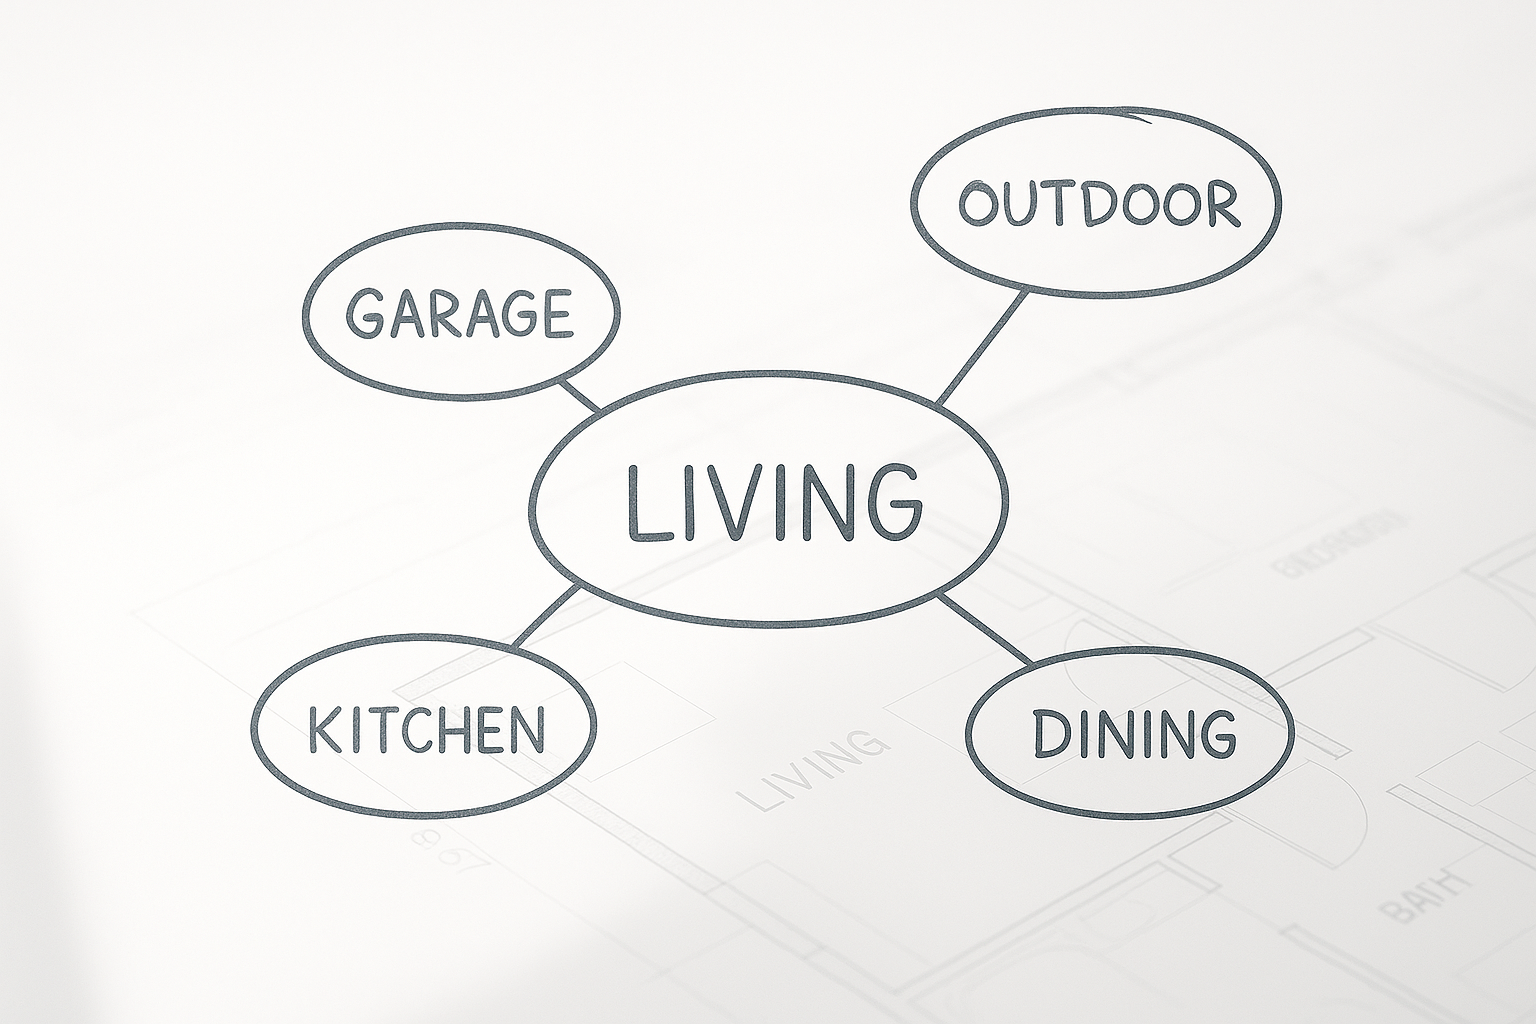
Before walls, we sketch circles.
● Draw bubbles for each space (kitchen, living, bedrooms).
● Size them by importance, not square feet.
● Overlap bubbles where spaces connect (kitchen/dining).
● Separate where they shouldn’t (master bedroom vs. garage).
It looks childish. It works. A couple I worked with wanted the laundry next to the kitchen. When we bubbled it out, the noise would have bled into the living space. They moved it upstairs, problem solved.
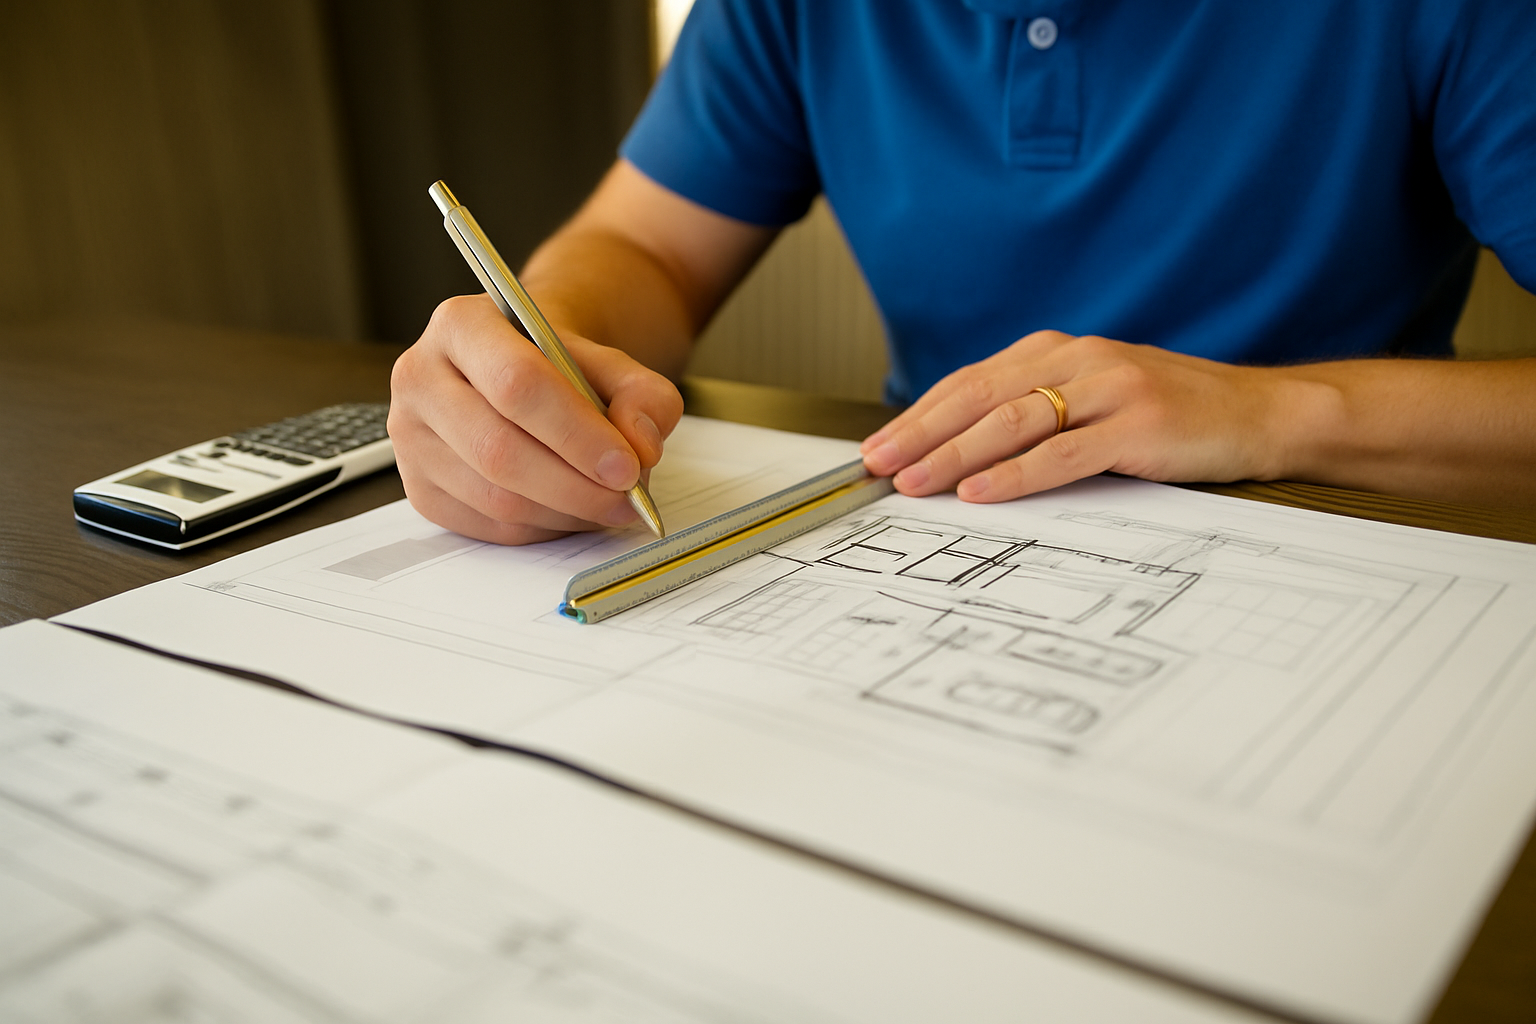
Step 3: Blueprint Basics Everyone Must Know
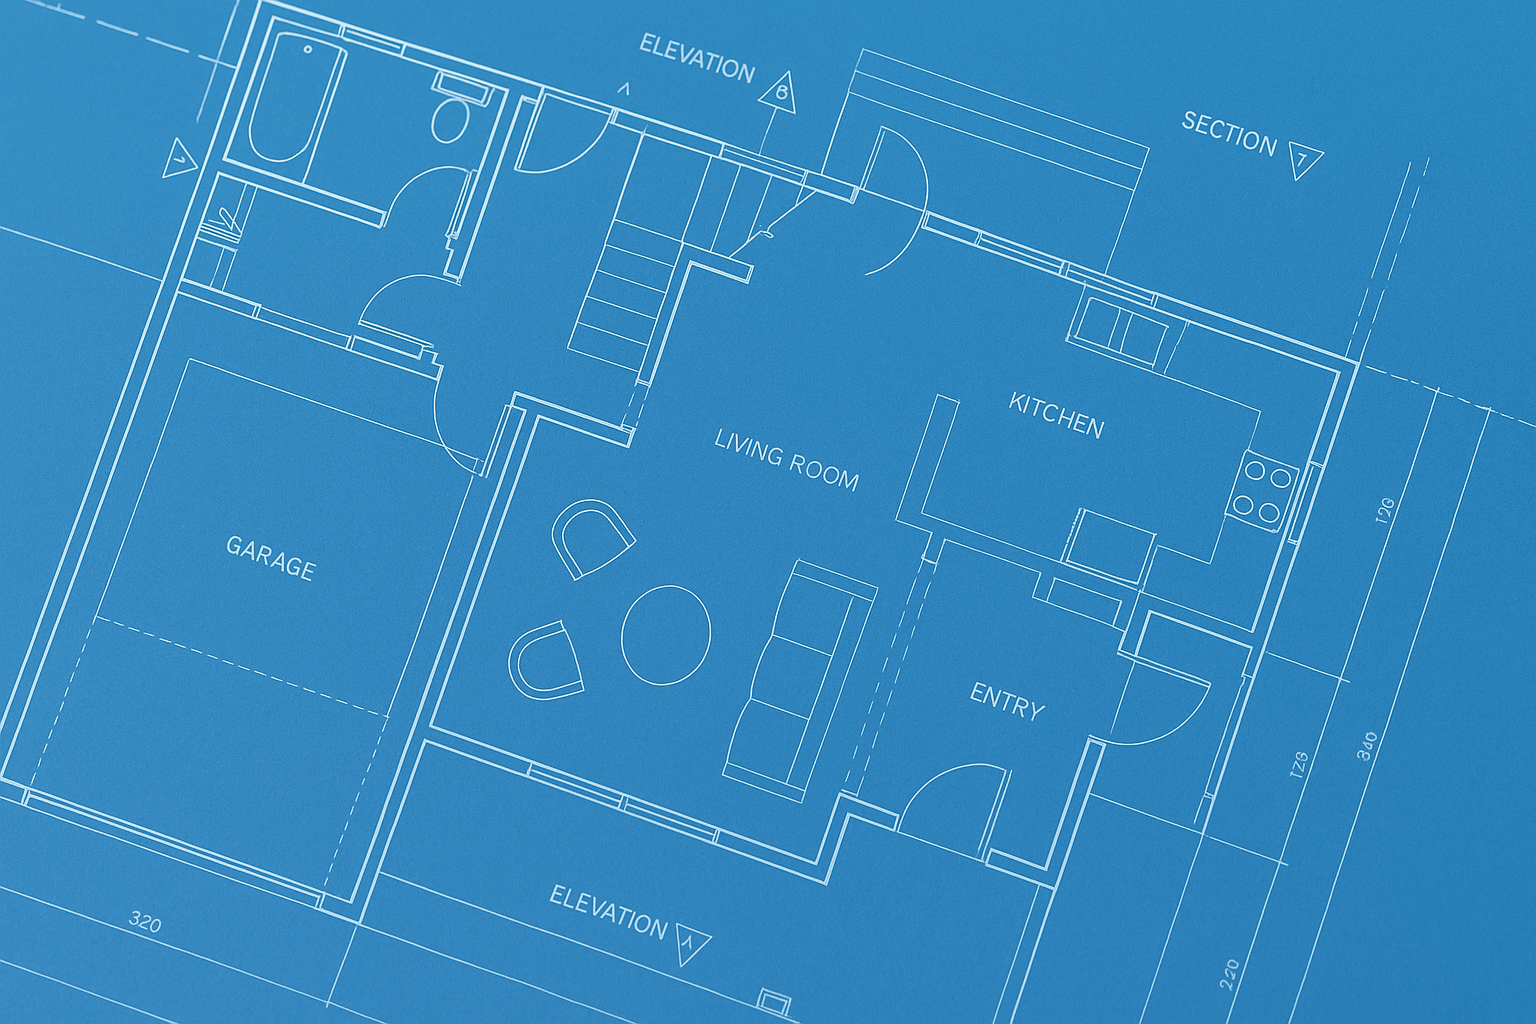
You can’t design without knowing the parts.
Floor plan. The map of rooms, doors, windows. If your bathroom door hits the sink, you’ll hate it forever.
Elevations. Exterior views. They show how your dream farmhouse turns into a box if you skip proportions.
Sections. A cut-through slice. Shows stairs, roof slopes, how the structure really works.
Details. The zoom-ins. Stair treads, window heads, cabinets. Miss them and budgets blow up.
Step 4: Tools That Work (and Don’t)
I’ve tried them all. Here’s the truth:
● Graph paper + scale ruler: Fastest way to start. Still my napkin go-to.
● SketchUp Free: Great for massing. Not for code-level drawings.
● RoomSketcher / Sweet Home 3D: Easy for beginners. Useful to show family, not for builder sets.
● AutoCAD / Revit: Industry standard. Steep learning curve. If you’re not planning a career, don’t waste months here.
I’ve had homeowners hand me AutoCAD plans that looked slick but failed basic code checks. Graph paper would have saved them time.
Step 5: Draw the Floor Plan
This is where people get cocky and blow it.
Pick a scale: ¼” = 1’-0” works.
Exterior walls first, then interior. Doors and windows come after—always mark swings. Too many DIYers forget and then realize the washer door slams into a wall.
Drop in furniture. A 12x12 bedroom sounds fine until you place a queen bed and see there’s no space for nightstands.
I once saw a plan where closet doors couldn’t open without hitting the bed. It cost the owner $800 in change orders.
Step 6: Add Dimensions That Matter
Without numbers, your drawing is just a sketch.
● Room sizes. Every single one.
● Wall thicknesses: 2x4 = 3.5", 2x6 = 5.5". Miss this and plans won’t align.
● Doors and windows: Standard doors are 2’-6” minimum.
● Stairs: Code says ~7" rise, 11" run. Don’t wing it.
Builders will smile at pretty plans with no dimensions—and then charge you heavily later to fix them.
See also: Understanding Design Thinking in Architecture
Step 7: Layer in Systems
This is the unsexy part amateurs forget.
Electrical. Outlets every 6–12 feet by code. Miss them and you’ll live with extension cords.
Plumbing. Stack bathrooms vertically. Every offset adds cost. Kitchens near water lines save thousands.
HVAC. Decide where the furnace, air handler, or heat pump goes. If you don’t, it’ll end up wherever the contractor feels like.
Systems aren’t add-ons. They shape the house. Ignore them early and you’ll blow your budget late.
You might like: Draw and Design Your Own House Blueprints: Architect’s Guide
Mistakes I See Constantly — And How to Fix Them
I’ve seen these same errors wreck more DIY house plans than anything else. Each has a simple fix if you catch it early.
Oversized great rooms
The mistake: People draw a 25x30 “open concept” box that feels impressive on paper. In reality, it’s an echo chamber that swallows furniture and costs a fortune to heat and cool.
The fix: Cap main living rooms around 16x20 unless you’re going full luxury. Break up volumes with ceiling drops, beams, or partial walls so they feel human.
No storage
The mistake: Beginners chase open flow and forget closets, linen cabinets, or a mudroom. Six months later, boxes live in the hallway.
The fix: Plan at least one full closet per bedroom, a coat closet at entry, and a pantry if the kitchen isn’t huge. Roughly 10% of total floor area should be storage.
Bedrooms too small
The mistake: A 10x10 bedroom looks fine in sketches until you place a queen bed and dresser. Suddenly, you can’t open a door.
The fix: Go minimum 11x12 for a queen, 12x14 for a king. Always drop furniture blocks into the plan.
Window overload = heat loss
The mistake: Walls of glass look great in renders, then cook the house in summer and bleed heat in winter.
The fix: Balance glazing by orientation. South = controlled gain. North = diffuse light. East/West = limited or shaded. Stick to 20–25% glazing-to-floor ratio.
Stair placement as an afterthought
The mistake: People wedge stairs into leftover corners. Wrong runs, headroom issues, or no landing space kill the design — or fail code.
The fix: Plan stairs first. Straight run needs ~3x16 feet. A switchback eats ~10x10. Lock them in early.
Kitchen triangle ignored
The mistake: DIY layouts scatter sink, stove, and fridge. Daily cooking becomes a marathon.
The fix: Keep each leg between 4–9 feet. No obstacles. Test with actual appliance sizes.
Bathrooms with bad stacking
The mistake: Upstairs bath on one side, downstairs bath on the other. Plumbing runs triple.
The fix: Stack wet walls. Put bathrooms above or back-to-back. Cuts cost and noise.
Ignoring circulation space
The mistake: Hallways drawn at 30 inches. Furniture blocks door swings. Looks okay in 2D, fails in life.
The fix: Hallways = 36 inches minimum, 42–48 for main runs. Check every door swing.
Mechanical space forgotten
The mistake: DIY plans leave no room for furnace, water heater, or panel. Builder crams them into a closet.
The fix: Dedicate a 6x10 utility room minimum. Plan clearances early.
No thought for future
The mistake: People max out footprint with no flexibility. Families grow, needs shift.
The fix: Build options in. Leave attic truss space, unfinished basement, or a bonus room that can convert later.
Real Experiences From People Who Tried
Every one of the mistakes above has a story behind it. Here’s what actually happened when homeowners and self-builders tried to design their own houses.
The stair disaster
One client handed me a free online floor plan. Looked polished. Then the builder flagged the stairs — rise and run didn’t meet code. They had to redraw the second floor. Weeks lost, extra fees paid.
The self-build savings (and limits)
A Vermont couple sketched their own house. “We saved fifteen grand by drawing our own plans,” they told me. But when it came to roof trusses, the engineer’s stamp was unavoidable. Layout is fair game. Structure is not.
The bedroom regret
One homeowner skipped furniture blocks. Their master barely fit a queen bed, no space for nightstands. Square footage meant nothing once life had to fit inside.
The budget shock
A family wanted a steeper roof pitch because it “looked classic.” The material takeoff added $30,000. Sketches don’t warn you about framing and shingles — reality does.
The surprise win
Not every DIY story is regret. One homeowner drew their plan, hired a draftsman to tighten it, and the builder said: “One of the most straightforward plans I’ve built all year.” Discipline pays.
The window mistake
A couple insisted on floor-to-ceiling glass on their west wall. First summer, the living room hit 90°F by 3 p.m. Retrofitting shades and high-performance glass cost thousands.
The storage blind spot
A DIYer sketched wide-open spaces, generous bedrooms, and forgot closets. They paid for built-ins later. Storage doesn’t sketch well, but you feel its absence every day.
The circulation trap
One plan had hallways eating 15% of the square footage. The owner admitted: “We should’ve walked it with tape on site before finalizing.” Paper flow ≠ real flow.
The stair win
Another couple nailed it. They drew their stairs at scale, taped it on the ground, and walked it. When framed, it landed perfectly.
The kitchen regret
A homeowner put the sink on an island without checking plumbing runs. Once the slab was poured, rerouting cost thousands.
The HVAC surprise
One self-designer left no space for mechanicals. HVAC ended up in the garage. Noise up, usable space down. Systems shape houses.
The orientation payoff
A DIY builder in Maine oriented living spaces south with deep overhangs. Winter bills dropped. Summer comfort held. Smart sun placement is free performance.
The porch regret
A homeowner’s wraparound porch cut into the setback. Six feet had to go. Zoning doesn’t care about symmetry.
The cost creep
One family sketched a 3,500-square-foot dream house online. Builder priced it at double their budget. They cut half the rooms and started over.
The drafting win
A young couple drew their starter home on graph paper, scale ¼” = 1’-0”, tested furniture, checked swings. Their builder called it “one of the cleanest homeowner-drawn plans” he’d seen. Small house. Smooth build.
You might like: The Principles of Design: Transforming Ideas into Visual Excellence
What It Took to Get Good
Designing your own house isn’t a weekend hack. It took me time, mistakes, and more than one embarrassing plan review before I got drawings a builder could take seriously.
One weekend for site + bubbles
I still remember my first attempt. I opened a free app and started drawing walls before I even looked at the lot survey. A contractor friend laughed and said, “Great plan — too bad the driveway would drop straight into a ditch.” That weekend I forced myself to stop rushing and map the site first. Setbacks, slope, sun path, utilities, access. Only after that did I draw bubble diagrams. Circles for spaces, overlaps for connections. Childish, yes. But that was the first time my plan started to make sense.
Two weeks for floor plans
The bubbles only took a night. The real work started when I tried to draft scaled floor plans. Two weeks of evenings with graph paper, then SketchUp. That’s when the gaps showed. My “big” bedrooms shrank to shoe boxes once I dropped in a queen bed block. A hallway I thought was fine was actually too narrow for code. I lost count of how many erasers I chewed through. But by week two, I had layouts that looked believable — not perfect, but not laughable.
One month for builder-ready drafts
Then came the hardest part: builder-ready drafts. One month of revisions adding real dimensions, door swings, window sizes, stairs, and labeling everything. I started printing at scale and walking the plan with a tape measure. That’s when reality slapped me. My great room looked like an aircraft hangar. My stair run ate ten extra feet. I spent nights moving walls, redrawing windows, and learning why architects obsess over circulation lines. At the end of that month, I finally had a draft that didn’t collapse under a contractor’s review.
You might like: The Overthinking Trap in Interior Design: How to Avoid It
Pro Tips From the Field
Over time I picked up habits that turned my DIY plans from “nice sketch” to “usable document.” These are blunt, field-tested.
● Draw circulation like you’re carrying groceries. Imagine pulling into the driveway, hauling bags in the rain. If you have to cut through a dining room maze just to hit the fridge, rethink the plan.
● Stack plumbing for savings. A second-floor bathroom above the kitchen cuts pipe runs, labor, and leaks. A bathroom shoved across the house adds thousands in hidden cost.
● Keep hallways short. Long corridors waste space and money. Good plans keep bedrooms close to baths and living spaces directly connected.
● Test every door swing. Builders will install what’s drawn. If a closet door collides with a bed, that’s on you. Print the plan, cut cardboard furniture, and check clearances.
● Print and check at scale. Plans look perfect on laptops. They fall apart when printed and measured. A ten-dollar print run at a copy shop will save you ten-thousand-dollar changes later.
● Think sun and wind. Free comfort comes from orientation. South-facing windows with shading outperform any gadget if you get it right.
● Leave space for storage. Every client I’ve worked with underestimated closets. You’ll regret it when winter coats and holiday boxes eat your garage.
Real Experiences From People Who Tried
I’m not the only one who learned the hard way. Here’s what homeowners, DIYers, and self-builders have shared.
The stair disaster
A Redditor posted: “I drew my house for free online. Looked great until the builder told me the stairs were illegal — rise and run didn’t meet code. Had to redraw the entire second floor.” That’s the cost of skipping basics.
The self-build savings (and limits)
A couple I knew in Vermont sketched and drafted their house themselves. “We saved fifteen grand by drawing our own plans,” they told me. But they admitted, “We still had to hire an engineer for the roof trusses.” The lesson: you can do layout, but structure still needs a pro stamp.
The bedroom regret
One DIY blogger confessed: “I wish I had drawn furniture early. Our bedroom barely fits a queen bed. Forget side tables.” A reminder that scale isn’t just walls and doors — it’s how life fits inside them.
The budget shock
On a builder’s forum, a first-time designer said: “We thought drawing it ourselves would save money. It did, until we realized our roof pitch added $30k in materials.” Design decisions aren’t free when they hit material takeoffs.
The surprise win
Not every story is regret. One homeowner shared: “I drew my own plan, hired a draftsman to clean it up, and the builder said it was one of the most straightforward plans he’d built all year.” Proof that with discipline, DIY can work.
Real Costs and Trade-Offs
Designing your own house isn’t “free.” You either pay in money or in time. Here’s what the numbers really look like.
Graph paper and ruler
● Cost: under $20
● Trade-off: Fastest way to sketch. Forces you to think in scale. But you’ll hit the limits quick when you need to share or revise.
Free design apps
● Cost: $0
● Trade-off: RoomSketcher, Sweet Home 3D, or SketchUp Free can get you a 3D prototype. But free tools often choke on precision. Print scale, code compliance, and file sharing are weak. Time is the real cost.
Paid software
● Cost: $50–200 for entry-level apps, $400+ for pro tools
● Trade-off: Cleaner exports, layers, better editing. Still a learning curve. Unless you’re already into design, expect weeks before you’re fluent.
Printing
● Cost: $2–5 per sheet at copy shops
● Trade-off: This feels minor until you start iterating. But nothing beats catching a scale error on a printed sheet. Contractors trust paper more than iPads.
Engineer review
● Cost: $500–2,000
● Trade-off: Worth it if you drew your own structure. They’ll flag stairs, spans, trusses, and snow loads before the inspector does. Skipping this risks a stop-work order.
Architect review
● Cost: $300–600 for a consult, $10,000–25,000+ for full design services
● Trade-off: The consult is the sweet spot. Your DIY drawings get sanity-checked, code-checked, and polished before permits. Full service means less risk and more polish, but it’s a bigger line item.
DIY vs pre-made plans
● DIY (graph paper, apps): Low cost, high customization. But mistakes are on you.
● Pre-made: $1,000–2,000 for stock house plans online. Faster, permit-ready, but less tailored. You’ll still need an engineer or architect to stamp for local codes.
How to Apply This Yourself
Homeowner
Draft your concept first. Even a crude sketch saves money later. The fewer redesigns mid-build, the less you bleed on change orders.
Self-builder
Think of your DIY plan as a briefing tool. Hand it to your architect or engineer. They’ll respect that you’ve thought through flow and scale, and they’ll translate it into permit drawings.
Tiny house, barndominium, or cabin
Lean on digital tools. Test systems early—plumbing stacks, stair runs, loft access. Code constraints are tighter on small footprints, so you need precision before you buy lumber.
The bottom line: DIY saves money upfront, but every gap shifts liability back to you. The smartest path I’ve seen is DIY concept + professional check. It protects your budget without gambling the whole build on guesswork.
See also: Housing Concepts Explained: From Traditional Styles to Minimalist Trends
FAQ
34 Real Questions People Ask
1. Can I legally build from my own house plans?
Sometimes. Simple homes may pass with homeowner-drawn plans. Complex builds need licensed stamps.
2. What’s the cheapest way to design a house?
Graph paper + SketchUp, then pay an engineer to review.
3. Do I need an architect?
Not always, but they save headaches. At least hire one for review.
4. What’s the difference between house plans and blueprints?
Plans = layout. Blueprints = full set (plans, elevations, sections, details).
5. How much does it cost to hire an architect?
For a custom home, usually 5–15 percent of construction cost.
6. How long does it take to design a house?
A month for DIY drafts. Architects take 3–6 months for full sets.
7. What’s the number one rookie mistake?
No scale. Rooms end up cartoonish.
8. Which free software works best?
SketchUp for 3D, RoomSketcher for drag-and-drop.
9. Do professionals ever use free tools?
Yes, for concept sketches. Not for permit drawings.
10. What’s a bubble diagram?
A sketch of spaces as circles to test flow before walls.
11. Should I draw furniture in my plans?
Yes. Otherwise your rooms won’t fit real beds or couches.
12. What size should bedrooms be?
10×10 ft minimum for a child’s room, 12×12 ft for a master.
13. How wide should hallways be?
At least 3 feet. Wider if budget allows.
14. What’s the best ceiling height?
8 feet minimum. 9–10 feels better if budget allows.
15. How do I design a kitchen that works?
Follow the work triangle: sink, fridge, stove within easy reach.
16. Can I design a tiny house myself?
Yes, but check trailer codes if it’s mobile.
17. What about barndominiums?
You can sketch layout, but structure needs an engineer.
18. What about container homes?
You can design plans, but cutting steel requires pro engineering.
19. Can I design my own mansion?
You can sketch, but large homes require pro teams.
20. What about log cabins?
DIY is common, but foundation and spans still need engineer input.
21. How do I avoid wasting space?
Short hallways, shared plumbing walls, stacked closets.
22. Should I design in 3D or 2D first?
2D first for accuracy. 3D later for visualization.
23. Do I need to show plumbing on my blueprints?
Yes, at least fixtures and rough pipe locations.
24. Should I include electrical?
Yes, outlets, switches, and fixtures.
25. What about HVAC?
Mark intent, but leave detailed design to pros.
26. Can I add a pool in my plans?
Yes, but zoning and permits make it complex.
27. How detailed should a DIY plan be?
Enough for a builder to price — dimensions, systems, elevations.
28. What if my plans fail code review?
You’ll need revisions or pro redrawing.
29. How do I learn faster?
Study example blueprints. Copy by hand to understand flow.
30. Can I design online for free?
Yes, but most free sites cap features. Expect limits.
31. Is it worth it to design myself?
If budget is tight, yes. If timeline is strict, hire help.
32. How do I know if my design is good?
Test furniture fit. Walk it with tape on the floor.
33. Can I get financing with DIY plans?
Banks often require stamped drawings for loans.
34. Final advice?
Start simple. Respect scale. Get pro review before you build.
Final Word
Designing your own house isn’t just possible — it’s practical if you follow the sequence: site, bubbles, plans, systems, dimensions. I’ve seen homeowners save thousands by preparing thoughtful plans. I’ve also seen them burn months redoing mistakes.
Do the work, respect the process, and your design will be something builders can actually use.