
Gable End Trusses Simplified: From Basics to Advanced Applications
Gable End Trusses: What They Do and Why They Matter
That triangular frame at the end of your roof? It’s not just for show.
Gable end trusses are structural. They hold up the roof edge, brace the walls, and tie everything together during wind, load shifts, and framing stress. Without them, the end of your building becomes a weak point—prone to cracking, bowing, or collapse.
This isn’t theory. From field framing to prefab delivery, understanding gable end trusses helps you design better, build smarter, and avoid costly structural failures.
We’ll break down what they’re made of, how they’re used, and what to watch for—step by step.
FIELD PICK
Complete Book of Framing: An Illustrated Guide for Residential Construction (RSMeans)
What You’ll Learn: Real-world roof framing details, gable truss layout, wind bracing, and on-site fixes from a veteran carpenter.
🔗 Check Price on Amazon
Gable End Truss: The Cornerstone of Roof Design
A detailed look at how gable end trusses enhance structural integrity and aesthetics in residential and commercial roofing.
What Is a Gable End Truss?
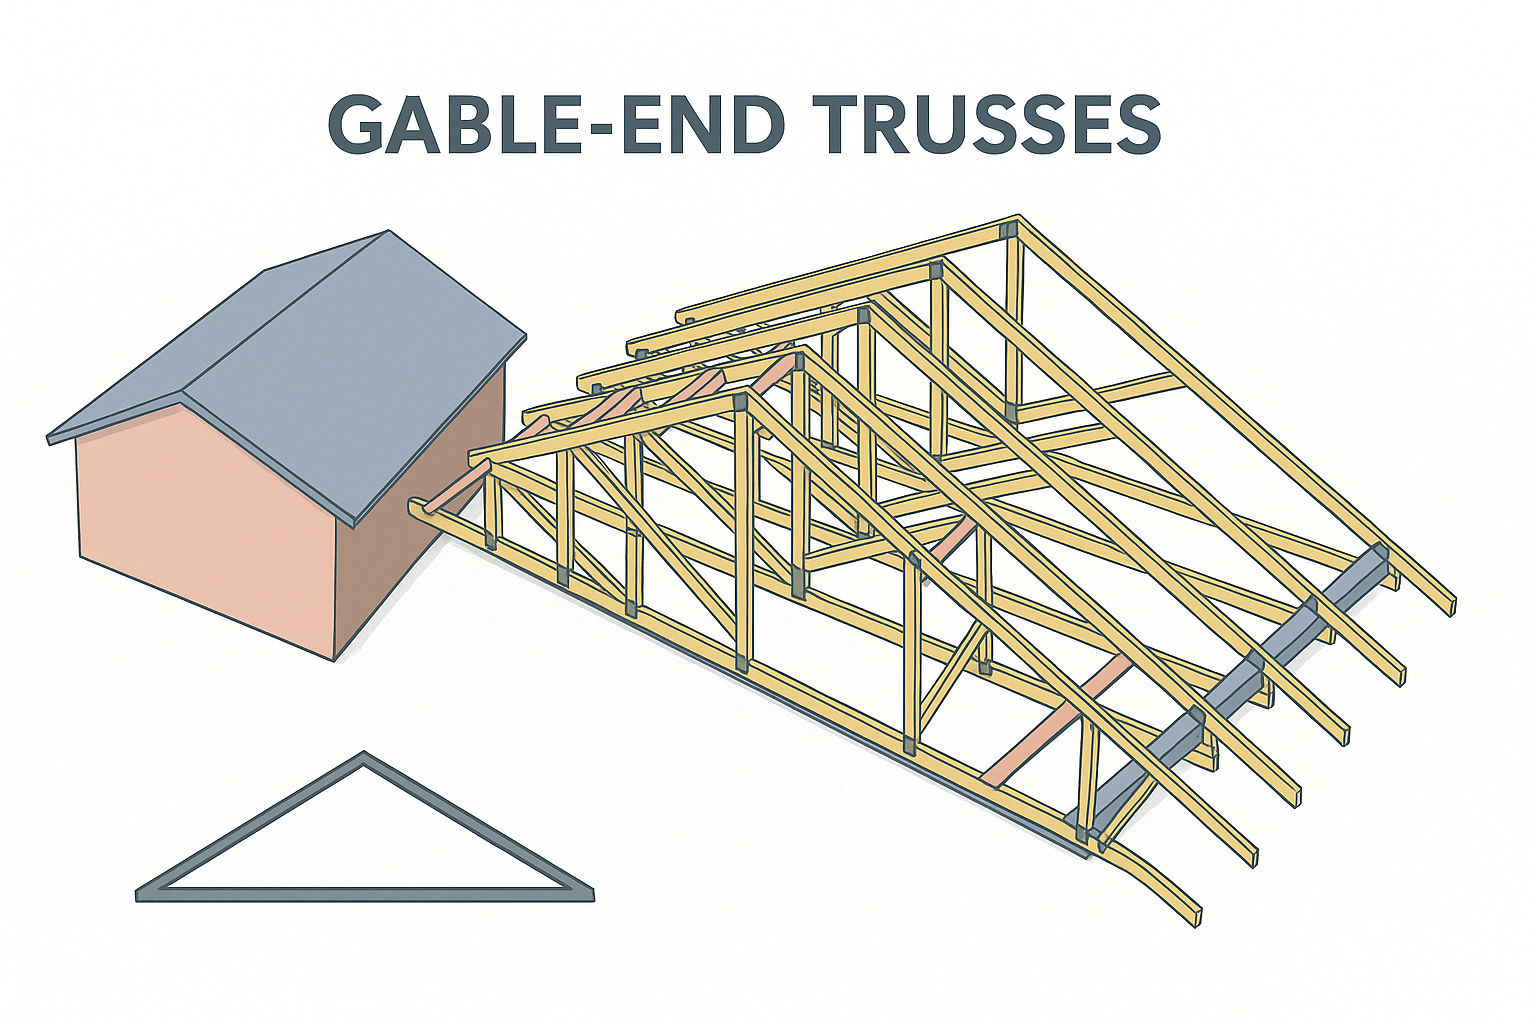
A gable end truss sits at the very edge of a gable roof. It’s the flat triangle you see at the front and back of the house. But it’s not just a pretty outline—it holds the roof together.
This truss supports the roof’s overhang, keeps the gable wall aligned, and helps brace the entire structure against wind and movement. Without it, the roof can sag or the end walls can shift.
What Makes It Different
● Matches Roof Pitch – Follows the angle of the roof, from low-slope to steep.
● Supports Overhangs – Keeps the roof eaves strong and stable.
● Material Choices – Built from wood, steel, or engineered lumber.
● Custom Framing – Can include framing for attic vents, gable windows, or detailing.
Why Gable End Trusses Actually Matter
● Holds the Roof in Place – Keeps the structure square and braced.
● Protects Against Weather – Helps direct rain and snow away from the walls.
● Improves Curb Appeal – Gives a clean edge to the roofline.
● Faster to Install – Prefab options save time and reduce on-site error.
MUST READ
What I Wish My Roofer Had Told Me: The Ultimate Guide to the Roof of Your Dreams on a Budget (Homeowner Books)
Why It’s Worth It: Clear breakdown of roof systems, gable framing, and common mistakes—ideal for remodelers and builders.
🔗 Check Price on Amazon
The Best Applications for Gable End Trusses in Construction
Gable end trusses are the unsung heroes of construction, framing the triangular wall sections where roof slopes meet. They don’t just add strength to your roof—they bring style and function together, creating clean lines and symmetry.
Applications of Gable End Trusses
1. Residential Homes
Gable end trusses are a no-brainer for homes with pitched roofs. They provide structural support and define that classic, symmetrical gable roof look everyone loves. Plus, they’re practical for integrating vents or insulation.
Example:
A family home in Denver used pre-fabricated gable end trusses, making the construction faster and easier. The design allowed for built-in attic vents, improving the home’s airflow and energy efficiency.
Pro Tip:
If your home is in a windy area, make sure the trusses are securely braced to prevent movement or damage.
2. Commercial Buildings
Smaller commercial spaces like cafes, boutiques, and offices often benefit from the aesthetic appeal of gable end trusses. They’re perfect for businesses that want a welcoming yet distinctive roofline.
Example:
A modern café in Austin used steel gable end trusses to create large overhangs, providing shade for outdoor seating. The exposed trusses also gave the space a chic, industrial vibe.
Pro Tip:
Opt for durable materials like engineered wood or steel for commercial applications where heavier loads and durability are priorities.
3. Sheds and Garages
Detached garages, workshops, and sheds are all about functionality, and gable end trusses deliver. They’re cost-effective, easy to construct, and perfect for creating practical spaces.
Example:
In Maine, a timber shed with steep-pitched gable end trusses handled heavy snowfall like a champ. Bonus: the design made installing skylights a breeze, bringing in natural light.
Pro Tip:
Use treated wood for structures in wet or snowy areas to protect against moisture damage.
4. Agricultural Buildings
Think barns, equipment sheds, and farm storage. Gable end trusses handle large spans and heavy loads with ease, making them a solid choice for agricultural projects.
Example:
A Wisconsin dairy barn used pre-engineered wooden gable end trusses to frame a wide roofline. This supported ventilation systems and solar panels, making the barn both functional and energy-efficient.
Pro Tip:
For additional installations like solar panels, reinforced trusses are a must to handle the extra weight.
5. Recreational and Outdoor Structures
Outdoor spaces like gazebos, pavilions, and pergolas can also use gable end trusses for a clean, open design that feels spacious and inviting.
Example:
In Seattle, a park pavilion featured exposed wooden gable end trusses paired with a lightweight metal roof. The result? A shelter that felt both modern and rustic, perfect for community gatherings.
Pro Tip:
Add decorative brackets or exposed beams to make outdoor structures even more visually appealing.
Why Builders Love Gable End Trusses
It’s simple: gable end trusses combine strength, efficiency, and aesthetic appeal. They’re versatile enough for everything from homes to barns to trendy cafes. With the right materials and proper installation, they’ll give your project a polished, reliable roofline that looks as good as it performs.
No matter the build, these trusses are the smart choice when function and style both matter.
Essential Design Tips for Gable End Trusses
How to Plan and Design Gable End Trusses for Your Project
Critical Design Factors for Gable End Trusses
Designing a gable end truss involves multiple factors that balance strength, durability, and aesthetics. Here's a breakdown of key considerations, complete with calculations and examples to make the process as practical as possible.
Gable End Truss Design: What You Need to Know
From Loads to Materials: Smart Gable End Truss Design
1. Load Calculations
Understanding the loads your gable end truss will bear is the foundation of a safe and efficient design.
- Dead Loads: This includes the weight of the roofing materials (shingles, tiles, metal sheets) and any insulation.
- Live Loads: These are variable forces such as wind, snow, and occasional maintenance activities (like someone walking on the roof).
- Dynamic Loads: Particularly important in regions with seismic activity or hurricanes.
Pro Tip: Always account for local climate conditions. For instance, areas with heavy snow need trusses designed for higher live loads, while regions prone to hurricanes require enhanced wind resistance.
Load Example Calculation:
For a gable roof with a span of 40 feet and a total combined load of 30 pounds per square foot (psf):
- Total Load on the Roof:
Table of Typical Loads by Climate:
| Climate Zone | Snow Load (psf) | Wind Load (psf) | Dead Load (psf) |
|---|---|---|---|
| Coastal (Hurricane) | 0 | 40–60 | 15 |
| Snowy Mountains | 40–70 | 15 | 20 |
| Temperate Urban | 20–30 | 20 | 15 |
2. Material Selection
Choosing the right material is crucial for performance and cost-efficiency.
- Timber:
- Affordable and widely available.
- Easy to cut and shape, making it ideal for residential and small-scale projects.
- Best for homes, sheds, or garages in moderate climates.
- Steel:
- Excellent for commercial and industrial projects.
- High resistance to environmental factors like moisture and fire.
- Can handle larger spans and heavier loads compared to timber.
Material Comparison Table:
| Material | Durability | Cost | Weight | Best Use |
|---|---|---|---|---|
| Timber | Moderate | Low | Light | Residential, sheds, barns |
| Steel | High | Moderate | Heavy | Commercial, large spans |
| Engineered Wood | High | Moderate | Moderate | Custom projects |
3. Roof Pitch
The roof pitch determines the angle and design of your truss.
- Low Pitch (Below 4:12):
- Great for modern, flat-looking roofs.
- Requires additional bracing to handle loads.
- Medium Pitch (4:12 to 9:12):
- Common for most residential homes.
- Balanced runoff and aesthetic appeal.
- High Pitch (Above 9:12):
- Perfect for snowy regions to encourage snow runoff.
- Creates additional attic space for storage or living areas.
Example Calculation for Roof Pitch Angle:
If the rise is 10 feet over a span of 40 feet, the pitch can be calculated as:
4. Span-to-Depth Ratio
The span-to-depth ratio helps determine the optimal height of the truss.
Formula for Truss Depth:
For a 40-foot span with a span-to-depth ratio of 8:
5. Bracing and Support
Proper bracing ensures the truss maintains its shape and stability under load.
- Diagonal bracing helps distribute loads evenly.
- Lateral bracing prevents twisting or movement.
Pro Tip: Use metal bracing in high-wind zones for extra reinforcement.
What We’ve Learned
Gable end trusses might seem simple, but designing them involves a mix of calculations, material considerations, and climate-specific tweaks. Take the time to plan carefully—because whether you’re framing a cozy shed or a sprawling barn, the right truss design makes all the difference.
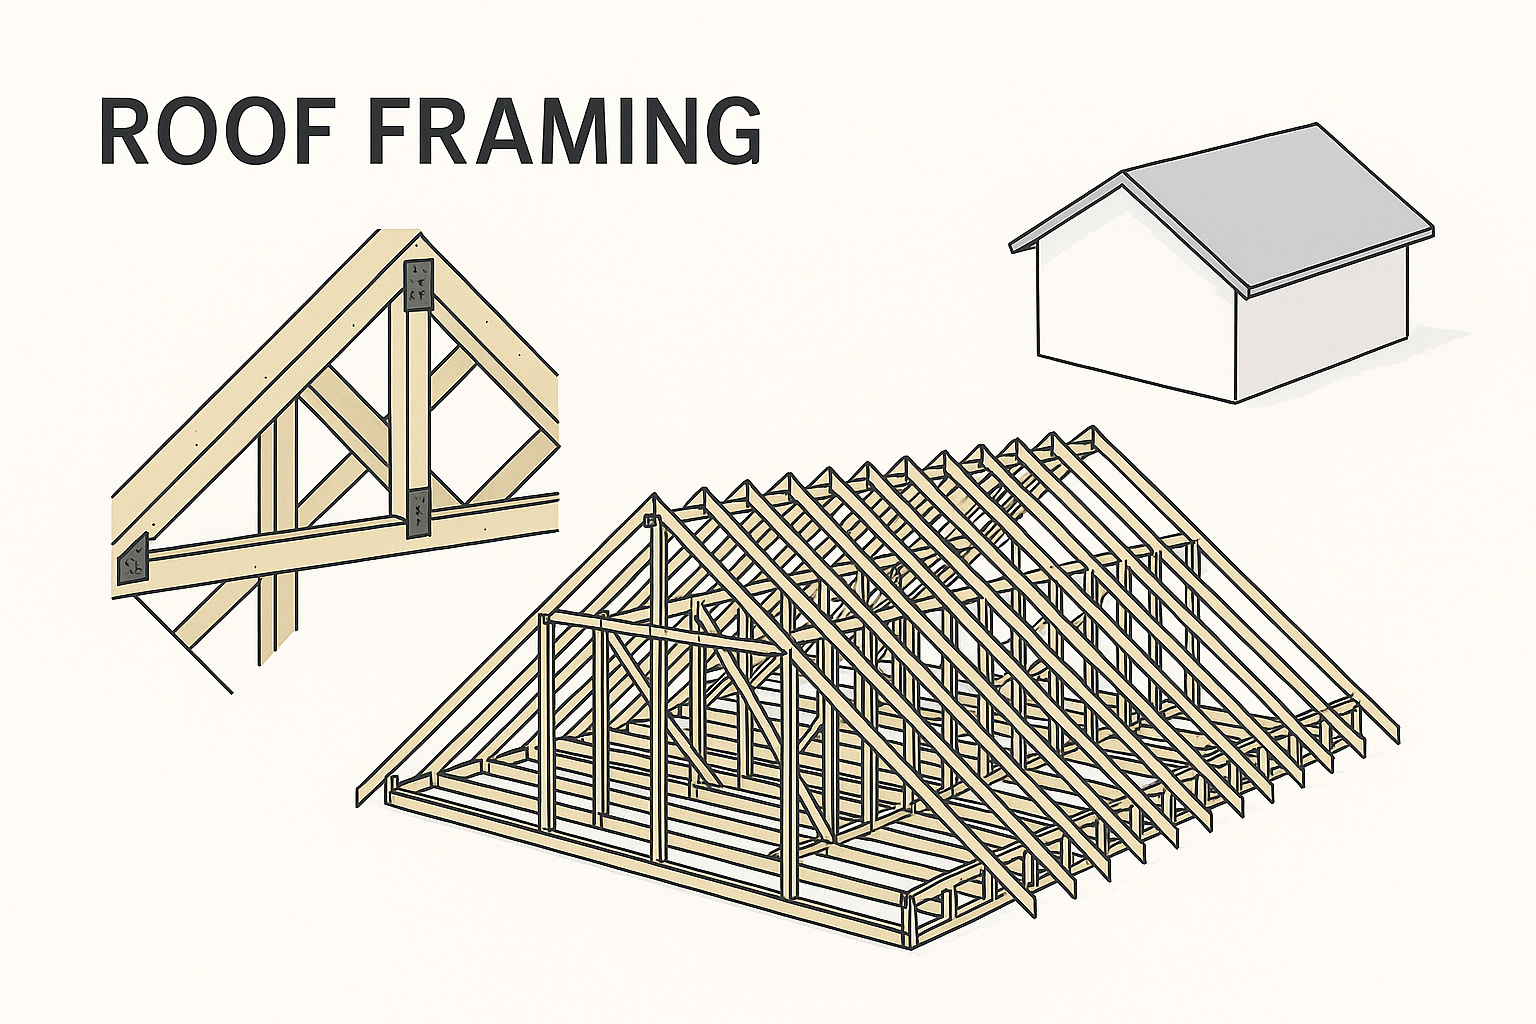
Step-by-Step Guide to Installing Gable End Trusses Safely
Top Installation Tips for Strong and Secure Gable End Trusses
How to Install Gable End Trusses Like a Pro
Installing gable end trusses is a critical step in roof construction. Done right, it ensures a safe, stable, and long-lasting structure. Here’s how to make the process smoother and more reliable:
Gable End Truss Installation: Avoid Mistakes with These Tips
1. Prefabrication: The Smart Choice
Using prefabricated trusses is a time-saver and helps reduce construction errors. These trusses are precision-engineered in factories, ensuring consistency and quality. However, accurate measurements are a must before ordering—small miscalculations can lead to costly delays.
Pro Tip:
Double-check the dimensions of your project and communicate them clearly to the manufacturer. Prefabrication minimizes on-site cutting and adjustments.
2. Bracing Is Critical
Temporary bracing during installation is non-negotiable. It keeps the trusses aligned and stable while work is ongoing. Once the installation is complete, permanent bracing must match the design specifications to maintain structural integrity over time.
Pro Tip:
Install diagonal bracing as soon as the first truss is secured to ensure alignment and prevent tipping. Use a reliable bracing plan that adheres to local building codes.
3. Quality Inspection Before Installation
Inspect every truss for defects like splits, warping, or rust before installation begins. Even small issues can affect the truss’s load-bearing capacity and compromise the roof’s performance over time.
Example:
A contractor in Chicago avoided major delays by inspecting trusses immediately upon delivery. They identified and replaced a warped member before it could cause alignment issues during installation.
Pro Tip:
If you notice any damage or imperfections, consult the manufacturer for replacements instead of trying to fix them on-site.
Additional Tips for Smooth Installation
- Use Proper Lifting Equipment:
Trusses are heavy and awkward to maneuver. Use cranes or lifts for large trusses to avoid accidents and ensure precise placement. - Secure the First Truss Carefully:
The first truss sets the alignment for the entire roof. Use guide ropes or braces to anchor it securely before proceeding with the rest. - Follow Manufacturer’s Guidelines:
Every truss design has unique specifications. Follow the manufacturer’s instructions for spacing, bracing, and fastening to maintain warranty and safety standards.
What We've Learned
Installing gable end trusses requires preparation, precision, and attention to detail. Prefabrication simplifies the process, bracing ensures safety, and thorough inspections prevent costly mistakes.
How Much Do Gable End Trusses Cost? A Complete Guide
Gable End Trusses: What They’ll Cost You in Materials and Labor
Material and Installation Costs for Gable End Trusses Explained
Breaking Down the Costs of Gable End Trusses for Your Project
Material Costs
The cost of materials varies based on the type of truss you choose:
- Timber Trusses:
Expect to pay $30–$50 per linear foot, depending on the type and quality of the wood. Pine and spruce are more affordable, while cedar or oak are on the higher end due to their durability and aesthetic appeal. - Steel Trusses:
Prices range from $50–$80 per linear foot for corrosion-resistant steel, making them a strong choice for commercial and industrial applications or areas with extreme weather.
Pro Tip:
If you’re in a humid or coastal area, investing in treated wood or galvanized steel can reduce maintenance costs over time, protecting your investment from rust or decay.
Installation Costs
Labor and installation costs depend on the size and complexity of the project:
- Labor:
A standard residential gable end truss installation typically costs $1,500–$3,000, covering labor and equipment for a straightforward setup. - Prefabricated Trusses:
Using prefabricated trusses can reduce overall costs by 15–20%, thanks to shorter installation times and reduced on-site adjustments.
Why Costs Vary
The cost of gable end trusses can vary based on several factors:
- Roof Span and Complexity: Larger spans require more materials and labor.
- Customization: Unique designs or complex architectural details will increase costs.
- Local Labor Rates: Installation costs vary widely depending on your region.
- Material Type: Steel is more expensive upfront but may offer better long-term savings in maintenance.
Budgeting for Gable End Trusses
When planning your project, factor in both the upfront material and labor costs as well as the long-term savings from choosing durable materials. While timber trusses are cost-effective, steel trusses offer added durability for harsher climates or larger projects.
Advantages and Disadvantages of Gable End Trusses
Advantages
- Cost-Effective: Prefabrication saves time and materials.
- Aesthetic Appeal: Defines the iconic triangular roofline of homes.
- Versatility: Works for residential, commercial, and agricultural buildings.
Disadvantages
- Limited to Specific Roof Types: Doesn’t suit flat or complex roof designs.
- Requires Skilled Installation: Misalignment can lead to structural issues.
Gable Braces
What Are Gable Braces?
Gable braces are essential structural components that provide stability to the gable end wall, the triangular section of a building's wall located beneath the roof's peak. These braces are typically installed in horizontal or diagonal configurations, reinforcing the gable wall against environmental forces like wind or snow. In simple terms, they act as the unsung heroes, ensuring your roof doesn’t sag or collapse under pressure.
Why Are Gable Braces Crucial?
Gable braces play a pivotal role in maintaining roof stability. Their importance lies in three primary functions:
- Resistance Against Wind Pressure: In areas prone to hurricanes or tornadoes, gable braces protect the roof by countering lateral forces that could otherwise weaken or collapse the gable wall.
- Support for Roof Overhangs: Aesthetic roof overhangs exert strain on the gable wall. Proper bracing helps distribute this load, preventing sagging or structural damage.
- Enhanced Structural Integrity: A well-braced gable wall fortifies the roof, ensuring stability during heavy snowfalls or storms.
Example in Action:
During a hurricane in Florida in 2020, homes equipped with gable braces experienced significantly less structural damage compared to homes without them. This stark difference underscored their importance in extreme weather.
Types of Gable Braces
Gable braces come in two main types, each tailored for specific needs:
- Horizontal Gable Braces:
- Positioned parallel to the roof’s peak, these braces provide lateral reinforcement.
- Ideal for long gable walls, they help reduce flexing in areas with moderate wind pressure.
- Best Used For: Homes in regions with standard weather conditions requiring basic reinforcement.
- Diagonal Gable Braces:
- Installed at an angle, connecting the gable wall to the roof trusses or rafters.
- Offer superior resistance to lateral and downward forces.
- Best Used For: High-wind or heavy snow areas where additional support is essential.
Tip: Always reference local building codes when determining which type of brace is suitable for your project.
When and Where Should You Use Gable Braces?
Understanding when and where to install gable braces can save time and ensure safety:
- During New Construction: Incorporate gable braces at the construction stage to align with the building’s load path and save on retrofitting costs later.
- For Retrofitting Older Homes: Homes with sagging gable walls or aging structures can benefit from added bracing to meet modern safety standards.
- In Extreme Weather Zones: Coastal or snow-heavy regions should prioritize diagonal bracing for maximum stability.
What to Avoid:
Installing braces without considering load distribution can lead to structural failures. Proper planning and professional consultation are essential.
Avoiding Common Installation Mistakes
Even the best materials can fail if improperly installed. Here are common pitfalls and how to avoid them:
- Using the Wrong Size Braces: Undersized braces lack the strength to bear loads effectively. Always measure and choose accordingly.
- Improper Alignment: Misaligned braces fail to connect effectively with trusses and rafters, compromising their functionality.
- Skipping Quality Checks: Post-installation inspections are critical to ensure secure connections and functionality.
Pro Tip: Utilize tools like laser levels and structural analysis software to model stress points and optimize brace placement.
Practical Examples of Gable Bracing
- Residential Use:
A family in Colorado retrofitted their mountain home with diagonal gable braces to counter heavy snowfall. The braces prevented roof sagging during a record snowstorm, saving the structure from costly damage. - Commercial Applications:
A retail store in hurricane-prone Louisiana installed horizontal gable braces and hurricane straps during its construction. This combination minimized roof damage during severe storms.
Gable braces may not be the first thing you think of in construction, but their role is indispensable in ensuring structural integrity and roof stability. By understanding their purpose, selecting the right type, and avoiding common mistakes, you can enhance your building’s resilience to environmental stresses. Think of gable braces as the strong, silent force that protects your roof and everything beneath it—because when done right, they make all the difference.
Interesting Facts About Gable End Trusses
- Historical Roots: The design dates back centuries, commonly used in traditional European cottages.
- Eco-Friendly Options: Many manufacturers now offer trusses made from sustainable wood or recycled steel.
- Versatility: Gable end trusses are often used as decorative elements in high-end homes, adding character to exterior walls.
FAQ
1. Can gable end trusses be customized?
Yes, they can be designed to match the roof pitch and aesthetic requirements of your project.
2. How are gable end trusses different from other trusses?
They are specifically designed for the ends of roofs, providing both structural support and a finished look for gable walls.
3. Are gable end trusses suitable for flat roofs?
No, they are best suited for pitched roofs. Flat roofs require different structural solutions, such as beam systems.
4. How long do gable end trusses last?
When made from treated timber or steel, they can last 50+ years with proper maintenance.
5. What’s the average cost of a gable end truss?
For residential projects, expect to pay $30–$80 per linear foot, depending on the material and complexity.
Resources
Building Codes and Standards
- International Residential Code (IRC): iccsafe.org
- National Design Specification for Wood Construction (NDS): awc.org
Design Tools
- Truss Calculator: Energy.gov
- Truss Design Software: MiTek
Conclusion
Building Strong with Gable End Trusses
Gable end trusses,as structural elements; are the backbone of clean, efficient, and durable roofing systems.
From residential homes to commercial buildings, their versatility and practicality make them an essential choice for builders and designers alike.