How to Tell If Your Brick Needs Repointing
Failing Mortar in Old Brick Houses: The Real Problem Hidden in Plain Sight
Old brick homes—whether from the 1890s, 1920s, or 1930s—can fool you. From a distance, the walls look straight, proud, and solid. But the real danger isn't the brick. It’s the mortar holding it together.
Mortar is what fails first. And when it goes, moisture gets in. That’s when a hairline crack turns into rot behind plaster, bowed walls, and even structural collapse.
This guide cuts straight to what matters. How to check your mortar. What signs mean trouble. And what to do before your “strong old house” starts breaking down.
What Old Mortar Failure Looks Like
Most homeowners wait too long. They notice damage only after water stains or cracks inside. But brick tells you earlier—if you know where to look.
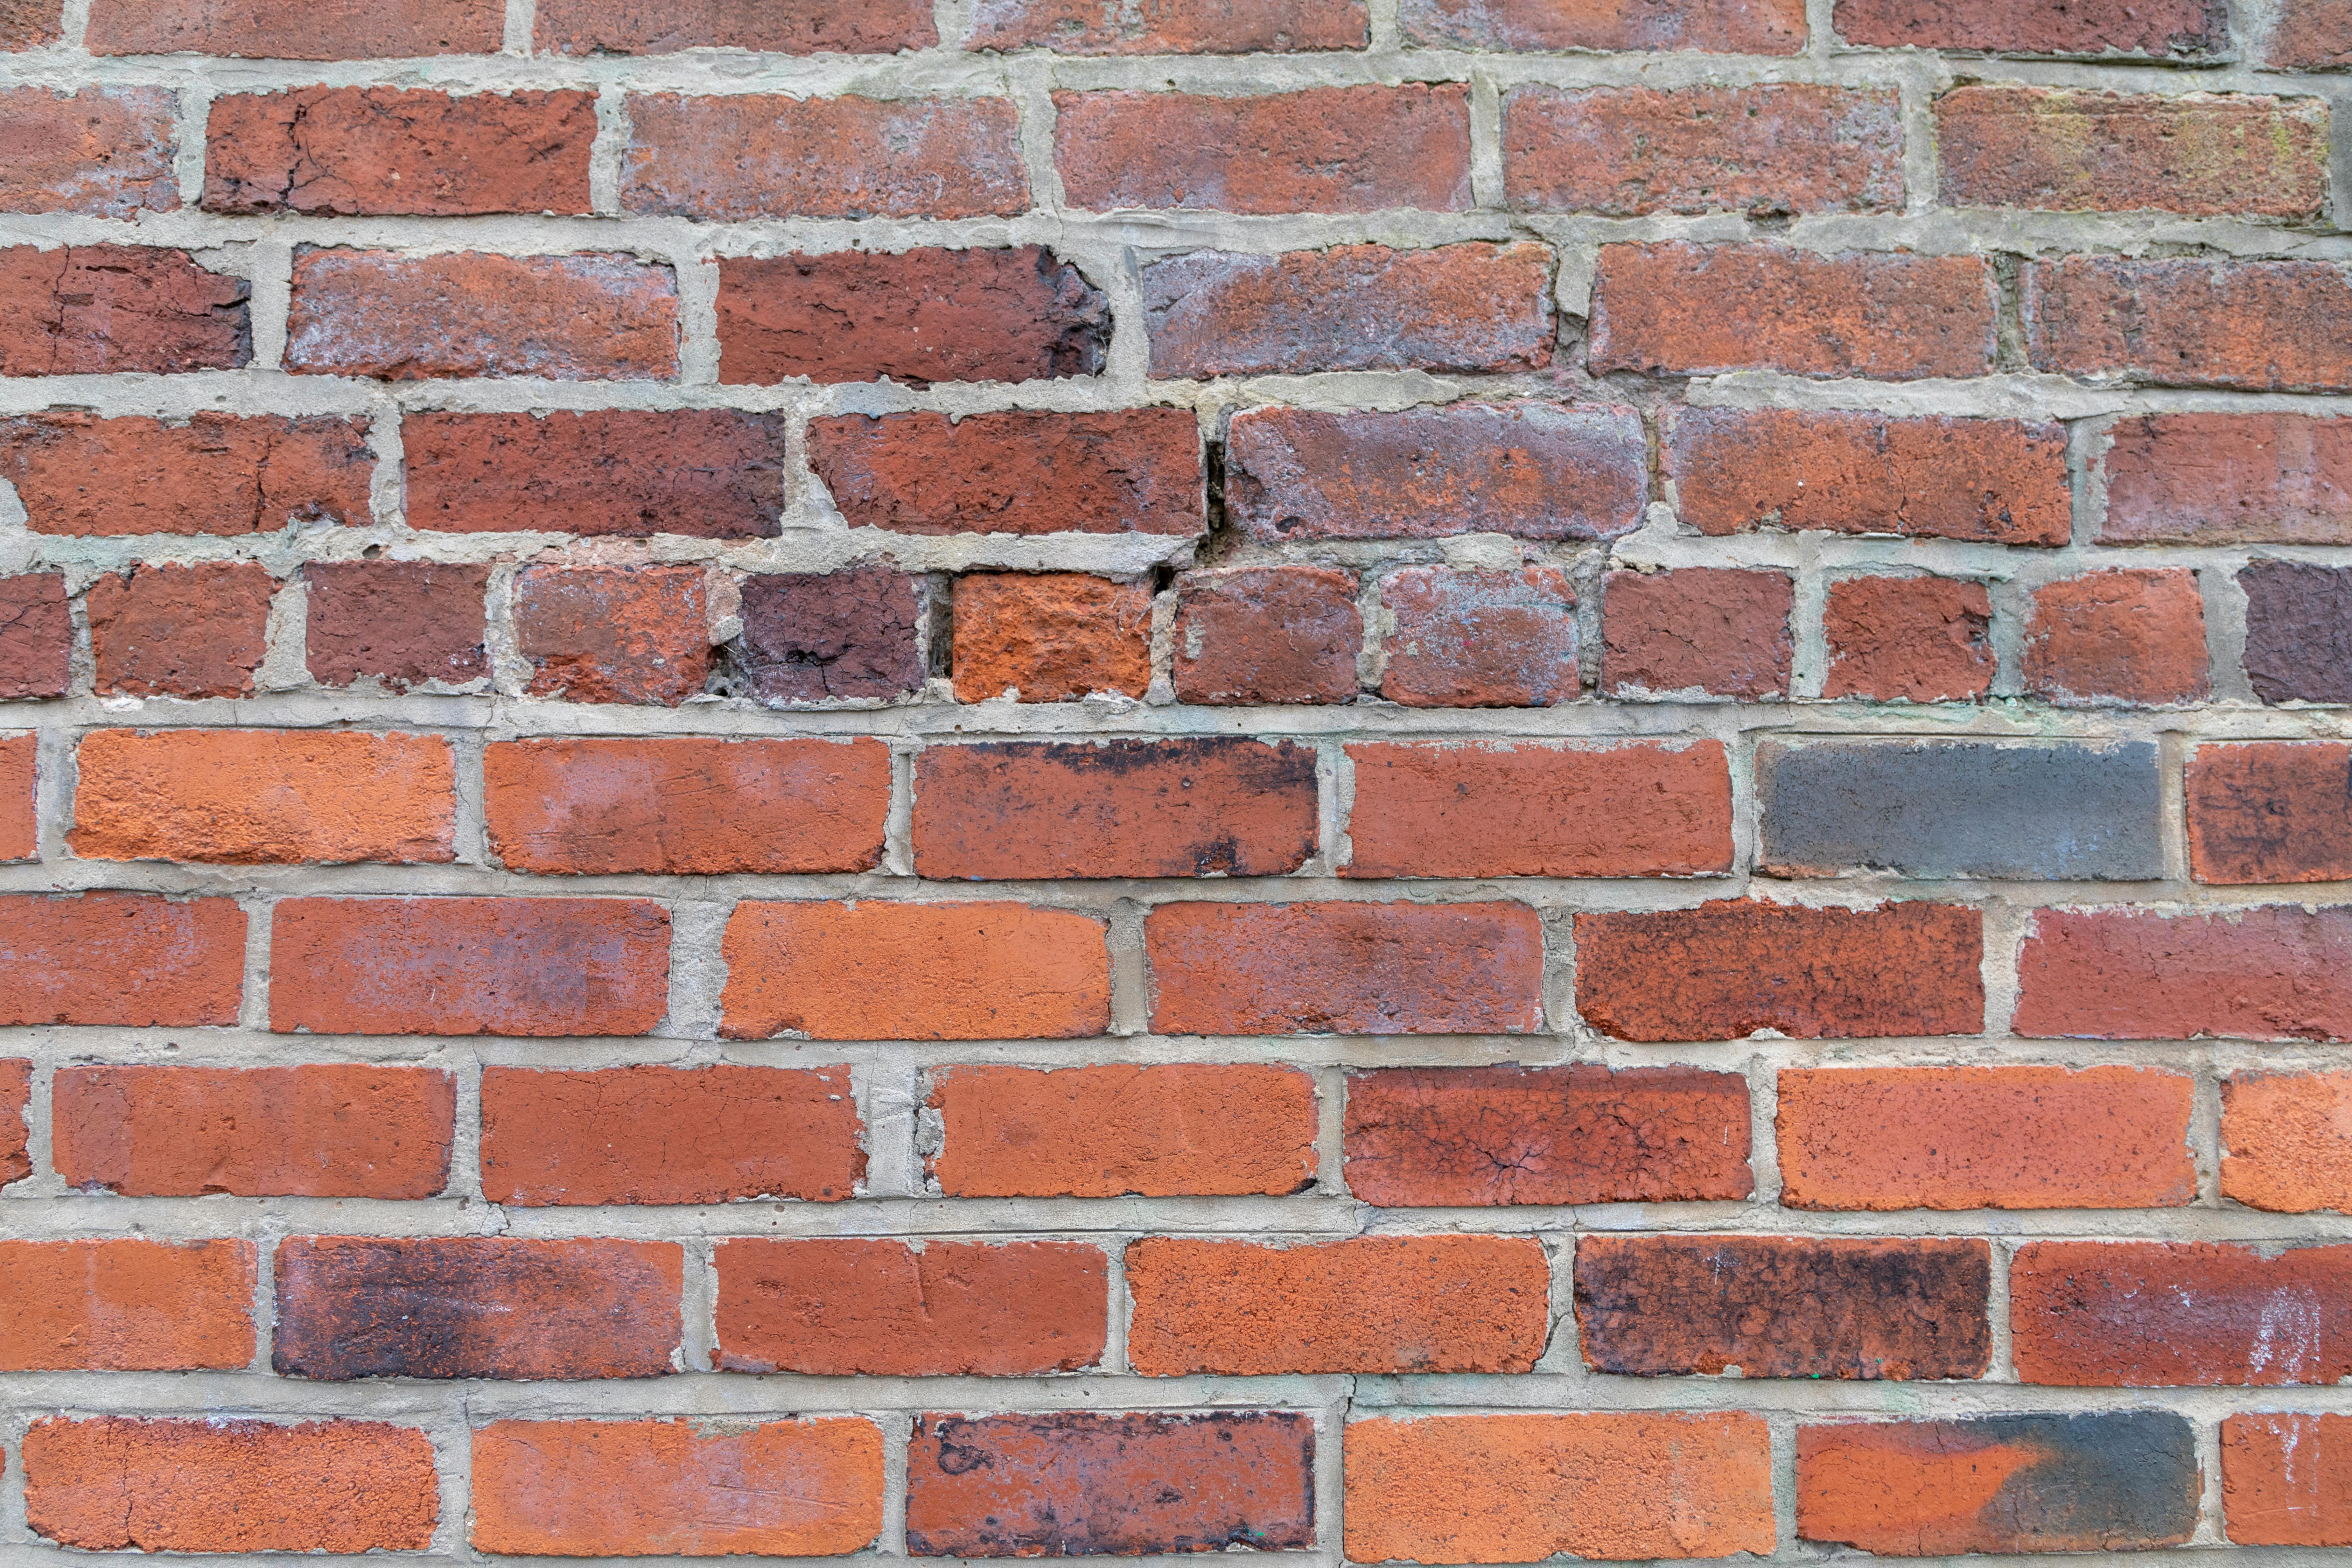
● Finger Test
Run your finger across the mortar. If it powders off, that’s lime mortar breaking down. This is common in homes before the 1950s. It means water can now seep in.
● Visible Gaps
See daylight between the brick and mortar joint? That’s water’s entry point. Every freeze-thaw cycle pushes that gap wider.
● Tap Test
Lightly hit the mortar with a screwdriver. A solid joint sounds dull. A hollow one means the back has detached. That’s hidden water damage starting to grow.
● Look Low and in Shade
Moisture lives longest on north-facing or shaded walls. You’ll often see green algae, darker joints, or flaking here first. Rising damp is common at the base.
● Check for Interior Signs
Cracks near window sills, soft plaster spots, and bubbling paint are indoor clues. If you're seeing these, the wall’s been compromised for a while.
Which Homes Are Most at Risk?
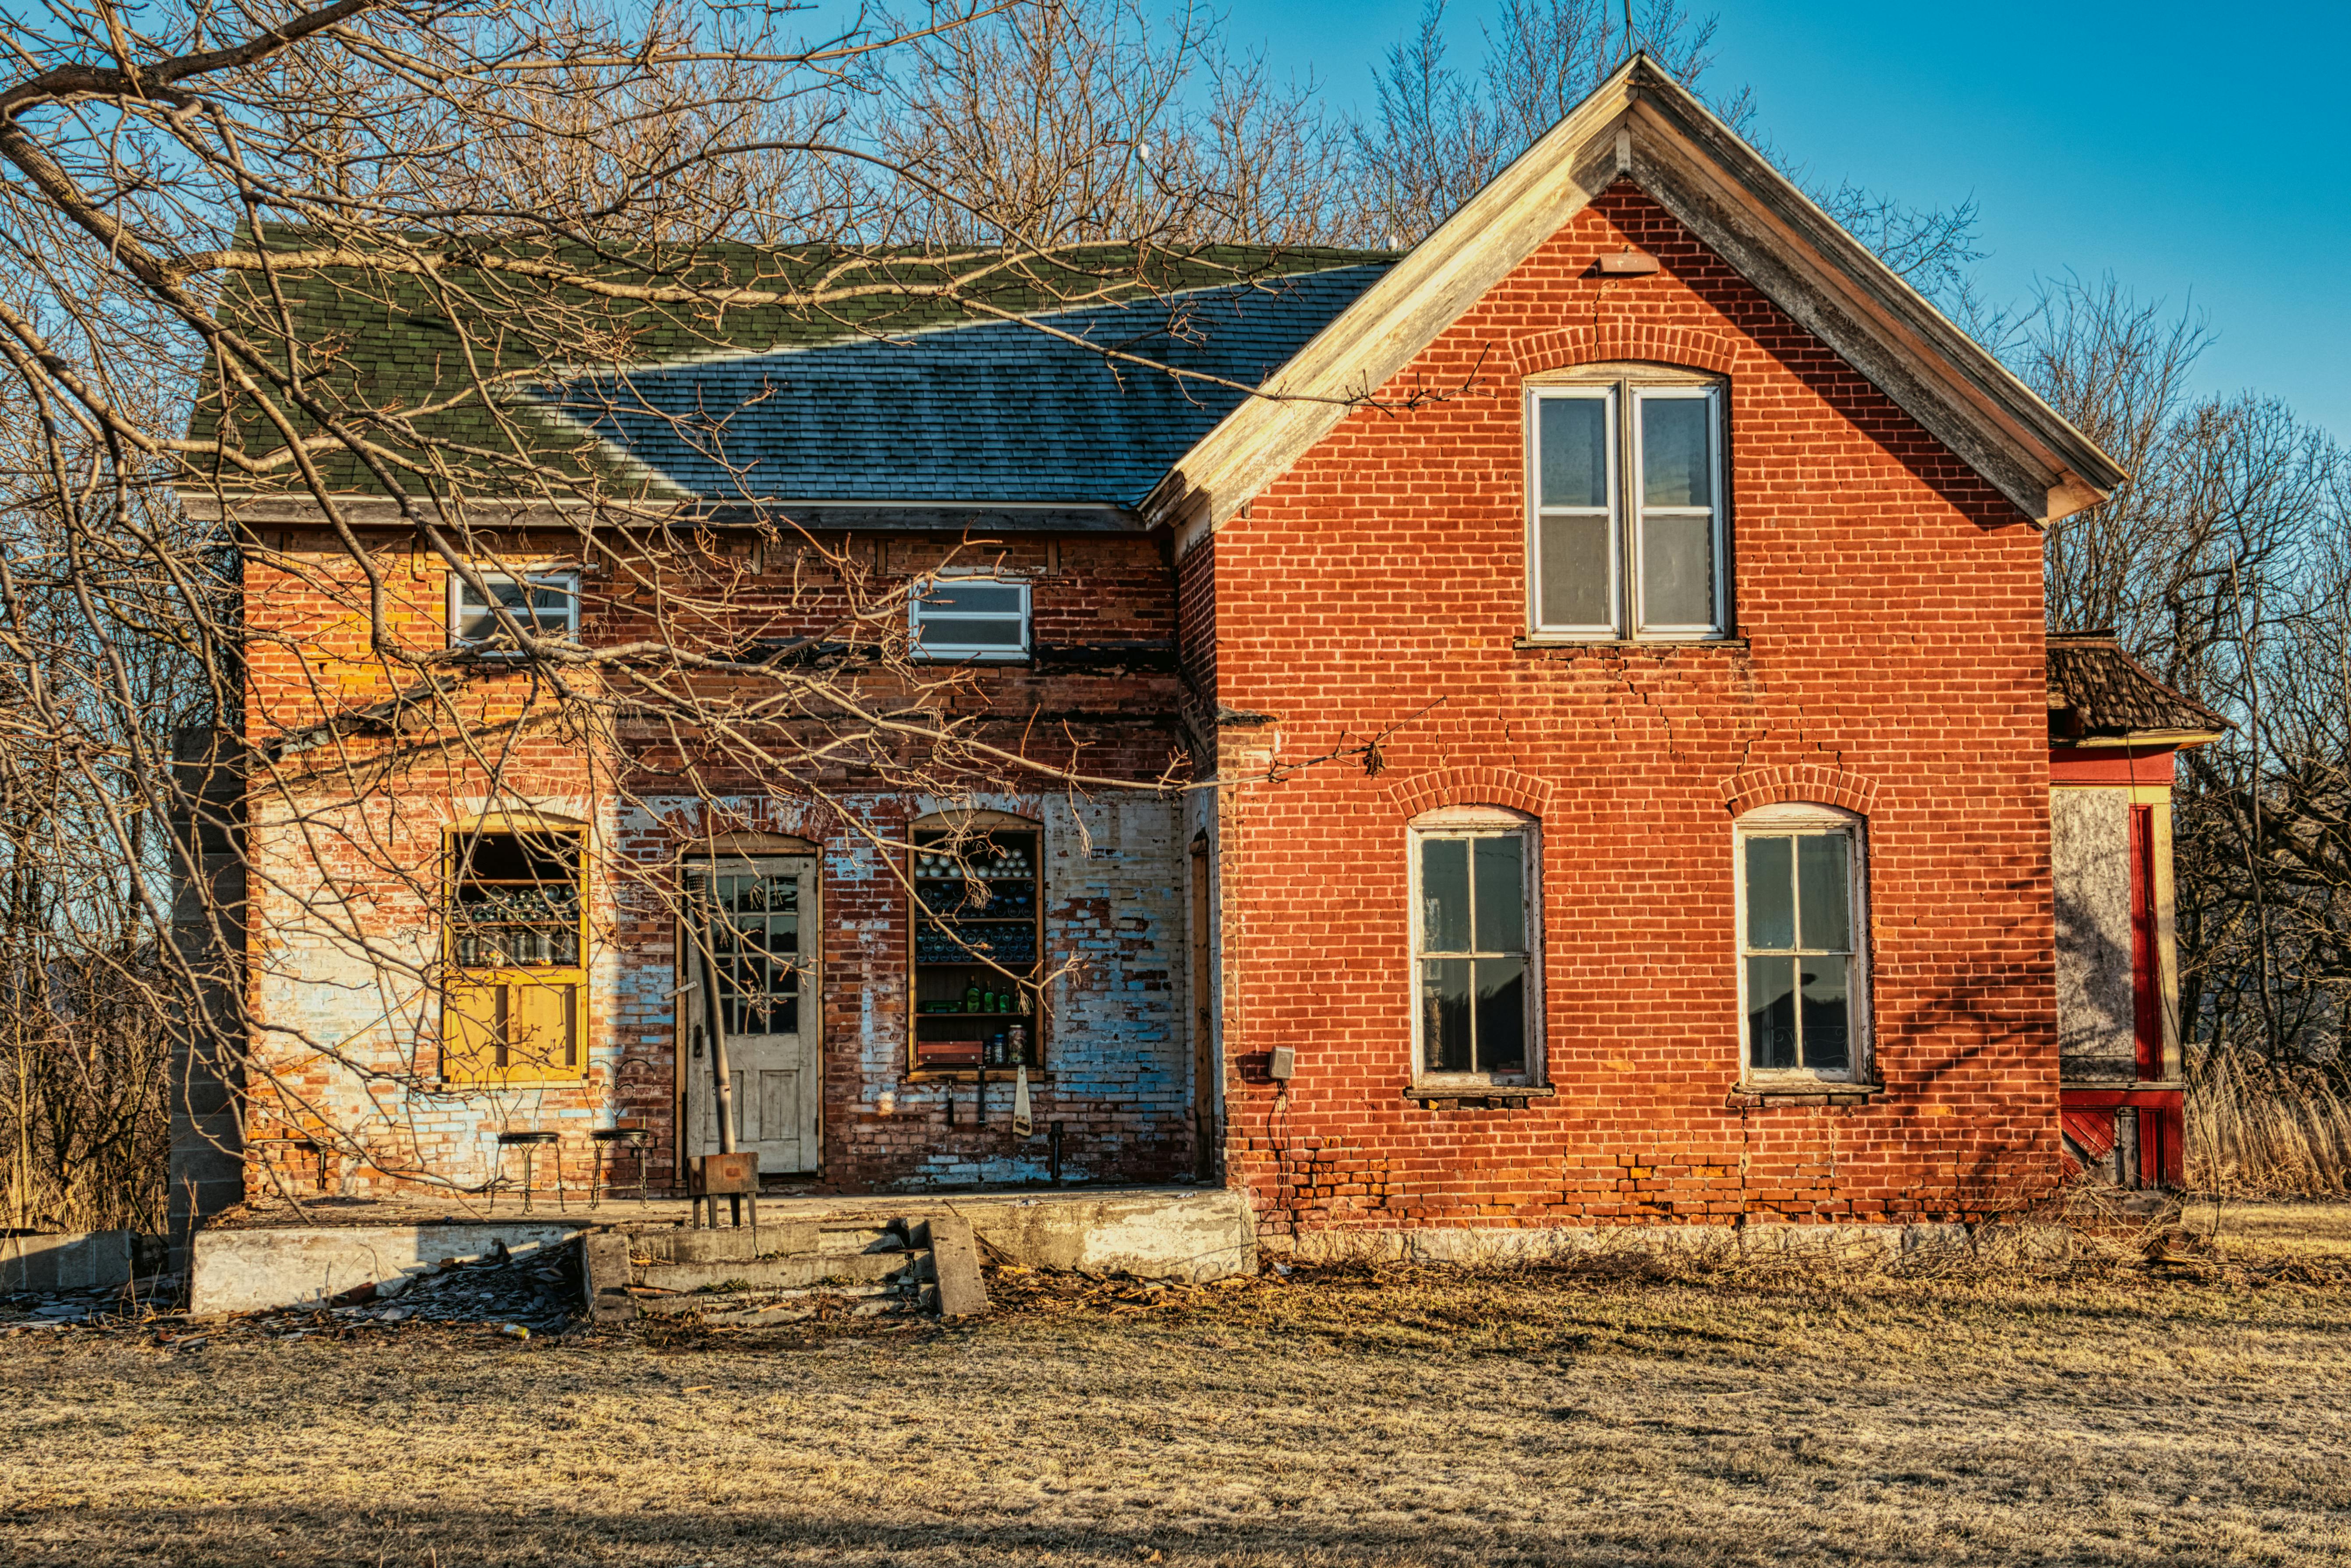
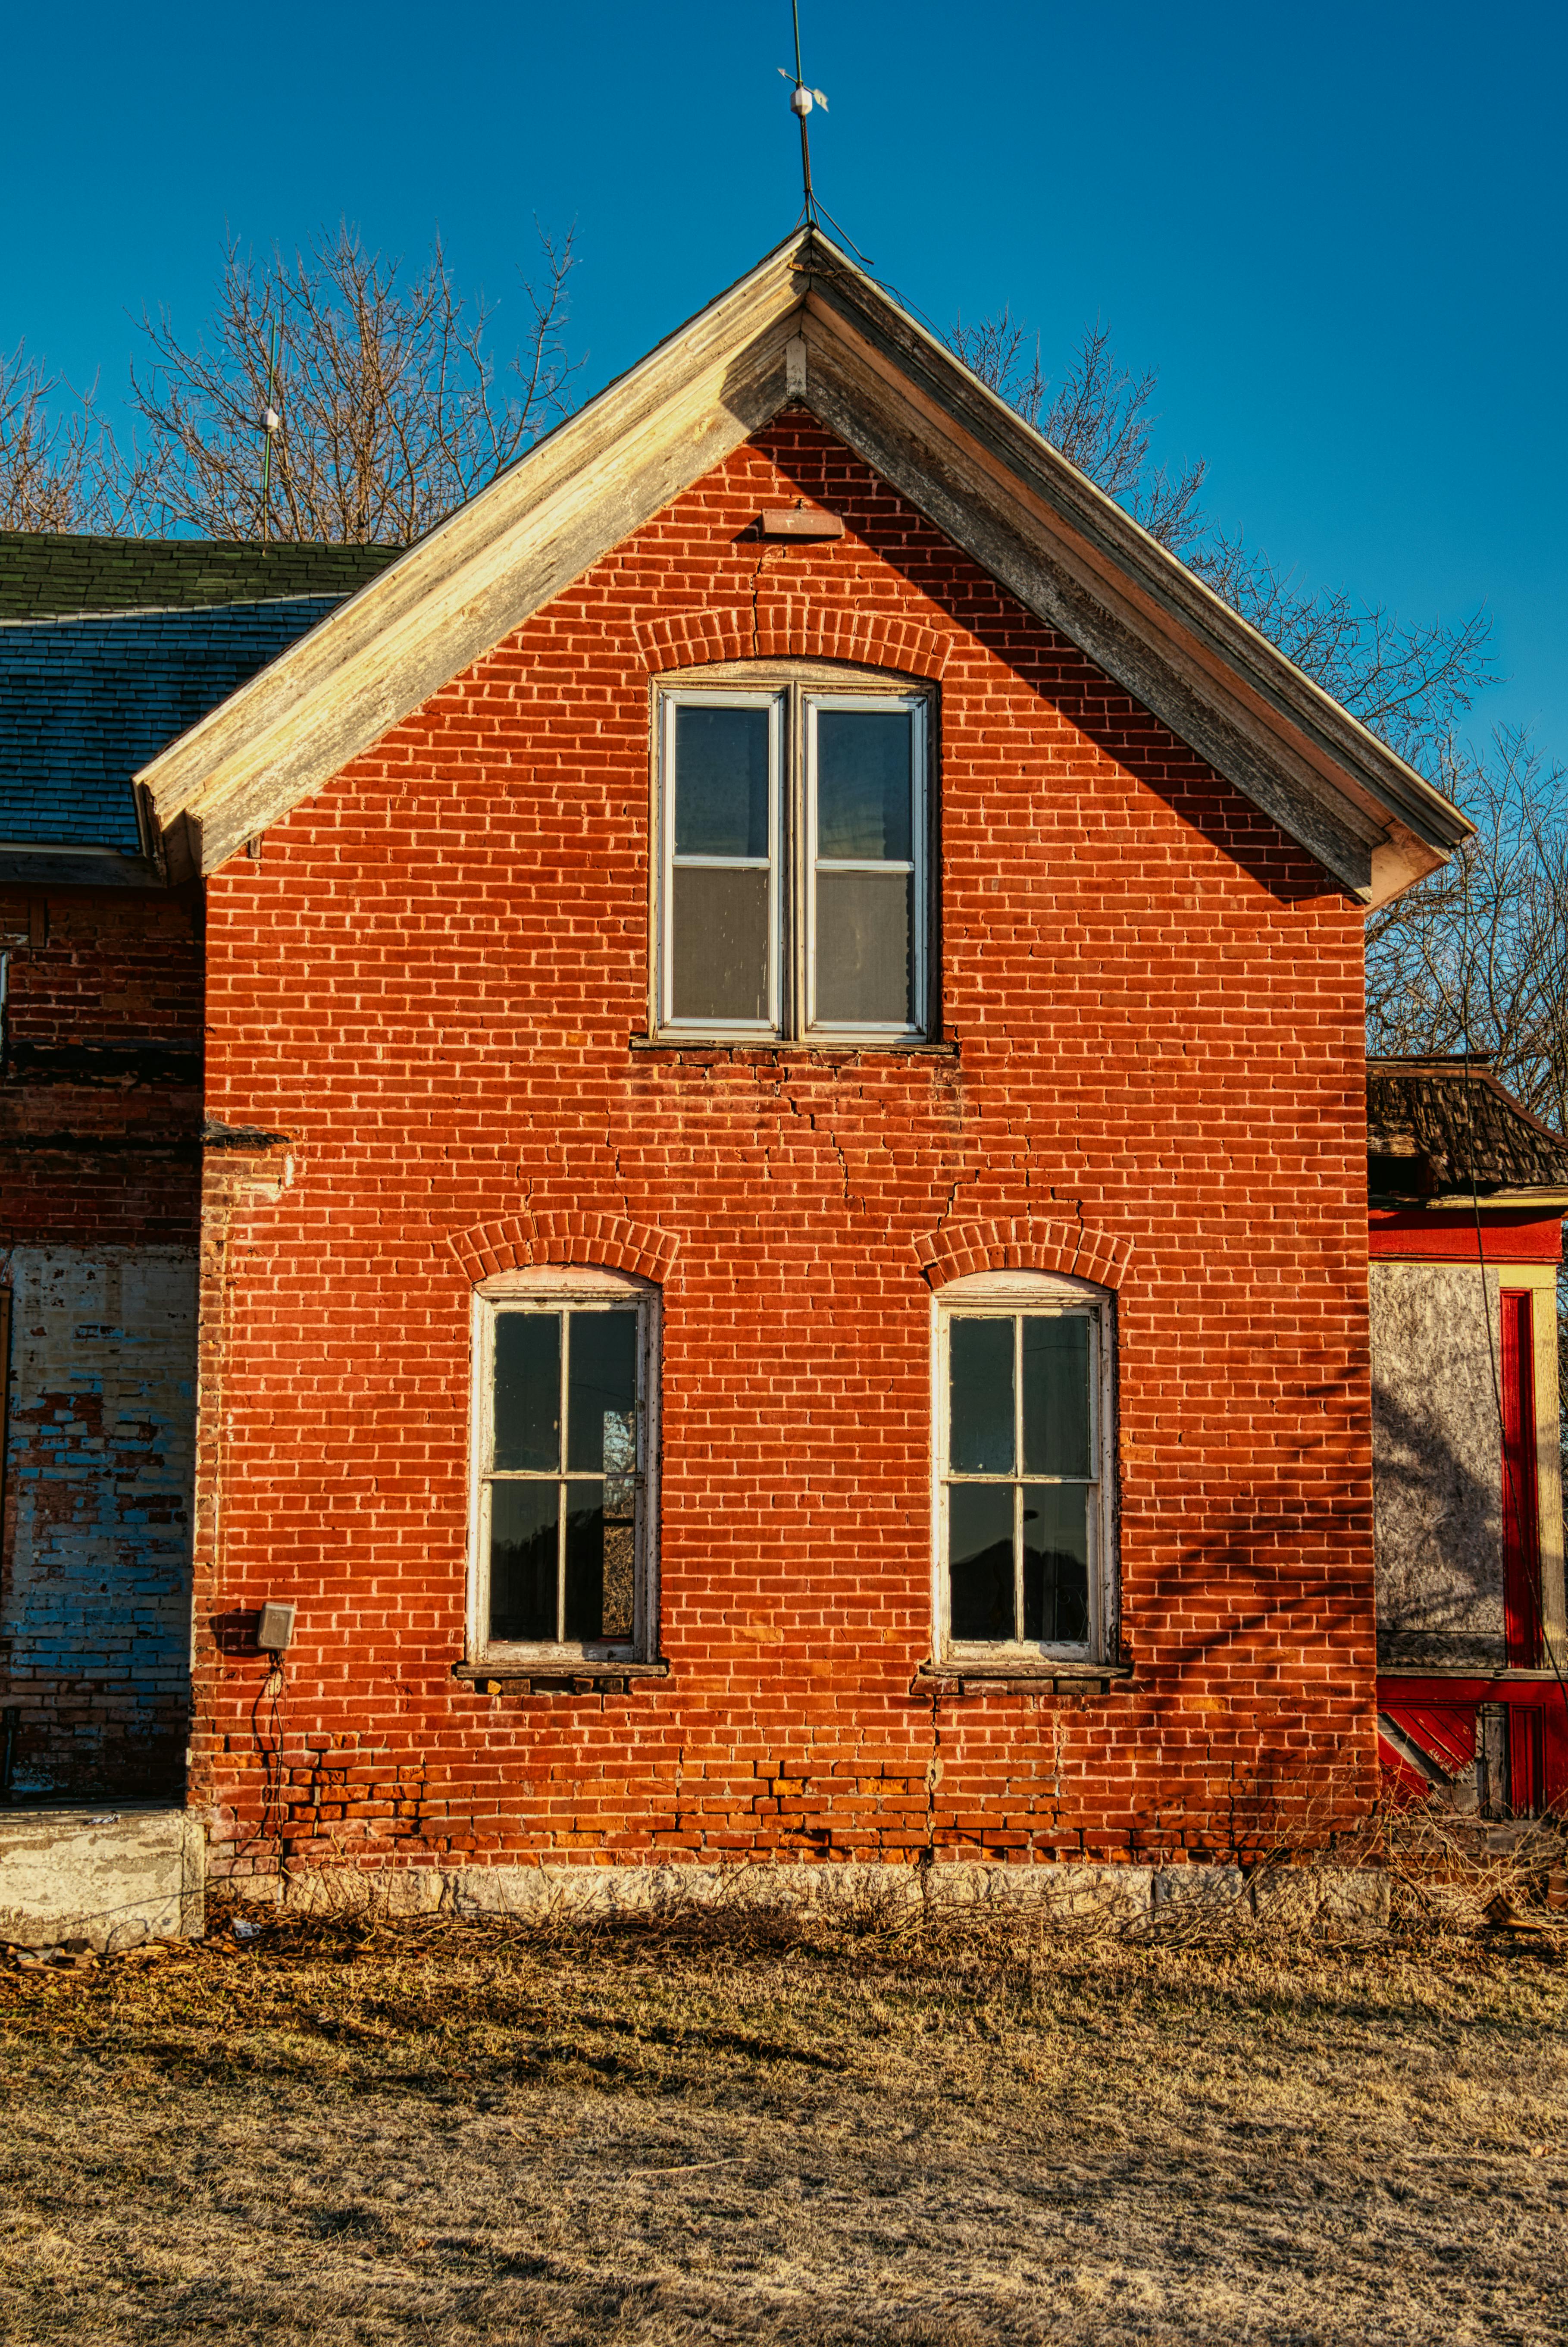
IMAGE: Brown brick house with visible mortar decay and slightly dislodged bricks, captured before restoration.
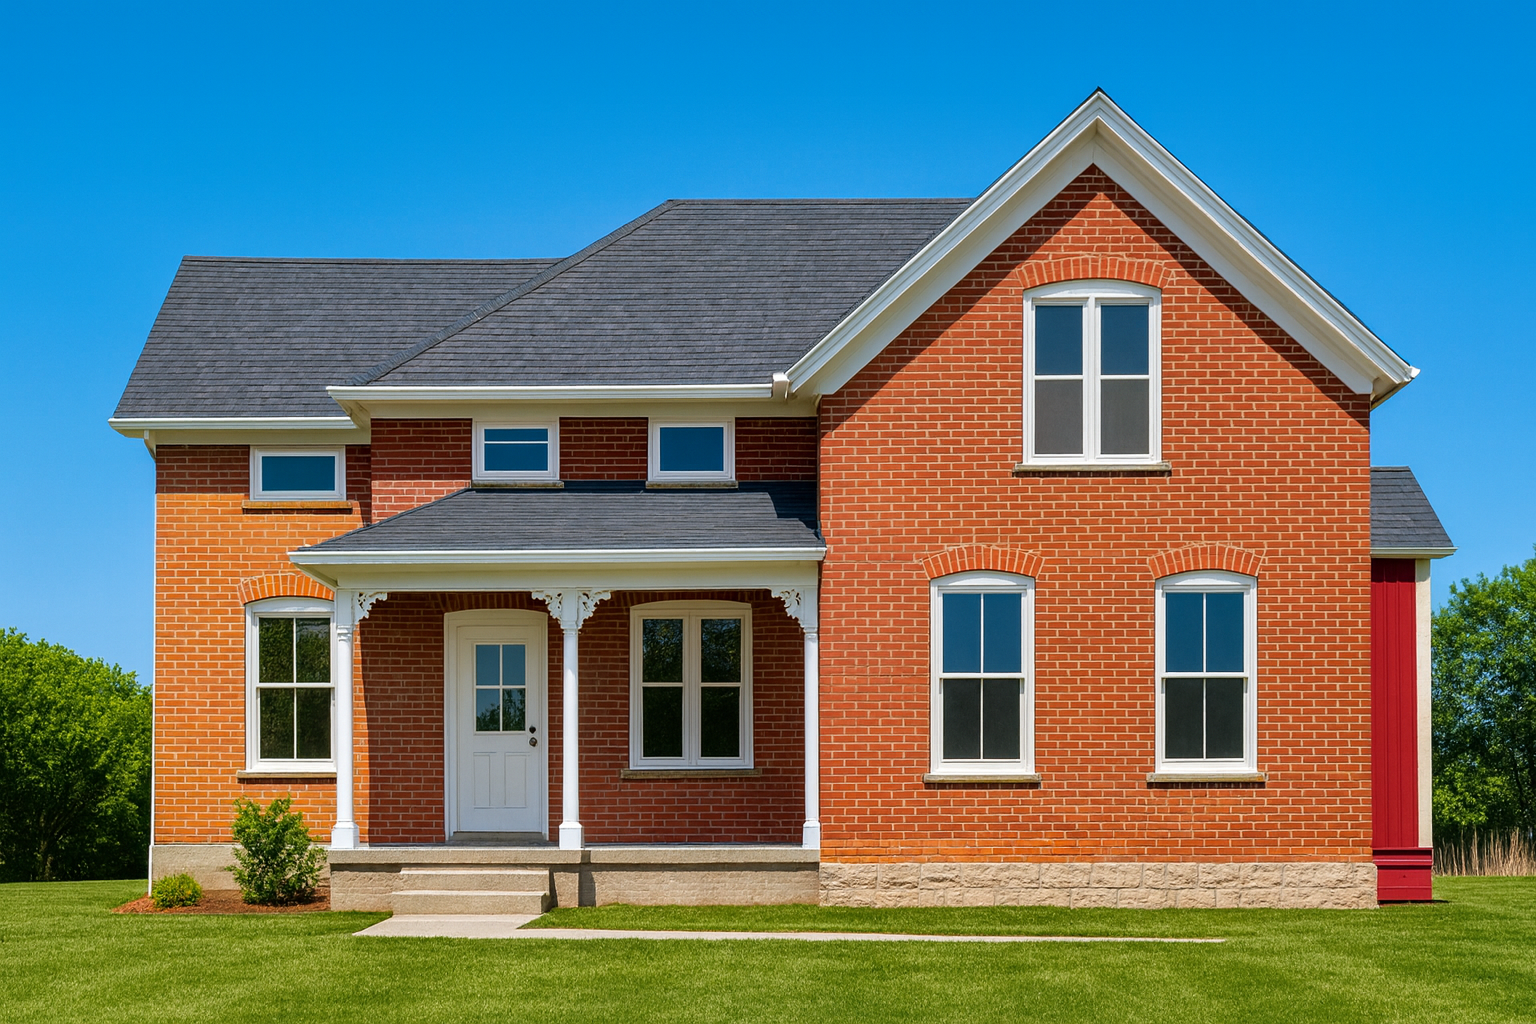
IMAGE: Traditional brown brick wall house in Minnesota, freshly restored with clean mortar lines and intact brickwork, maintaining its classic American residential style.
● Homes Built Before 1950
If your house was built before cement mortar became standard, chances are it has lime-based mortar. Lime breathes. Cement doesn’t. Using the wrong mix destroys the wall over time.
● 1930s Brick Veneers
A lot of 1930s homes used brick as a veneer, not full structural walls. These rely heavily on tight mortar bonds. Once that bond fails, the whole face can start to separate.
● Victorian and Edwardian Solid Brick
These older homes often used softer clay bricks and highly porous mortar. You’ll see rounded weathering, deep joints, and sometimes even plant growth between bricks.
Why Mortar Fails Before Brick
Why Mortar Fails First in Older Homes
Mortar is the weak link in pre-war brick homes. Here's how to spot decay, avoid disaster, and repoint the right way.
Brick can last 100 years or more. Mortar might last 40–60 in perfect conditions. But most old homes have seen storms, freezes, heatwaves, and neglect.
● Moisture + Freeze = Expansion
Water in cracked joints freezes and expands. Over decades, this slowly pries apart the wall.
● Wrong Repairs
Modern cement patches on lime mortar joints don’t flex. They trap water behind the wall. This speeds up decay.
● Settling and Vibration
Nearby construction, traffic, or even decades of foundation settling can shake loose older joints.
What Happens If You Ignore It?
Don’t Trust the Brick: The Mortar Will Kill the Wall
✓ More water gets in
✓ Bricks begin to pop or shift
✓ Interior plaster starts bubbling
✓ Insulation gets wet and rots
✓ Mold grows behind walls
✓ Entire sections may collapse
Repointing doesn’t just protect appearance. It protects the structure, your energy bills, and your indoor air.
How to Repoint the Right Way
Repointing Old Brick Walls: What Actually Works
Step 1: Hire the Right Mason
You need someone trained in traditional lime mortar—especially if your house predates 1950. Ask for before-and-after examples. Make sure they understand mortar color and joint profile matching.
✓ Ask to see jobs from similar homes
✓ Make sure they don’t use power grinders
✓ Demand a hand-tool approach for precision
Step 2: Refuse Sandblasting
Sandblasting strips off the hardened outer surface of bricks. It makes them sponge-like. Water damage speeds up after that. It’s permanent. If anyone recommends this, walk away.
Step 3: Insist on a Test Patch
Pick a small, visible area. Have them repoint just that. Let it weather for two weeks. If it blends, go ahead. If it looks fake or cracks, stop.
Step 4: Use the Right Mix
The mortar must match the softness and porosity of the original. Lime-based for older homes. Never use hard Portland cement unless the house was built with it from the start.
Common Mistakes People Make
1930s Brick Problems That Most Owners Miss
✕ Using modern cement on old brick
✕ Letting painters or handymen “touch up” mortar
✕ Thinking one crack means nothing
✕ Sealing bricks with waterproof coatings that trap moisture inside
✕ Power-washing old brick
✕ Hiring general masons with no historic work
Each one of these errors speeds up failure and costs more long term.
How Often to Check Your Mortar
Failing Mortar in Old Houses: Warning Signs and Fixes
Every 3–5 years is the general rule. But check more often if:
→ You had a harsh winter
→ There’s been major construction nearby
→ You see moss or discoloration
→ You hear creaking or popping near brick walls
→ Cracks start showing up around window and door frames
Repointing Costs: What to Expect
This varies by region and house type. But here’s a general guide:
▪ Basic repointing (lime mortar): $25–$35 per square foot
▪ Historic matching with color and tooling: $35–$60 per square foot
▪ Whole house repointing (2,000 sq ft home): $20,000–$45,000
▪ DIY hand-tool kits: $300–$600 for small jobs
It’s not cheap. But waiting too long means wall rebuilding, not just repointing.
Pro Tip
If your house was built before 1950, assume you have lime mortar until proven otherwise. Get a mason who understands this. Cement looks clean at first—but kills the wall over time.
Field Pick
MUST READ
Lime Mortar for the Repair of Historic Buildings by Patrick H. Wendler
One of the few books that lays out real mixes, case studies, and before/after images for traditional brick homes.
→ Buy on Amazon
Bonus Section: Brick Is the Armor. Mortar Is the Joint.
Old homes weren’t weak. But they were breathable. Brick and lime mortar work together to let moisture escape.
If you seal that system shut with hard mortar or waterproofing, moisture gets stuck inside. That’s when your strong wall rots from the inside out.
Good repointing keeps the wall breathing. Bad repairs lock the moisture in.
Final Tips
✓ Repoint every few decades—before damage shows
✓ Hire someone who knows lime mortar
✓ Don’t let appearance fool you—check the joints
✓ Never use cement unless it was original
✓ Use soft tools and hand work only
✓ Start small with a test area
That’s how you keep an 1890s or 1930s brick home strong for another century.
KEEP LEARNING
The Old House Handbook – by Roger Hunt and Marianne Suhr
Covers everything from brick and lime to windows and interior repairs. Perfect for owners of old homes.
→ Read more and buy here
Disclosure: As an Amazon Associate, we earn from qualifying purchases.
When Mortar Fails, It Fails Fast
You won’t get a warning bell.
One bad rain, one freeze, one unnoticed crack—and the damage starts moving fast. Behind that clean brick face, water starts eating the wall from the inside.
We’ve seen 1930s homes lose entire brick corners in a season. Chimneys that snap in half. Plaster walls bulging like a hernia.
And the worst part? Most of it was avoidable.
All it takes is missed mortar damage. A $4,000 repointing job turns into $40,000 in structural rebuild and interior repair.
This isn’t cosmetic. It’s structural.
Once moisture gets in, brick starts spalling, interior studs rot, and insulation collapses. You’ll see it in cracked ceilings. Soft window frames. Floors warping near exterior walls.
If your house is pre-1950 and you haven’t checked your mortar in years, do it now.
FAQs
30 Real Questions About Mortar and Repointing
Blunt answers. Grouped for speed.
Spotting Mortar Problems
How do I know if my mortar’s failing?
Rub it with your finger. If it powders, it’s shot. Also look for gaps, hollow sounds when tapped, or bricks that shift slightly.
Is one cracked joint a big deal?
Yes. Water finds the smallest weakness. One gap spreads fast if left alone.
What does healthy mortar look like?
Tight, smooth, slightly recessed, and solid to the touch. No gaps, dust, or crumbling.
Does color change mean damage?
Sometimes. Darker areas in shaded spots can mean water retention and early decay.
Can I inspect mortar from the inside?
Only indirectly. Look for soft walls, bubbling paint, or cracks near openings.
Brick vs Mortar
Why does mortar fail before brick?
Mortar is softer by design. It’s meant to take the weathering. Brick is harder and longer-lasting.
Can good bricks still fall out from bad mortar?
Absolutely. Mortar is the glue. Once it goes, bricks loosen and shift.
Can I just patch the worst spots?
Yes, if it’s localized. But if decay is widespread, full repointing is smarter.
What happens if I wait too long?
Interior damage, brick spalling, insulation rot, and in worst cases—wall collapse.
Repair Methods
What’s repointing exactly?
Digging out failed mortar and replacing it with new mortar—matched in composition, color, and joint style.
Do I need lime mortar?
If your house was built before 1950, almost always yes. Cement will crack the brick over time.
Can I do it myself?
Small patches? Maybe. A whole wall? Hire a pro. The wrong tools and mix will ruin old brick.
Should I grind out the joints?
Never with power tools. Use hand tools only. Grinding causes irreversible brick damage.
How deep should old mortar be removed?
At least 2x the width of the joint. Usually ¾ to 1 inch deep on older homes.
Can I use store-bought mortar mix?
Not unless it’s designed for historic lime-based work. Regular mortar is too hard.
Moisture and Damage
Will failing mortar cause leaks?
Eventually, yes. Moisture will find a path—into plaster, joists, or insulation.
Can rising damp be linked to mortar?
Yes. Poor lower joints let water wick upward from the ground.
Why is the damage worse on shady walls?
Shaded sides dry slower. That means more time for moisture to work into cracks.
Should I waterproof the brick?
No. Sealants trap moisture inside. Old walls need to breathe. Use breathable lime render if needed.
Contractors and Costs
How do I know if a mason is legit?
Ask for lime mortar jobs. Ask to see homes from your house’s era. Avoid anyone who says “we always use cement.”
What does repointing cost per square foot?
$25–$35 basic. $50+ for color-matched historic jobs.
How long does it take?
Small walls: 2–3 days. Whole home: weeks. It depends on access, weather, and detail.
What’s the most common contractor scam?
Suggesting sandblasting. It ruins brick forever. Also using modern cement without telling you.
What if they say cement is stronger?
Run. Strength isn’t the goal—compatibility is. Lime flexes and breathes. Cement traps and cracks.
Planning and Prevention
How often should I check my mortar?
Every 3–5 years. After big storms, quakes, or nearby construction, do a visual check again.
Should I repoint before selling my house?
If it’s visibly failing—yes. It protects value and prevents future buyer problems.
What seasons are best for repointing?
Spring and early fall. Avoid extreme cold or heat. Mortar needs stable cure temps.
Can I repoint in winter?
Only with special equipment and heated tents. Not worth the risk for DIY.
What’s the biggest mistake DIYers make?
Using the wrong mortar mix or damaging the brick during mortar removal.