
How Architects Use Proportion to Make Drawings Feel Real
Written for junior designers who want their drawings to read as architecture, not just images.
“Proportional balance with the column height.” It sounds tiny. It decides everything. When the parts of a drawing—columns, arches, labels, light—keep the right relationships, the eye relaxes and believes the space. If any piece swells or shrinks out of turn, the whole image feels unreliable. This guide breaks proportion into working moves you can use today, from setting a module to sizing annotations and managing a sketch-to-render transition.
If you want a quick refresher on fundamentals before we dive in, see a beginner’s guide to building design.
What Proportion Really Is
Proportion is not only math. It is how parts feel in relation to the whole. The numbers help, but the eye finishes the job. A column that meets rules on paper can still read heavy if the base is too thick or the capital is loud. A cornice that projects too far pulls the wall out of balance. The viewer may not name the problem; they just do not trust the drawing.
Think in two layers:
- Proportion as ratio. Measurable relationships: diameter to height, bay width to vault rise, entablature height to column height.
- Proportion as perception. The sense that forms belong together. This is where your eye checks the math and tunes it to read cleanly.
Most of your day as a designer is spent reconciling those two. The more you practice, the faster it becomes.
What Every Architecture Student Should Learn First
Architectural Proportions: From Classical Orders to Modern Visual Balance
The Module: Your Measuring Unit

Historic architects worked with a module. The most common module came from the column’s radius at the base. Once set, everything else referenced that unit. Bay width. Entablature height. Capital size. Even the spacing between columns.
Pick a module for your drawing. Use it early. Express big and small pieces as whole numbers or clean fractions of that unit. When one part changes, adjust the parts that depend on it. The system holds because the unit holds.
Quick module workflow
- Choose a module tied to a primary element (column radius or door width).
- Write a short list: column height, entablature height, bay spacing, vault spring point, label size.
- Assign clean multiples or halves. Avoid odd decimals where you can.
- When you scale the drawing, scale the module. The relationships survive.
Why Scale and Ratio Still Rule Every Drawing
The Simple Guide to Getting Design Balance Right
Annotation That Respects Scale
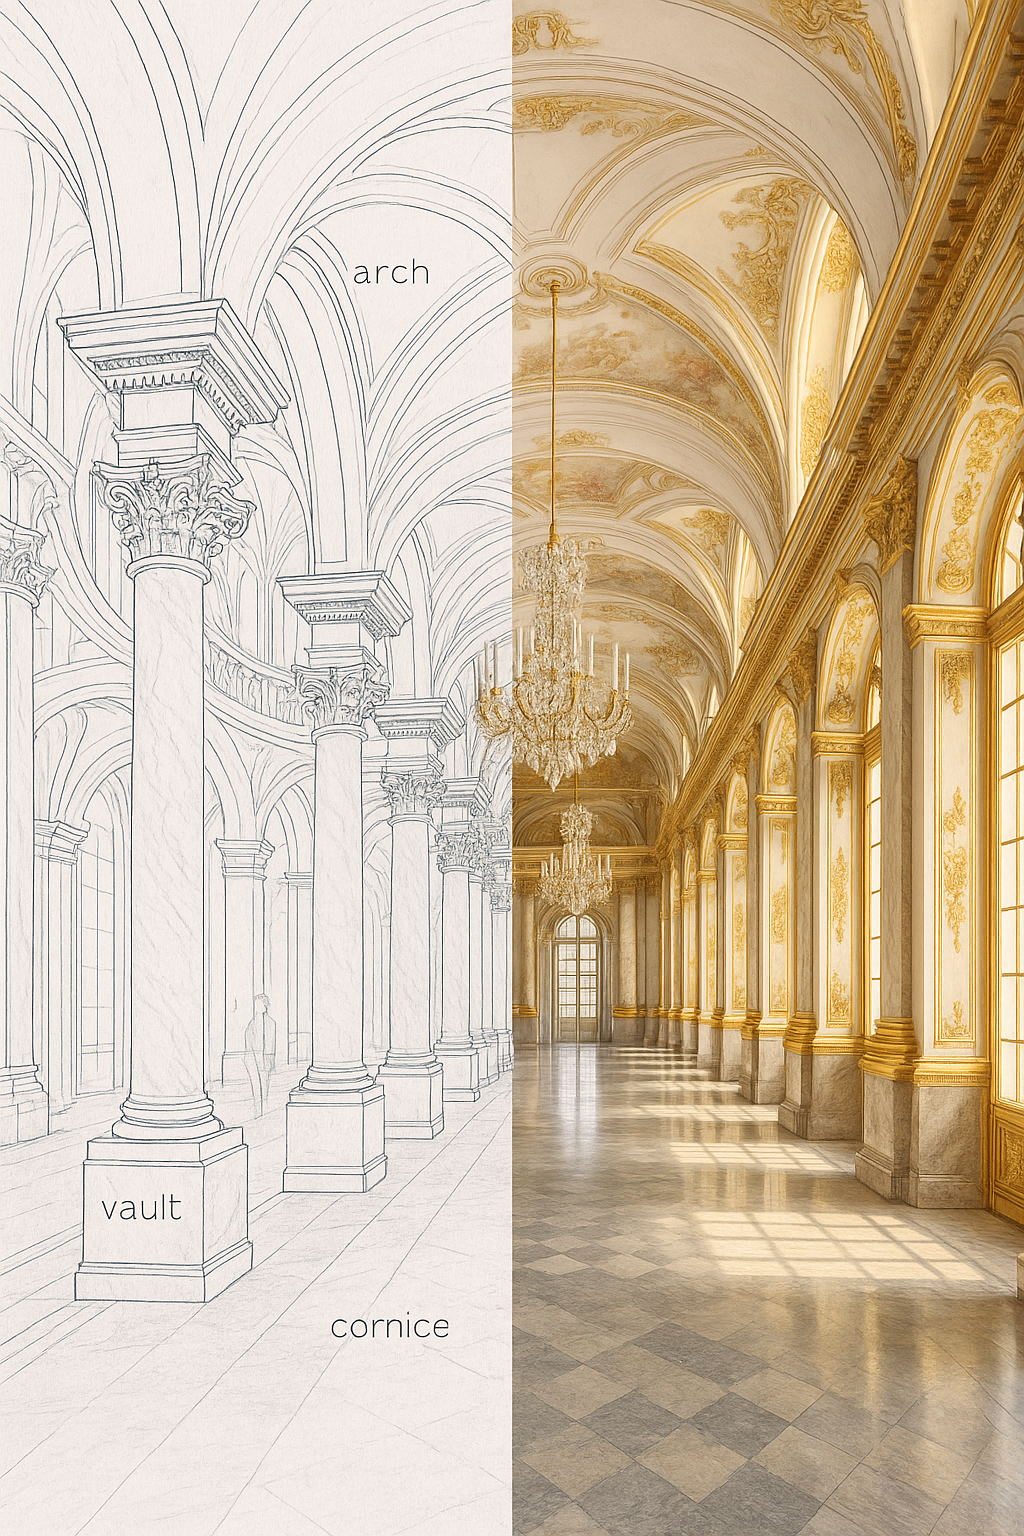
Labels are part of the composition. They cannot shout over the architecture. When you sized “arch,” “vault,” and “cornice” in the half-sketch image, you probably noticed a simple rule: the taller the column reads, the smaller the label should feel relative to it.
A practical sizing rule
- Let label height sit between 1% and 3% of the total drawing height.
- Keep letter weight light. Thin strokes sit well against linework.
- Give each label breathing room from the nearest edge or molding.
- Align labels to the perspective, or keep them flat but consistent across the page. Do not mix the two.
When labels respect scale, the brain accepts the information without feeling pushed. The drawing stays architectural, not diagrammatic.
Making Half-Sketch / Half-Real Images Read as One Space
Architectural proportions and scale made simple. Understand how architects use measured balance to give drawings realism and structure.
The hybrid image is a good training tool. It forces you to check whether your sketch and your render obey the same geometry. If they do, the seam vanishes. If they do not, the viewer senses a fracture.
Checklist for a clean transition
- Shared vanishing points. Lock orthogonals on both halves to the same convergence.
- One module for both halves. A cornice drawn in the sketch must match the depth rendered in the photoreal side.
- Consistent light direction. Morning light from the side windows should land with the same angle and length of shadow on both halves.
- Scale figures only as anchors. Keep silhouettes faint. They calibrate height without dragging attention.
Studio Drills That Train Your Eye
You learn proportion by making and adjusting. Here are drills that work.
Column family sheet
Draw one bay with three versions: sturdy, balanced, light. Keep diameter as the module. Shift height and intercolumniation to test how the room breathes. Note what happens to the entablature each time.
Entablature tuning
Render a wall section with three different cornice depths. Study the shadow at noon and early morning. Pick the version that frames the wall without dragging it down.
Label proportion pass
Export your sketch at final size. Add labels at 1%, 2%, and 3% of the image height. Pick the one that reads at arm’s length and at thumbnail size. Save that ratio as your default.
Presenting Proportion to Clients and Reviewers
Clients feel proportion even when they do not have the words. Your job is to guide their eye so it trusts the image.
- Lead with a clean elevation or perspective where rhythm reads first. Color comes later.
- Use one or two labels to teach the logic, not twenty. Let the drawing carry most of the message.
- Zoom in on a bay to explain why the gap is set as it is. Tie it to human use and light, not just numbers.
- Show a before/after with a small correction to a cornice or column height. The difference sells itself.
If you need a bigger fundamentals refresher for a client or student, link them to something simple like How Architecture Works: A Beginner’s Look at Building Design.
Common Mistakes and How to Fix Them
Mismatch across the seam
In hybrid images, the sketch side says one proportion and the render side says another. Solution: lock your module, draw a light centerline at the seam, and measure key depths before rendering.
Labels that compete
If a label feels as loud as a capital, shrink it and lighten the weight. Move it off the structural edges. You can also place simple leader lines so text sits away from the action.
Over-sharpened edges
A strong render can make moldings look brittle. Ease the contrast slightly. Keep the primary edges crisp and let secondary edges breathe.
Light without scale
Shadows read scale. If your light is flat, the space feels diagrammatic. Sketch the sun angle first. Place reflectance on the floor to hint at height and material.
Field Rules You Can Reuse
- Pick one module. Use it everywhere.
- State column height as a multiple of diameter. Keep a consistent family across the room.
- Keep entablature height a steady fraction of the column height. Tune only when the space demands it.
- Set label size as a fixed percentage of image height. Save that with your template.
- In presentations, show one decisive proportional adjustment. Let the eye feel the upgrade.
FAQ
Quick Answers for Juniors
How big should my labels be?
Start at 1–3% of the total image height. Adjust once you see it at phone size and large screen.
What if I do not use classical language?
Proportion is language-agnostic. You can design in steel and glass and still use a module, bay rhythm, and balanced caps. The eye reads relationships, not capitals.
Can I ignore the orders?
You can, but they are good teachers. Learn why they work. Then abstract the lessons into your own system.