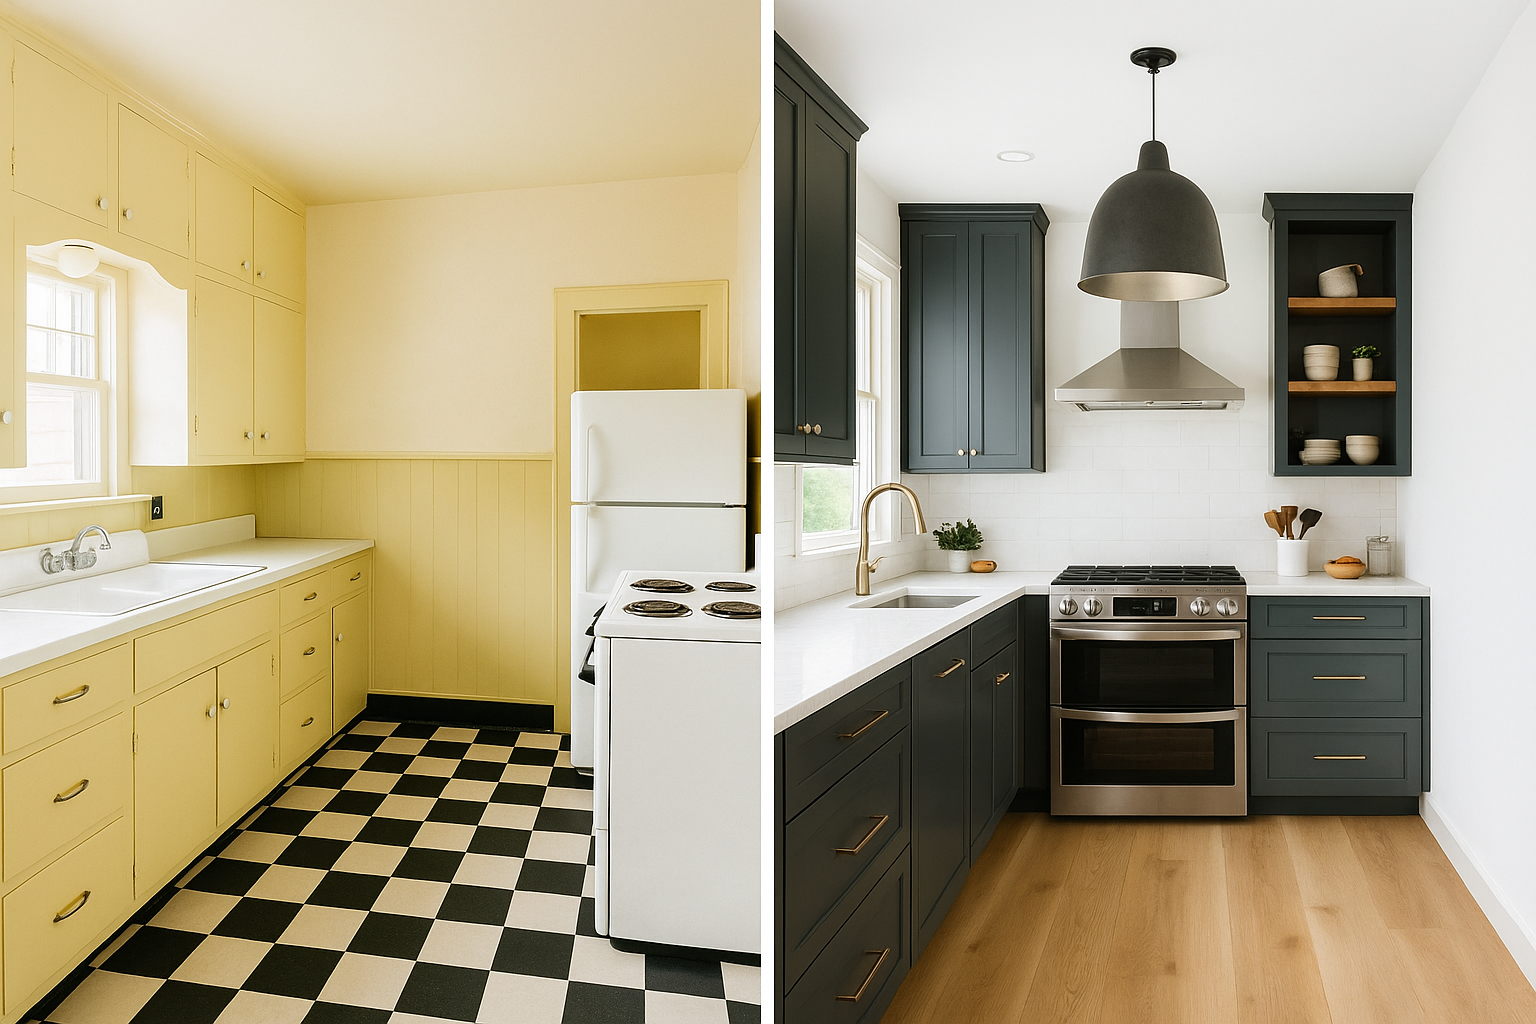
1930s kitchens were not built to impress from across the room. They were built to work. Small footprint, tight layout, sturdy cabinets, hard-wearing surfaces. That is part of why they still hold up. A good one feels settled into the house in a way a lot of newer kitchens do not.
It is also why these rooms are easy to renovate badly. The wrong update strips out the things that gave the kitchen its shape in the first place. Original cabinets get replaced with generic boxes. Flooring gets swapped for something too glossy or too new. Walls come down, the room gets wider, and somehow it feels flatter.
The better approach is more selective than dramatic. Keep the pieces that give the room its character. Upgrade the parts that slow daily life down. Hide the modern convenience where you can. If you want the broader background first, this guide to 1930s kitchen layouts and materials is the right place to start.
This article looks at what to keep, what to change, and which upgrades usually help a 1930s kitchen feel better instead of newer for the sake of it.
MUST READ: Old House Handbook: A Practical Guide to Care and Repair. A solid reference if you are trying to improve an old kitchen without treating the room like a blank slate.
Start With the Layout, Not the Finish
Most 1930s kitchens were planned around efficiency. That is still one of their strengths. The sink, stove, and prep area were usually close together for a reason. Before picking tile, counters, or lighting, look at how the room actually moves.
- Fix the flow before changing the footprint. Moving one appliance, tightening a prep zone, or reworking a pantry corner can do more than knocking down a wall.
- Keep circulation clear. These kitchens rarely want an oversized island in the middle. It usually steals more than it gives back.
- Respect the room’s proportions. A 1930s kitchen does not need to become open-plan to work better. Often it just needs a smarter cabinet run and better task space.
- Widen carefully, not automatically. If you do open the room up, a larger doorway or arch often works better than erasing every boundary.
Worth Knowing: If the kitchen is only one part of a larger renovation, these modernization ideas for a 1930s home help keep the whole project from drifting into a different style.
What to Keep and What to Upgrade
The easiest way to get this wrong is to act like every original feature is either precious or worthless. Neither is true. Some things are worth protecting because they define the room. Others need to go because they make the kitchen harder to use, harder to clean, or harder to maintain.
Usually Worth Keeping
- cabinet boxes or doors with good proportions
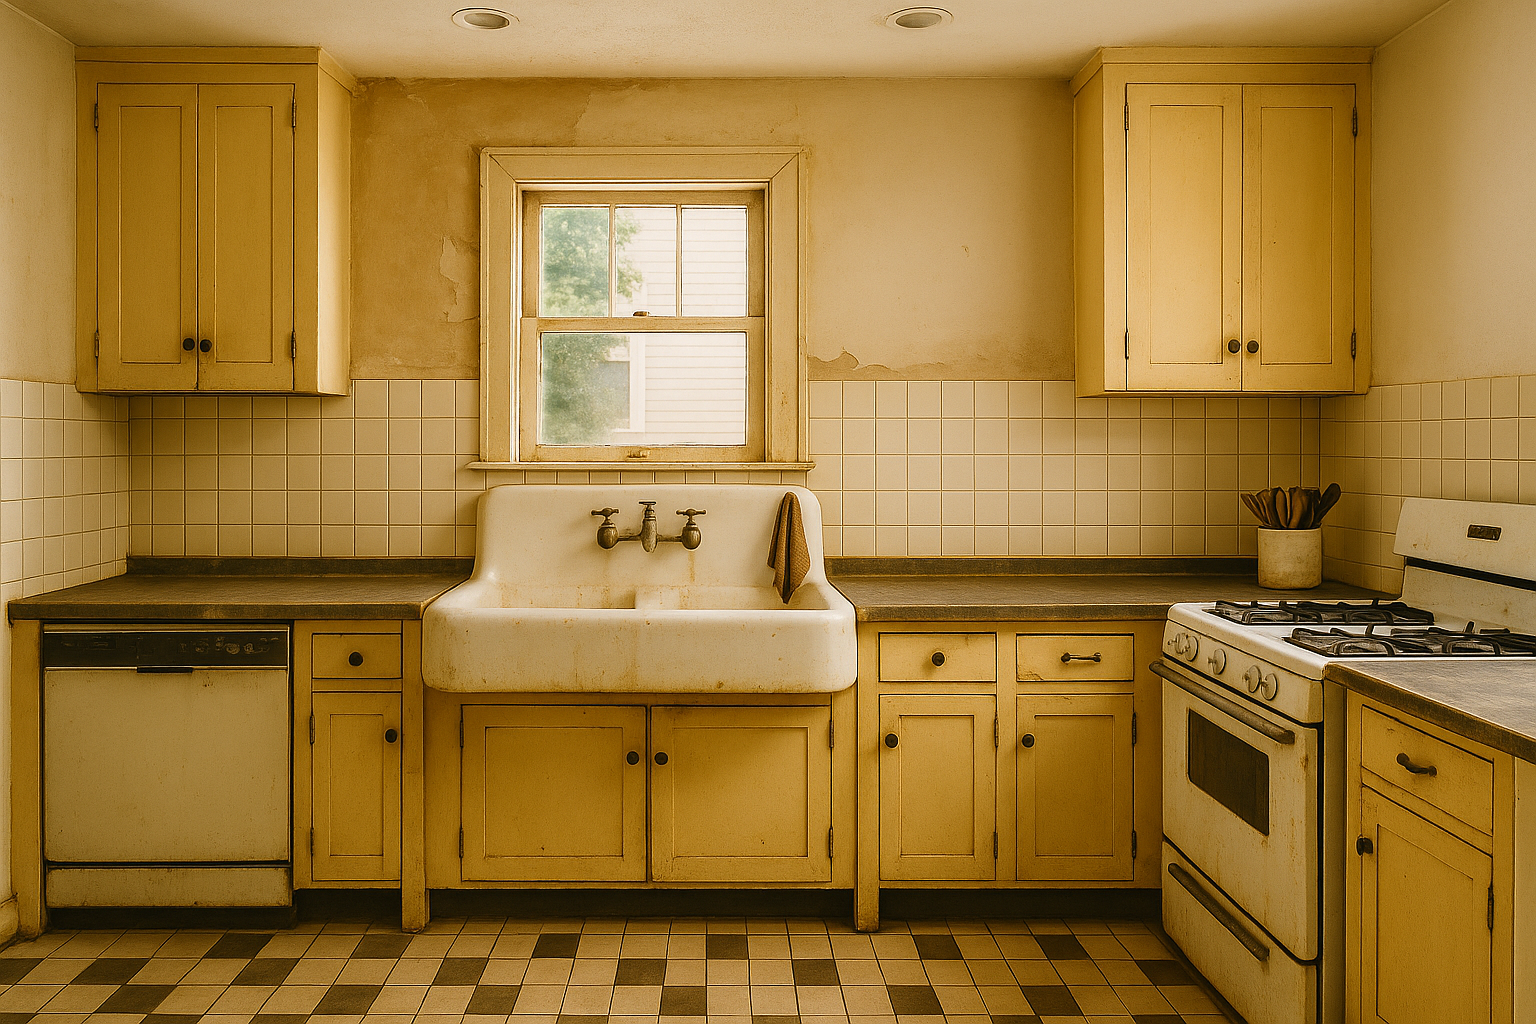
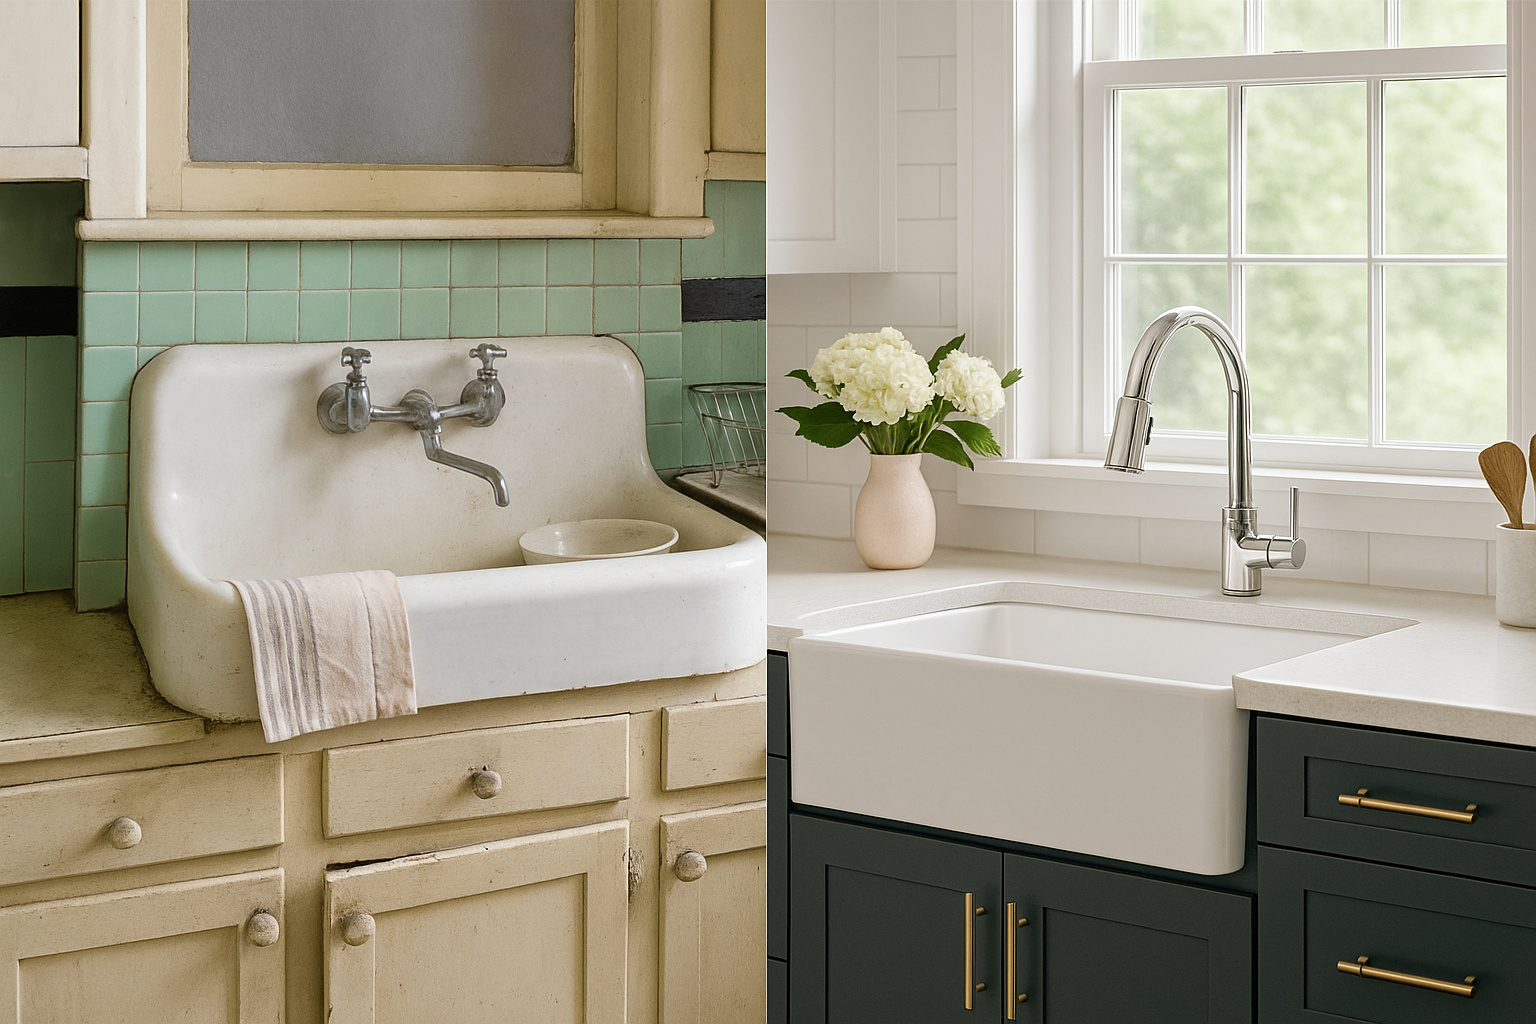
- cast-iron or enamel sinks that are still structurally sound
- older tile that can be repaired or matched
- windows, trim, and door openings that tie the kitchen to the rest of the house
Usually Worth Upgrading
- wiring, outlets, and task lighting
- drawer slides, hinges, and interior storage
- countertops that are damaged, unhygienic, or visually off
- flooring that traps moisture, fails under use, or makes the room feel wrong
Also Useful: A lot of kitchen problems turn out to be house problems in disguise. This guide to common failure points in 1930s homes is worth reading before you lock in a budget.
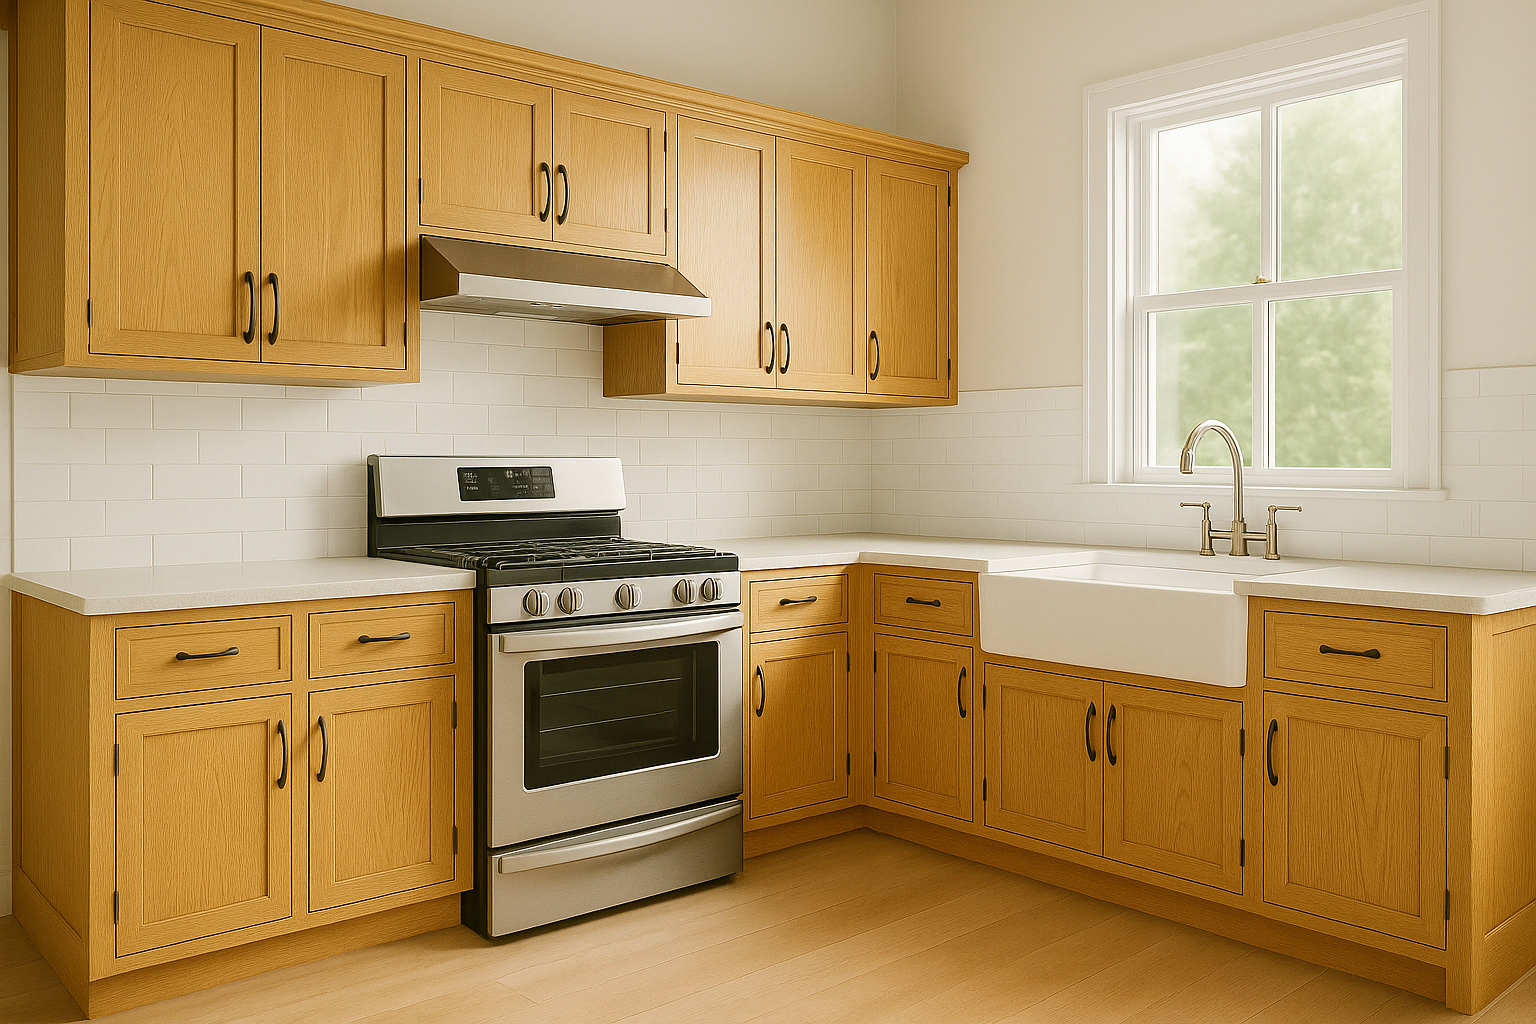
Cabinets Usually Decide the Room
If a 1930s kitchen feels right, the cabinets are usually a big reason why. They carry the room’s proportions, most of its storage, and a lot of its visual calm. Get them wrong and the rest of the renovation has to work twice as hard.
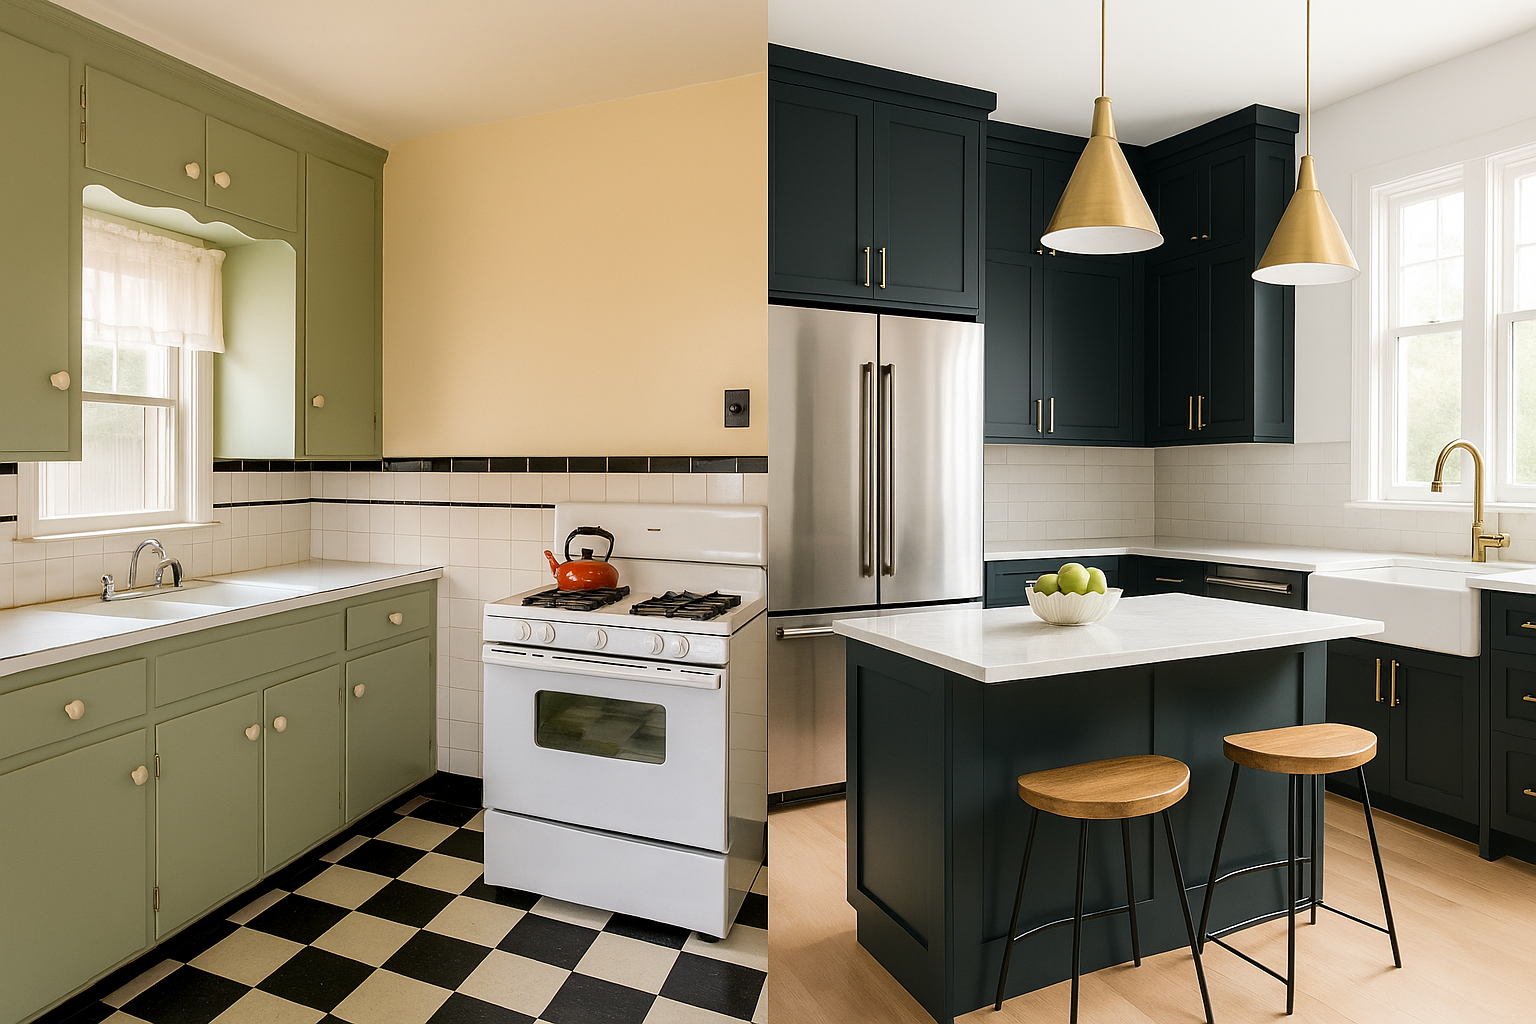
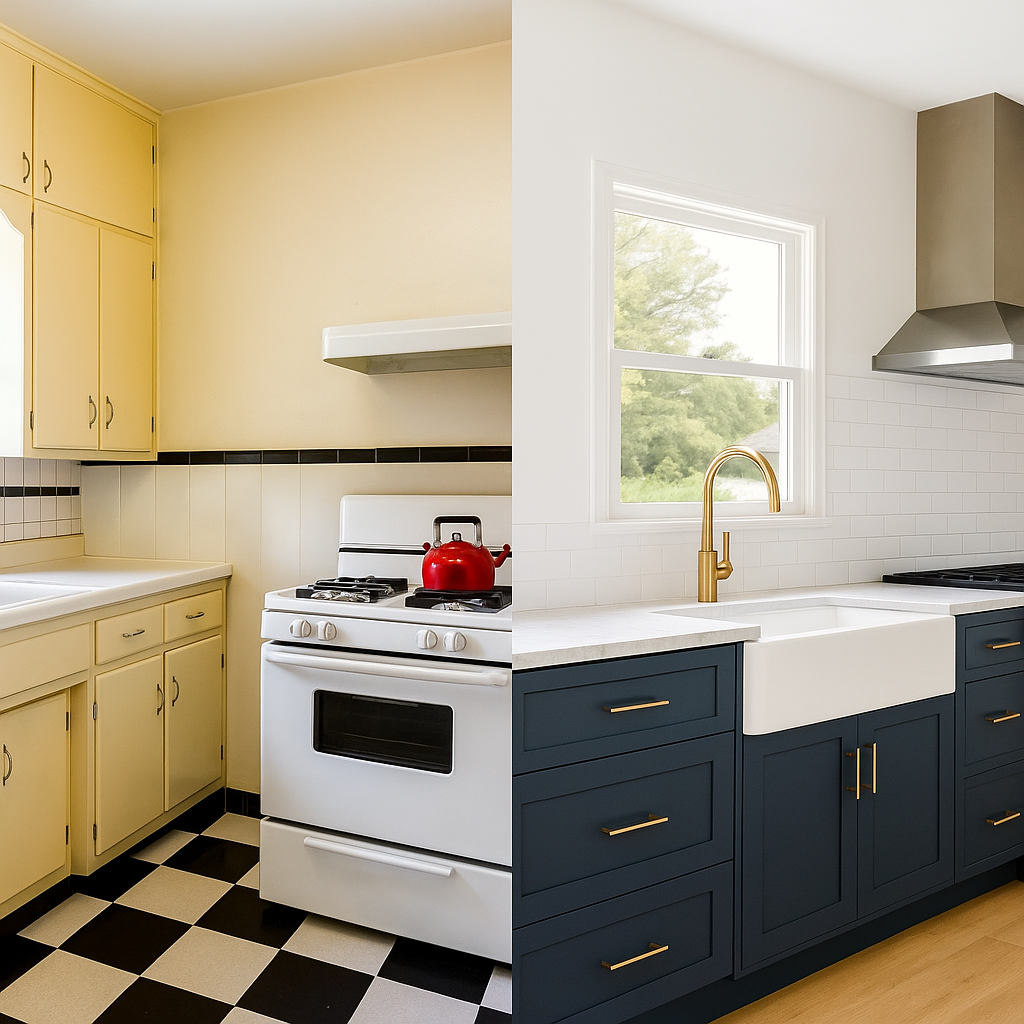
The cabinet language in these kitchens is usually quieter than people remember. Simpler door styles. Muted paint colors. Modest hardware. Built-in runs that feel like part of the room instead of furniture pushed against the wall.
- What works: painted wood, inset or simple framed doors, creams, dusty blues, muted greens, and restrained hardware
- What usually looks wrong: thick glossy laminates, oversized pulls, heavily sculpted doors, and too much open shelving
If the cabinets are the main issue, go deeper with this guide to 1930s cabinet repairs and replicas. It is the next logical read if you are deciding what to save, what to copy, and what not to fake.

MUST READ: Restoring Your Historic House: The Comprehensive Guide for Homeowners. Helpful when the project involves original materials you would rather repair than replace.
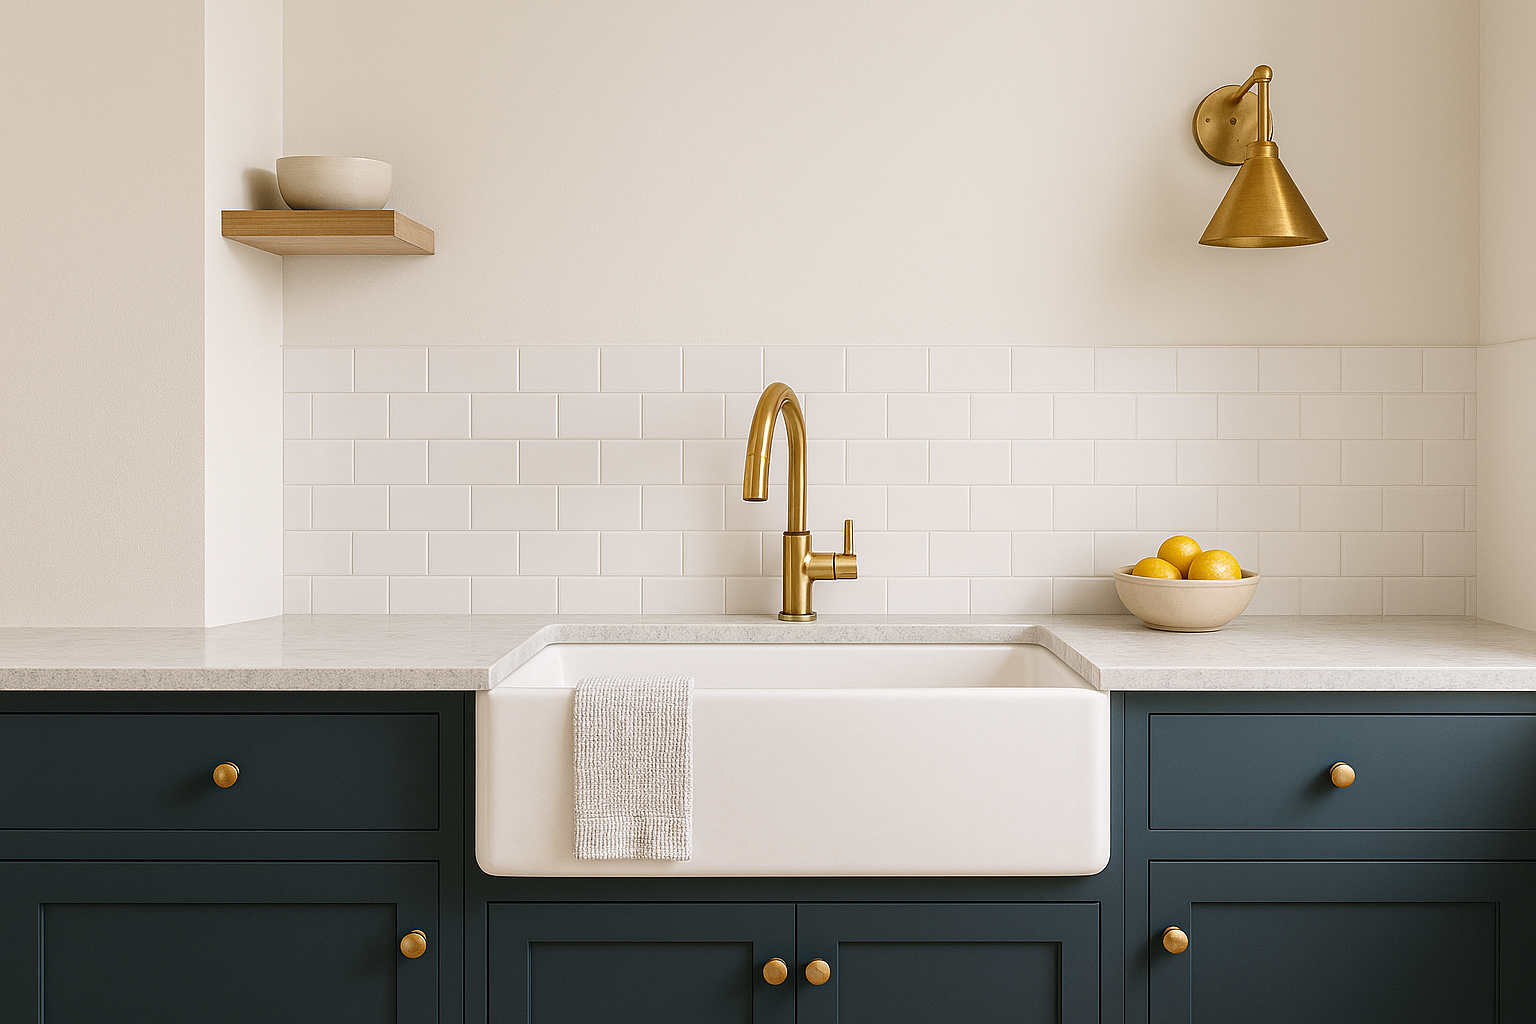
Countertops and Sinks Need to Work Together
Countertops are where a lot of otherwise decent renovations start to drift. The material may be durable, but the sheen, pattern, edge profile, or color can make the whole room feel borrowed from a much newer kitchen.
What Usually Works
- Quartz with restraint. Soft movement, low sheen, and simple edges work better than loud faux-luxury patterns.
- Butcher block in the right places. Best as a prep zone or warmer accent, not always across the whole room.
- Tile if you want period fidelity. More maintenance, yes, but still one of the most convincing ways to keep the room grounded.
What Usually Dates the Room Fast
- thick waterfall edges
- high-gloss black stone
- busy faux-marble patterns
- counters that look imported from a condo showroom
The countertop does not need to disappear, but it should support the cabinets and sink rather than dominate them. That matters even more if you are keeping an original basin. Read This Next: this sink guide is worth checking before you finalize counter details around it.
Lighting Can Fix More Than People Think
Lighting is one of the easiest ways to improve a 1930s kitchen and one of the easiest ways to overdo it. These rooms want layered light, but they rarely want a ceiling filled with harsh recessed cans or cold-white LEDs.
- Warm under-cabinet lighting helps with real task work without cluttering the room visually.
- Vintage-leaning pendants in porcelain, chrome, brass, or frosted glass usually sit well here.
- A layered plan works better than one dramatic fixture trying to do everything.
- Dimmers matter more than people think. They let the room shift from working kitchen to evening room without feeling flat.
What usually goes wrong is not the fixture itself. It is the brightness, the color temperature, or the sheer amount of light dumped into a small room that never needed to be treated like retail space.
How to Add Storage Without Making It Look New
Storage is one of the biggest practical pressure points in an old kitchen, but it is also where renovations get bulky fast. The goal is not more cabinets at any cost. The goal is smarter storage that still feels like it belongs to the room.
- Use vertical space carefully. Tall narrow cabinets usually work better than oversized wall units.
- Add pull-outs where they solve a real problem. Spice pull-outs, tray dividers, toe-kick drawers, and sink storage can make awkward runs useful again.
- Make built-ins earn their keep. A breakfast nook, shallow pantry wall, or recessed shelf can add storage without changing the room’s character.
- Use glass fronts in moderation. Enough to lighten the room, not enough to turn every shelf into display space.
Before You Move On: Storage changes still need to make sense with the house around them. This overview of 1930s house style helps keep the kitchen tied to the architecture it came from.
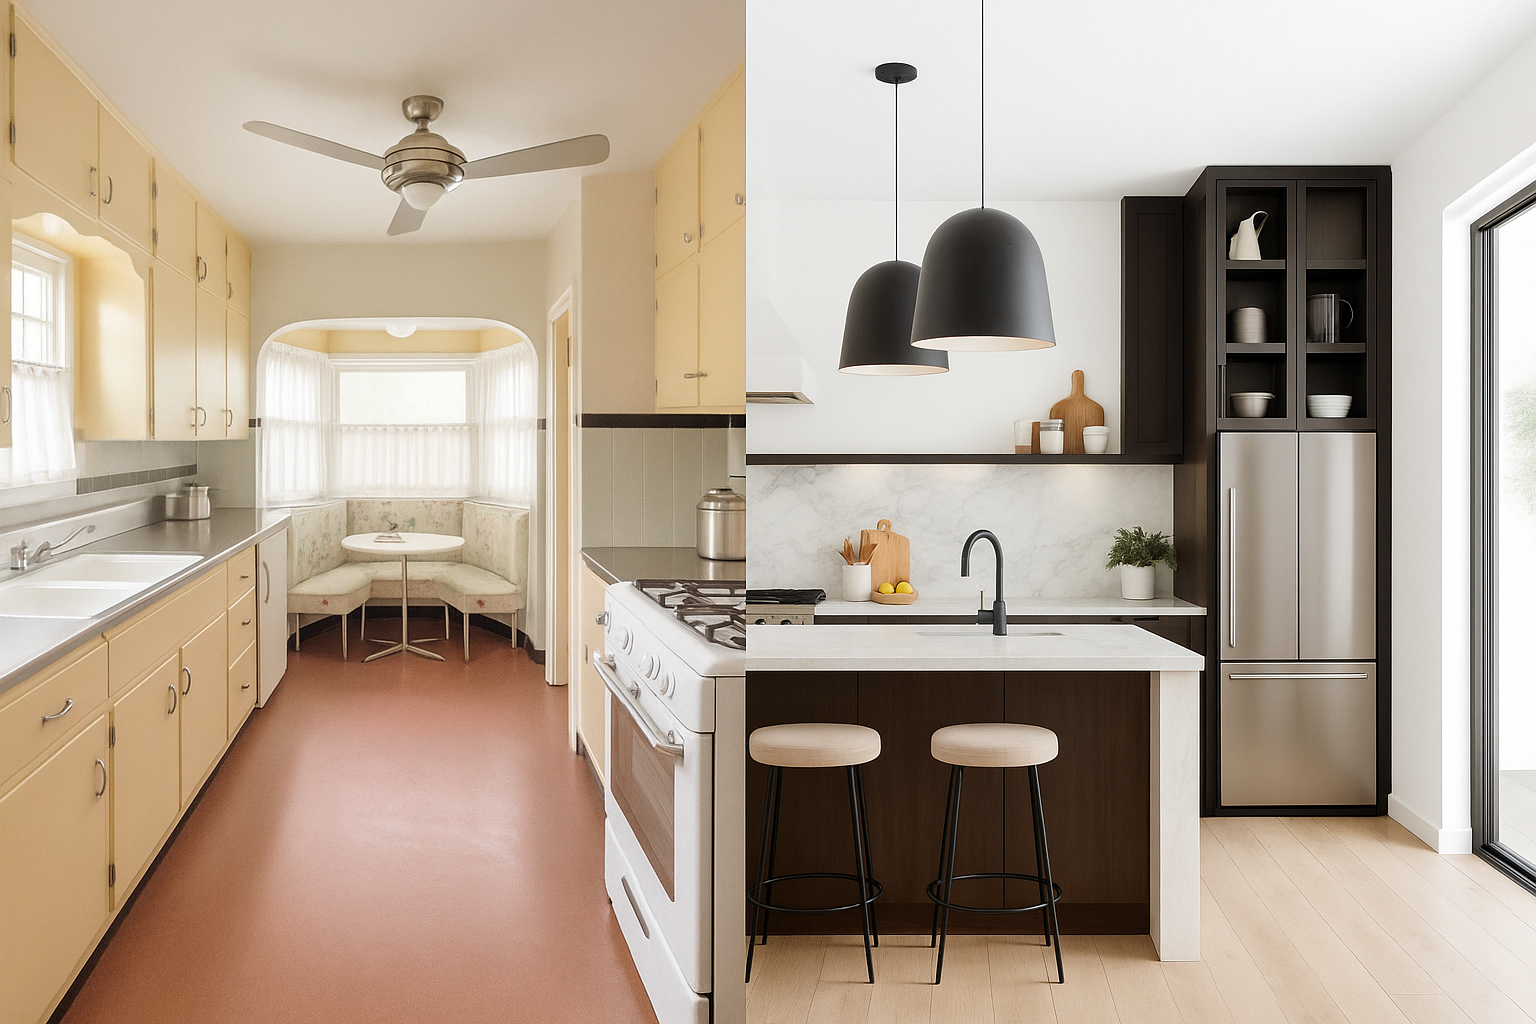
Open It Up Carefully
Some 1930s kitchens do benefit from more openness. But there is a difference between giving the room breathing room and stripping out every wall that once gave it shape.
- Widening one opening is often enough to make the room feel less boxed in.
- A smaller table or built-in banquette often works better than an island in a compact footprint.
- Better sightlines can matter more than more square footage.
- Partial separation still has value. A 1930s kitchen does not need to dissolve completely into the next room to feel useful.
The best “opened-up” 1930s kitchens rarely look opened up. They just feel easier to move through.
Flooring That Still Feels Right
The floor does more than take wear. In an old kitchen, it sets the room’s age and temperature. One wrong flooring choice can make every other good decision feel less convincing.
What Usually Works
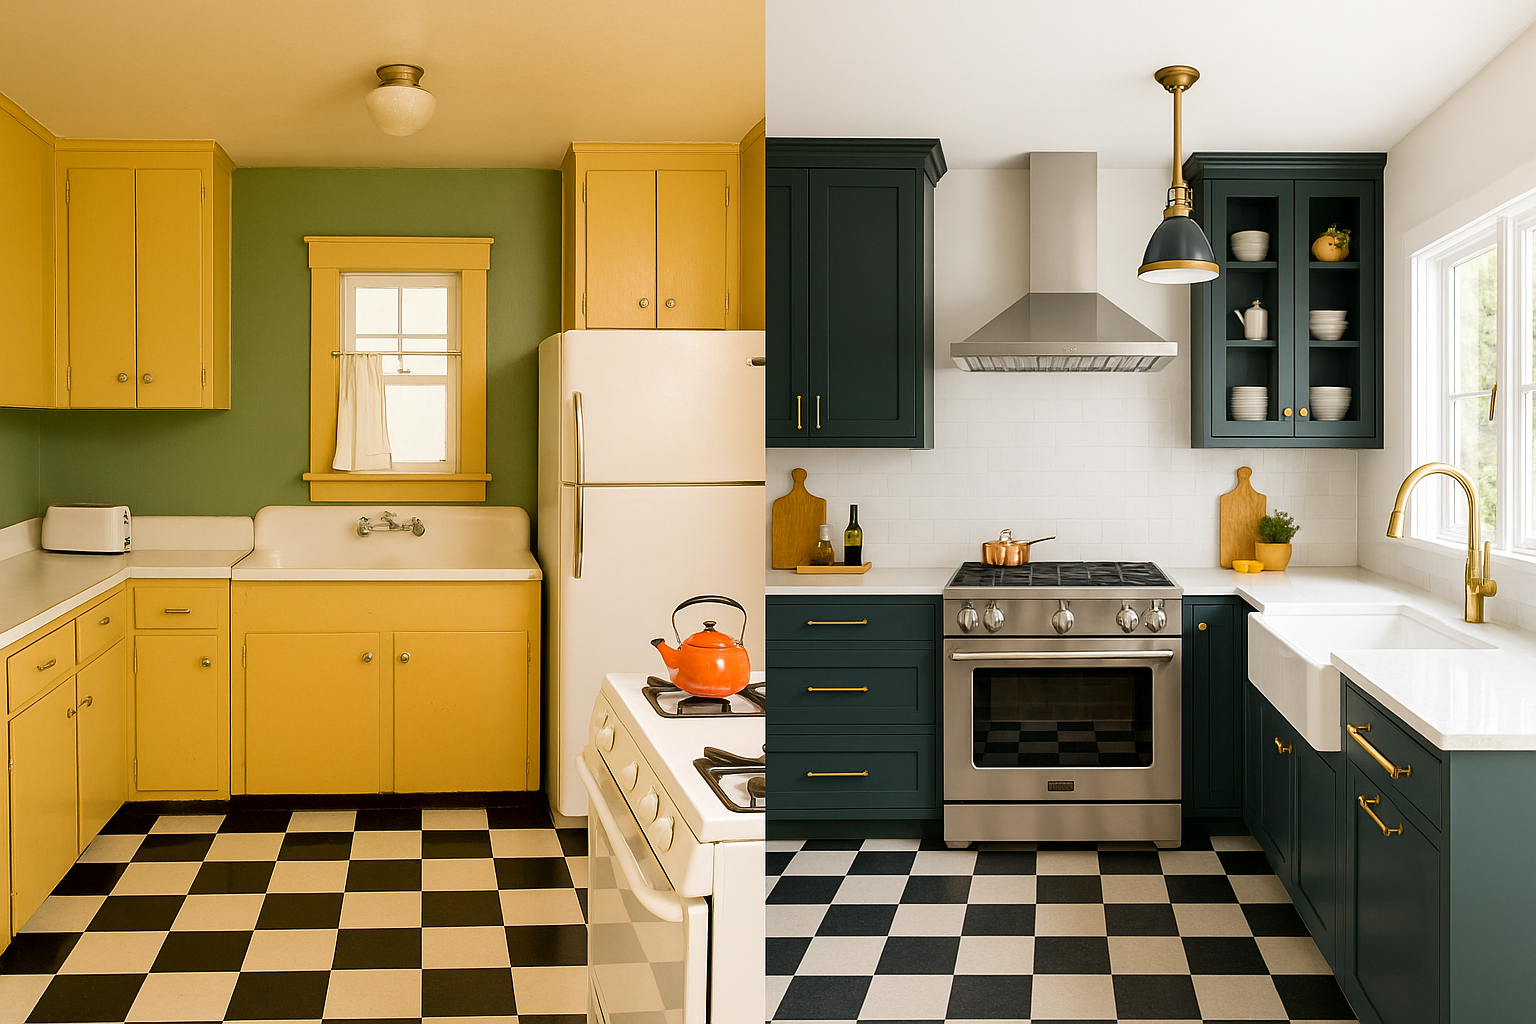
- Original hardwood if it survives and still makes sense for the room
- Checkerboard tile in matte porcelain or ceramic
- Good-quality linoleum in quiet colors and patterns
What Usually Falls Flat
- cheap laminate with a plastic feel
- high-gloss tile that feels sterile
- trendy wood-look products that do not match the rest of the house
- floors with too much faux-distressing or exaggerated texture
If the kitchen opens into rooms with older wood floors, preserving that continuity often matters more than choosing something louder just because it reads vintage.
What People Usually Get Wrong
This is where otherwise decent renovations start to wobble. The cabinets may be fine. The sink may even be original. But the smaller decisions pull the room off course.
- Too much open shelving. One stretch can work. A whole room of it usually looks staged and gets messy fast.
- Fake-vintage hardware. If it looks artificially aged or overdesigned, it usually reads that way immediately.
- Oversized islands. They swallow circulation and make a compact old kitchen feel newly awkward.
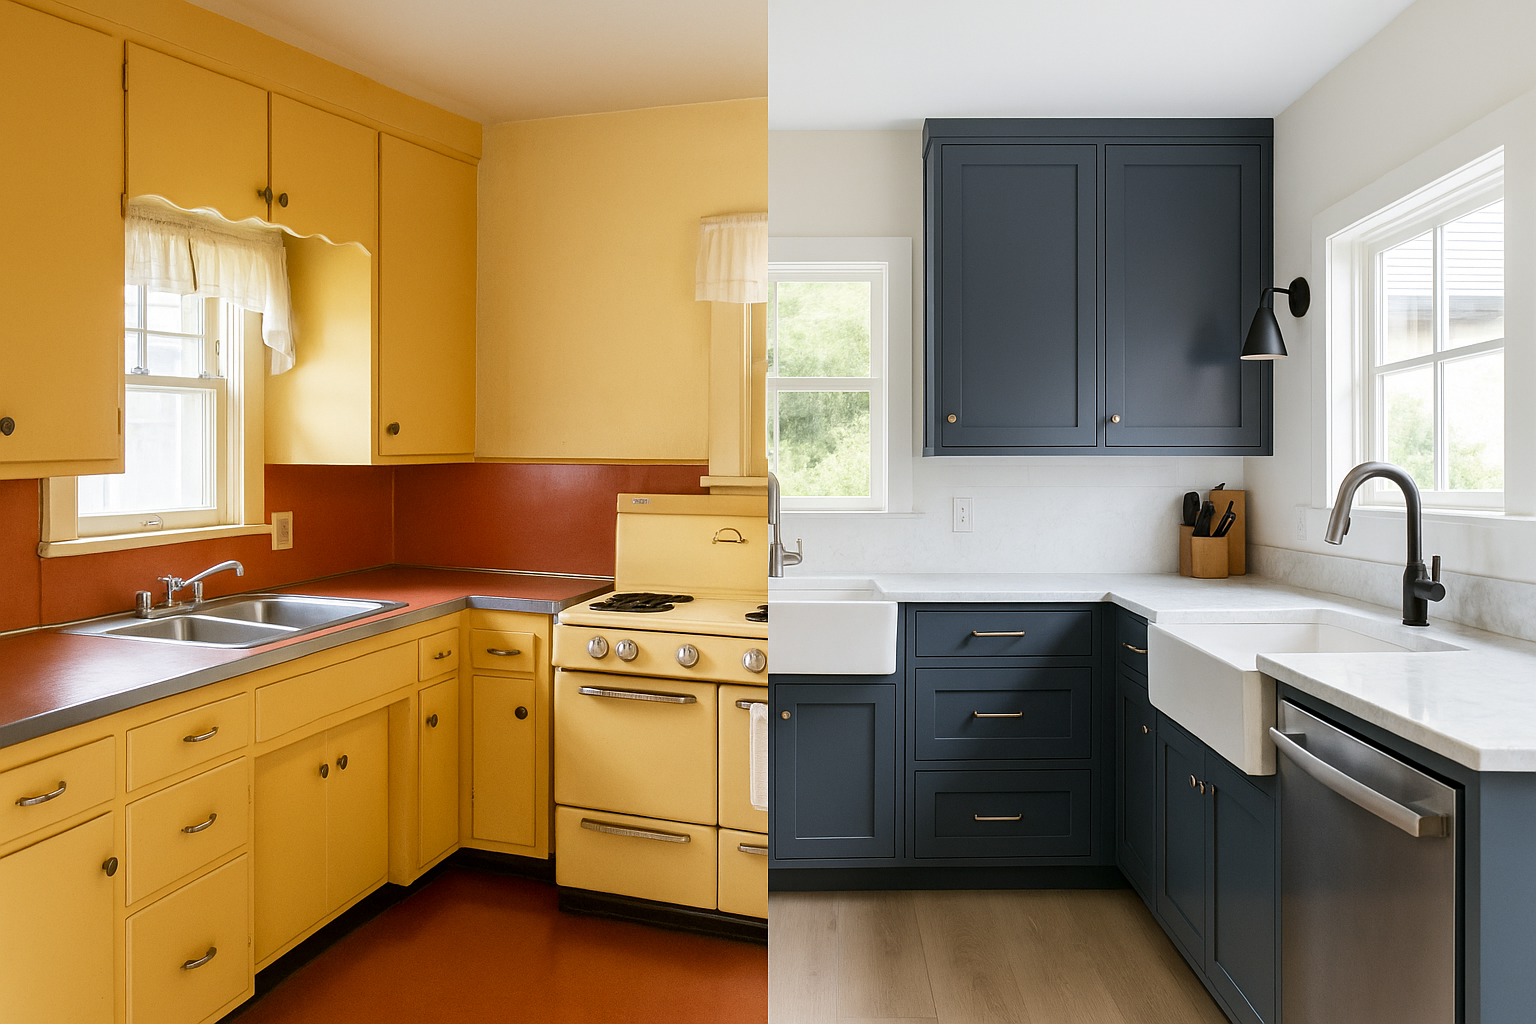
- Bright white everything. These rooms usually want warmer whites and softer contrast.
- Gloss where the room wants softness. High-sheen cabinets, counters, or floors can harden the whole renovation.
- Trying too hard. A 1930s kitchen does not need novelty signs, diner styling, or exaggerated retro appliances everywhere to feel period-aware.
In practice, the room usually improves when the period cues are quieter, not louder.
What This Usually Costs
Costs move fast in older kitchens because the finish work is only part of the story. Plumbing, electrical, hidden moisture damage, uneven walls, venting, and lead-safe prep can all shift the budget once the job starts. Treat the ranges below as planning numbers, not promises.
| Renovation Task | Typical Cost Range | What Usually Drives It |
|---|---|---|
| Cabinets and storage | $5,000-$20,000 | Restoration vs replacement, interior upgrades, and finish quality |
| Countertops | $2,000-$8,000 | Material choice, edge detail, fabrication, and sink integration |
| Flooring | $3,000-$10,000 | Restoration vs replacement, subfloor repairs, and material quality |
| Plumbing upgrades | $2,000-$6,000 | Fixture moves, drain changes, and wall access |
| Electrical updates | $3,000-$8,000 | Rewiring, new circuits, outlets, and task lighting |
| Appliances | $3,000-$12,000 | Panel-ready, retro-style, or higher-end integrated options |
| Lighting | $1,000-$3,500 | Fixture count, rewiring, dimmers, and under-cabinet lighting |
| Overall renovation | $20,000-$60,000+ | Scope, labor market, hidden conditions, and how much original material you keep |
The smartest budget move is usually selective restoration. Keep the bones where they are good. Spend on infrastructure, finish quality, and the changes that improve daily use instead of blowing the whole budget on surfaces.
What’s Next
If you are planning the kitchen in pieces, start with the decisions that affect everything else. The cabinet guide is the next useful read if the room’s shape and storage are still up in the air. The sink guide helps if counters, plumbing, and fixture choices are all tied together. And if you are still trying to decide how much of the room to change at all, this renovation guide is the clearest next step.
FAQ
Can I open up a 1930s kitchen to make it feel bigger?
Yes, but total openness is not always the best answer. A wider opening, arch, or partial connection often works better than removing every boundary.
What is the best way to update flooring without losing the period feel?
Original hardwood, matte checkerboard tile, and good-quality linoleum usually fit better than glossy contemporary tile or cheap laminate.
Can I add modern appliances without ruining the look?
Yes. Paneled appliances, restrained finishes, and careful layout planning usually work better than making every appliance a visual statement.
Are open shelves a good fit in a 1930s kitchen?
In moderation, yes. One display zone can work. Too much open shelving usually adds clutter and takes away useful enclosed storage.
Can I use modern lighting and still keep the room feeling right?
Yes. Warm under-cabinet lighting, period-aware pendants, and a layered lighting plan usually work well. Cold light and overlit ceilings usually do not.