The Basic Steps I Follow Every Time I Install a Floor
The Floor Prep Basics That Keep Jobs From Failing Later
Subfloor installation. Hardwood. LVP that stays tight. Tile that does not crack. Underlayments that actually do something. Gaps and joints that stop buckling before it starts.
Most people only look at the finish. Nice plank. Nice tile. Good color. Six months later the floor creaks in the hallway or peaks in a doorway and they are shocked. I am not. Floors usually fail from the bottom up.
If you want the big picture of how floors sit in a house, I broke that out here: Understanding How House Floors Are Built: From Joists to Finished Surfaces.
That one shows how joists, beams and subfloors carry the loads you are about to stack on them.
Here I am just walking you through how I install the layers, step by step, the way I do it on real jobs.
The Floor Tells You First
Most guides jump straight into tools, layouts, underlayments, all that stuff.
I want to show you something you almost never read about — because nobody teaches it, but every good installer knows it the same way a mechanic knows when an engine doesn’t sound right.
It’s this:
A floor will warn you before it fails.
But only if you know how to listen to it.
I don’t mean spiritually. I mean literally.
When I walk into a room to start a job, I take 30 seconds and do something I’ve never seen written in any book:
I stand still.
I shift my weight.
And I feel what the house is doing.
Floors talk long before they break.
If the subfloor is loose, it gives you a dull hollow thud.
If a joist is crowned, it kicks your hip to one side.
If the previous installer rushed, the seams feel proud under your sock.
If moisture is in the system, the air feels heavier right where the boards meet the wall.
It’s subtle, but it’s there.
Most people bring in stacks of fancy tools and skip the only step that tells you exactly how the job is going to go.
I call it the 30-Second Check-In:
-
Stand in the middle of the room.
No tools. Just your feet. -
Shift your weight left and right.
Listen with the bottoms of your feet. Feels soft? Something moves below. -
Slide your foot across the subfloor.
Any ridge higher than a nickel will show up later in LVP or tile. -
Press your hand on the outside wall.
Feel vibration? That wall isn’t tight. Floors connected to loose walls drift. -
Do one slow circle.
Hint: the room will tell you where the high spot is before your level does.
This isn’t mystical.
It’s experience. It’s jobsite pattern recognition.
It’s the kind of thing you learn only after fixing enough floors that someone else installed too fast.
I put this section early in every guide now because it’s the moment people realize:
Floor installation isn’t just “putting boards down.”
It’s reading the house before you touch a tool.
When you start with that mindset, everything else — subfloor prep, hardwood acclimation, LVP expansion space, tile layout — suddenly makes sense.
A solid floor is built long before the first plank hits the room.
Simple Floor Installation Basics for Anyone Doing It at Home
What I Check Before I Put Any Floor In A House
I walk you through how I install subfloors, hardwood, LVP and tile in real houses. Moisture checks, layout, underlayments and expansion gaps in plain language.
How I Install A Subfloor
Layout, Adhesives, Fasteners And Checks Before I Start
I never treat the subfloor as “rough work.” If I rush this part, the finish floor tattles on me later. So I slow down.
First thing I check is moisture.
I keep a small pin moisture meter in my bag. Nothing fancy. I push it into a few sheets of plywood or OSB and see where the numbers land. If they feel high for that house, I let the material sit inside longer. Wet wood always looks fine on day one. It shrinks later and tries to pull itself loose. That is how you get squeaks.
Then I look at the structure under the subfloor. The joists.
I walk the joists. I run a straight edge across them. Sometimes I find one joist that is crowned too high. I plane that down. Sometimes I see a dip where two joists meet or where there is a splice. I shim or fix that before I even think about dropping a sheet.
If you want more on what the framing is actually doing under your feet, I covered that here: Joists, Beams, and Subfloors: A Simple Guide to Structural Floor Systems.
Once the framing feels right, I check flatness.
I put a long level or a good straight board on the floor and slide it around. I look for light under the straight edge. High spots get knocked down. Low spots get a patch or a bit of self leveling compound. It is not exciting work, but it is the difference between a floor that feels like a solid stage and one that feels like a loose drum.
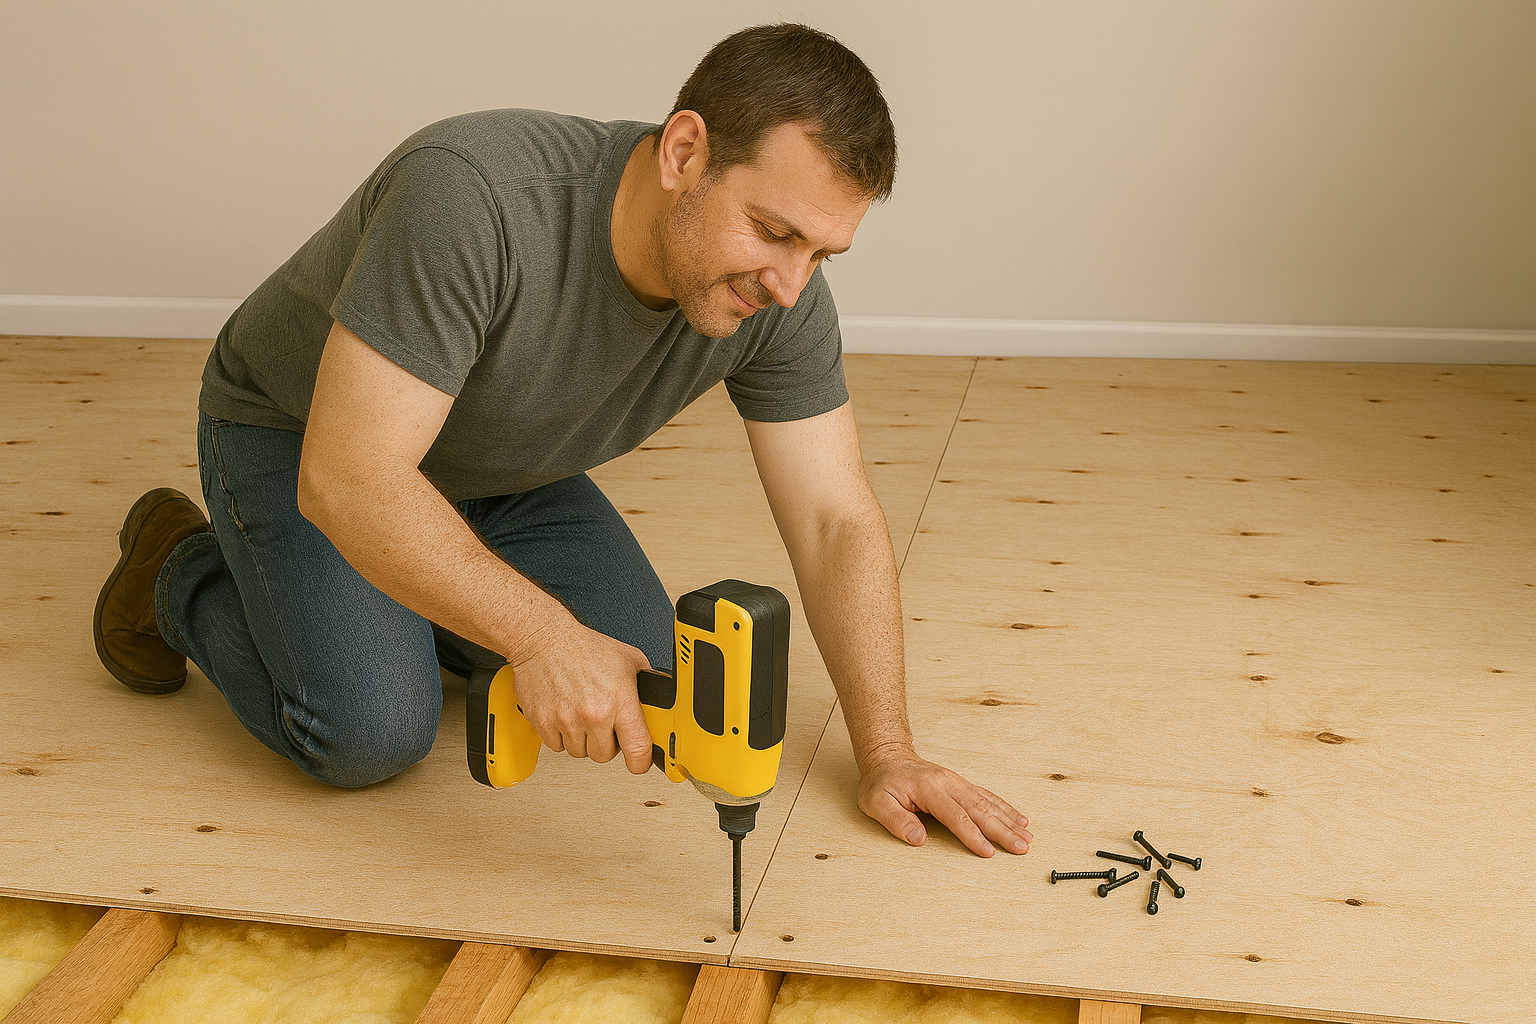
When I set panels, I run them across the joists.
I put a bead of subfloor adhesive on every joist. Not dots. A bead. Then I drop the sheet in place and walk it down so the glue spreads out. I leave a small gap between sheets so they can move a little without buckling into each other.
For fastening I like screws.
Nails are quick, but they can back out and squeak. I hit panel edges every six to eight inches and the field a bit wider. You can feel and hear a panel pull down tight. When I walk across the floor and it feels dead solid, I am happy.
Then I clean up.
I vacuum up nails, splinters and dust. I do not want some random chip telegraphing through the finished floor or rolling under LVP later. A clean subfloor makes every other step easier.
FIELD TOOL
General Tools Moisture Meter
Simple and cheap. Good enough to tell you if wood and subfloors are in the danger zone before you cover them.
How I Install Hardwood Floors Over Wood Subfloors
Acclimation, Layout, Fastening And Common Screw Ups
Hardwood has its own mood. It moves as seasons change. If you ignore that, it will remind you.
When the flooring shows up, I do not start nailing the same morning.
I bring the boxes into the room where they will live. I open the wraps so air can get in. I spread bundles around the room, not stacked in one corner. Then I leave them alone for a few days. The boards adjust to the room instead of fighting it later.
While the wood settles, I walk the subfloor again.
I like to do this in socks. Your feet notice humps and dips fast. Any proud seams get sanded. Any squeaks get another screw. I want the base to feel dead solid and quiet. Hardwood only hides so much.
Then I deal with layout.
I look for the longest straight wall in the room. Often that is an exterior wall or a long hallway wall. That becomes my reference. I snap a chalk line a board or two off that wall.
I measure across to the far wall and see how the last row will land. If the math tells me I will end up with a skinny strip, I shift my starting line a bit so both sides get decent width boards. It is easier to fix with a tape measure than after half the room is nailed.
I also check floor height where this room meets another one. I do not want a big step at the doorway if I can help it. Matching or getting close on thickness saves you from ugly transitions later.
Once the plan makes sense, I roll out rosin paper or a simple underlayment. That gives me a slip sheet and a little sound help.
The first row usually gets face nailed with a finish nailer.
I keep those nails where baseboard or shoe molding will cover them. I leave a small gap at the wall. Wood wants to grow and shrink. The gap is its breathing room.
When the first two rows are straight and solid, I bring out the flooring nailer.
I cut a small scrap of flooring and use it as a tap block so I do not wreck the edges. I tap each board into the previous one, tongue into groove, then nail through the tongue. I keep nails close, about six inches apart or less. Long boards get more nails so they do not sing when you walk on them.
I keep an eye on the pattern.
I do not like to see joints stacked in a line. I stagger the end joints at least six inches. The floor looks calmer that way and feels better when you cross it.
Common mistakes I see with hardwood:
-
No acclimation at all.
-
No gap at the walls.
-
Starting off a crooked wall instead of a true line.
-
Joints lined up like a ladder.
Most of that disappears if you spend a little time before you set that first row.
Here is a book I like to keep around for general framing and floor sense:
FIELD PICK
Ultimate Guide To House Framing
https://www.amazon.com/Ultimate-Guide-House-Framing-Updated/dp/1580117107
Good pictures, clear notes, and it gives you a better feel for what is happening under the hardwood.
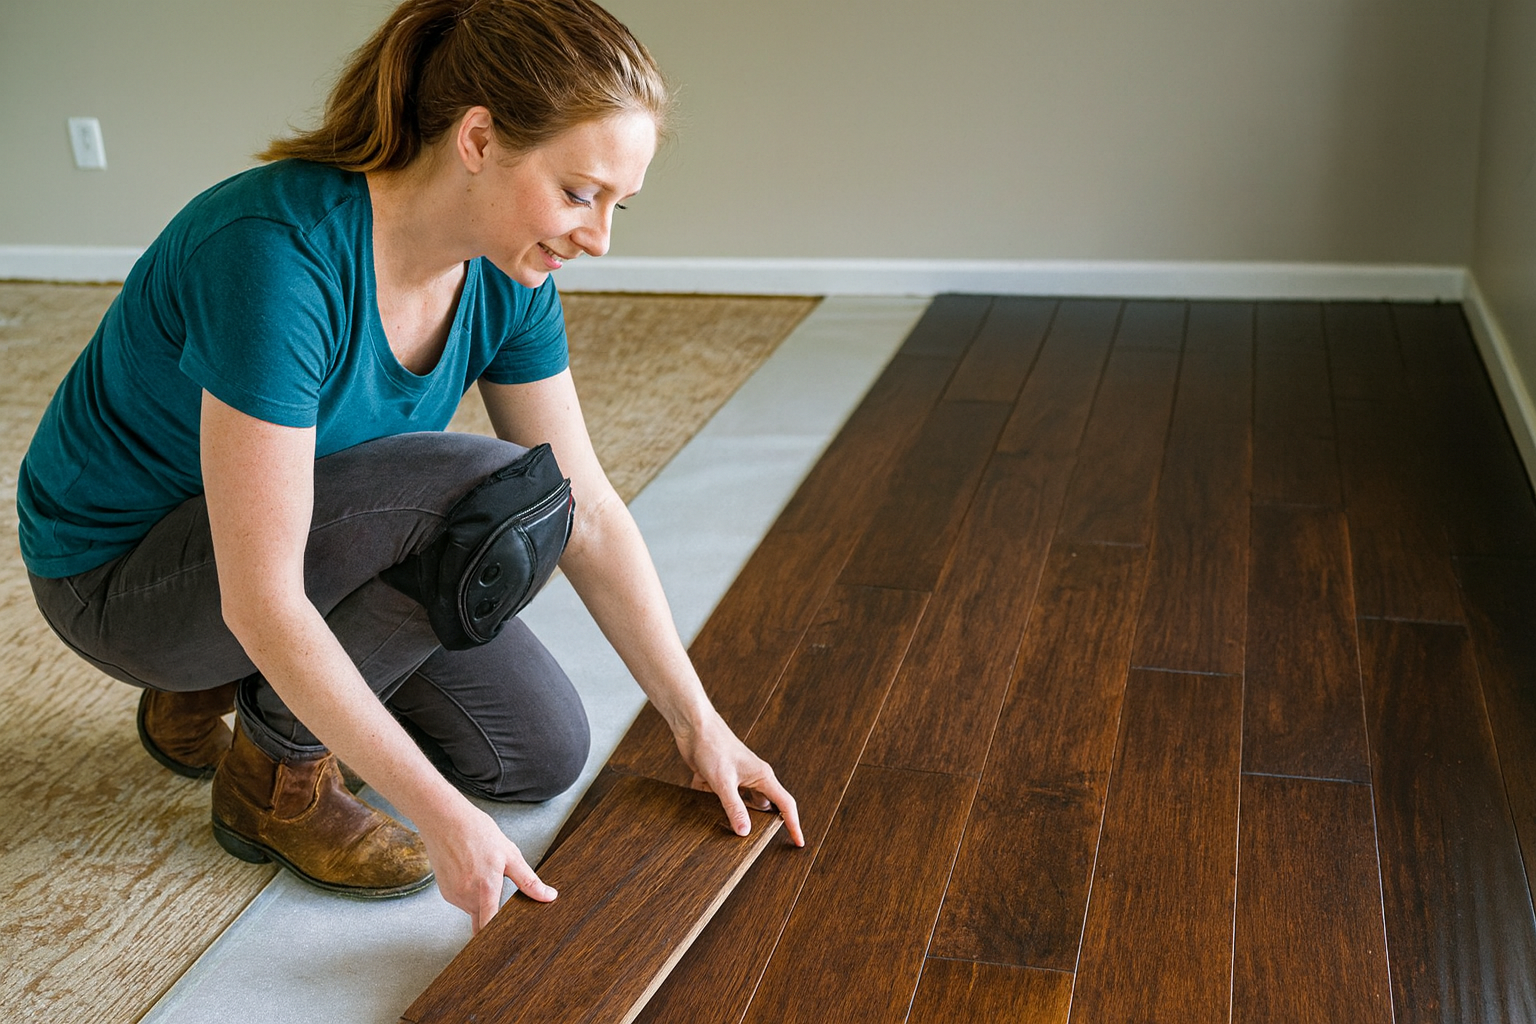
How I Install LVP So It Does Not Gap Or Peak
Subfloor Flatness, Expansion Space, Doorways, Transitions
LVP is sold as an easy floor. Click it together, you are done. It can be that simple, but it is just as simple to mess up if you skip a couple of checks.
Most of the bad LVP I see comes back to two things. The floor underneath was not flat, or the planks had no room to move.
So I start with flatness.
I pull a long straight edge across the room. If I can slide a pencil under the straight edge, that dip needs help. If the straight edge rocks on a hump, I knock that high spot down. LVP will flex a bit, but it will still show you obvious dips and ridges.
Then I hunt for leftovers from the old floor.
Staples. Nails. Bits of tack strip. All of it has to go. A click plank that sits on some random nail head is going to talk back later. Either the joint opens or the board creaks.
Once the floor feels flat and clean, I look at room size and what the box says.
Every LVP system has rules for how far you can run it before you need a break. Some let you run a long distance. Others want transitions after a shorter run. I read that part. It matters.
I always leave a gap around the edges.
Quarter inch is normal. I keep that gap at walls, around posts, at pipes and especially at door frames.
One of the first LVP failures I saw had a nice looking living room and one ugly peak in a bathroom doorway. The planks were jammed tight against the casing. Summer heat hit. The floor grew a bit. It had nowhere to go, so it buckled right at the jamb. A simple undercut on that casing would have stopped the whole mess.
For layout I like to start along a straight exterior wall.
I dry lay a couple of rows and check the far side. If the last row looks like it will be a thin strip, I trim the first row so both sides look decent. Then I start for real.
When I click planks together, I keep the angle right and use a pull bar or a tap block if I need to nudge them. I do not beat them into place. If a plank fights me, I stop and see what is wrong instead of hitting harder.
If you are still choosing floor types and not sure what belongs where, this might help:
How To Choose The Right Floor Materials For Each Room
That one looks at floor types by room and use, not just by style.
How I Tile A Floor
Substrate, Layout, Expansion Joints
Tile feels solid when it is done, but it is picky about what is under it. If the base moves, the tile shows it.
On wood, I usually go with cement board or an uncoupling membrane.
For cement board, I spread thinset on the subfloor with a notched trowel. I set the board into the thinset and screw it down with the right screws. The thinset just fills hollow spots so the board does not rock. Then I tape the seams with mesh and skim them with more thinset. Now I have a single even surface.
Layout is next.
I stand in the doorway or main view and decide what line people are going to notice first. I snap a chalk line there. I dry lay tiles along that line and check cuts at walls, tub, cabinets and corners.
If I see tiny slivers or weird wedges in obvious spots, I shift the layout before I mix more thinset. A little planning here saves a lot of cutting and swearing later.
Trowel choice matters. Big tiles need bigger notches. I also back butter larger tiles a lot of the time. As I go, I lift a tile here and there and check the back. If the thinset is only touching in a few spots, I adjust how I am troweling. Hollow spots under tile are future cracks.
Tile also needs room to move.
On big floors or rooms with a lot of sun, I break the field with a soft joint or a movement strip. At the edges, I keep a small gap and hide it later with baseboard or flexible caulk.
If you lock the tile tight between walls, heat it up and give it no slack, it can push up in the middle. I have seen that once. A ridge of tiles right through a living room. Not fun to fix.
If you like seeing pictures more than reading descriptions, this book is good to keep near the bench:
MUST READ
Visual Handbook of Building and Remodeling
https://amzn.to/3H7e7Cm
Simple drawings that show floor layers, tile bases and a lot of the little details that are hard to picture from text alone.
Underlayments: Quiet, Level Or Waterproof
What Each Type Really Does So You Can Choose On Purpose
Underlayments confuse a lot of people. The labels promise everything in one roll. Sound. Level. Moisture. In real work, most products do one main job well and maybe help a bit with something else.
So I keep it simple in my head.
Sound underlayments are for noise.
These are the soft mats under floating floors. They make footsteps quieter and the floor a bit nicer to walk on. They do not fix a wavy subfloor. If the base has dips and humps, you still have dips and humps.
Leveling products are for dips and sags.
These are the cement mixes and patch compounds. When I feel a sag in a room, I dam the doorway, mix a bag of self leveler and pour it. I move it around with a rake and trowel and let it find level. It dries into a flat base. It is not pretty work, but it saves you a lot of grief later.
Waterproof and moisture control underlayments keep water and vapor from reaching a sensitive floor.
These can be roll on coatings, sheet membranes or uncoupling mats that also handle a bit of movement. I use them in bathrooms, laundry rooms and on concrete that sweats.
Some products claim to do all three jobs at once. Sometimes they are fine. I still read the data sheet. I want to see thickness, compression, sound rating and moisture limits, not just the words on the front of the package.
A lot of floor problems in older houses start below everything, in the crawl space or basement. If it is damp down there, every layer above it has a harder life.
MUST READ
The Homeowner’s Guide To Crawl Space Encapsulation
https://amzn.to/4o7FCfJ
Good if you deal with wet crawl spaces or musty basements. It shows how fixing the space under the house helps every floor inside it.
Expansion Gaps And Movement Joints
Keeping Floors From Buckling
Expansion gaps and movement joints are simple. They are just the places where the floor is allowed to move without wrecking something. Every floor system needs that.
Wood floors swell in humid weather and shrink when it is dry. LVP changes length with temperature. Tile moves a bit too. The house itself shifts a little with seasons. Put all of that together, and you need some slack.
If the floor is trapped on all sides, it finds the weakest point and pushes there. That is when you see boards buckling, LVP peaking at a doorway or tile tenting in the middle of the room.
So I leave a gap around the room. Every time.
Hardwood gets a gap at the walls that the baseboard and shoe cover.
LVP gets a gap at walls, around posts and even at islands if the floor runs under them.
Tile gets a small gap at the edges that gets covered by trim or flexible caulk.
On long runs, I break things up.
A long hardwood hallway might get a transition at a doorway so the floor is in smaller sections. LVP that runs through a whole main floor often gets T moldings in the openings. Those trims are not just decoration. They let each section move on its own.
I saw one hallway where hardwood was tight to the base on both sides. No gap at all. A wet summer came through. The boards swelled. The whole floor rose up in the middle like a small ridge. You could feel it under your shoes. We had to pull the base, cut the edges back and let the floor drop down again. The problem was not the wood. It was the lack of breathing room.
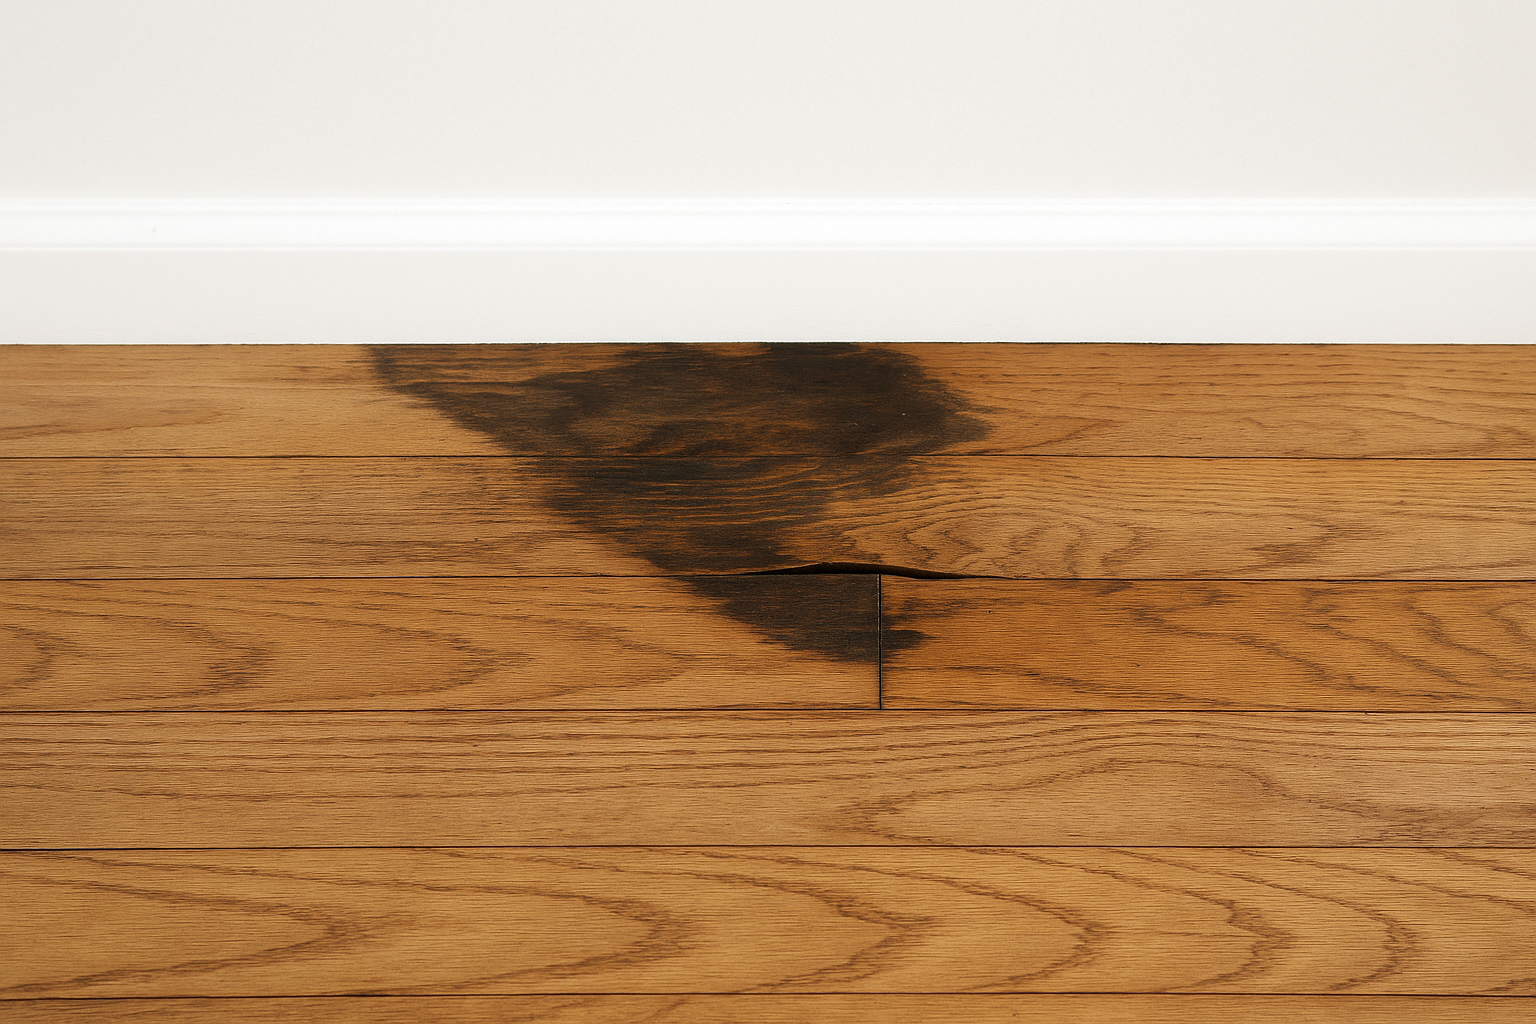
If you want help reading what floors are trying to tell you, I wrote this up:
Floor Failures: How To Read Floor Problems In A House
It goes over cracks, dips, buckles and what they usually mean. Handy when a client just says “something feels off in here” and that is all you get.
RECOMMENDED TOOL
hOmeLabs Energy Star Dehumidifier
https://amzn.to/4kWrqDq
Nice to have on damp jobs. Keeps humidity in check so wood and subfloors move less and behave better.
Bringing It All Together
This is the basic routine I follow now.
I check moisture.
I check structure.
I check flatness.
I plan the layout.
I respect expansion.
If I do those before I open a box of flooring, most of the classic problems never show up. If I skip them, I end up back in that house later with a pry bar and a repair bill.
Floors are honest. If you rush, they creak. If you skip a step, they point right at it. If you do it right, you probably will not hear from that client for years. And in this line of work, that silence is a pretty good compliment.
FAQ
Do I really need to check subfloor moisture before installing anything?
Yes. Always.
If the wood under your floor is soaking up humidity, it will move later — and whatever you lay on top will move with it. A $25 moisture meter saves you from floors that squeak, cup, or open up at the seams. When I skip this step (rare, but it has happened), the floor always tells on me later.
How flat does the subfloor actually need to be?
Flatter than most people think.
If I can slide a pencil under a straightedge, I fix it. Hardwood can hide tiny waves, LVP will show everything, and tile will crack if you install over dips or crowns. When a subfloor feels perfectly flat under bare feet, that usually means it’s good enough.
Do I need to remove baseboards before laying a new floor?
If you can, yes.
It makes the job cleaner and the expansion gaps easier to hide.
Some old homes have baseboards that are basically fused into the wall with plaster — in those cases, I leave them and install a new shoe molding after. Do what causes the least damage.
How long should hardwood acclimate?
Two to five days in the actual room — not the garage, not the hallway.
I open the boxes, spread the boards around, and let the house “teach” them how to behave. If you install hardwood straight out of the box, it will cup or gap when the seasons change. Learned that the hard way.
Why do my LVP planks keep separating at the ends?
Two common reasons:
-
The subfloor wasn’t flat.
-
You pinned the floor somewhere (tight to a wall or door casing).
LVP needs to float. If it catches on anything, it will open up or peak when the room warms up.
Can I run LVP through multiple rooms without putting a transition strip?
Sometimes.
Some brands allow long, continuous runs. Others need a break after 30–40 feet or when turning a corner. I read the box every single time. When people ignore those limits, the buckles show up right in the doorway.
Is tile really that sensitive to movement?
Yes — tile is tough, but it hates flex.
That’s why the layers below matter so much. Cement board or uncoupling membrane + thinset done right gives the tile a stable base. Skip the prep and the grout will crack first, then a tile or two will follow.
Do I actually need soft joints or movement joints in tile?
On big floors or sunny rooms — absolutely.
Tile expands when it heats up. If the field is boxed in tight between walls, it has only one option: push upward. I’ve walked into a kitchen where the tile peaked like a little ridge right across the room. Took hours to fix something that could’ve been prevented with a single movement joint.
How big should the expansion gap be for hardwood or LVP?
Usually 1/4" around the walls, posts, pipes — anything solid.
Hardwood expands and contracts with humidity. LVP moves with temperature. Giving them breathing room keeps the floor flat instead of buckling.
Do underlayments actually help with sound?
Some do.
The soft rolls under floating floors help with footstep noise, but they won’t fix an uneven subfloor. Leveling is a separate job. Most “2-in-1 miracle underlayments” are just marketing — pick one based on what you actually need: sound, leveling, or moisture.
How do I avoid tiny skinny cuts at the wall?
Lay out the room before you install even one board.
I dry-lay a few rows or measure the full width. If the last row comes out too thin, I shift the starting row. A little math and chalk-line time saves you from ugly edges later.
Is a vapor barrier always needed under hardwood?
On wood subfloors — usually yes.
Rosin paper or the simple red rolls are enough. They don’t waterproof anything; they just reduce friction and help the boards settle without squeaking.
Why does my tile sound hollow in some spots?
Because the thinset didn’t fully contact the back of the tile.
“Spot bonding” or rushing the trowel pattern leaves voids. Those voids eventually turn into cracks or loose tiles. I lift a tile every now and then while installing to make sure coverage is good.
Can I install new flooring over old flooring?
Sometimes, but I rarely do.
Every extra layer raises the floor higher against door casings, cabinets, toilets, and transitions. You can do it with some LVP, but hardwood and tile almost always need a clean, solid base.
Why do floors squeak?
Movement between layers.
Could be a loose subfloor panel, a nail that missed the joist, or wood rubbing against wood. I fix squeaks by driving screws through the subfloor into the joists until the noise disappears. If the framing is weak, you hear it every step.
How do I know if my old subfloor is still good?
Walk it barefoot.
Your feet will find soft spots, humps, dips, or high seams faster than your eyes. If it feels spongy, cracked, or bouncy, it needs repair before you cover it with anything.
Should I undercut my door casings?
Yes, always.
Sliding the floor under the casing looks clean and prevents the floor from binding. Cutting planks around the casing always looks like a patch job. I use a scrap piece of flooring as a guide, lay a saw on top, and cut the casing to the exact height.
Do I really need to stagger the boards?
Yes — visually and structurally.
End joints lined up in a row look cheap and create weak spots. Stagger by at least 6".