How to Build an Architectural Model
A clean model speaks louder than a messy drawing. It shows you understand space, structure, and scale. No gimmicks. Just smart choices. Cut sharp, glue right, finish clean.
You’ll learn how to pick the right board, what tools won’t fail you, and how to avoid sloppy mistakes that ruin good work. This is hands-on stuff. Straightforward and real.
MUST READ
Architectural Modelmaking by Nick Dunn
Covers real-world techniques, material choices, and how to make models that stand out in reviews and competitions.
→ Buy on Amazon

What’s Inside
Smart tools. Clean techniques. Real-world model ideas. From materials to pro tips, this guide walks you through how to build models that actually work and stand out.
✓ Basics that matter
✓ Mistakes to skip
✓ Tools and books that help
Read start to finish or jump to what you need.
This is a free architectural model-making course covering essential techniques and design principles.
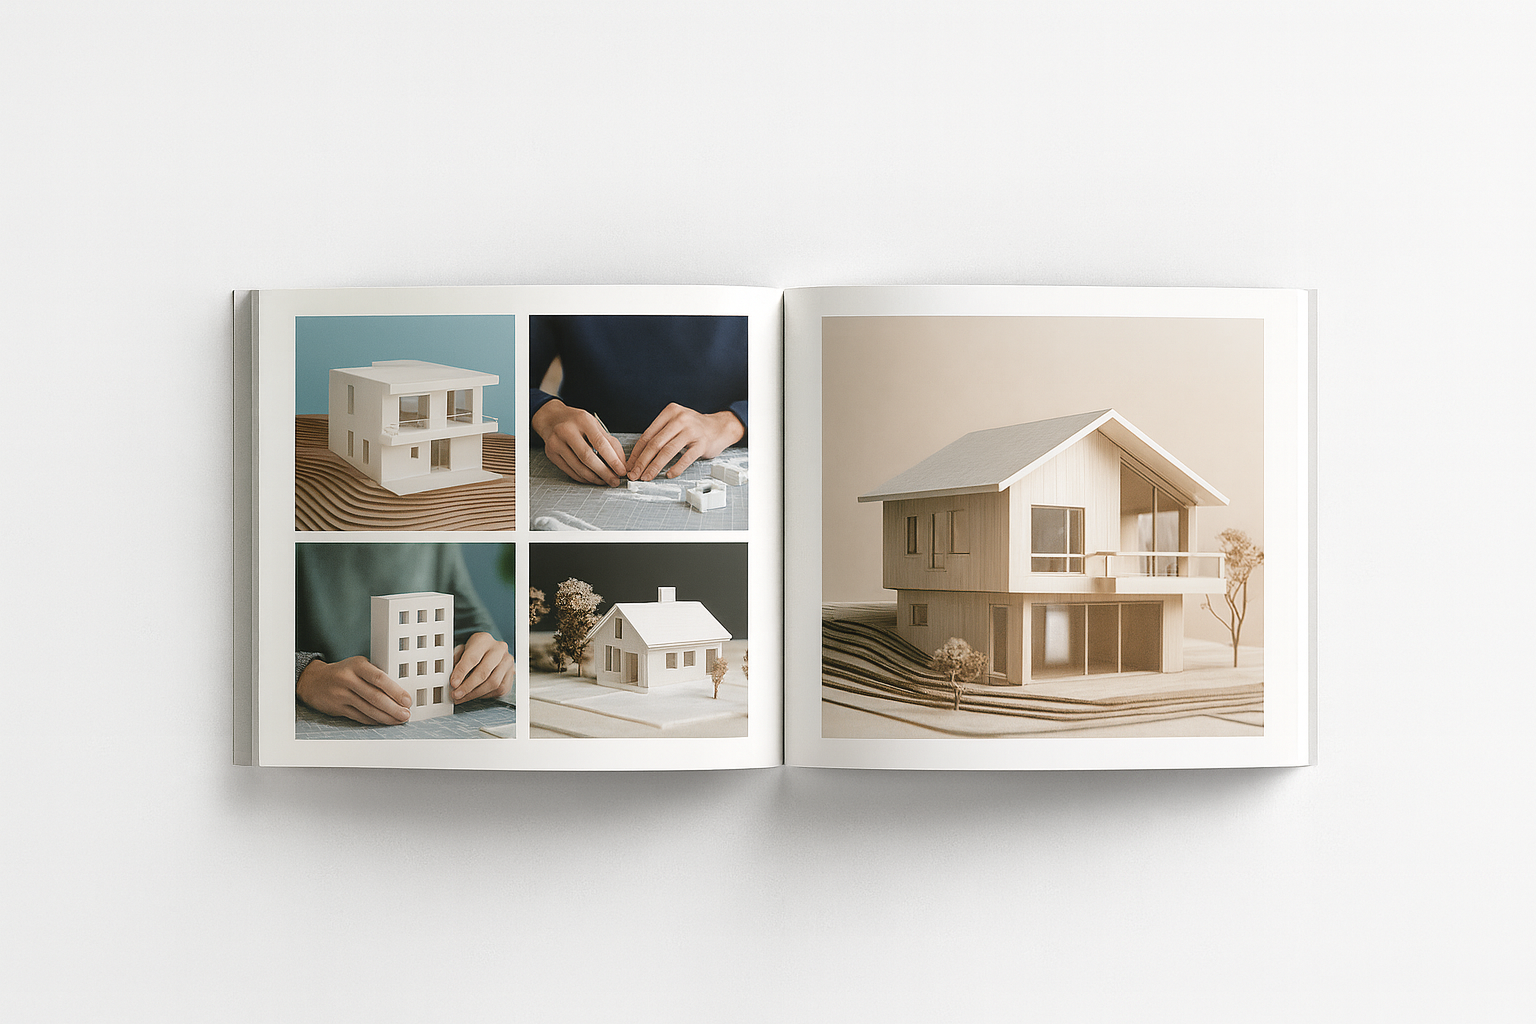
Why Model Making Still Matters

In a world of photorealistic renders and virtual walkthroughs, physical models still do what screens can’t.
-
Stronger Spatial Sense
Holding a model helps you see form, scale, and proportion in ways no screen can. You spot flow, gaps, and logic with your eyes and hands. -
Better Team Feedback
Clients and professors react differently to something real. A physical model invites questions, ideas, and clearer feedback. -
Faster Problem Solving
Build it, and flaws show fast. Awkward joints, off-kilter angles, bad layout—it all becomes obvious when you put it together. -
It Feels Real
A good model builds emotional connection. It makes the design feel possible, not hypothetical.
It still works. And it still matters.
FIELD PICK
Design Drawing by Francis D.K. Ching
Perfect visual language for architects. Covers form, space, and drawing with the same clarity you need in physical models.
→ Buy on Amazon
Related: Design Storytelling for Architects: Speak Clearly, Get Approved Faster
Student Models vs Client Models: What You’re Really Being Judged On
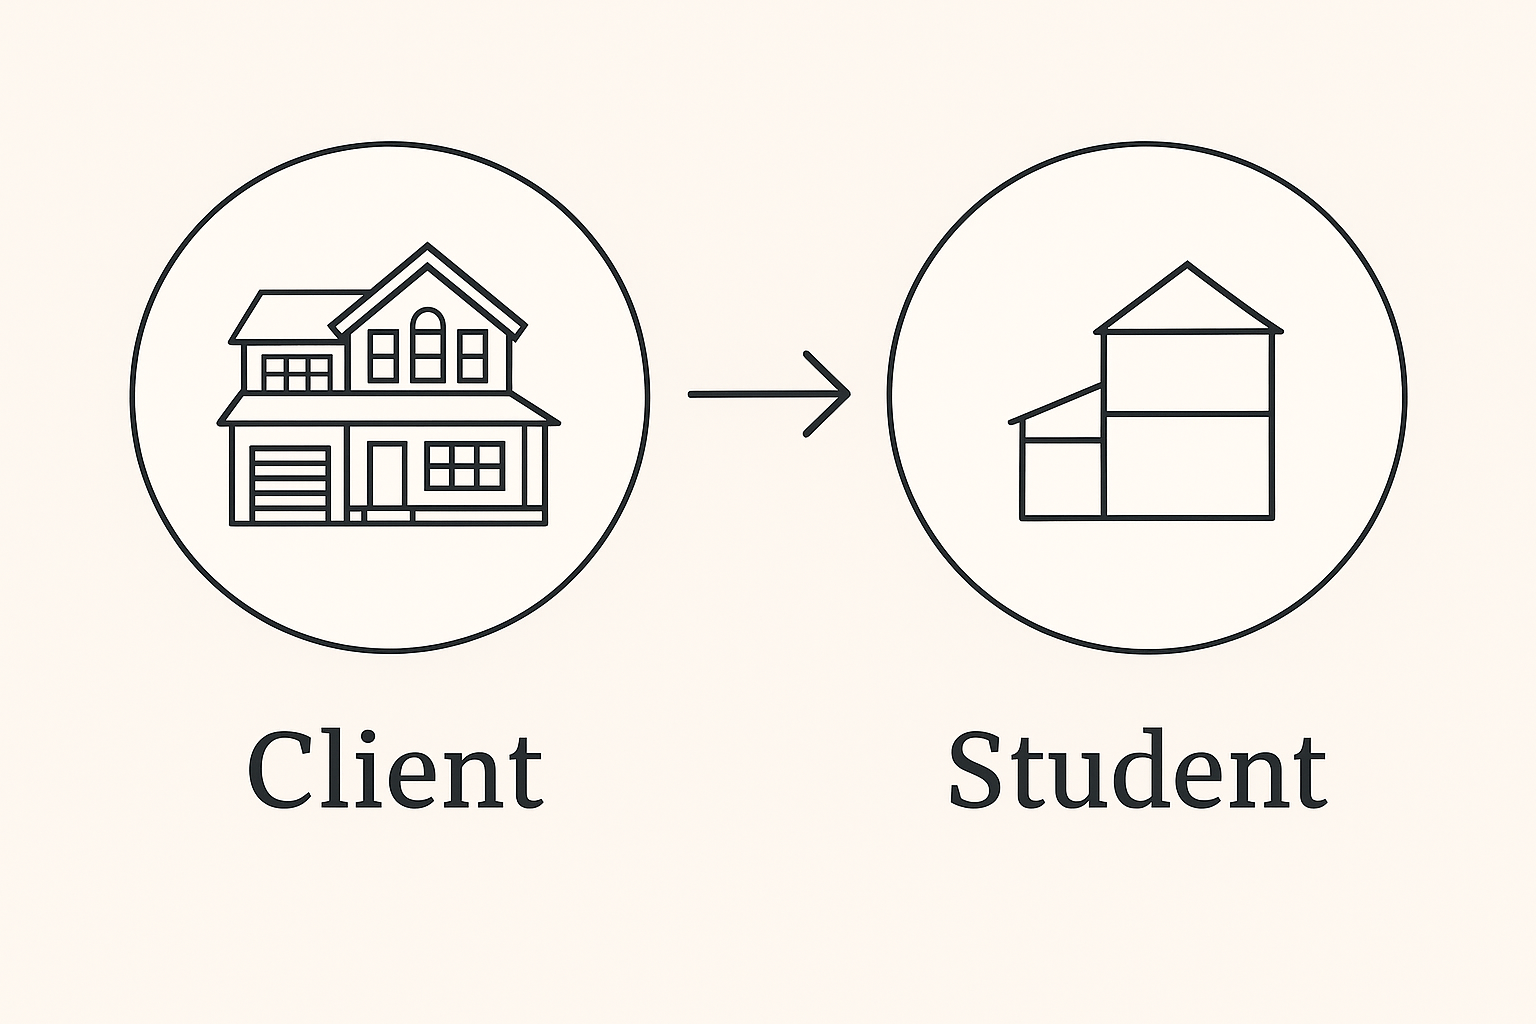
Architecture students and professionals aren’t playing the same game. So stop building like they are.
Professional Models Are Built to Sell
Client-facing models are about persuasion. They’re tools to impress, win trust, and close the deal. If it looks cheap or rushed, the project looks weak—even if the design’s solid. One bad glue joint can kill confidence.
That’s why firms go all in. Laser-cut parts. High-grade boards. Custom finishes. They don’t care about the “process.” They’re showing the polished end result.
Student Models Are Built to Show Thinking
Professors don’t care how expensive your materials are. They care whether you understand what you’re designing.
A good student model is clean, clear, and honest. It shows how you’re solving problems—not hiding them behind fancy wood or lighting tricks. Cheap board is fine if it’s sharp. Shiny foam with no logic? Fail.
In fact, overdone models often lose points. If it’s too “designed,” professors get suspicious. They want clarity, not decoration.
What Professors Actually Look For:
✓ Strong massing and layout logic
✓ Clear structure and scale
✓ Clean cuts and precision (even with basic tools)
✓ Process that’s readable through the model
✓ No color explosions or overworked textures
What Clients Actually Expect:
✓ Polished finish and presentation strength
✓ Premium feel, even from a glance
✓ Accurate finishes in critical areas
✓ Refined materials—wood, acrylic, brass, etc.
✓ A model that says: “this is real and ready to build”
Bottom line: Students should focus on clarity and design logic. Firms should focus on polish and trust. Know who you’re building for. That’s how your model actually works.
See also: Conceptual Architecture Examples That Still Hold Up
Getting Started: Essential Materials & Tools
Most people dive into model making with a bit of foam board, some glue, and a hobby knife. But there’s a whole world of materials out there:
1.0 Materials
-
- Lightweight, easy to cut, great for quick massing models or even more detailed presentations if you’re careful.
- Often used for base plates, building partitions, or conceptual forms.
-
- Lightweight, can be carved and shaped with ease.
- Ideal for structural elements, delicate details like handrails, and window frames.
-
- Budget-friendly and widely available.
- Great for rough prototypes and massing studies, especially if you’re just starting out.
-
- Fantastic for glazing (representing windows) or modern structures.
- Usually needs careful cutting tools (scoring knife, laser cutter) for neat edges.
-
3D-Printed Components
- For intricate parts, complex geometries, or repetitive patterns, 3D printing is a game-changer.
- Ideal for advanced students or professionals looking to showcase elaborate designs.
2.0 Basic Tools
- X-acto Knife or Scalpel: Precision cutting is everything. Dull blades will ruin your edges.
- Cutting Mat: A self-healing cutting mat not only protects your workspace but also extends the life of your blades.
- Metal Ruler & T-Square: Essential for straight cuts and consistent measurements.
- Adhesives (White Glue, Super Glue, Double-Sided Tape): Different adhesives for different materials. White glue is slow but forgiving; super glue is fast but can cause messy spills if you’re not careful.
- Pencils & Markers: For labeling, sketching on foam board, or adding final touches.
- Fine Sandpaper & Files: To smooth rough edges and refine details.
For an in-depth exploration of architectural model-making tools, please refer to Introduction to Architectural Model Making Tools.
Remember when you first tried building an architectural model with just cardboard, school glue, and a pair of dull scissors? Mine looked like a half-chewed science project. Over time, I learned that the right tools can transform a “meh” model into a real showstopper—wowing professors, clients, or even your social media followers.
In the Architectural Model Making Tools Guide, I share essential tools, how to use them, and insider tips to avoid common pitfalls.
See also: Best Bags for Architecture Students: Sketchbooks, Laptops, and More
Choosing the Right Scale and Layout

Scale determines how detailed your model can be. A common beginner’s mistake is choosing a scale too large (meaning, you have to build a huge model) or too small (where important features become too tiny to represent).
1.0 Popular Scales
- 1:50 or 1:100: Common for showing building layouts and interior partitions clearly.
- 1:200 or 1:250: Good for showing the building in context with surrounding structures.
- 1:500 or 1:1000: Often used for urban design or master planning, where you need to show entire neighborhoods or city sections.
2.0 Layout Tips
- Plan Your Base: Decide if your model is just the building or includes landscape elements like roads, trees, or water features.
- Check for Overhangs/Fragile Parts: If your design has a large cantilever, ensure you have a stable base or internal support.
- Labeling & Legend: Some professional models include small labels or a color-coded legend, especially if the model is used for presentations or regulatory approvals.
See also: Best Laptops for Architecture Students
Recommended Reading
We highly suggest picking up Architectural Model Building: Tools, Techniques and Materials by Roark T. Congdon. Here’s why:
- Covers Everything You Need – Tools, techniques, and materials explained clearly.
- Easy to Follow – Includes helpful illustrations for better understanding.
- Practical Tips – Useful for both beginners and experienced model makers.
How to Build Strong Concepts Before You Start Modeling
Jumping into software too early is what ruins most student projects—and wastes time in firms.
A model won’t fix a bad idea. It just makes the confusion 3D.
Here’s how to get your concept right before you open SketchUp, Rhino, or anything else.
1. Don’t Model a Vibe
Don’t start with shape. Start with purpose.
Ask:
● What is this building doing?
● Who’s moving through it—and how?
● What’s the core tension? (Light vs privacy? Openness vs control?)
If your answer sounds like “cool form” or “a mood,” stop. That’s not a concept. That’s decoration with extra steps.
→ Better move: Write down what the building must solve. One honest sentence. That’s your spine.
2. Draw Dumb First
Before any model, do 5-10 dumb sketches.
Blocky. Loose. Fast. Doesn’t matter.
You’re testing space, not art.
No textures. No trees. No entourage.
Just figure out massing, flow, and daylight. What goes where and why?
→ Sketch rule: If your sketch doesn’t show structure, it’s useless. Don’t decorate the problem. Solve it.
3. Use Software to Test, Not Polish
Start ugly.
Make fast massing blocks in SketchUp or Rhino.
Push and pull volumes. Flip them. Stack them. Rotate.
Don’t zoom in. Don’t bevel edges. Don’t add materials.
→ Studio hack: First 2 hours in software = pure shape logic. Screenshot everything. You’re not building. You’re learning.
4. Know the Rules You’re Breaking
Every good concept sets up a system:
● Public front / private back
● Dense base / light top
● Grid circulation / soft edges
Then it breaks the system in one place—with purpose.
That disruption becomes your moment.
→ Why it works: Without contrast, your model is just repetition. With contrast, it speaks.
5. Limit Tools On Purpose
Too many plugins kill thinking.
Set restrictions before you model:
● Only box + move in Rhino
● Only 3 mass types in SketchUp
● No components yet. No detail. No photoreal
This forces you to think in concept—not surface.
→ Field move: Time yourself. 30 minutes max to test one spatial logic. Then move on.
6. Talk It Out Before You Render It
If you can’t explain what the building does in 10 seconds, your model won’t help.
Don’t model to find your idea.
Model after you know it.
→ Ask a peer: “Does this shape explain what I just said?” If not, it’s back to sketch. No ego. That’s how real designers work.
MUST READ
Form, Space, and Order – by Francis Ching
Still the best visual book for thinking in 3D before you touch software. Essential if your models feel empty.
→ Buy on Amazon
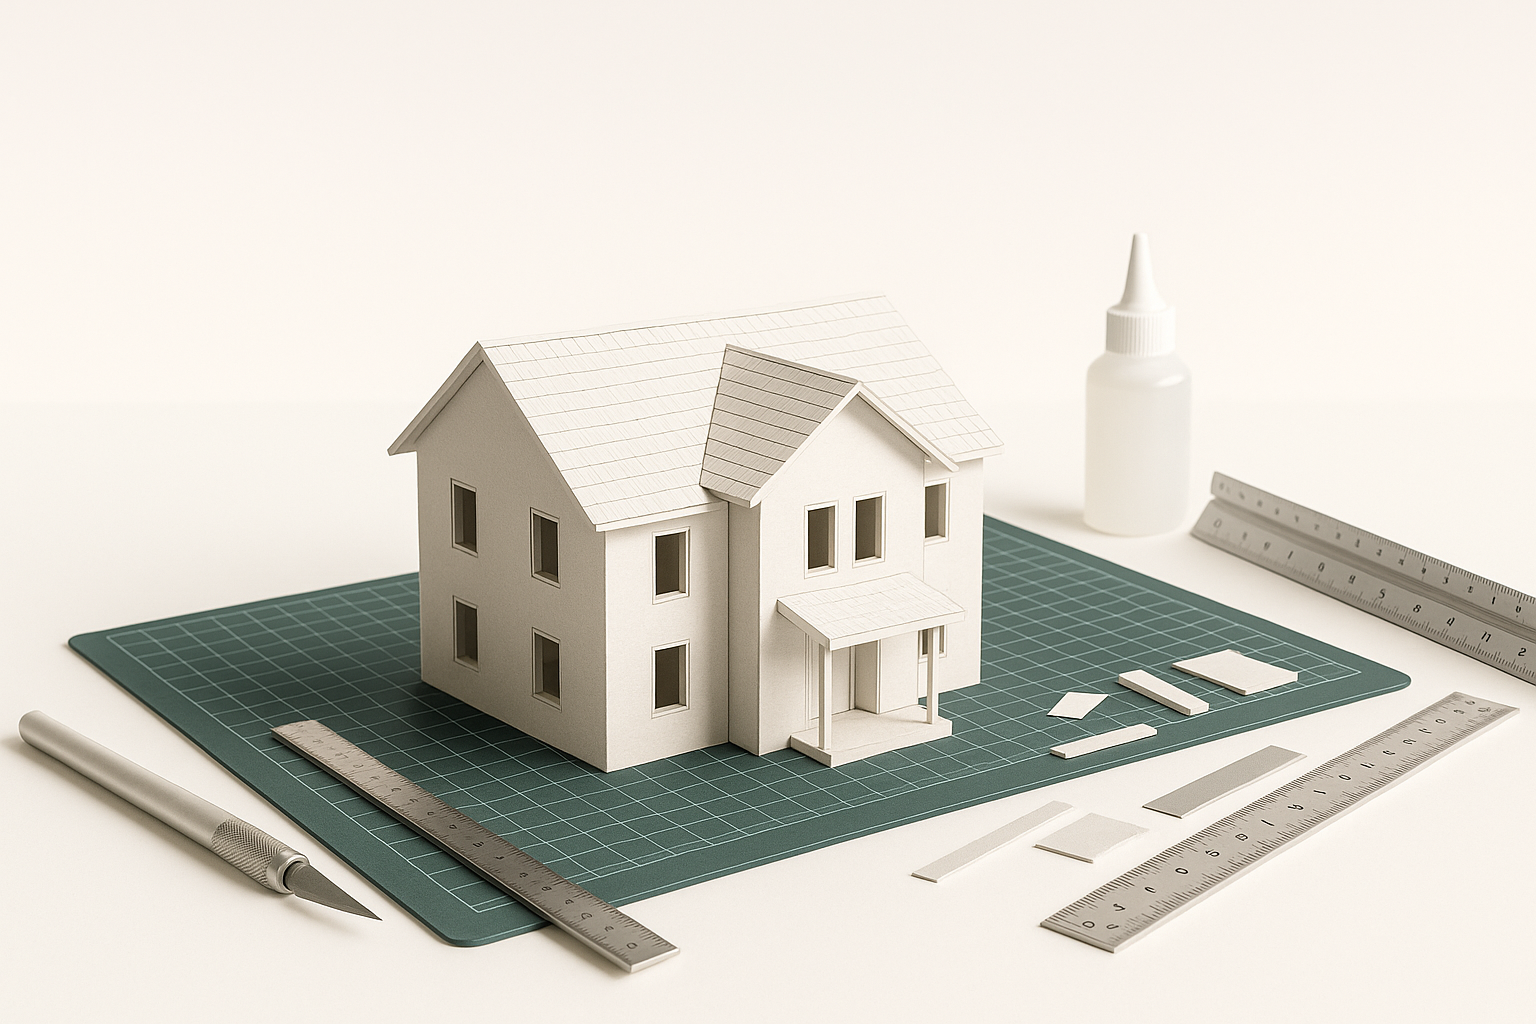
Step-by-Step: Building a Basic Architectural Model
How to Make an Architectural Model That Doesn’t Look Like a School Project

Below is a straightforward process you can follow. This approach works for many design phases—conceptual, study, or final presentation—depending on how much detail you add.
Architectural Model Making That Actually Teaches You Design
Below is a tried-and-true process for constructing a solid architectural model. It’s flexible enough for concept work, study models, or full-blown presentation pieces—just adjust the level of detail as needed. Along the way, we’ll offer tips, tricks, do’s and don’ts, and potential pitfalls to avoid so you can achieve a clean, professional look every time.
Step 1: Gather Your Reference
Why This Matters:
- A model is only as accurate as the drawings or digital files it’s based on.
- Having all sketches, plans, and elevations on hand prevents guesswork and re-dos later.
✔️ What to Do:
- Collect all your drawings (floor plans, sections, elevations) or 3D digital layouts.
- Highlight the building boundaries or site edges in a clear, bold marker on your reference.
- Verify your chosen scale (e.g., 1:50 or 1:100). Double-check with any official instructions (professors or project requirements).
Common Mistakes:
- Starting to build without a clear plan—leading to mismatched pieces.
- Forgetting to confirm scale, causing doors or windows to end up too big or too small.
Pro Tip: If you can, print a scaled version of your floor plan. You can then cut it out and use it as a template for your base or walls.
Step 2: Prepare Your Base
Why This Matters:
- The base is your foundation—if it’s crooked or flimsy, the entire model suffers.
- A sturdy base ensures you can move the model around without causing collapses.
✔️ What to Do:
- Cut a piece of foam board or thick cardboard slightly larger than your building footprint.
- Lightly sketch the building outline, site boundaries, and any critical reference points (like roads or property lines).
- Label key areas (front entrance, road access) if needed, so you don’t forget later.
Don’t:
- Rely on flimsy materials. Corrugated cardboard can warp, so choose something with enough thickness.
- Skip measuring. Even a tiny misalignment can throw off your final look.
Trick: Use double layers of foam board if your design calls for topography. Stack them up in layers to represent hills or slopes.
Step 3: Construct Walls & Main Structures
Why This Matters:
- Walls form the core geometry of your building. This is where precision counts—crooked walls or mismatched heights can ruin the overall impression.
✔️ How to Do It:
- Measure each wall precisely on foam board, cardboard, or balsa wood.
- Mark door/window openings before cutting. It’s easier than cutting them out after assembly.
- Glue walls together—double-checking angles. A small set square or corner clamp helps you keep corners at 90°.
Do:
- Test fit each piece without glue first to ensure everything lines up.
- Label each wall section on the backside (e.g., “North Wall”) so you don’t mix them up.
Don’t:
- Use too much glue—excess glue can smear and make your walls look sloppy. Apply sparingly and wipe away any drips with a Q-tip or paper towel.
Mistake to Avoid:
- Uneven top edges. Make sure all walls are cut the same height. If they’re uneven, your roof plate will wobble.
Step 4: Add Floors & Roof
Why This Matters:
- Floors define levels inside the building; a roof completes the building’s silhouette.
- Proper floor placement shows how spaces connect and can highlight multi-story elements like staircases or atriums.
✔️ Steps to Follow:
- Cut floor plates from foam board or cardboard to match each level in your design.
- Attach them at the correct heights inside the model. Columns or internal supports might be necessary if your design has large open spans.
- Install the roof last for easy interior access while you’re adding details.
Do:
- Plan for interior details (like mezzanines or open-to-below areas) before gluing down floors.
- Consider separate removable layers if you need to showcase or photograph the interior.
Don’t:
- Seal everything too early. If you close off the roof prematurely, it’s tough to fix or add interior features later.
Trick:
- If the roof is flat, you can attach it with small magnets or discreet Velcro, allowing you to remove it at will.
Step 5: Insert Details
Why This Matters:
- Details bring personality and realism to your model—windows, railings, columns, and staircases show you’ve thought through the design.
✔️ Detail Ideas:
- Window Frames: Use strips of balsa wood or thin plastic. Acrylic sheets can represent glass.
- Railings or Columns: Thin dowels, plastic rods, or even toothpicks (for small-scale) can do the trick.
- Interior Elements: If you’re going for extra credit or a wow factor, add basic furniture or partition walls inside, visible through windows or a removable roof.
Do:
- Keep details consistent with your scale. Oversized columns or railings look cartoonish.
- Focus on key features if time is limited—don’t try to detail every tiny doorknob.
Don’t:
- Use random scraps for details without measuring. Sloppy detail work kills the professional vibe.
Pitfall:
- Gluing tiny pieces can get messy. Use tweezers and a toothpick to apply small glue dots.
Step 6: Landscape & Context (Optional)
Why This Matters:
- Adding site context—like hills, streets, trees—helps viewers understand how your design fits into its environment.
✔️ How to Include Context:
- Topography: Layer foam sheets or carve out contours. Modeling clay can simulate uneven terrain.
- Trees & Greenery: Either buy ready-made model trees or twist wire into tree shapes and apply foam flock.
- Roads & Sidewalks: Use painted cardboard or matte board. Mark lanes, crosswalks, etc.
Do:
- Keep landscaping simple unless it’s a main focus. A few trees or shrubs can make a big difference.
- Consider how people will view the model—front? 360°? Add landscaping accordingly.
Don’t:
- Overdo it with random details. A cluttered site can distract from your actual building.
Trick:
- Use colored cardstock for water features (like a river or pond). Glue or resin can create a more realistic, glossy surface but can be messy to handle.
Step 7: Final Touches
Why This Matters:
- Proper finishing can elevate a rough model to “wow” quality.
- It’s also your last chance to correct any small mistakes before the big reveal.
✔️ Finishing Touches Checklist:
- Clean stray glue strings with a sharp blade or tweezers.
- Touch up paint if you want to color-code sections or highlight building materials.
- Label certain areas for clarity—(e.g., “Main Entrance,” “Atrium,” “Service Access”).
- Ensure stability—test-lift the model to see if anything wobbles.
Do:
- Consider adding tiny human figures or cars to give a sense of scale.
- Keep it consistent—if you add them, ensure they’re the same scale as your building.
Don’t:
- Rush packaging or transportation. If you need to move the model, protect delicate parts with foam or bubble wrap.
Time-Saving Tip:
- Dry fit every major piece before gluing. This helps you see alignment issues early and saves you from painful rework.
Common Mistakes to Avoid
- Winging It Without a Plan
- Measure everything and pre-cut all major components to avoid surprises.
- Sloppy Adhesive Work
- Globs of glue or tape showing is a dead giveaway of rushed craftsmanship.
- Ignoring Scale Consistency
- Mixing scales or eyeballing sizes can undermine the whole model’s credibility.
- Overcrowding the Model
- Too many details can overshadow your main design. Prioritize what’s essential.
- Not Allowing Glue to Set
- One wobbly wall can cascade into a crooked structure.
Extra Tips & Tricks
- Use Reference Photos: If you’re modeling an existing building, study photos. This helps you interpret color, texture, and proportions more accurately.
- Keep Extra Supplies Handy: Running out of foam board or blades midway can stall your progress. Have a bit more than you think you need.
- Light Test: Shine a lamp through windows or the roof to see how natural light interacts with your interior. This can highlight any interior details you might want to add.
- Back Up Plan: If you’re on a tight schedule for a presentation or critique, consider making a simpler massing model first, then add details if time allows.
Your Path to a Clean, Impressive Model
By following these seven core steps, you’ll have a solid roadmap for building an architectural model that stands out—whether it’s for a class project, an office presentation, or just honing your creative skills.
Remember: Patience, precision, and planning are your three biggest allies. Take the time to measure, cut carefully, and assemble methodically, and you’ll see how these small details compound into a polished, professional finish.
Now go build something amazing!
Time-Saving Tip: Always do a “dry fit” (no glue) to check alignment before you permanently assemble pieces.
Advanced Techniques: Elevate Your Models from “Nice” to “Jaw-Dropping”
Tools, Cuts, and Tips for Models That Actually Look Right
Once you’ve got the basics down, it’s time to flex those creative muscles and take your architectural models to a whole new level. Below are five advanced methods that will help you inject precision, realism, and even a little drama into your builds. Each one comes with insider tips, tricks, and step-by-step guidance to give your projects that truly professional edge.
Advanced Techniques: How to Take Your Models to the Next Level
1.0 Laser Cutting
Why It’s Awesome:
- Speed & Precision: A laser cutter can handle hundreds of repetitive shapes in the time it takes you to measure and cut a single piece by hand.
- Intricate Designs: Perfect for complex facades, stencils, or detailed patterns you’d struggle to achieve with a hobby knife.
How to Get Started:
- Prepare Your CAD File: Use software like AutoCAD, Illustrator, or Inkscape to draw your vectors. Keep line thickness and color coding in mind—many laser systems read specific colors as “cut” vs. “engrave.”
- Choose the Right Material: Most laser cutters handle foam board, balsa wood, cardboard, acrylic, and MDF. Thicker materials need slower cutting speeds.
- Test Your Settings: Always do a small test cut before committing. Different materials (even from the same supplier) can vary in density, so dial in the correct power and speed.
- Set Up Proper Ventilation: Cutting plastic or MDF can release fumes. Make sure you’re in a well-ventilated area or have a fume extractor.
Advanced Hacks:
- Layering Technique: If your building has ornamentation, laser-cut multiple thin layers and stack them for depth.
- Engrave for Texture: Lightly engrave lines to simulate brick or panel details, then paint or wash to highlight them.
Common Mistakes:
Using too high power on foam board = big scorched mess.
Skipping the test piece—one overlooked setting can waste an entire sheet of material.
Pro Tip: If you’re new to laser cutting, start with small test projects like doors, windows, or decorative panels. Gradually move up to entire facades.
2.0 3D Printing
Why It’s Awesome:
- Effortless Curves & Parametric Forms: Some geometries are nearly impossible (or extremely time-consuming) to do by hand, but a 3D printer can handle them easily.
- Professional Polish: Well-printed parts can add a futuristic edge to your model, impressing clients, professors, or visitors.
How to Begin:
- Model in 3D Software: SketchUp, Rhino, or Blender are popular. Be sure to clean up any stray vertices or overlapping surfaces—3D printers hate messy geometry.
- Export to .STL or .OBJ: Most printers require these formats.
- Slice Your Model: Use slicing software (Cura, PrusaSlicer, Simplify3D) to set layer height, infill, and supports. Thinner layers yield finer detail but take longer to print.
- Print & Clean Up: Remove support structures carefully. Sand lightly, apply primer, and paint if you want to hide layer lines.
Advanced Hacks:
- Combine 3D-Printed Parts with Hand-Built Sections: Print only the complex bits—like a curved facade or a spiral staircase—then integrate with foam board or acrylic for the rest.
- Create Modular Pieces: If your design is large, print sections that fit together like puzzle pieces, saving on printer time and bed space.
Common Mistakes:
Ignoring bed adhesion—watch out for warping if your part has a big surface area.
Forgetting to adjust orientation—the orientation can impact supports and layer lines.
Pro Tip: Acetone vapors can smooth ABS prints, while a simple spray primer or filler putty does wonders for PLA. Sand lightly between primer coats for a truly polished finish.
3.0 Mixed Media & Texturing
Why It’s Awesome:
- Realism & Depth: Nothing beats adding a sense of texture—brick patterns, stone veneers, or wood grain—to make a model come alive.
- Visual Contrast: A variety of materials draws the eye and helps viewers understand different building surfaces (like metal vs. concrete).
Simple Steps to Get Started:
- Gather Texture Sheets: Brick or stone sheets are widely available in hobby shops. Alternatively, print your own textures on heavy paper.
- Use Paint Washes: A diluted paint wash seeps into engraved lines or texture nooks, giving a “weathered” look. Dark washes over light base coats, or vice versa, can bring out subtle detail.
- Apply Real Materials: Thin wood veneers can mimic hardwood floors or siding. Lightweight spackle or acrylic texture mediums can represent stucco or stone.
Neat Tricks:
- Dry Brushing: After your base coat dries, dip a brush lightly in a contrasting color, wipe most of it off, then gently skim over raised edges for highlights.
- Tape & Mask: Use masking tape to define crisp boundaries between different surfaces or colors.
Common Mistakes:
Overkill: Too many textures or clashing colors can overwhelm the design. Keep a cohesive palette.
Rushing: Paint needs time to dry fully, especially if you’re layering washes.
Pro Tip: If you’re going for a stone or concrete effect, try a light speckling with an old toothbrush. Dip in slightly darker paint and flick gently for a realistic grain.
4.0 LED Lighting
Why It’s Awesome:
- Atmosphere & Drama: Adding lights can transform a plain model into a small-scale world that feels lived in.
- Functional Demonstration: It’s easier to highlight interior courtyards, glass facades, or multi-level lighting strategies for green building concepts.
Step-by-Step:
- Plan Your Lighting Scheme: Decide if you want interior lights shining out windows, exterior floodlights, or a combination.
- Lay Out Wires Early: Before you glue floors or roofs, run wires through channels in the foam board or behind walls.
- Use Low-Voltage LEDs: They run cool and can be powered by a simple battery pack or small USB adapter.
- Hide Everything: Tuck batteries or power supplies under the base. Secure wires neatly to avoid tangles.
Advanced Tricks:
- Dimmer Switch: A tiny dial can let you control brightness, which is great for day-to-night transitions in presentations.
- Colored LEDs: Perfect for showing different functional areas or highlighting special features (like an aquarium or skylight).
Common Mistakes:
Cluttered Wires that are visible ruin the illusion. Plan wire routes like you’d plan building utility lines.
No Resistive Limits: If you skip the resistor for certain LED setups, you risk blowing out the bulbs.
Pro Tip: Label each wire or keep a simple diagram so you don’t spend hours figuring out what goes where if something stops working.
5.0 Interactive Elements
Why It’s Awesome:
- Engagement: Letting viewers open roofs or move walls draws them in, turning a static model into an experience.
- Clarity: Removable sections can showcase interior layouts that would otherwise be hidden.
How to Implement:
- Hinges & Magnets: Small hinges for rooftops or side panels, tiny magnets to hold them in place when closed.
- Modular Design: Plan your model in segments that can interlock. This approach is especially handy for big, multi-building sites.
- Sliding Walls: Use rails or grooves cut into foam board so walls can slide open like a door.
Sweet Tricks:
- Removable Furniture or Fixtures: If you’re detailing an interior, allow furniture blocks to be repositioned or removed.
- Printed Overlays: Layer a clear sheet with floor plans or occupant flow diagrams over your base. You can lift it off to view the raw structural model.
Common Mistakes:
Too Many Moving Parts: Go easy—too many hinges or magnets become fiddly and can break. Choose one or two interactive features that really matter.
Underestimating Tolerances: Magnets too weak or hinges not lined up = sloppy fit.
Pro Tip: For a large roof panel, use two small magnets on opposite corners—strong enough to hold, but easy to lift without damaging anything.
Takeaway
Adding these advanced techniques—laser cutting, 3D printing, texturing, lighting, and interactive components—will transform your architectural models into unforgettable statement pieces. Whether you’re presenting to a critical jury, an engaged client, or a classroom full of peers, these methods grab attention and showcase your design thinking in a compelling, hands-on way.
Remember: Start small, test your methods on scrap pieces, and build confidence before diving into complex final models. Each new skill you master not only impresses viewers but also gives you deeper insights into your own architectural ideas. So, get out there, experiment, and watch your models go from “nice effort” to “wow, that’s incredible!”
How to Impress Your Professor (or Boss) with Your Models
Presentation matters. Whether you’re in a classroom or at your firm, a polished model can set you apart. Here’s how:
1.0 Show Up with a Plan
Don’t wing it. Have a clear concept and use your model to illustrate the main design points.
Storytelling helps. Explain why you chose certain materials or shapes.
2.0 Mind the Details
Clean Assembly: No stray glue strings or jagged edges. Professors (and bosses) spot sloppiness instantly.
Proper Scale Figures: Tiny figurines or cars can bring life to your model and help viewers grasp proportions.
3.0 Highlight Innovation
If your design solves a specific problem (e.g., climate adaptation, user flow), make that the focal point.
A short typed label or note near the model can highlight your main concept.
4.0 Practice Your Pitch
Be ready to talk through your design logic. Confidence and clarity show that you’re not just “gluing bits together”—you understand the space you’ve created.
Expect questions. Professors love probing your reasoning. Have answers that reflect real thought, not guesswork.
Insider Secret: Add a small overhead or ambient LED, or even a tasteful spotlight. Good lighting transforms an average model into a cinematic experience.
Common Pitfalls: Do’s & Don’ts of Model Making
No matter how experienced you are, it’s easy to slip up. Avoid these classic mistakes:
The Model Making Mistakes That Ruin Good Designs
Do’s
Do measure twice, cut once.
Do keep your workspace organized—losing small parts is frustrating.
Do experiment with different materials on scrap pieces before using them on your final model.
Do label your building elements if that clarifies your design intention.
Do ask for feedback early—peers might catch a flaw before you proceed too far.
Don’ts
Don’t rush gluing. Give your adhesives time to bond properly.
Don’t overcomplicate. If a simpler structure conveys your concept, go with that.
Don’t ignore scale. A mismatch between building scale and site context looks sloppy.
Don’t skip the testing phase. Doing a rough mock-up can save you from major headaches later.
Don’t handle your model carelessly. One drop could mean hours of repair work.
Related: Why Your Architecture Model Looks Wrong (and How to Fix It)
When to Keep It Simple vs. Go All Out
Striking the Right Balance in Model Making
With so many cool materials and advanced tools at our disposal, it’s easy to think that “fancier” automatically means “better” when it comes to architectural models. But that’s not always the case—especially for students. Sometimes a simple foam board model can demonstrate your design approach far more effectively than a jewel-studded sculpture. Let’s explore when (and why) to keep it simple and when it makes sense to go big on the polish and detail.
1. Know Your Purpose: Concept vs. Final Presentation
- Concept/Study Models: Early on, you’re testing ideas, massing, or basic spatial relationships. A quick foam board or cardboard model is perfect here. It’s cheap, fast, and easy to edit.
- Refined/Final Models: For a final jury or client pitch, you might want to step up the quality—incorporate laser cutting, textures, or lighting. This can help communicate the depth of your design clearly.
Reality Check: Sometimes professors prefer to see a simple, no-frills model that demonstrates you truly grasp the project’s main concept. Overloading it with flashy materials can overshadow the core idea you’re trying to convey.
2. The “Don’t Overdo It” Principle
- Time & Cost: Fancy materials (acrylic sheets, expensive veneers) eat up your budget quickly. If you’re a student, spending a fortune doesn’t guarantee a better grade.
- Craftsmanship vs. Glitz: Your professor wants to see good craftsmanship, not just pricey plastic or metal. A meticulously built foam board model can be far more impressive than a sloppy, jewel-encrusted sculpture.
- Clarity Above All: A “perfect” model that obscures the design logic can be counterproductive. Your final product should highlight the concept, not bury it under glitz.
3. When Going Fancy Can Backfire: A True-ish Tale
Picture This:
- A student named Marco decided to “wow” everyone at the final critique by building an elaborate model with premium hardwood, custom 3D-printed metallic facades, and LED lights. It looked like a prop from a sci-fi movie—stunning at first glance.
- On critique day, Marco left behind all his older concept models (the ones that showed his iterative process). He thought the final piece would speak for itself.
- Unfortunately, his professors were not impressed. They said it was unclear how his design evolved. They wanted to see the why—the sketches, the massing studies, the early prototypes. The fancy final model was eye-catching, but it didn’t reveal the design thinking behind it.
- In the end, Marco’s grade suffered. His peers who showed simple foam or cardboard models alongside progress models got much better feedback, even if their final build looked less like a million-dollar masterpiece.
Moral of the Story:
Architecture is not about who can spend more on materials; it’s about conveying your design process, solutions, and creativity effectively. If you skip explaining the journey, your final piece might just be an expensive prop with no narrative.
4. Deciding Which Approach Suits You
Keep It Simple If…
- You’re at an early concept stage or refining the massing and general layout.
- Time is tight, and you need to focus more on the design itself than advanced craftsmanship.
- Budget constraints: If you can’t realistically afford advanced materials or tools, a neat and clean foam board model can still earn top marks.
Go Fancy If…
- It’s a final presentation or competition where visual impact is critical.
- You have the time (and skill) to craft it properly—no half-baked attempts.
- Your professor or client specifically requests a highly detailed, realistic model.
5. Tips to Impress Without Overdoing It
- Show Your Iterations: Even if your final model is polished, bring your older concept sketches or rough prototypes. This proves you’ve done real problem-solving.
- Focus on Key Features: Instead of bedazzling the entire model, highlight one or two aspects—like a unique façade or innovative roof structure.
- Mind Your Budget & Time: A well-cut foam board model with crisp edges can outshine a poorly executed metal-and-glass contraption.
- Explain Your Reasoning: Use small labels or a short typed note to clarify critical design choices. Professors appreciate clear communication as much as they do craftsmanship.
6. Do’s & Don’ts for Balanced Model Making
Do
Do keep your design logic front and center—tell the story of why your design is special.
Do invest in good cutting tools if you can only afford one “fancy” element. Sharp, clean cuts impress.
Do ask for professor feedback early: “Should I go full detail or keep it conceptual?”
Don’t
Don’t skip showing your iterative process. Missing progress work can sink your grade faster than you might think.
Don’t assume that expensive = impressive. Poor craftsmanship in high-end materials looks worse than crisp craftsmanship in cheap materials.
Don’t blow your entire project budget on one flashy piece of the model if it sacrifices everything else.
Let the Design Shine
Remember: The point of an architectural model—whether simple foam or high-tech 3D printed—is to express your design thinking. In many academic environments, professors value concept clarity, process demonstration, and consistent craftsmanship far more than a glitzy final product. By understanding when to keep it simple and when to push the boundaries, you’ll strike a balance that highlights your creative brilliance without overshadowing the entire reason you became a designer in the first place.
Early in my career, I once built an extravagant model using glossy boards, overdid it with fancy acrylic for windows, and realized the scale was off by a few millimeters. That forced me to recut almost everything. Ever since, I rely on a consistent set of measuring and cutting tools to keep me honest.
Related:
- Understanding Design Thinking in Architecture
- Architectural Presentation and Rendering
- Creating Beautiful and Functional Spaces: Expert Tips for All Levels
Must-Know Tips for Students
- Stay Organized: Keep your materials labeled in separate bins—foam board scraps in one, balsa wood strips in another. Chaos kills productivity.
- Manage Time Wisely: If you have a big critique or jury coming up, don’t leave building the model until the night before. Start early so you can refine.
- Invest in Quality Tools: A decent cutting mat and sharp blades save you from ragged edges and frustration.
- Learn from Mistakes: Every time you cut something crooked or mis-measure, reflect on what went wrong. Improvement is constant.
- Document Everything: Take progress photos. Professors appreciate seeing how your model evolves—it also helps you reflect on your design process.
20 Fun & Practical Architecture Model Ideas
- Green-Roofed Tiny Home – Explore eco-friendly design in a small footprint.
- Futuristic High-Rise – Integrate curved, parametric forms.
- Floating City Pod – Perfect for tackling rising sea levels.
- Historic Church or Temple Renovation – Show how you’d modernize it with sensitivity.
- Community Food Market – Combine landscaping, stalls, and gathering spaces.
- Mars Colony Habitat – Go interplanetary with resource-saving methods.
- Vertical Farm Tower – Stack hydroponic gardens in an urban setting.
- Minimalist Beach House – Test your detailing with large glass panels.
- Mixed-Use Urban Block – Combine retail, offices, and apartments.
- Eco-Resort in a Rainforest – Add a lot of greenery and water features.
- Compact Courtyard Home – Play with natural ventilation and inner courtyards.
- Urban Transportation Hub – Integrate bus, train, or tram lines seamlessly.
- Public Library & Cultural Center – Combine quiet reading spaces with event halls.
- Art Gallery Pavilion – Let your creativity flow with bold shapes.
- Luxury Hillside Villa – Tackle slope constraints.
- Tech Startup Campus – Emphasize flexible workspaces and courtyards.
- Port Redevelopment – Convert old docks into modern mixed-use developments.
- Desert Dwelling – Focus on shading, evaporative cooling, and local materials.
- Tiny Cabin for Remote Locations – Stress test your model with minimal resources.
- Adaptive Reuse of an Old Factory – Incorporate existing structural elements into your new design.
FAQ
Materials & Techniques
-
What’s the best material for beginners?
- Foam board. It’s forgiving, cheap, and easy to cut.
-
Can I use cardboard for a final presentation model?
- Yes, if finished neatly with paint or other surface treatments. Cardboard can look impressive if well-crafted.
-
How do I create curved forms?
- Score foam board or bend thin plywood; for advanced shapes, consider 3D printing or layered cardboard cutouts.
Scaling & Proportions
-
How do I pick the right scale?
- Consider how much detail is necessary. For entire building layouts, 1:100 or 1:200 is common. For interior details, 1:50 might be best.
-
Is it okay to mix scales in one model?
- Generally, no. It can confuse viewers. Exceptions exist if you’re highlighting a specific area in more detail (like a breakaway model).
Tools & Technologies
-
Is a laser cutter worth it?
- Absolutely, if you have consistent use for it. Laser cutters save time and improve precision.
-
Is 3D printing expensive?
- Costs are coming down. You can also outsource to online 3D printing services if you don’t own a printer.
-
What software is best for designing models?
- Many prefer SketchUp (easy to learn), Rhino (more advanced shapes), or Revit (industry standard for BIM). Choose based on project needs.
Presentation & Grading
-
How do I make my model stand out in a critique?
- Clean edges, good scale representation, and a strong concept. A simple LED spotlight can also give your model that extra “wow” factor.
-
What if my professor doesn’t like a certain style?
- Focus on clarity of concept and craft. Even if they disagree with the aesthetic, they’ll respect a well-executed model.
-
How big should my presentation board be next to the model?
- Enough to show key drawings or renders. Don’t overshadow the model or crowd the table.
Career & Professional Questions
-
How can I become a professional model maker?
- Develop craftsmanship, master digital fabrication, and build a strong portfolio. Many start by freelancing or joining specialist workshops.
-
Is model making still relevant in architecture firms?
- Yes! Physical models provide a tangible sense of space, especially in early design stages or final client presentations.
-
Do architects do all the model making themselves?
- Not always. Large firms often have dedicated model-making teams. Smaller offices might outsource specialized tasks (like 3D printing).
Best-Selling Books on Architectural Model Making & Design
-
“Architectural Modelmaking” by Nick Dunn
- A comprehensive guide for both beginners and pros, covering materials, techniques, and creative approaches.
-
“Manual of Section” by Paul Lewis, Marc Tsurumaki, and David J. Lewis
- While not strictly about model making, it’s fantastic for understanding spatial relationships and how to represent them.
-
“Architectural Graphics” by Francis D.K. Ching
- Great for sharpening your drawing and visual communication skills, which translate well into model making.
-
“Model-making: Materials and Methods” by David Neat
- A practical book focusing on methodical approaches, from concept to final presentation, including step-by-step tutorials.
-
“Architecture: Form, Space, and Order” by Francis D.K. Ching (Best Sellers in Architecture)
- Not directly about model making, but a must-read for any architect. Understanding form and space is the core of building better models.
Best Tools for Model Making
(These suggestions are based on consistent high ratings and popularity among architecture students and professionals.)
-
- ✔️ Ultra-sharp, ergonomic grip, includes various blade types. Perfect for foam board and balsa wood.
-
Alvin Self-Healing Cutting Mat (24” x 36”)
- ✔️ Large surface area, grid lines for measuring, self-heals after cuts to stay smooth.
-
Logan Graphic Foam Board Cutter
- ✔️ Helps achieve perfectly straight cuts at 90° or 45°, a lifesaver for frequent foam board users.
-
- ✔️ Handy for sanding, cutting, and drilling. Versatile for advanced detailing or working with plastic and wood.
-
- ✔️ Reliable brand, consistent thickness, easy to cut. Ideal for multiple projects or group studios.
-
- ✔️ Great for plastic parts. The thin applicator brush allows precise bonding of small details.
-
- ✔️ Fun tool for quick prototypes, bridging small gaps, or “drawing” small details in 3D.
Final Thoughts
Architectural model making is a blend of art, engineering, and storytelling. In our fast-paced, digitally driven age, physical models still hold a unique power to captivate, clarify, and inspire. Whether you’re an architecture student hoping to wow your professor, a professional seeking to land a big client, or a curious hobbyist wanting to explore design, mastering these techniques is a lifelong journey.
- Remember: Start simple and focus on craftsmanship.
- Learn constantly: Each model reveals new ways to solve problems and innovate.
- Enjoy the process: Model making is fun, creative, and deeply rewarding.
Here’s to building better, thinking smarter, and creating spaces worth experiencing in 2025 and beyond.
If you found this guide helpful, share it with a friend or classmate. Now, grab your cutting mat and get to work—the world is waiting to see your next masterpiece!
Related
Design and Presentation
- Architectural Presentation and Rendering: A practical guide to sharpening your visual communication.
- Architectural Renderings Enhanced by AI: How machine learning is reshaping how we show ideas.
- Rendering for Architecture Students: Tools, tips, and layout advice tailored for school submissions.
- Understanding Design Thinking in Architecture: Applying real logic to visual and spatial decisions.
Study & Career
- Study Architecture Abroad Opportunities Real programs that mix learning and cultural exposure.
- 10 Best Countries to Study Architecture Abroad A breakdown of the top destinations for architecture education.
- Why Choose to Be an Architect: Hard truths and inspiring reasons behind choosing this path.
- Top 10 Reasons to Study ArchitectureWhy now is still a smart time to get into design.
Architecture Humor & Culture
- The Hilarious Chronicles of Architects: Inside jokes and survival stories from the design trenches.
- What is Fun About Architecture? A reminder that this career isn’t all deadlines and drawing sets.
Form, Function & Space
- Creating Beautiful and Functional Spaces: Expert Tips for All Levels: Real strategies for balancing aesthetics and use.
- Form Meets Function: Principles for Great Architectural Design: How form supports use—and when it doesn’t.
- Form Follows Function in Architecture and Design: Where the famous phrase still applies in modern work.
- Architectural Form Examples: How Shape Defines Function: Physical cases that show why form decisions matter.
Proportion, Interior, and Style
- Scale and Proportion in Architectural Design: Balancing Form and Function: Why size, scale, and harmony make or break your design.
- Interior Design Functional Elegance: Practical Tips for Stunning Interiors: Real techniques for layout, material choice, and feeling.
Architects & Theories
- Clustered Form Architecture: Function, Space, and Design: Planning concepts where grouping buildings drives user flow.
- Frank Lloyd Wright: Merging Form and Function in Architecture: His core ideas, visual logic, and long-lasting influence.
Resources
- American Institute of Architects (AIA):
Offers guidelines, best practices, and continuing education courses. - Royal Institute of British Architects (RIBA):
Provides architectural standards, resources, and competitions. - National Council of Architectural Registration Boards (NCARB):
For those aiming at licensure in the U.S., great resource on professional practice.