Make Your Own Windows
2024 Easy How-To: Complete Free DIY Guide to Making, Designing, and Building Your Own Windows
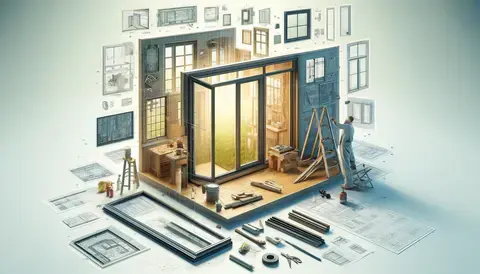
Welcome to your comprehensive guide on how to make and design your own windows, tailored for 2024. Whether you're updating your home with contemporary design features or interested in the architectural history behind window design, this guide will walk you through every step of the process. Learn to combine modern aesthetics with practical functionality in your window projects.
This section deals with the making, building, and installing of your own custom windows. For guidance on designing your own windows, refer to this guide: Design Your Own Windows
A Comprehensive Windows Making, Building, & Installing Guide for DIY Enthusiasts
Feel free to skip the historical intro and head straight to the DIY guide, but it's wise to grasp some basics about the history and features of what you're planning to DIY. Understanding these aspects will help you make better choices and increase your appreciation for the project. Plus, discussing your project with neighbors will demonstrate your intelligence and enrich your engagement with it.
Creating a comprehensive guide for DIY enthusiasts interested in designing and making their own windows requires a structured approach, blending historical insights with practical advice. This outline proposes a format for such a guide, aimed at providing both context and detailed instruction.
Section 1: The Evolution of Window Design
The History of Windows in Architecture
- Early window forms and functions
- The impact of technological advancements on window design
- The transition from traditional to modern windows
Architectural Significance of Windows
- The role of windows in architectural styles through the ages
- Key figures and movements in window design
Modern Windows in Contemporary Homes
- Current trends in window design for 2024
- Incorporating energy efficiency and sustainability
Section 2: Planning Your Window Design Project
In this section:
Understanding Window Components
- Frame, glass, and hardware: options and considerations
- The importance of choosing the right materials
Window Components
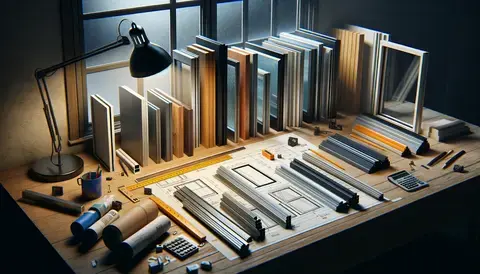
When you're setting out to design and make your own windows, it's crucial to understand the different parts that come together to form a window. Each component plays a specific role, and choosing the right materials and design can make a big difference in how your window looks, functions, and lasts over time.
Frame, Glass, and Hardware: Options and Considerations
Frame: The frame is like the skeleton of your window; it holds everything together. Frames can be made from various materials, each with its own benefits.
- Wood is traditional, offering natural beauty and excellent insulation but requires more maintenance to protect against rot and weather damage.
- Vinyl is affordable, energy-efficient, and low maintenance but may not be as strong or customizable as other materials.
- Aluminum is durable and resists rust and corrosion, making it great for harsh weather conditions, but it's not the best insulator.
- Fiberglass combines the best features of wood and vinyl, being durable, low maintenance, and energy-efficient, but it can be more expensive.
Glass: The glass you choose affects not just how your window looks but also how it insulates your home.
- Single-pane glass is basic and affordable but offers little in terms of insulation.
- Double-pane glass has two layers of glass with air or gas in between, providing better insulation and noise reduction.
- Low-E glass has a coating that reflects heat while letting light in, making it energy efficient without darkening the room.
Hardware: The hardware includes the handles, locks, and hinges. While these might seem like small details, they affect the window's security and ease of use. Look for hardware that matches the style of your window and your home but doesn't compromise on functionality.
The Importance of Choosing the Right Materials
Selecting the right materials for your window project is about balancing aesthetics, performance, and budget. For example, if you live in a coastal area, choosing corrosion-resistant materials like aluminum or fiberglass can save you a lot of maintenance trouble down the line. If energy efficiency is a priority, investing in double-pane or Low-E glass can reduce your heating and cooling costs.
Remember, the best material is one that meets your specific needs, fits your budget, and complements your home's design. Taking the time to research and choose carefully will pay off in windows that not only look great but also perform well over time.
Designing Your Window
- Assessing the aesthetic and functional requirements
- Choosing a style: from casement to picture windows and beyond
Designing Your Own Window Guide
Designing your own window is an opportunity to blend aesthetics with functionality, ensuring your creation not only looks good but serves its purpose effectively. Here’s how you can start designing your window, considering both its look and how it will be used.
Assessing the Aesthetic and Functional Requirements
Aesthetics: Think about how your window will complement your home's existing style or how it could enhance or transform a space. Consider the architectural style of your home—whether it's modern, traditional, or somewhere in between—and choose window designs that fit within that framework. The window's shape, size, and proportions should align with your home’s overall look and feel.
Functionality: Functionality is key to ensuring your window meets your needs. Ask yourself what the primary purpose of your window will be. Is it to provide more natural light? Enhance airflow? Offer a scenic view? Your answer will guide the type of window you design. Also, consider the room's orientation (which direction it faces) as it affects light exposure and temperature control.
Choosing a Style: From Casement to Picture Windows and Beyond
Casement Windows: Casement windows hinge at the side and swing outwards. They offer excellent ventilation and are easy to open and close, making them a versatile choice for many rooms.
Picture Windows: Picture windows are large, fixed panes of glass designed to offer unobstructed views of the outside. They don’t open, making them more energy-efficient, but they don’t provide ventilation.
Sliding Windows: Sliding windows open horizontally along a track, making them ideal for spaces where you don't have the room to swing a window open, like kitchens or tight hallways.
Double-Hung Windows: Double-hung windows can open from the top or bottom, offering versatile ventilation options. They’re a classic choice that fits well with traditional home designs.
Bay and Bow Windows: These windows project outward from the home, creating a curved appearance. They add extra space to the room and allow in more light from different angles.
Custom Shapes: Don’t feel limited to traditional shapes. Modern manufacturing techniques mean you can design windows in nearly any shape—circular, triangular, or even abstract forms. This is your chance to add a unique touch to your home.
Making Your Choice
When choosing a style, weigh both the aesthetic appeal and how the window will function in your daily life. For example, if you’re aiming for a room with a view, a picture window might be the right choice, but if ventilation is a priority, consider casement or double-hung windows. It’s also worth thinking about maintenance and ease of cleaning, especially for windows in hard-to-reach places.
Remember, the best window design for you is one that meets your aesthetic desires while fulfilling your practical needs. Don’t hesitate to mix and match styles across your home to suit different rooms’ requirements.
Tools and Materials Needed
- A comprehensive checklist for DIY window making
Tools and Materials Needed to Make and Design Your Own Windows
A successful and satisfying DIY window making project requires preparation. Below is a comprehensive checklist of tools and materials you'll need to ensure you have everything at hand before you start. This list combines the essentials for constructing a window frame, installing the glass, and ensuring a professional finish.
Tools Checklist
- Measuring Tape: Essential for accurate measurements of both the window opening and the materials you'll be cutting.
- Carpenter's Square: To ensure all angles are perfectly square for a professional fit.
- Saw: A circular saw for straight cuts and a jigsaw for any curved designs.
- Drill with Bits: For pre-drilling holes for screws or bolts.
- Screwdriver or Power Drill with Screw Attachment: For fastening components together.
- Level: To make sure the window frame is perfectly horizontal and vertical.
- Caulking Gun: For applying sealant around the window frame for weatherproofing.
- Utility Knife: For cutting trim or opening packages of materials.
- Staple Gun: Useful for attaching any building paper or flashing.
- Hammer: For any nails or for gently tapping components into place.
- Glass Cutter: If you're cutting your own glass panes.
- Paintbrush or Roller: For applying any finishes to the frame.
- Safety Glasses and Gloves: Always prioritize safety when working with tools and materials.
Materials Checklist
- Window Frame Material: Wood, vinyl, aluminum, or fiberglass, depending on your preference and design.
- Glass Panes: Choose based on the type of window, such as single, double, or triple-glazed glass, and consider special finishes like Low-E coating.
- Screws and Nails: For assembling the frame and attaching it to the building structure.
- Sealant: High-quality exterior sealant for weatherproofing the window.
- Weatherstripping: To seal the opening parts of the window for energy efficiency.
- Paint or Stain: If you're using wood or another material that requires finishing.
- Flashing or Building Paper: For waterproofing around the window frame.
- Trim or Molding: For finishing the interior and exterior edges of the window installation.
- Insulation: Spray foam or insulation strips for sealing gaps between the frame and the wall.
Preparing for Your Project
Before you start, organize your workspace and lay out your tools and materials for easy access. Check each tool to ensure it's in good working condition, and familiarize yourself with the safety features and proper operation of each one. Read through all instructions for materials, especially if you're working with substances like sealant or insulation, to understand proper application methods and safety precautions.
By carefully planning and preparing, you ensure a smoother process and a successful outcome for your DIY window-making project. Remember, the quality of your tools and materials can significantly impact the final result, so choose wisely and don't hesitate to invest in good-quality items that will make your job easier and your new windows last longer.
Section 3: The Making Process
Preparing Your Workspace
Let's start with the first step; lanning and material selection stage.
- Safety measures and workspace setup
Preparing Your Workspace for Your DIY Window Project
A DIY window project requires not just the right tools and materials, but also a well-organized and safe workspace. Here’s how to get your workspace ready, ensuring you have a conducive environment for building your windows.
Safety Measures
Safety should always be your top priority when undertaking any DIY project. Here are some key safety measures to follow:
- Wear Protective Gear: Always wear safety glasses to protect your eyes from dust and debris. Gloves can protect your hands from cuts and splinters, especially when handling glass and rough materials.
- Ventilation: If you’re working with fumes from paints, stains, or sealants, ensure your workspace is well-ventilated. Open windows or use a fan to circulate air.
- First Aid Kit: Keep a first aid kit nearby in case of minor injuries.
- Fire Safety: Have a fire extinguisher accessible, especially if you’re working with any flammable materials or tools that generate sparks.
- Electrical Safety: Inspect all power tools and cords for damage before use. Avoid overloading outlets with too many tools or devices.
Workspace Setup
Creating an efficient workspace not only helps in making the process smoother but also contributes to your safety. Here’s how to set it up:
- Clear Space: Choose a spacious area that gives you ample room to measure, cut, and assemble your windows without constraints. Ensure the floor is clean and clear of any tripping hazards.
- Stable Work Surface: Use a sturdy workbench or table that can support the weight of your materials and tools. It should be at a comfortable height to prevent back strain.
- Organize Tools and Materials: Arrange your tools and materials neatly so that everything you need is within easy reach. Use toolboxes and containers to keep small items organized.
- Lighting: Good lighting is crucial, especially when working on detailed tasks like measuring or cutting. Use additional task lighting if your general workspace lighting isn’t sufficient.
- Safety Zones: Designate specific areas for different tasks, especially for cutting and assembling. Keep power tools away from flammable materials and ensure that your assembly area is free from clutter.
- Dust Collection: If possible, set up a dust collection system or use a vacuum cleaner to manage sawdust and debris, keeping the air and your workspace clean.
Taking the time to prepare your workspace and implement safety measures can significantly impact the success of your DIY window project. A well-organized, safe environment not only enhances productivity but also ensures that you can enjoy the process from start to finish without accidents or injuries.
Step-by-Step Windows Construction Guide
- Measurements and cutting
- Assembling the frame
- Installing the glass
- Sealing and finishing touches
Practical Guide: Step-by-Step Windows Construction Guide
Creating your own windows is a rewarding project that can enhance the beauty and efficiency of your home. Follow this step-by-step guide to construct your windows with precision and care.
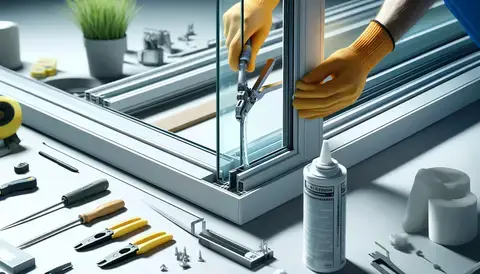
The following images have been created to visually guide you through each step of the window construction process. Starting from the precise measurements and cutting, to the careful assembly of the frame, installing the glass with attention to detail, and finally, applying sealant for a weatherproof finish. These visuals are designed to complement the detailed instructions provided, making it easier for you to follow along and successfully complete your DIY window project. With these images and guidelines, you're well-equipped to tackle each phase with confidence, ensuring a professional-quality outcome for your custom windows.
We will guide you through the general process of making your own windows with high-quality 3D render images to illustrate key steps. Let's break down the process into several stages, with a 3D render picture for each major step:
Design Planning and Material Selection: This involves choosing the type and size of the window, materials for the frame (wood, vinyl, aluminum, fiberglass), and the glass (single, double, or triple-pane).
Measurements and Cutting
Take Accurate Measurements: Measure the window opening twice to ensure accuracy. Remember the carpenter's adage: "Measure twice, cut once." Consider any necessary clearance for installation and the expansion of materials.
Mark Your Materials: Use a pencil and a straightedge or carpenter's square to mark the cutting lines on your frame material, based on your measurements.
Cut Your Materials: Using a saw appropriate for your material (circular saw for straight cuts and jigsaw for any curves), carefully cut along your marked lines. Always wear safety glasses and follow safety instructions for your tools.
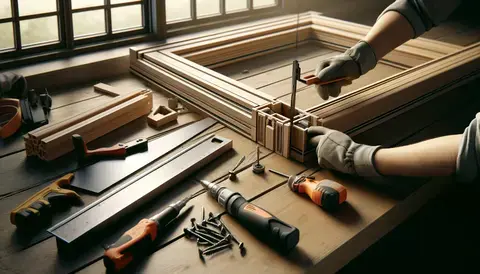
Assembling the Frame

Lay Out Frame Pieces: Arrange the cut pieces on a flat surface to form the window frame, ensuring all corners are square using a carpenter's square.
Secure the Corners: Join the corners with screws, nails, or corner brackets, depending on the frame material and the design. Pre-drill holes to prevent splitting if you're using wood.
Check for Square and Level: Use a level to check the frame is perfectly horizontal and vertical. Minor adjustments can be made before the frame is fully secured.
Installing the Glass
Apply Glazing Compound: If you're using a wooden frame, apply a thin layer of glazing compound along the ledge where the glass will sit. For metal or vinyl frames, ensure the rubber seal or gasket is in place.
Set the Glass in Place: Carefully place the glass pane into the frame on top of the compound or within the gasket, applying even pressure around the edges to set it in place without cracking.
Secure the Glass: Use glazier's points for wooden frames or the manufacturer-provided clips for metal or vinyl frames to secure the glass. Apply more glazing compound around the edge of the glass and smooth it with a putty knife for a neat finish.
Sealing and Finishing Touches
Seal the Frame: Use silicone caulk around the outside of the frame where it will meet the house to prevent water ingress. Smooth the caulk with a wet finger or caulk tool.
Install the Window: Place the finished window into the opening, using shims to ensure it's level and plumb. Secure the window to the house framing with screws or nails at the pre-drilled points.
Apply Final Paint or Stain: Once the window is installed and the caulk is dry, apply paint or stain to match your home's exterior and interior decor. This not only adds to the aesthetic but also provides an additional layer of protection against the elements.
Weatherstripping: Add weatherstripping around the movable parts of the window to improve energy efficiency and comfort.
Building a window requires patience, precision, and a bit of elbow grease, but the result is a custom window that fits your needs and complements your home. By following these steps and taking your time to do it right, you'll create a window that not only looks great but also functions perfectly.
Installation Tips
- How to properly install your new window
- Ensuring weatherproofing and insulation
Make Your Own Windows: Installation Tips

Installing your new window correctly is crucial for both its performance and longevity. Here’s how to ensure a proper installation, along with tips for weatherproofing and insulation.
How to Properly Install Your New Window
Prepare the Opening: Ensure the window opening is clean, dry, and free of debris. If there are any old nails or materials from a previous installation, remove them. Check the opening for squareness and adjust if necessary.
Dry Fit the Window: Before applying any sealant, place the window in the opening to check the fit. There should be a small gap around the edges for expansion and for applying insulation later.
Apply Sealant: Run a bead of high-quality exterior sealant along the sill (bottom part) of the window opening. This will create a watertight seal once the window is installed.
Install the Window: Carefully place the window into the opening. Press it firmly against the sealant on the sill and check that it's level and plumb. Use shims to adjust the position of the window as necessary.
Secure the Window: Once the window is correctly positioned, secure it to the frame using the screws provided. These should go into the sides of the window frame at the points indicated by the manufacturer. Don’t overtighten, as this can warp the frame.
Check Operation: Before moving on to sealing, open and close the window to ensure it operates smoothly. Make any necessary adjustments.
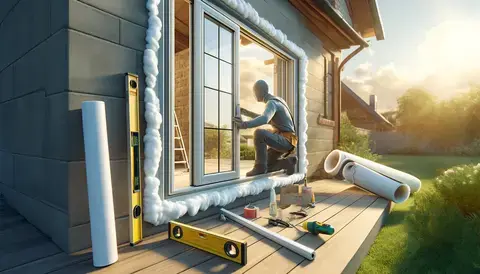
Ensuring Weatherproofing and Insulation
Insulate Around the Window: Fill the gap between the window frame and the wall with minimally expanding foam insulation designed for windows and doors. This will prevent drafts and increase energy efficiency.
Apply Exterior Sealant: Seal the exterior of the window where the frame meets the wall. Use a high-quality exterior caulk that matches the color of your window or wall. Smooth the sealant with a wet finger or tool to ensure a clean, professional finish.
Interior Sealing: On the inside, you can apply a bead of paintable caulk where the window frame meets the interior wall for a neat finish. Once the caulk is dry, you can paint over it to match your interior.
Weatherstripping: If your window has operable parts, check that the weatherstripping provided by the manufacturer is in place and properly seals the window when closed.
Final Check: Do a final inspection of the window from both inside and outside. Look for any gaps in the sealant or insulation that might need touching up. Ensure there’s no way for water or drafts to get through.
Proper installation is key to maximizing the performance and lifespan of your window. By following these steps and ensuring your window is well-sealed and insulated, you can enjoy the benefits of your new window without worry.
Section 4: Customization and Advanced Techniques
Customizing Your Design
- Adding unique touches: stained glass, frosting, and tinting
- Smart windows: integrating technology
Section 4: Customization and Advanced Techniques
Enhancing your DIY windows with custom features not only adds a personal touch but also can improve functionality and efficiency. Explore how to incorporate unique design elements and integrate smart technology into your window projects.
Customizing Your Design
Adding Unique Touches: Stained Glass, Frosting, and Tinting
Stained Glass: Adding stained glass panels is a fantastic way to introduce color and art into your windows. You can create custom designs that reflect personal interests, themes, or complement the architectural style of your home. Stained glass can be used in small accent panels or as the main feature of a window.
Frosting: Frosted glass is perfect for adding privacy to bathrooms or street-facing windows without sacrificing natural light. You can achieve frosting through various methods, including adhesive films, spray products, or by ordering glass pre-frosted. Consider patterns or designs in the frosting for an extra decorative touch.
Tinting: Window tinting can reduce glare and heat from the sun, making rooms more comfortable and reducing cooling costs. Tints range from nearly invisible to darker shades, allowing you to customize the level of privacy and solar control. Tinting can be applied as a film, making it a project suitable for DIY enthusiasts.
Smart Windows: Integrating Technology
Electrochromic Glass: This smart glass changes opacity with the flick of a switch, remote control, or even a smartphone app, allowing you to adjust for privacy or light preferences throughout the day. While the installation of electrochromic glass might require professional assistance, it's an innovative feature for custom window projects.
Thermochromic Glass: Thermochromic windows automatically adjust their tint based on the temperature, becoming more opaque as it gets hotter. This helps in controlling the internal temperature and can contribute significantly to energy efficiency.
Integrated Blinds: Between-the-glass blinds or shades offer a sleek, maintenance-free way to control light and privacy. These are especially useful in areas where traditional window treatments might be cumbersome or where allergen accumulation is a concern.
Advanced Installation Considerations
When customizing your windows, consider the following:
Structural Integrity: Customizations should not compromise the window's structure. Ensure that any additional weight or modifications are supported adequately.
Warranty and Compliance: Check that your customizations comply with local building codes and don’t void any warranties, especially when integrating smart technology.
Professional Consultation: For advanced customizations, especially those involving smart technology, consulting with a professional can ensure that the installation is safe, efficient, and meets your expectations.
Customizing your DIY windows allows you to tailor your living space to your exact needs and preferences, blending functionality with personal style. Whether through artistic touches or the incorporation of technology, these enhancements can transform windows from mere architectural elements into focal points of your home.
Advanced Design Features
- Exploring innovative window shapes and configurations
- Incorporating windows into unconventional spaces
Make Your Own Windows: Advanced Design Features
In the realm of DIY window projects, venturing into advanced design features can significantly elevate the aesthetic and functional aspects of your home. This section explores the potential of innovative window shapes and configurations, as well as strategies for integrating windows into unconventional spaces.
Exploring Innovative Window Shapes and Configurations
Geometric Windows: Moving beyond traditional rectangular or square windows, geometric windows — think circles, hexagons, or triangles — can add architectural interest and modern flair to any space. They work particularly well in minimalist or contemporary homes, serving as both a source of natural light and a striking design element.
Corner Windows: Corner windows wrap around the corner of a room, offering panoramic views and maximizing light entry. This design feature can make rooms feel more spacious and connected to the outdoor environment. Planning is crucial to ensure structural support and proper insulation.
Floor-to-Ceiling Windows: For a dramatic effect, floor-to-ceiling windows provide unobstructed views and flood interiors with natural light. They can make indoor spaces feel larger and more open. However, consider energy efficiency and privacy needs, possibly incorporating tinting or smart glass for greater control.
Skylights and Roof Windows: Utilizing the ceiling for window installation can brighten areas where side-wall windows aren't feasible. Skylights and roof windows are perfect for bathrooms, hallways, or attics, adding daylight and improving ventilation. Some designs also open to allow air circulation.
Incorporating Windows into Unconventional Spaces
Under-Stair Windows: The space beneath staircases is often underutilized. Small, strategically placed windows here can illuminate dark corners and add character to your home.
Transom Windows: Positioned above doorways or other windows, transom windows enhance light entry without compromising privacy or wall space for furniture. They're ideal for bathrooms, bedrooms, or along hallways.
Internal Windows: Incorporating windows between rooms can distribute natural light throughout your home, especially in interior rooms that lack direct exterior walls. Frosted or textured glass can maintain privacy while allowing light to pass through.
Window Seats: Including a window seat beneath a large window not only creates a cozy reading nook but also provides additional storage. This feature adds functionality to your window design, making it a comfortable spot to enjoy the view.
Key Considerations for Advanced Designs
Structural Integrity: Consult a structural engineer when planning significant alterations, especially for large openings or unconventional placements, to ensure your home's safety and stability.
Energy Efficiency: Innovative designs should still prioritize energy efficiency. Look for high-performance glass options and ensure proper sealing and insulation around the window frames.
Local Regulations: Check local building codes and regulations to ensure your window designs comply, particularly for structural changes or modifications to the facade.
Applying advanced design features in your window projects can transform the way you interact with your living spaces, bringing light, views, and architectural interest into every corner of your home. While these projects might require more planning and effort, the result is a customized space that truly reflects your unique style and meets your functional needs.
Section 5: Maintenance and Upkeep
Routine Maintenance Tips
- Cleaning and care for longevity
- Seasonal checks and insulation upgrades
Make Your Own Windows Maintenance and Upkeep
Keeping your windows in good shape is key to making sure they last a long time and work well. Here, we'll go over the main steps for taking care of your windows, checking them regularly, improving their insulation, and solving common problems.
Routine Maintenance Tips
Cleaning and Care for Longevity
Regular Cleaning: Use soap and water or window cleaner to clean the glass. Don't use rough materials that could scratch. For the frame, use a soft cloth and cleaner suited to the material (wood, vinyl, aluminum, or fiberglass).
Lubricate Moving Parts: Once a year, put silicone-based lubricant on hinges, locks, and tracks to keep them working smoothly.
Inspect Sealant and Weatherstripping: Look for any damage or wear in the sealant and weatherstripping. Fix or replace them to keep your window insulated and waterproof.
Seasonal Checks and Insulation Upgrades
Fall and Spring Checks: Before it gets too hot or cold, check your windows for damage or wear. Make sure the drainage holes are not blocked.
Insulation Upgrades: If you have single-glazed windows, think about switching to double or triple glazing. You can also add or replace weatherstripping to better insulate your windows.
Troubleshooting Common Issues
- Addressing leaks, drafts, and operational problems
Troubleshooting Common Issues
Addressing Leaks, Drafts, and Operational Problems
Leaks and Drafts: Find leaks or drafts by using a candle or incense stick. Move it along the window edges. If the smoke moves or the flame flickers, you have a draft. Use caulk or new weatherstripping to seal the gaps.
Sticking Windows: If a window is hard to open or close, clean and lubricate the tracks or hinges. If paint is sealing the window shut, gently use a putty knife to open it.
Condensation Between Panes: If you see condensation between glass panes, the seal might have failed. You might need a professional to fix or replace the window to keep it insulating well.
Cracked or Broken Glass: You can temporarily fix small cracks with clear nail polish or glass adhesive. If the pane is broken or badly cracked, replace it to stay safe and keep the window insulating properly.
Looking after your windows by doing regular maintenance, checking them each season, and fixing problems right away helps them last longer and work better. Keeping up with maintenance not only keeps your windows looking good but also makes your home more energy-efficient and comfortable.
Conclusion
Throughout this guide, we've covered everything from the basics of window components to the detailed steps of constructing, installing, and maintaining your own windows. The journey through designing custom windows has shown us that with the right tools, materials, and a bit of creativity, anyone can enhance their home with windows that not only look great but also perform well.
Key Takeaways:
- Understanding Is Key: Knowing the parts of a window and how they work together allows for better design and construction decisions.
- Design with Purpose: Customizing your window design to match your home’s style and meet specific needs can significantly impact both aesthetics and functionality.
- Quality Matters: Choosing the right materials and tools is crucial for creating windows that last and perform efficiently.
- Maintenance Makes a Difference: Regular care and timely troubleshooting can extend the life of your windows and keep them looking and working like new.
We encourage DIY enthusiasts to dive into the world of window design and construction. The process of creating your own windows not only brings a personal touch to your home but also offers the satisfaction of enhancing its comfort and appearance with your own hands. Whether you’re aiming for energy efficiency, unique designs, or simply the pleasure of making something yourself, the world of DIY window projects is rich with possibilities.
Let this guide inspire you to explore new ideas, push your skills, and take pride in the results. Your home is a reflection of your creativity and effort, and there’s no limit to the beauty and efficiency you can achieve with custom windows designed and made by you.
Appendices
Glossary of Terms
Here’s a glossary of key terms used throughout this guide to help clarify any technical language and enhance your understanding of window design and construction.
Caulking/Caulk: A waterproof filler and sealant used in building work and repairs, applied around window frames to prevent water ingress and improve insulation.
Condensation: The conversion of vapor or gas to liquid. In windows, it refers to the moisture that forms on the glass when warm, moist air inside the house comes into contact with the cold surface of the window.
Double-Glazed: Windows that have two panes of glass with a space between them to provide insulation against heat loss and noise.
Electrochromic Glass: Smart glass that can change its light transmission properties based on the application of voltage, allowing it to become transparent or opaque as needed.
Fenestration: The arrangement, proportioning, and design of windows and doors in a building.
Flashing: Materials used to prevent water from entering at joints in building materials, often used around windows and doors.
Frame: The fixed, structural part of a window that holds the glass and any moving parts in place.
Glazing: The glass panes within a window or the process of installing the glass in a frame.
Insulation: Material used to prevent heat or sound from being transmitted from one area to another. It’s used around windows to reduce energy loss.
Low-E Glass: Low-emissivity glass that has a microscopically thin coating applied to it to reflect infrared light, keeping heat inside in the winter and outside in the summer.
Mullion: A vertical or horizontal bar between the panes of glass in a window.
Sash: The part of a window that holds the glass and the framework around the glass. In operable windows, it’s the part that moves.
Sealant: A substance used to block the passage of fluids through the surface or joints in materials, similar to caulking but can be used in wider applications including the sealing of windows.
Thermochromic Glass: Glass that changes its tint properties with temperature changes, providing automatic solar control.
Triple-Glazed: Windows that have three panes of glass, with two air spaces between them, offering higher insulation than double-glazed windows.
Weatherstripping: Materials used to seal openings around windows and doors to prevent air and water from entering.
This glossary is intended to support your journey through DIY window making and maintenance, giving you the knowledge and confidence to work on your projects.
Appendices 2:
Resource List: Further Reading and Supplies
Starting a DIY window project is an exciting endeavor. To support your journey of making your own windows, we've compiled a list of resources for further reading and where to find the supplies you'll need. This list is designed to give you a head start on gathering information and materials, ensuring you're well-prepared for your project.
Further Reading
"Windows and Doors" by Fine Homebuilding: This comprehensive guide covers everything from installation to repairs, offering expert advice on working with windows and doors.
"The Complete Guide to Windows & Entryways" by Chris Marshall: A detailed book on repairing, replacing, or installing windows and doors, with step-by-step instructions.
"Building Construction Illustrated" by Francis D.K. Ching: For a deeper understanding of construction principles, including fenestration, this illustrated guide is invaluable.
Online Forums and Websites: Websites like This Old House, the DIY Network, and Houzz offer a wealth of tutorials, articles, and forums where you can get advice from fellow DIY enthusiasts and professionals.
Supplies
Tools and Materials
Local Hardware Stores: For tools like saws, drills, hammers, and measuring tapes. They also often carry basic window-making materials like wood, screws, and sealant.
Building Supply Stores: Places like Home Depot, Lowe's, or your local lumber yard will have a wider range of materials, including specialized window glass, frames, and hardware.
Online Retailers: Websites like Amazon, eBay, or specific window parts suppliers can be good sources for hard-to-find tools and materials.
Specialty Items
Stained Glass Supplies: Look for local art supply stores or specialized online retailers that offer stained glass panels or the materials to make your own.
Smart Glass Providers: Companies that specialize in smart window technologies can provide electrochromic or thermochromic glass solutions. Research providers like View, SageGlass, or Halio for more information.
Weatherstripping and Insulation Materials: While available at most hardware stores, you may find a wider selection and specialized products at online retailers or stores that focus on energy efficiency and green building supplies.
Additional Resources
YouTube Channels: Many DIY experts and professional builders share their knowledge through video tutorials, offering visual guides on window installation, design, and maintenance.
Workshops and Classes: Some community colleges, hardware stores, and community centers offer workshops on home improvement projects, including window installation and design.
Starting your window project with the right resources at hand will not only make the process smoother but will also enhance the quality and satisfaction of your work. Whether through books, online resources, or hands-on learning, continuing to educate yourself and gather the right materials will set you up for success in your DIY endeavors.
Appendices 3:
FAQs: Expert Answers to Common Questions
1. Can I replace a window myself, or should I hire a professional?
Answer: It depends on your level of DIY experience and comfort with home improvement projects. Simple window replacements in existing frames can often be done by individuals with some DIY skills. However, for more complex installations, structural changes, or if you're unsure, it's wise to hire a professional to ensure the job is done safely and correctly.
2. What's the best way to ensure my new window is energy-efficient?
Answer: Opt for windows with double or triple glazing, low-E coatings, and gas fills like argon or krypton between the panes. These features minimize heat transfer, keeping your home warmer in winter and cooler in summer. Also, ensure the window is properly sealed and installed to prevent drafts.
3. How often should I perform maintenance on my windows?
Answer: Perform a basic check and clean your windows at least twice a year. Inspect sealants and weatherstripping annually before extreme weather seasons, and immediately address any damage or wear to prevent bigger issues.
4. What's the difference between caulking and weatherstripping?
Answer: Caulking is used to seal stationary gaps or cracks, such as around the window frame's perimeter, to prevent air and water from entering. Weatherstripping is applied to movable parts, like where the sash meets the frame, to seal against drafts while still allowing the window to operate.
5. Can I make my existing windows more soundproof?
Answer: Yes, adding secondary glazing or replacing single-pane windows with double or triple-glazed units can significantly reduce noise. Using thicker glass and ensuring all gaps are sealed with high-quality caulking or weatherstripping can also help.
6. Is it worth investing in smart glass for my windows?
Answer: Smart glass can be a worthwhile investment for convenience, energy efficiency, and comfort. It allows you to control light and privacy with the touch of a button. However, it's generally more expensive than traditional glass options, so consider your budget and specific needs.
7. What should I do if I find condensation inside my double-glazed windows?
Answer: Condensation inside double-glazed windows indicates a seal failure, allowing moisture to enter. Unfortunately, this usually means the glass unit needs replacing. Contact a professional to assess the situation and recommend the best course of action.
8. How can I customize my windows without replacing them?
Answer: Adding window films for tinting or frosting, installing internal blinds, or applying decorative lead strips are ways to customize your windows without full replacement. These options can improve privacy, energy efficiency, and aesthetics with minimal investment.
Armed with these expert answers to common questions, you're better equipped to tackle your window projects with confidence. Whether you're maintaining, upgrading, or installing new windows, knowing how to approach these tasks can make all the difference in the outcome and enjoyment of your home.
Can I Build My Own Window?
Yes, you can build your own window. Many DIY enthusiasts create windows to match specific design preferences or dimensions not available in pre-made options. With the right tools, materials, and a clear understanding of the construction process, building a window is definitely achievable.
Can I Make My Own Double Glazed Windows?
Making your own double glazed windows is possible, but it requires precision and the correct materials. Double glazing involves sealing two panes of glass with a spacer between them, often filled with gas for insulation. The process needs to be done carefully to ensure the seal is airtight and moisture-free.
How Do People Make Windows?
Windows are made by constructing a frame, which can be made of wood, vinyl, aluminum, or fiberglass, and then installing glass panes within the frame. For operable windows, hardware like hinges or sliding mechanisms is added. The process varies depending on the window's design and materials.
What Is the Best Wood for Making Windows?
Hardwoods like oak, mahogany, and teak are considered the best for making windows due to their durability, resistance to rot, and aesthetic appeal. However, softwoods like pine are also popular because of their cost-effectiveness and ease of use, though they may require more maintenance.
Is It Cheaper to Build Your Own Windows?
Building your own windows can be cheaper than purchasing pre-made, especially for custom sizes or designs. However, the cost-effectiveness depends on the materials used, the complexity of the window design, and whether you already own the necessary tools.
How Difficult Is It to Build a Window?
The difficulty of building a window varies based on the design's complexity and your DIY skills. Simple fixed windows are more straightforward to construct than operable ones. The process involves precise measuring, cutting, and assembling, which might be challenging for beginners but is certainly manageable with detailed guidance and patience.
This guide aims to demystify the process of designing and making your own windows, making it accessible to DIY enthusiasts of all skill levels. With a focus on clear, straightforward language and practical advice, it’s designed to inspire and empower readers to take on their window projects with confidence.